GM Service Manual Online
For 1990-2009 cars only

Exhaust Crossover Pipe Replacement RPOs L26/L32

Removal Procedure


    Object Number: 910984  Size: SH
  1. Remove the fuel injector sight shield. Refer to Fuel Injector Sight Shield Replacement in Engine Mechanical - 3.8L.
  2. Remove the air cleaner intake duct. Refer to Air Cleaner Inlet Duct Replacement in Engine Controls - 3.8L.
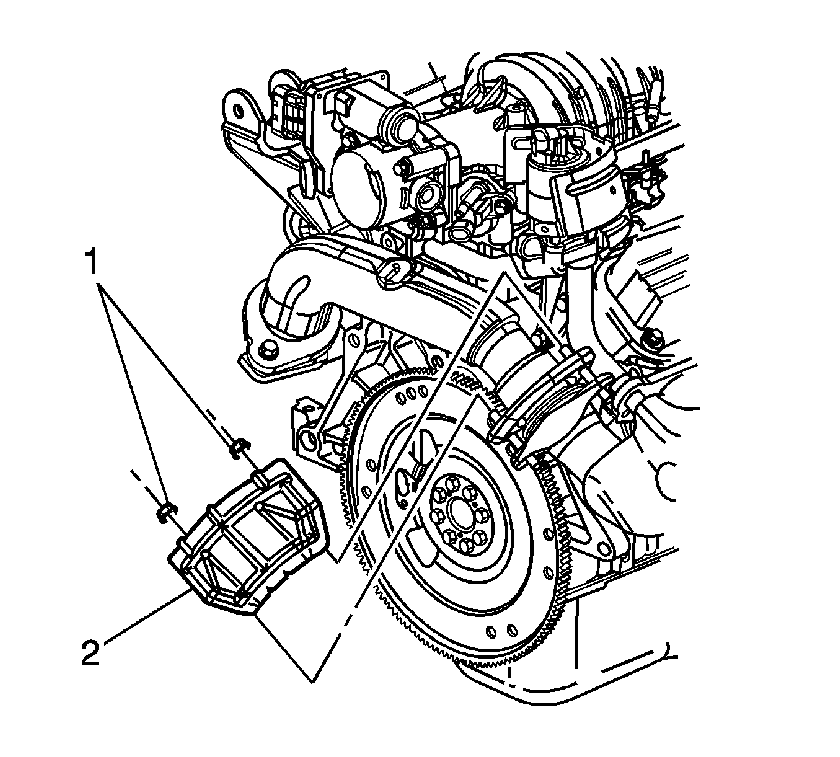
  3. Remove the exhaust crossover heat shield nuts (1).
  4. Remove the exhaust crossover heat shield (2).

  5. Object Number: 911162  Size: SH
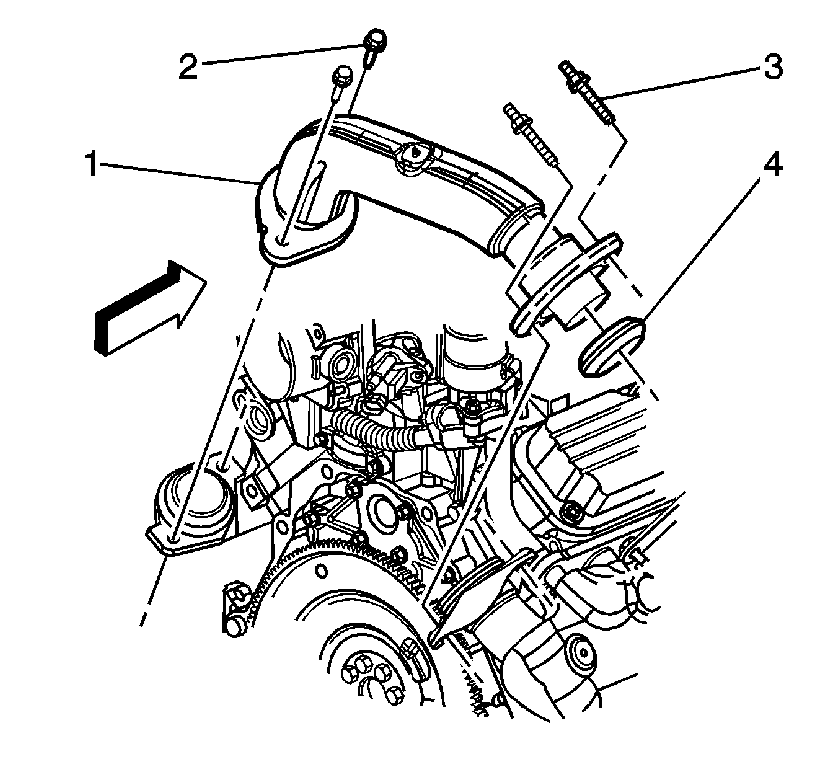
  6. Remove the exhaust crossover pipe studs (3) and the bolts (2).
  7. Remove the exhaust crossover pipe (1).
  8. Remove the exhaust crossover pipe seal (4).
Installation Procedure


    Object Number: 911162  Size: SH
  1. Install the exhaust crossover pipe seal (4) to the exhaust crossover pipe (1) at the right exhaust manifold connection.
  2. Install the exhaust crossover pipe (1).
  3. Notice: Refer to Fastener Notice in the Preface section.

  4. Install the exhaust crossover pipe studs (3) and the bolts (2).
  5. Tighten
    Tighten the studs and the bolts to 20 N·m (15 lb ft).


    Object Number: 910984  Size: SH
  6. Install the exhaust crossover heat shield (2).
  7. Install the exhaust crossover heat shield nuts (1).
  8. Tighten
    Tighten the nuts to 20 N·m (15 lb ft).

  9. Install the air cleaner intake duct. Refer to Air Cleaner Inlet Duct Replacement in Engine Controls - 3.8L.
  10. Install the fuel injector sight shield. Refer to Fuel Injector Sight Shield Replacement in Engine Mechanical - 3.8L.
Exhaust Crossover Pipe Replacement RPOLY7
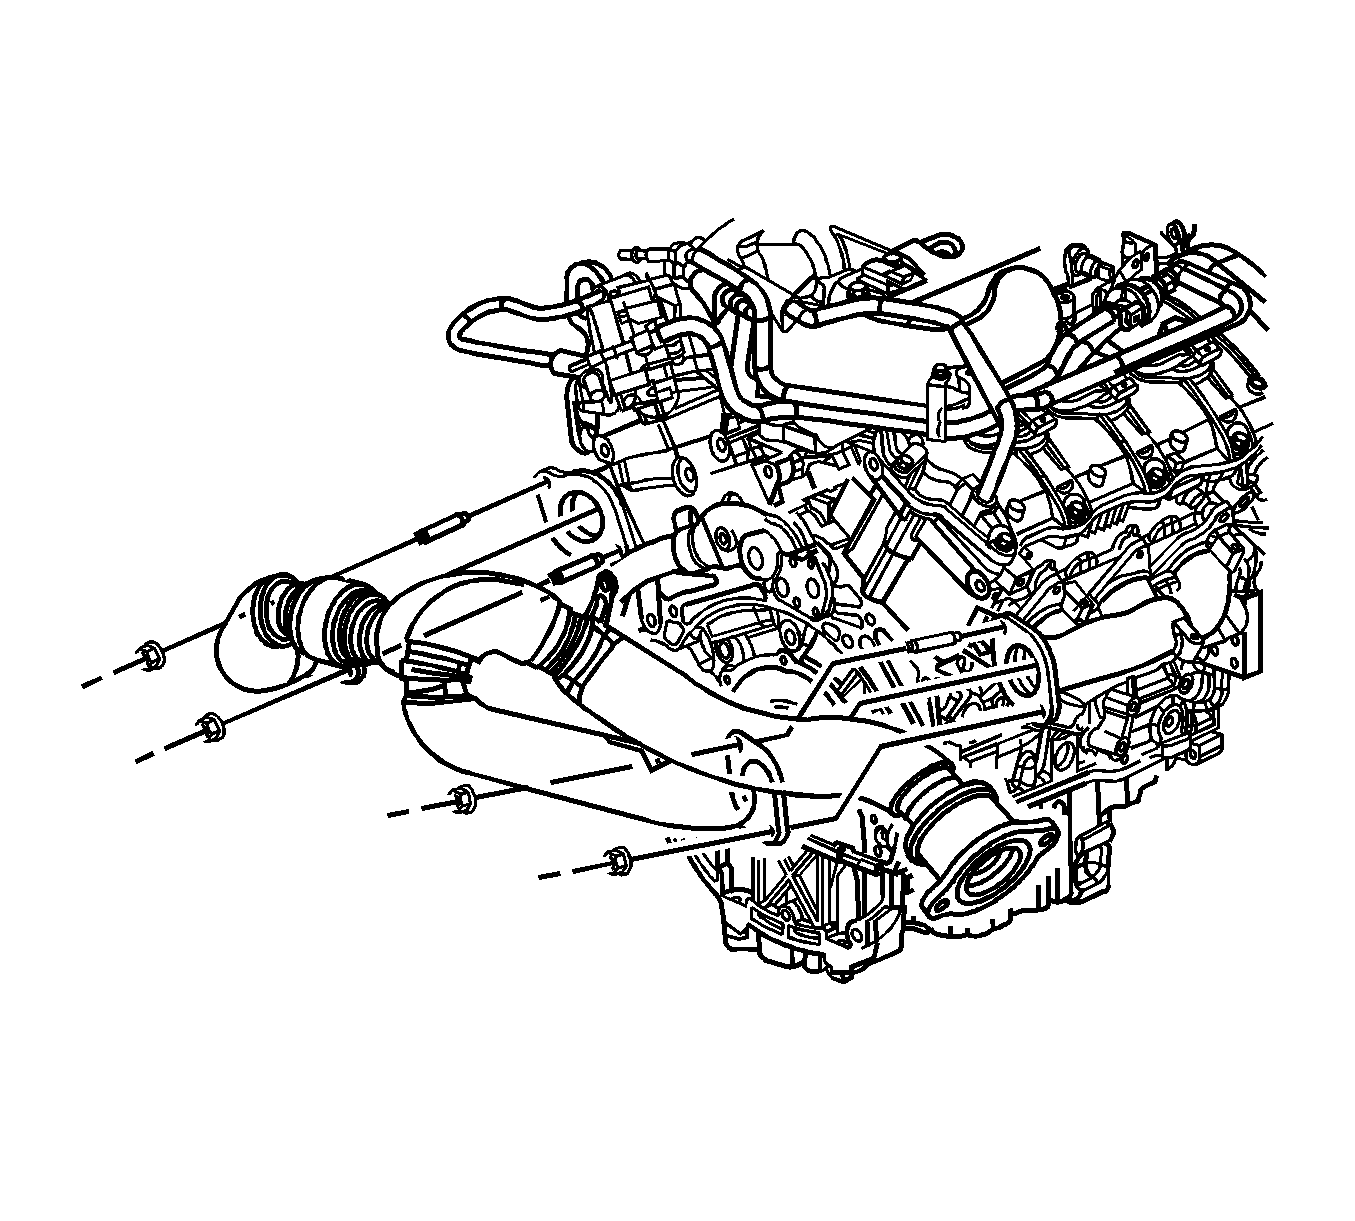

Object Number: 1574585  Size: MF

Callout

Component Name

Notice: Refer to Fastener Notice in the Preface section.

Fastener Tightening Specifications: Refer to Fastener Tightening Specifications .

Preliminary Procedures

  1. Disconnect the negative battery cable. Refer to Battery Negative Cable Disconnection and Connection in Engine Electrical.
  2. Remove the radiator support sight shield. Refer to Radiator Support Sight Shield Replacement in Body Front End.
  3. Remove the air filter assembly. Refer to Air Cleaner Assembly Replacement in Engine Controls - 3.6L
  4. Remove the throttle body. Refer to Throttle Body Assembly Replacement in Engine Controls - 3.6L.
  5. Important: In the following service procedure, DO NOT remove the brake lines from the master cylinder. Relocate the master cylinder to the side .

  6. Remove the brake master cylinder. Refer to Master Cylinder Replacement in Hydraulic Brakes.
  7. Remove oxygen sensor 1. Refer to Heated Oxygen Sensor 1 Replacement in Engine Controls - 3.6L.
  8. Remove the engine mount struts. Refer to Engine Mount Strut Replacement - Right Side for the right engine strut mount and Engine Mount Strut Replacement - Left Side for the left engine mount strut.
  9. Rotate the engine as far forward as possible.
  10. Remove the front tires and wheels. Refer to Tire and Wheel Removal and Installation in Front Suspension.
  11. Remove the wheel house liner. Refer to Fender, Fender Insulator, Wheelhouse Liner Replacement - Front in Body Front End.
  12. Remove the radiator air baffle and deflector-lower. Refer to Radiator Air Lower Baffle and Deflector Replacement Engine Cooling.
  13. Remove the transmission fluid filler tube. Refer to Transmission Fluid Filler Tube Replacement in Transmission/Transaxle.
  14. Remove the catalytic convertor. Refer to Catalytic Converter Replacement .
  15. Important: In the following service procedure, it is not necessary to remove the entire frame assembly.

  16. Remove the frame drivers side frame mounting bolts. Refer to Frame Replacement in Frame and Underbody.
  17. Lower the drivers side of the frame.

1

Nut, Crossover Pipe (Qty: 3)

Tighten
25 N·m (18 lb ft)

2

Bolt, Crossover pipe (Qty: 1)

Tighten
25 N·m (18 lb ft)

3

Pipe, Exhaust Crossover

Tip
DO NOT reuse the old gaskets; replace with new ones.

4

Studs, Exhaust Crossover (Qty: 3)

Tip
Replace the studs only if damaged.

Tighten
25 N·m (18 lb ft)