For 1990-2009 cars only
Removal Procedure
Tools Required
J 38778 Door Trim Pad and Garnish Clip Remover
- Remove the rear seats. Refer to Rear Seat Replacement in Seats.
- Remove the rear quarter trim panel. Refer to Rear Quarter Lower Trim Panel Replacement .
- Remove the body pillar upper trim panel. Refer to Center Pillar Upper Trim Panel Replacement .
- Remove the front door sill plate. Refer to Front Side Door Sill Plate Replacement .
- Remove the HVAC auxiliary control assembly. Refer to Control Assembly Replacement - Auxiliary in Side Trim Panel in HVAC Systems with A/C-Manual.
- Remove the rear audio controls. Refer to Rear Seat Audio Control Replacement in Entertainment.
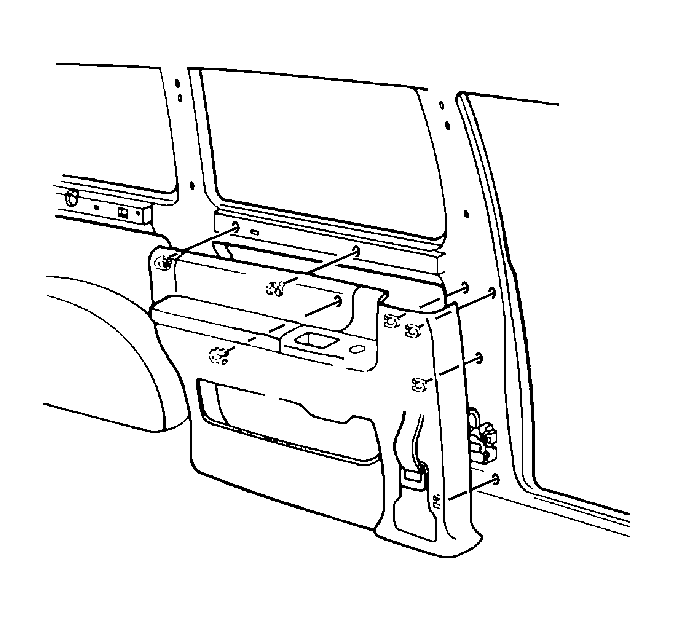
- Using the J 38778 , remove the retainers from the body side front trim panel.
- Remove the front trim panel from the vehicle.

Installation Procedure
- Install the front trim panel to the vehicle.
- Install the retainers to the front trim panel by aligning the retainers to the holes and pushing in on the retainers to secure.
- Install the rear audio controls. Refer to Rear Seat Audio Control Replacement in Entertainment.
- Install the HVAC auxiliary control assembly. Refer to Control Assembly Replacement - Auxiliary in Side Trim Panel in HVAC Systems with A/C-Manual.
- Install the front door sill plate. Refer to Front Side Door Sill Plate Replacement .
- Install the upper trim panel. Refer to Center Pillar Upper Trim Panel Replacement .
- Install the rear quarter trim panel. Refer to Rear Quarter Lower Trim Panel Replacement .
- Install the rear seats. Refer to Rear Seat Replacement in Seats.

