For 1990-2009 cars only
Special Tools
| • | DW-110-060 Engine Assembly Support Fixture |
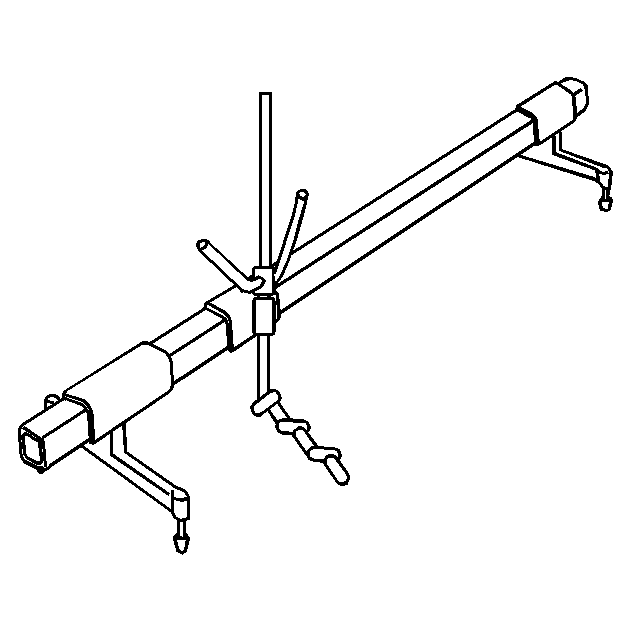
| • | EN-48245 Timing Belt Adjuster - Camshaft Holder |
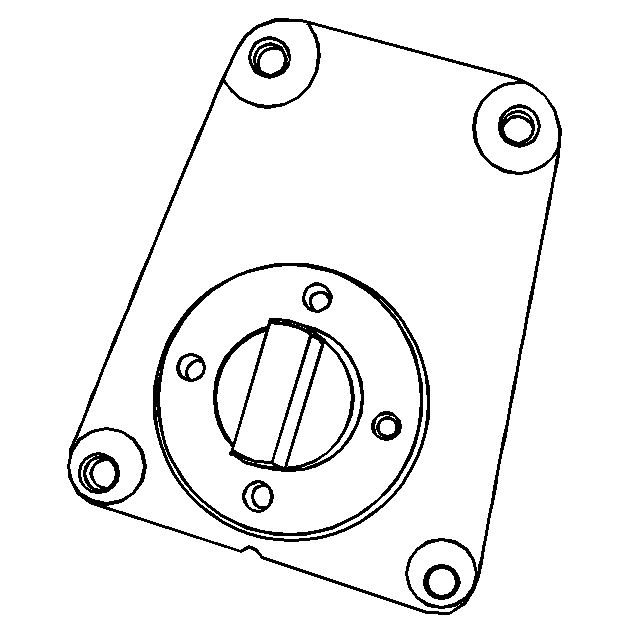
| • | EN-48246 Timing Belt Adjuster - Crankshaft Holder |
Removal Procedure
- Disconnect the negative battery cable.
- Remove the engine cover. Refer to Engine Cover Replacement.
- Remove the charge air system hoses and ducts. Refer to Charge Air Cooler Inlet Pipe and Outlet Pipe Replacement.
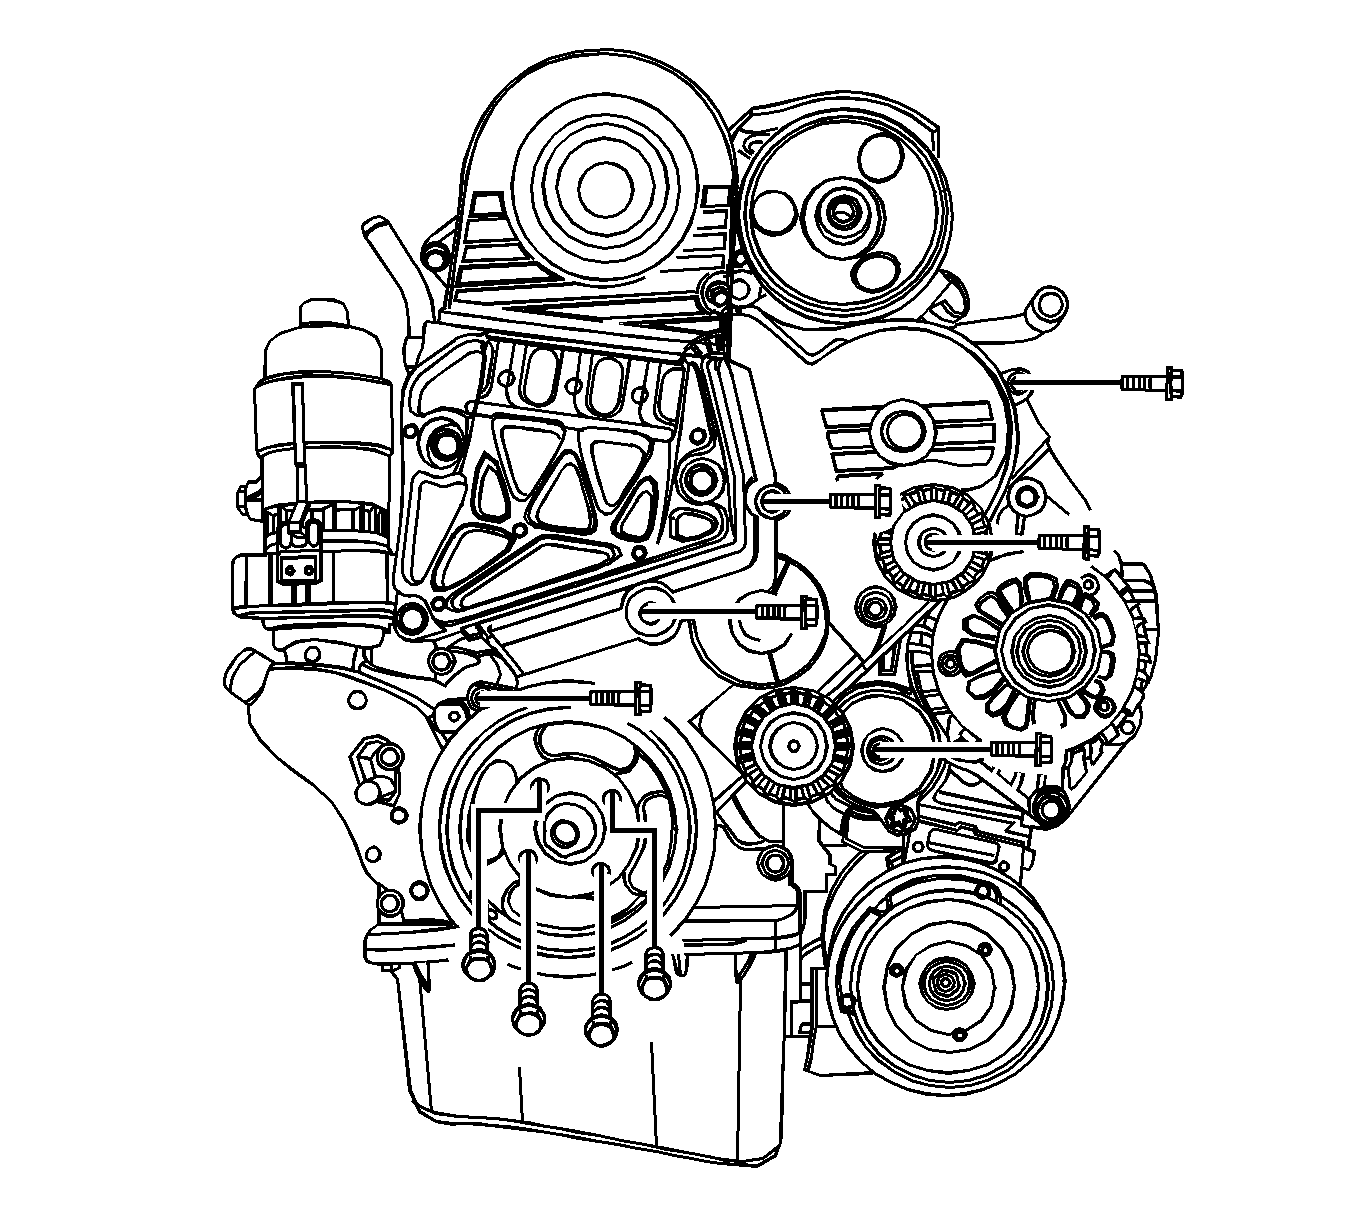
- Remove the accessory belt. Refer to Drive Belt Replacement.
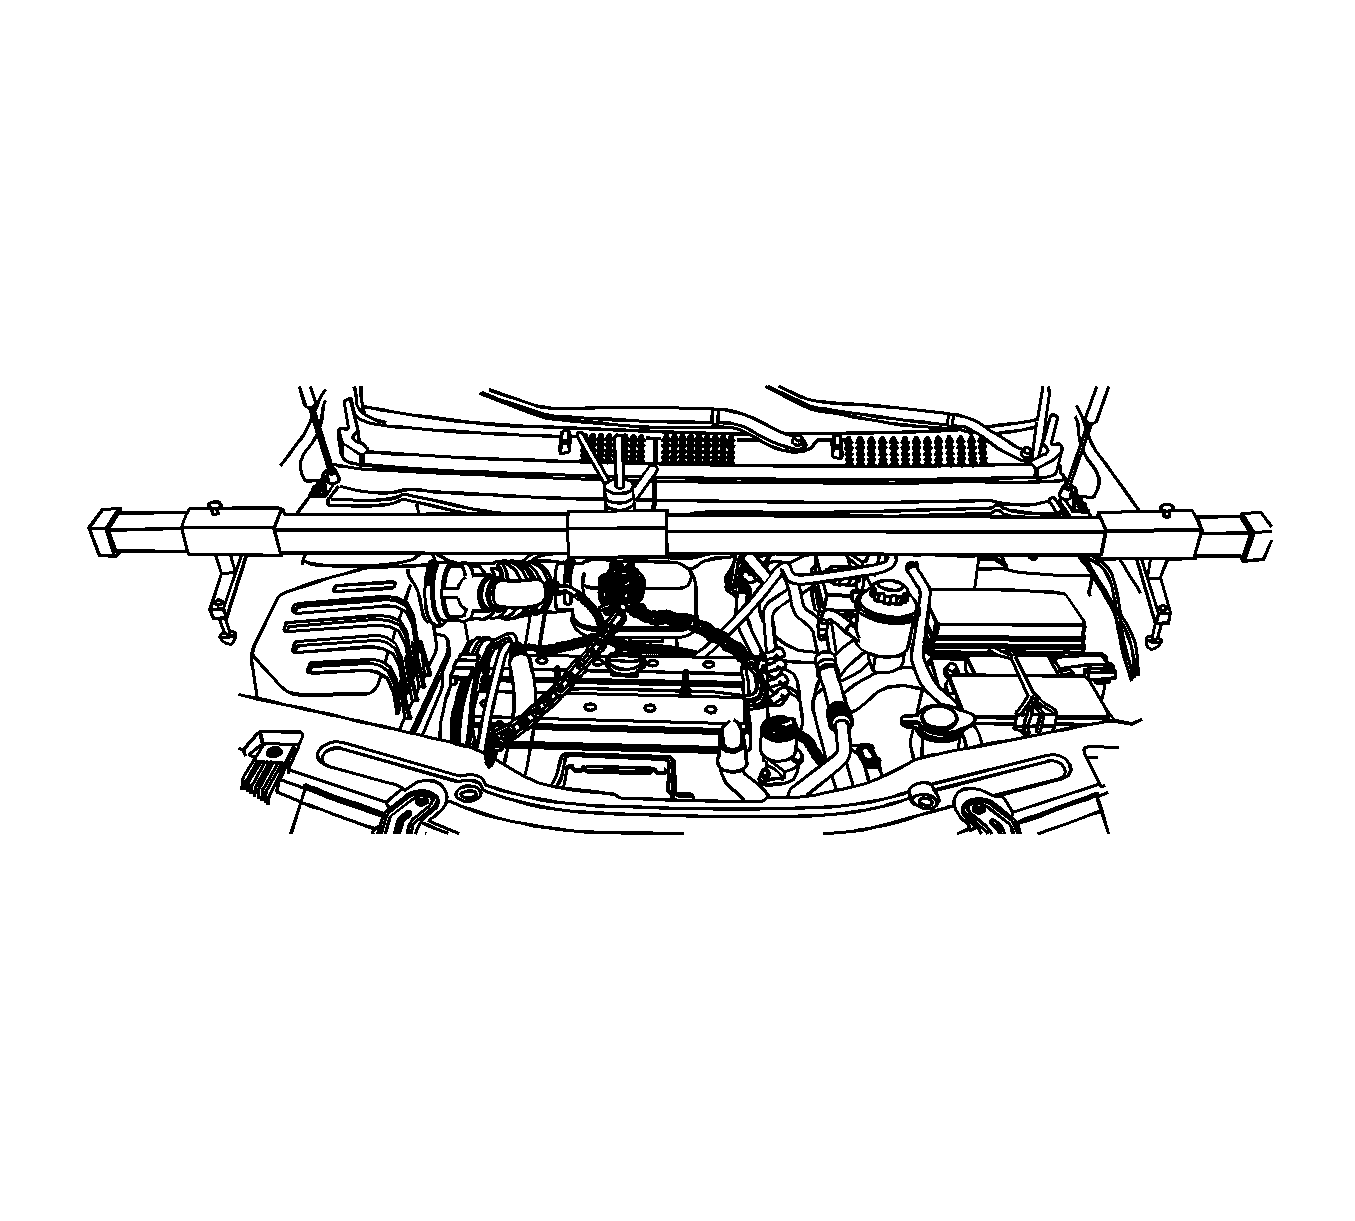
- Support the engine assembly using DW-110-060 .
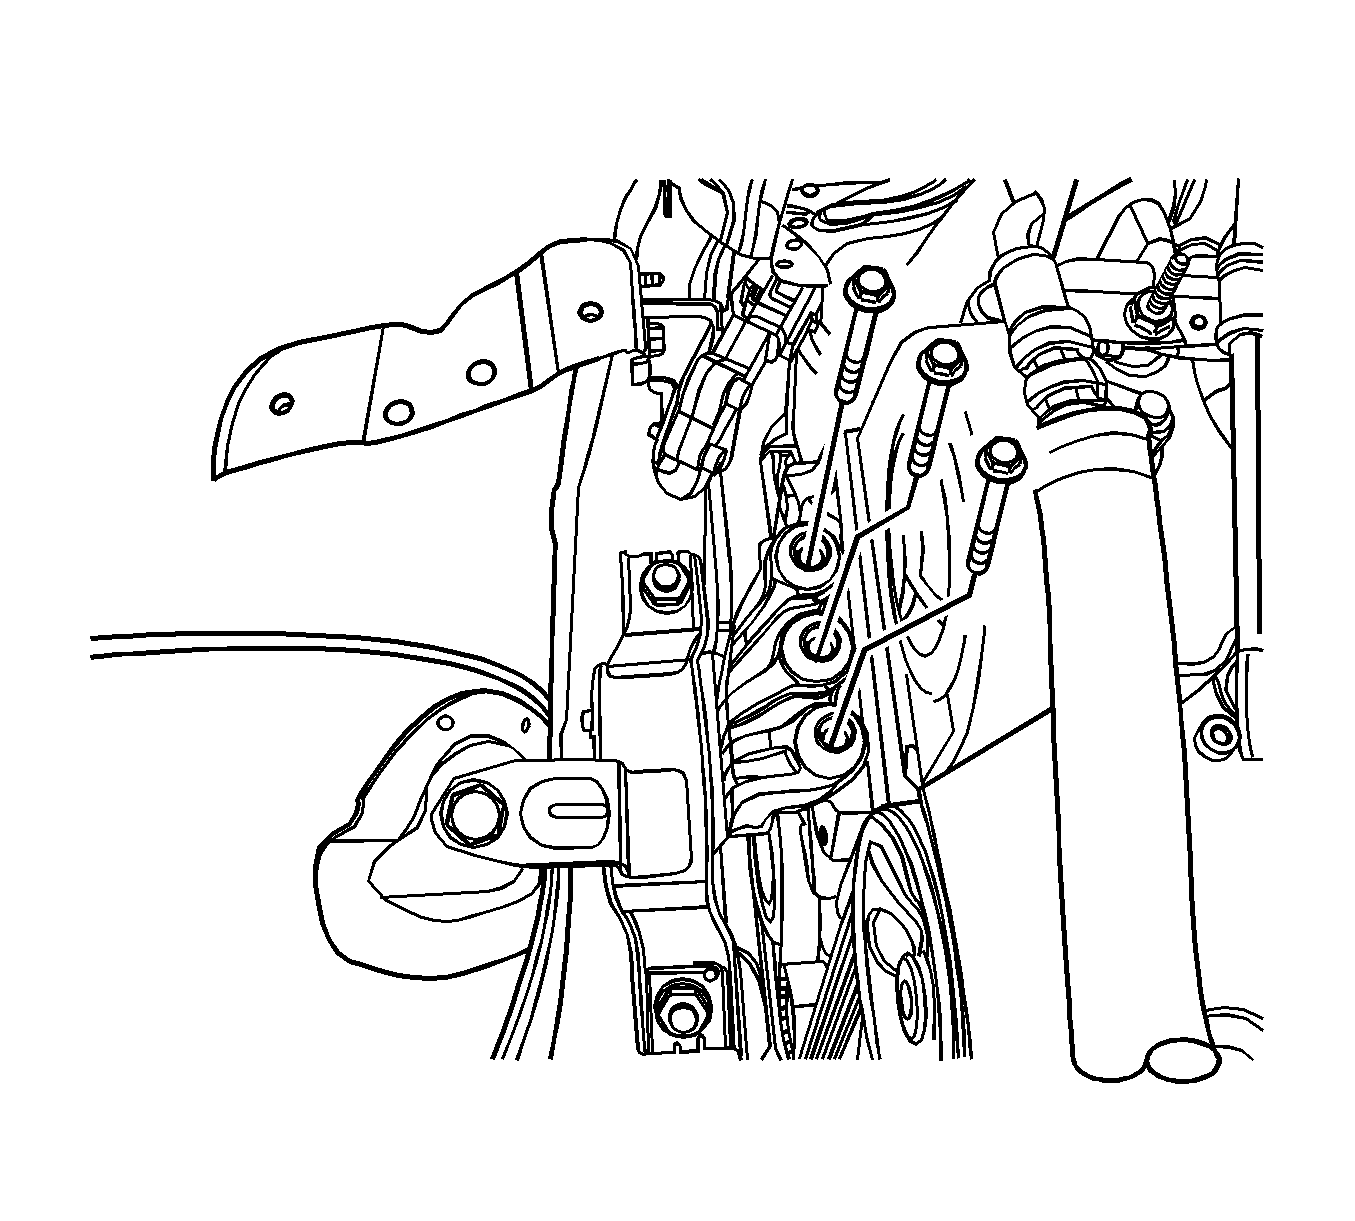
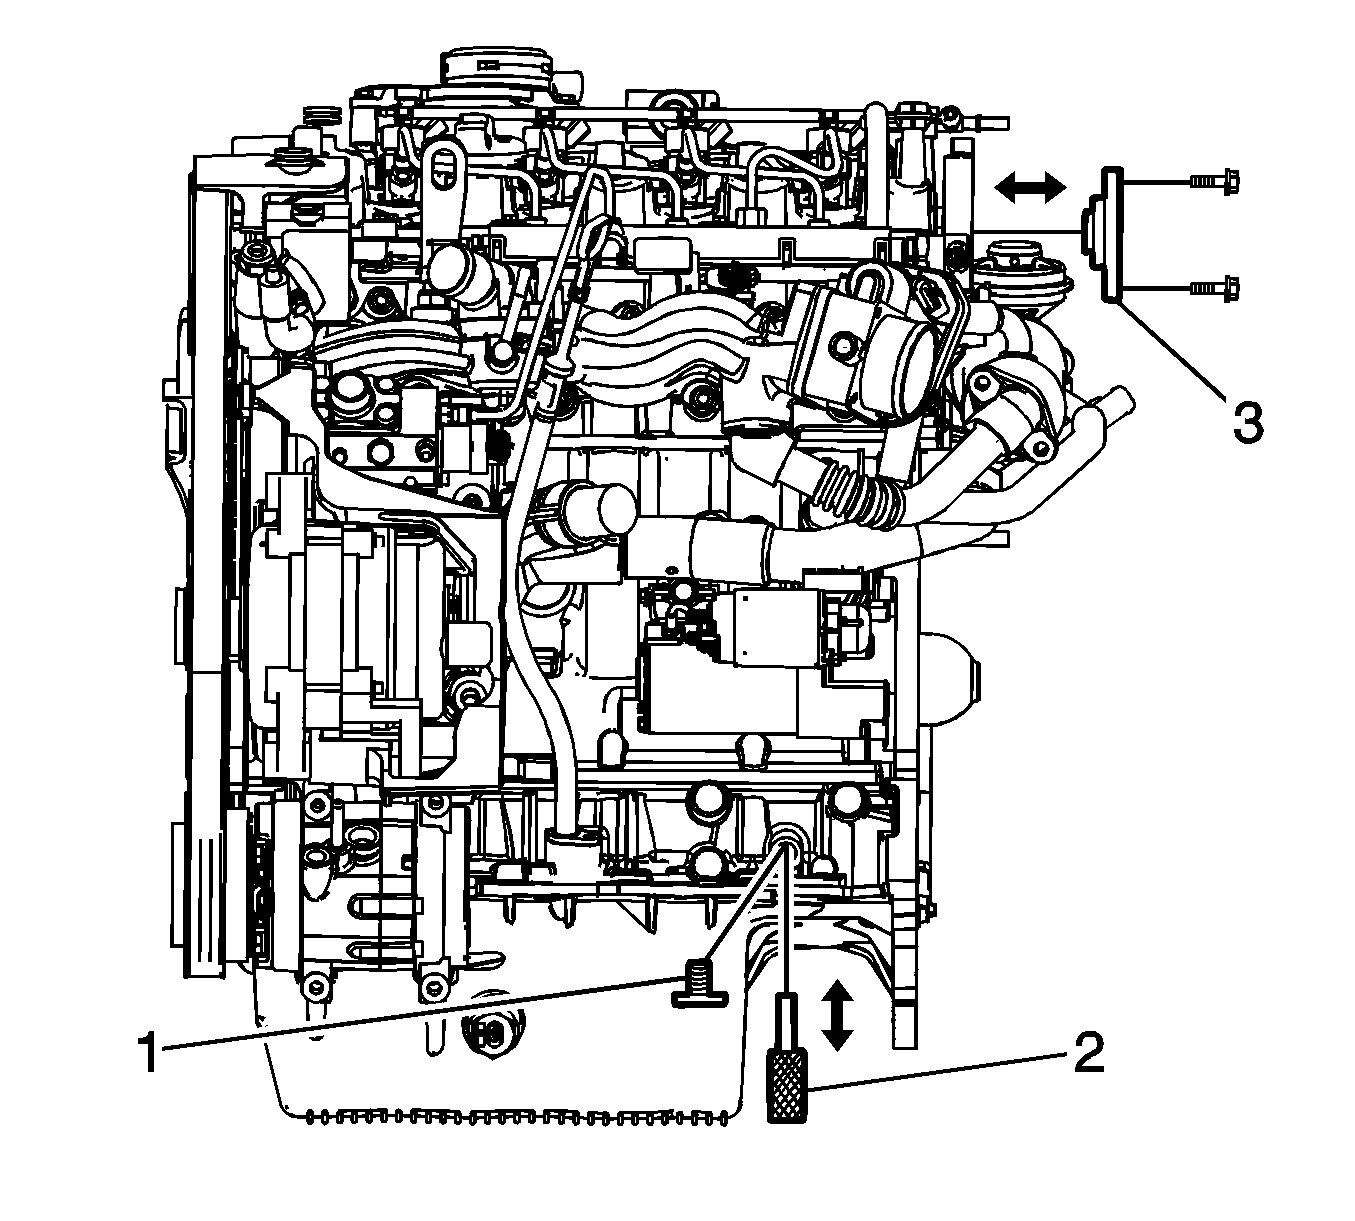
- Remove the engine mount damping block. Refer to Engine Mount Replacement - Right Side.
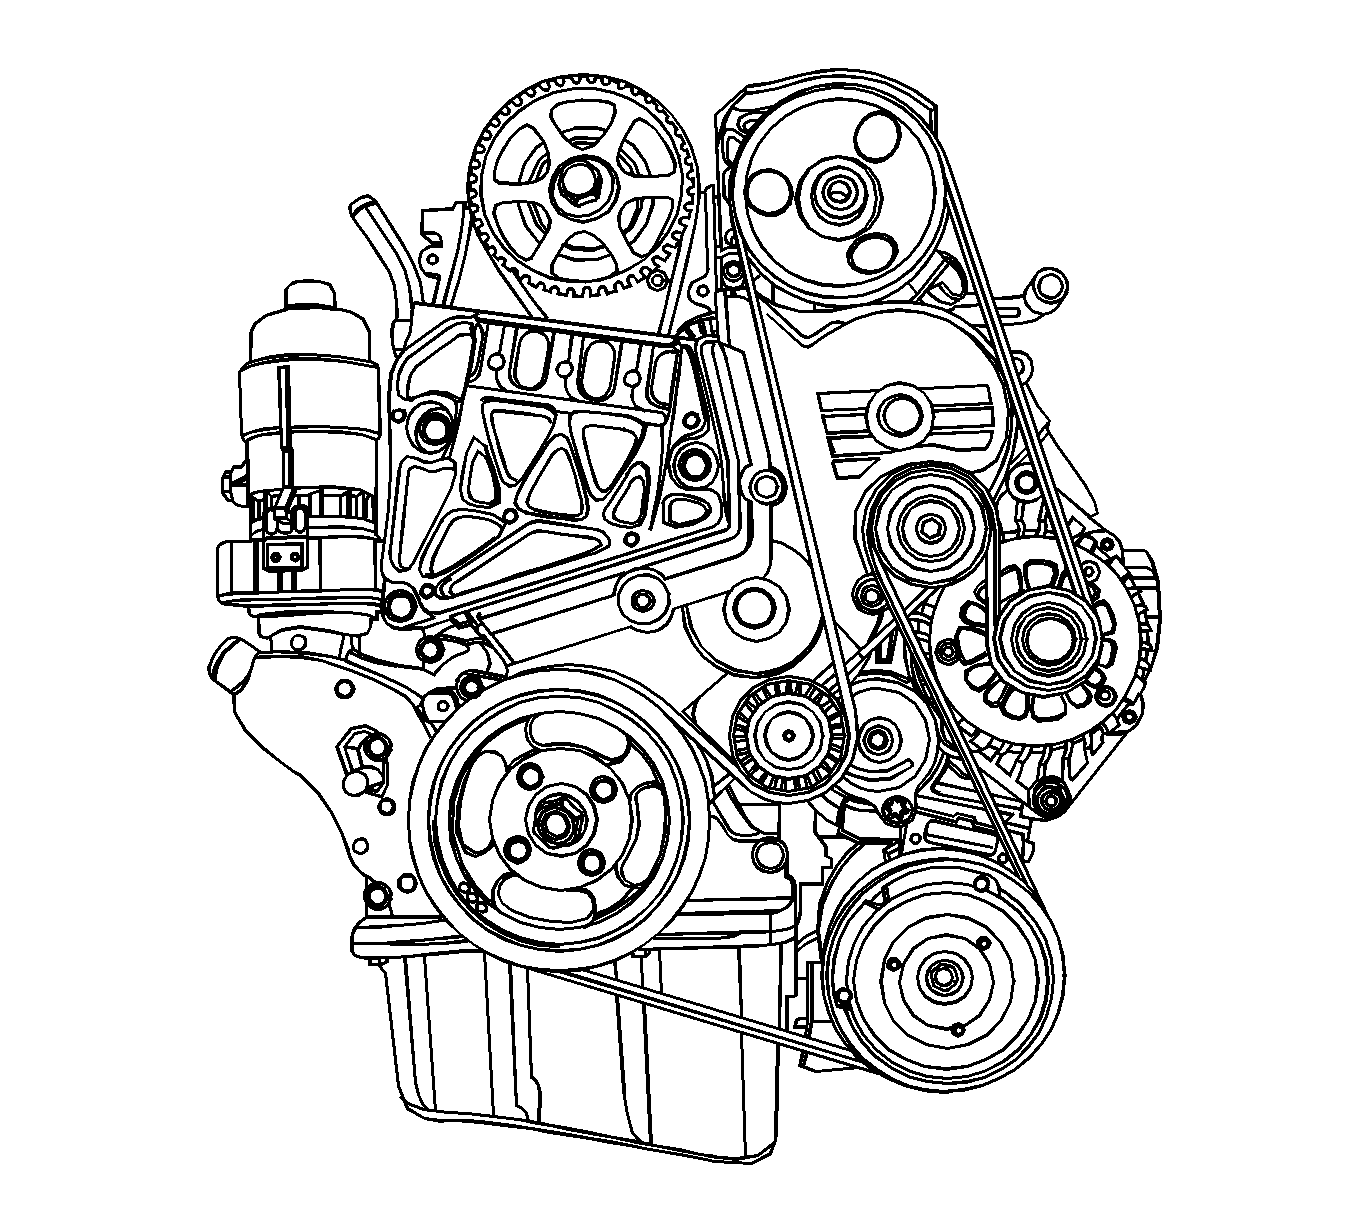
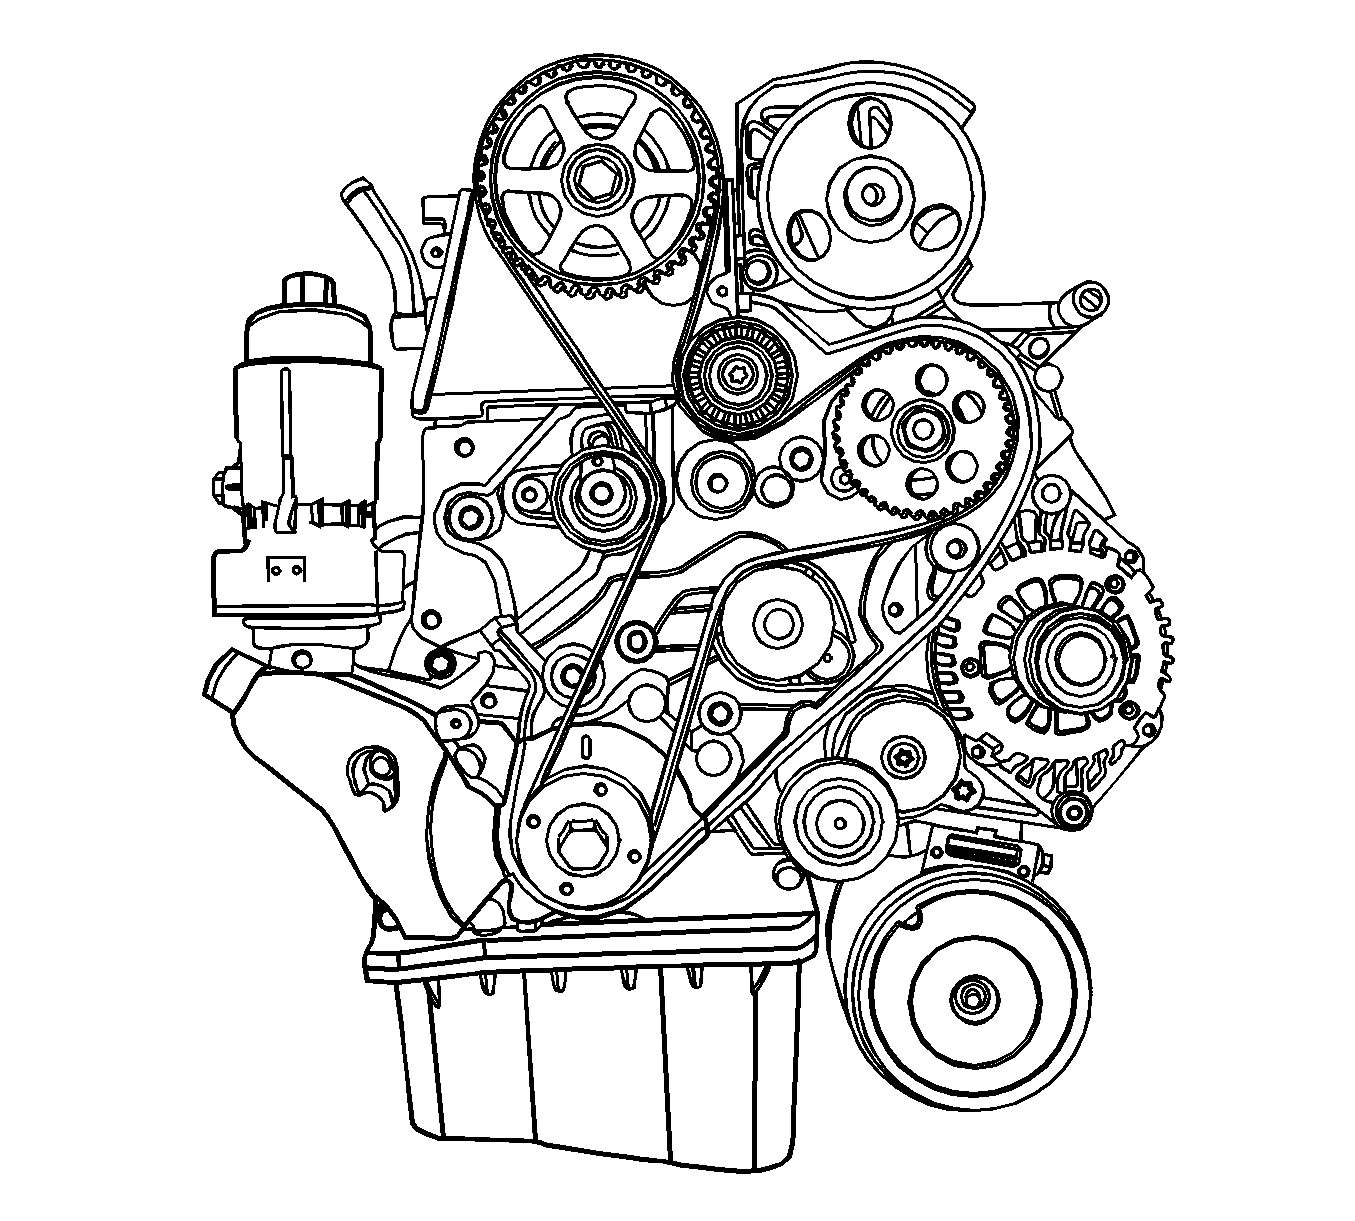
- Remove the timing belt upper cover.
- Remove the accessory belt idler.
- Remove the tensioner. Refer to Drive Belt Tensioner Replacement.
- Remove the crankshaft pulley.
- Remove the timing belt lower cover.
- Remove the engine mount bracket.
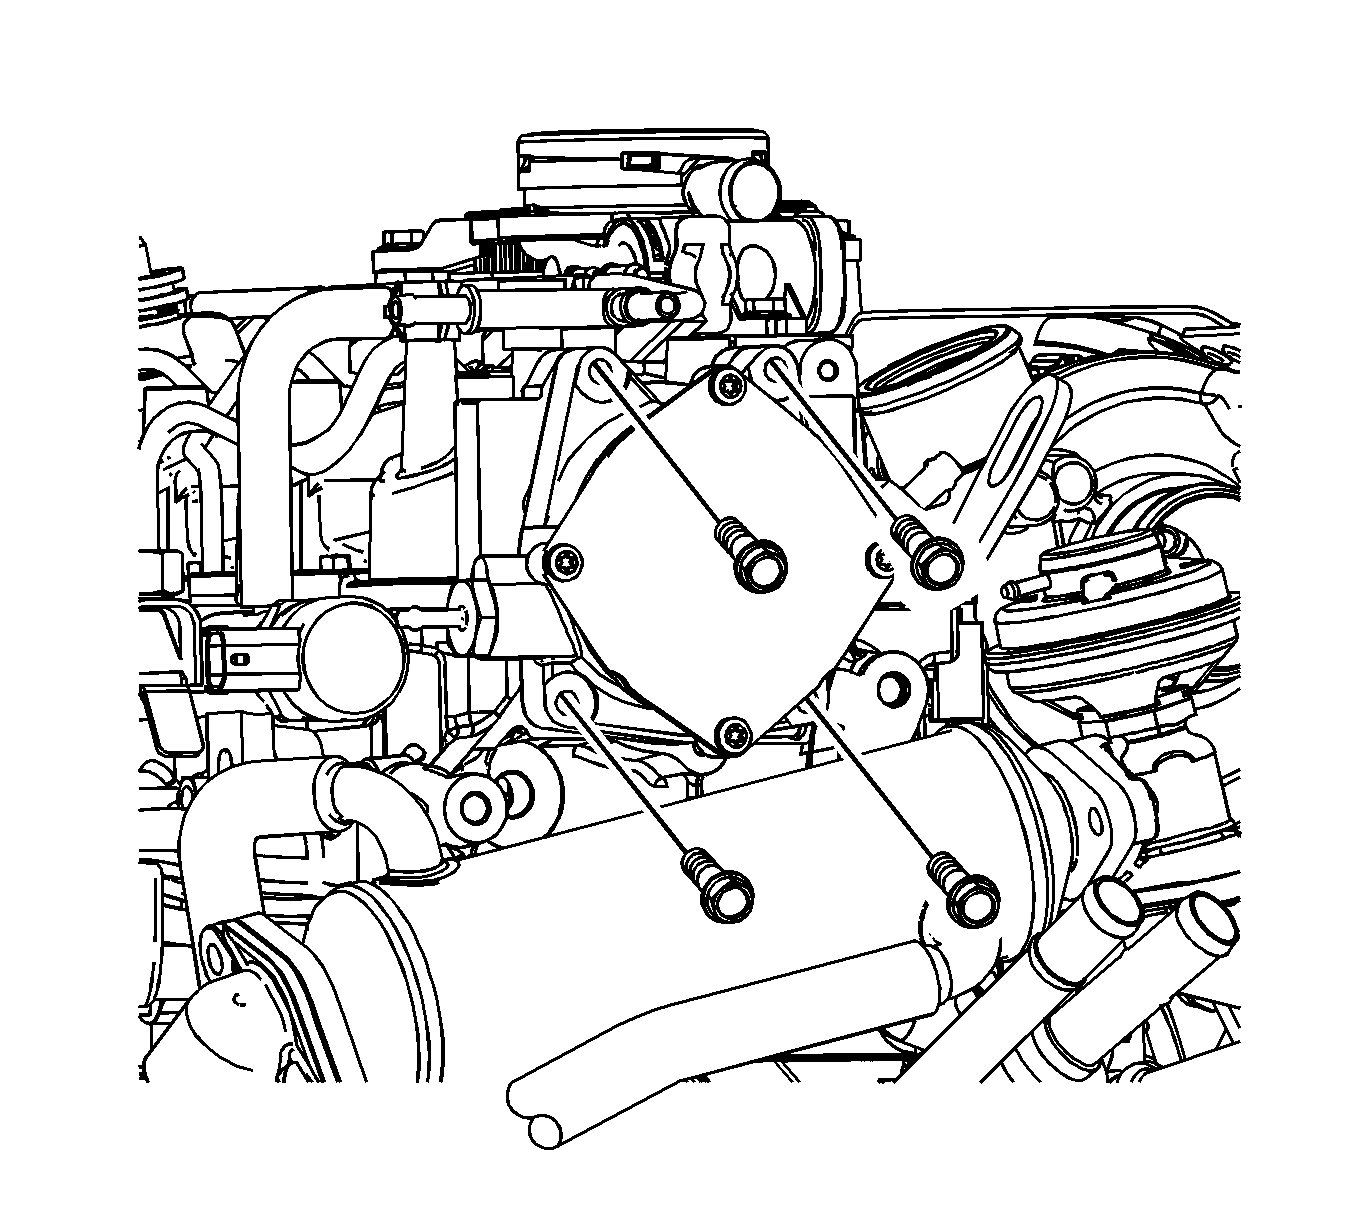
- Remove the vacuum pump. Refer to Vacuum Pump Assembly Replacement
- Rotate the camshaft and align the hole on the top point.
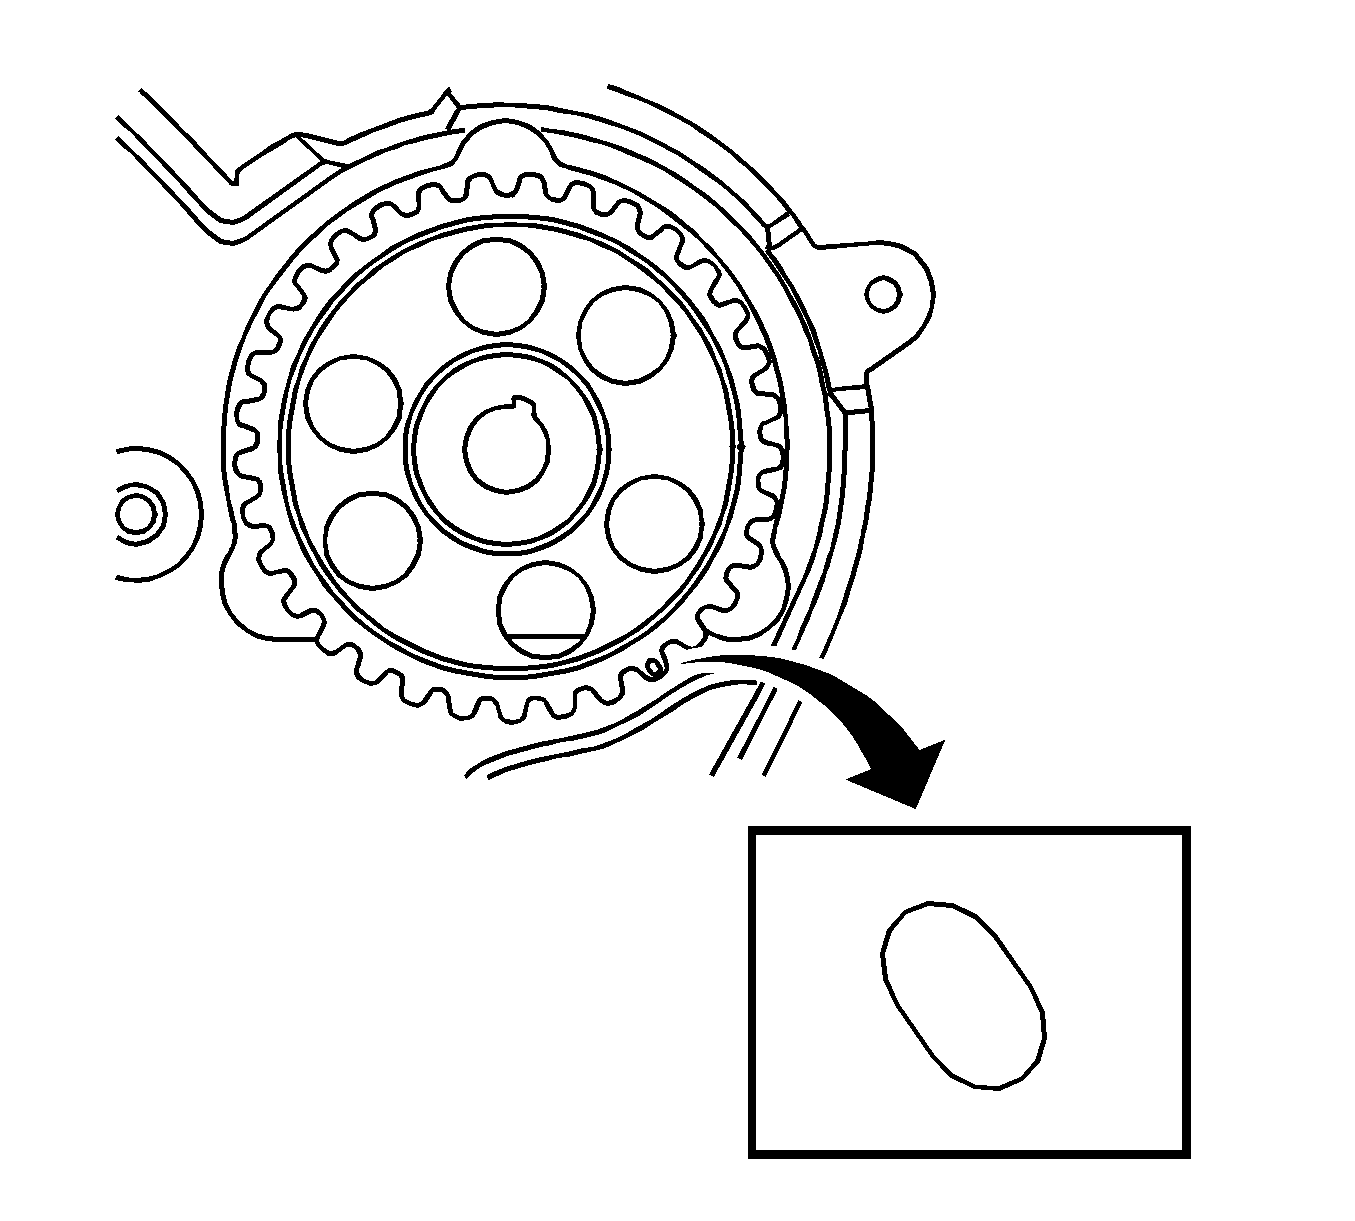
- Rotate the crankshaft and align the mark on the crankshaft sprocket.
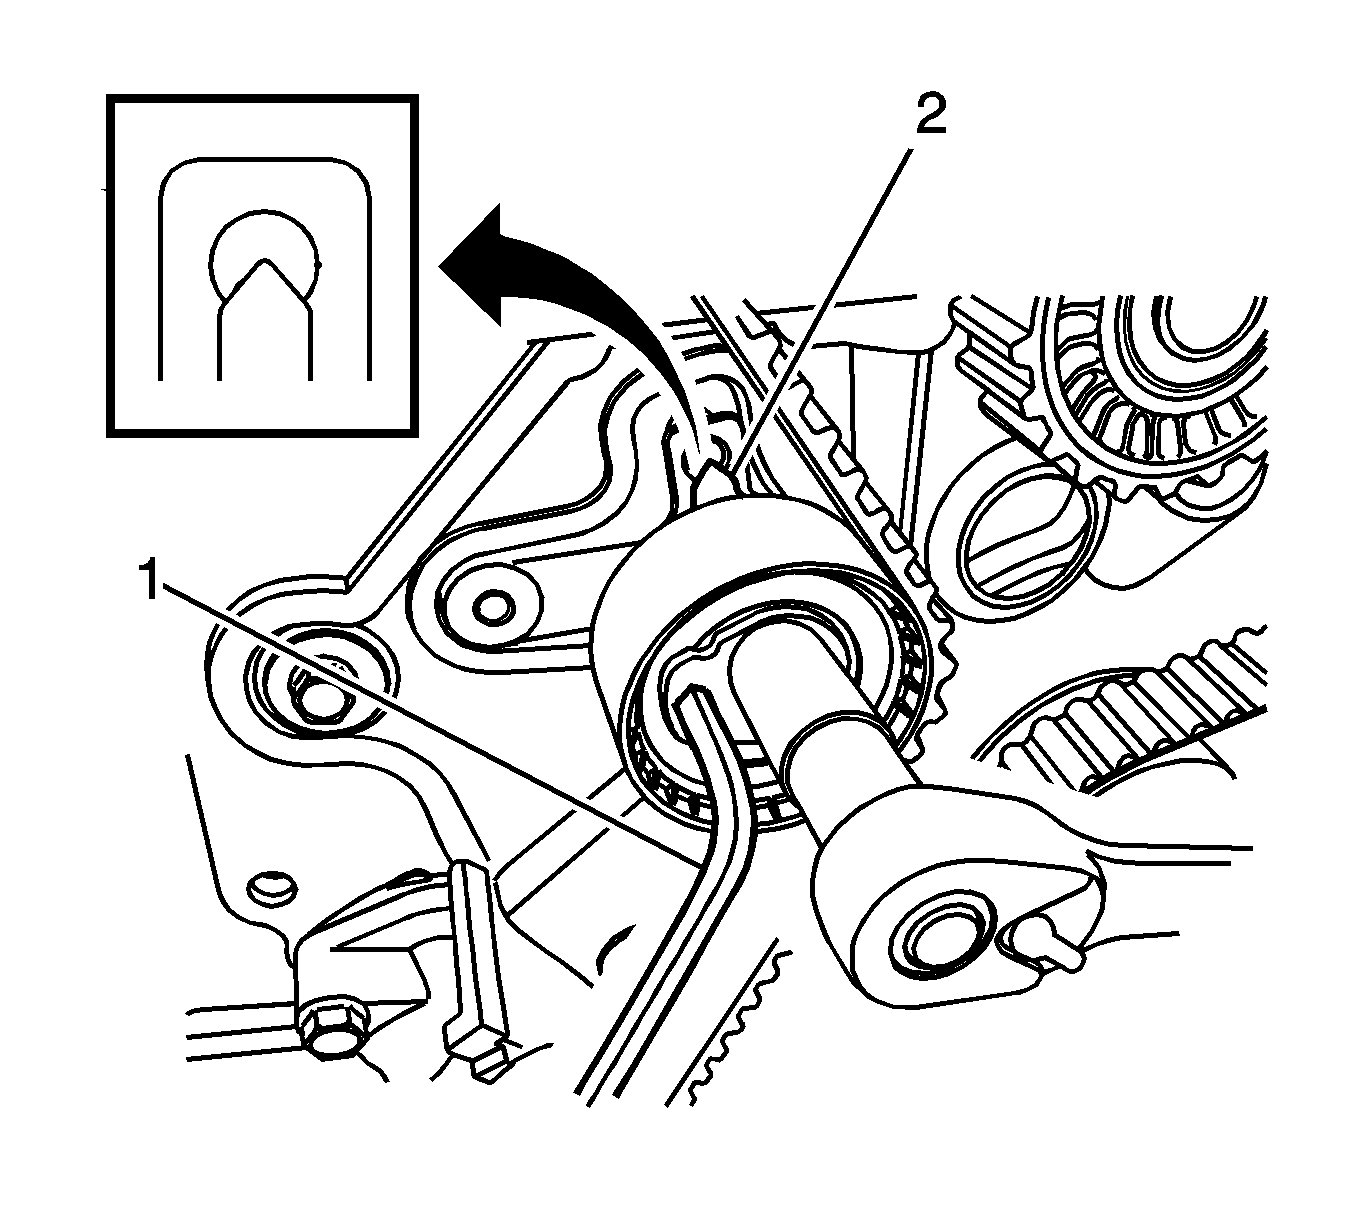
- Remove the crankshaft holder hole cap bolt (1).
- Insert EN-48246
- Install the EN-48245
- Remove the timing belt tensioner.
- Remove the timing belt.
- Remove the camshaft sprocket.
Caution: Refer to Battery Disconnect Caution in the Preface section.
Important: Only lift the engine far enough to take the weight off the engine mount assembly, or damage to the mount and lifting equipment failure may occur.

Important: Rotate the crankshaft sprocket a little and simultaneously insert the crankshaft holder.
Installation Procedure
- Align the sprocket mark on the timing belt rear cover mark.
- Install the camshaft sprocket with the retaining bolt finger tight.
- Install the timing belt.
- Install the timing belt tensioner with the retaining bolt finger tight.
- Turn the hex-key (1) tab in a counterclockwise direction to tension the belt. Turn until the point aligns with the notch (2).
- Aligning with notch, install the timing belt tensioner bolt.
- Install the camshaft sprocket bolt.
- Remove the crankshaft and camshaft holding tools.
- Turn the crankshaft in a clockwise direction 2 cycles and check the mark on the crankshaft sprocket.
- After alignment of the timing belt, install the crankshaft holder hole cap bolt.
- Install the vacuum pump. Refer to Vacuum Pump Assembly Replacement
- Install the engine mount bracket.
- Install the timing belt lower cover.
- Install the crankshaft pulley.
- Install the accessory belt idler.
- Install the timing belt upper cover.
- Install the engine mount damping block. Refer to Engine Mount Replacement - Right Side.
- Remove the engine support fixture.
- Install the accessory belt. Refer to Drive Belt Replacement.
- Install the charge air system hoses and ducts. Refer to Charge Air Cooler Inlet Pipe and Outlet Pipe Replacement.
- Install the engine cover. Refer to Engine Cover Replacement.
- Connect the negative battery cable.
Notice: Refer to Fastener Notice in the Preface section.
Tighten
| • | Tighten the timing belt tensioner bolt to 25 N·m (18.4 lb in). |
| • | Tighten the camshaft sprocket bolt to 133 N·m (98.1 lb in). |
Important: If the timing marks are not aligned, repeat steps 4-10 and recheck the timing marks. Alignment of timing marks is critical for engine performance and emissions.
Tighten
Tighten the crankshaft holder hole cap bolt to 30 N·m (22.1 lb ft).
Notice: Refer to Fastener Notice in the Preface section.
Tighten
| • | Tighten the engine mount bracket bolts to 45 N·m (33.1 lb ft). |
| • | Tighten the timing belt lower cover bolts to 11 N·m (97.4 lb in). |
| • | Tighten the crankshaft pulley bolts to 34 N·m (25.1 lb ft). |
| • | Tighten the accessory belt idler bolt to 52 N·m (38.4 lb ft). |
| • | Tighten the timing belt upper cover bolts to 11 N·m (97.4 lb in). |
