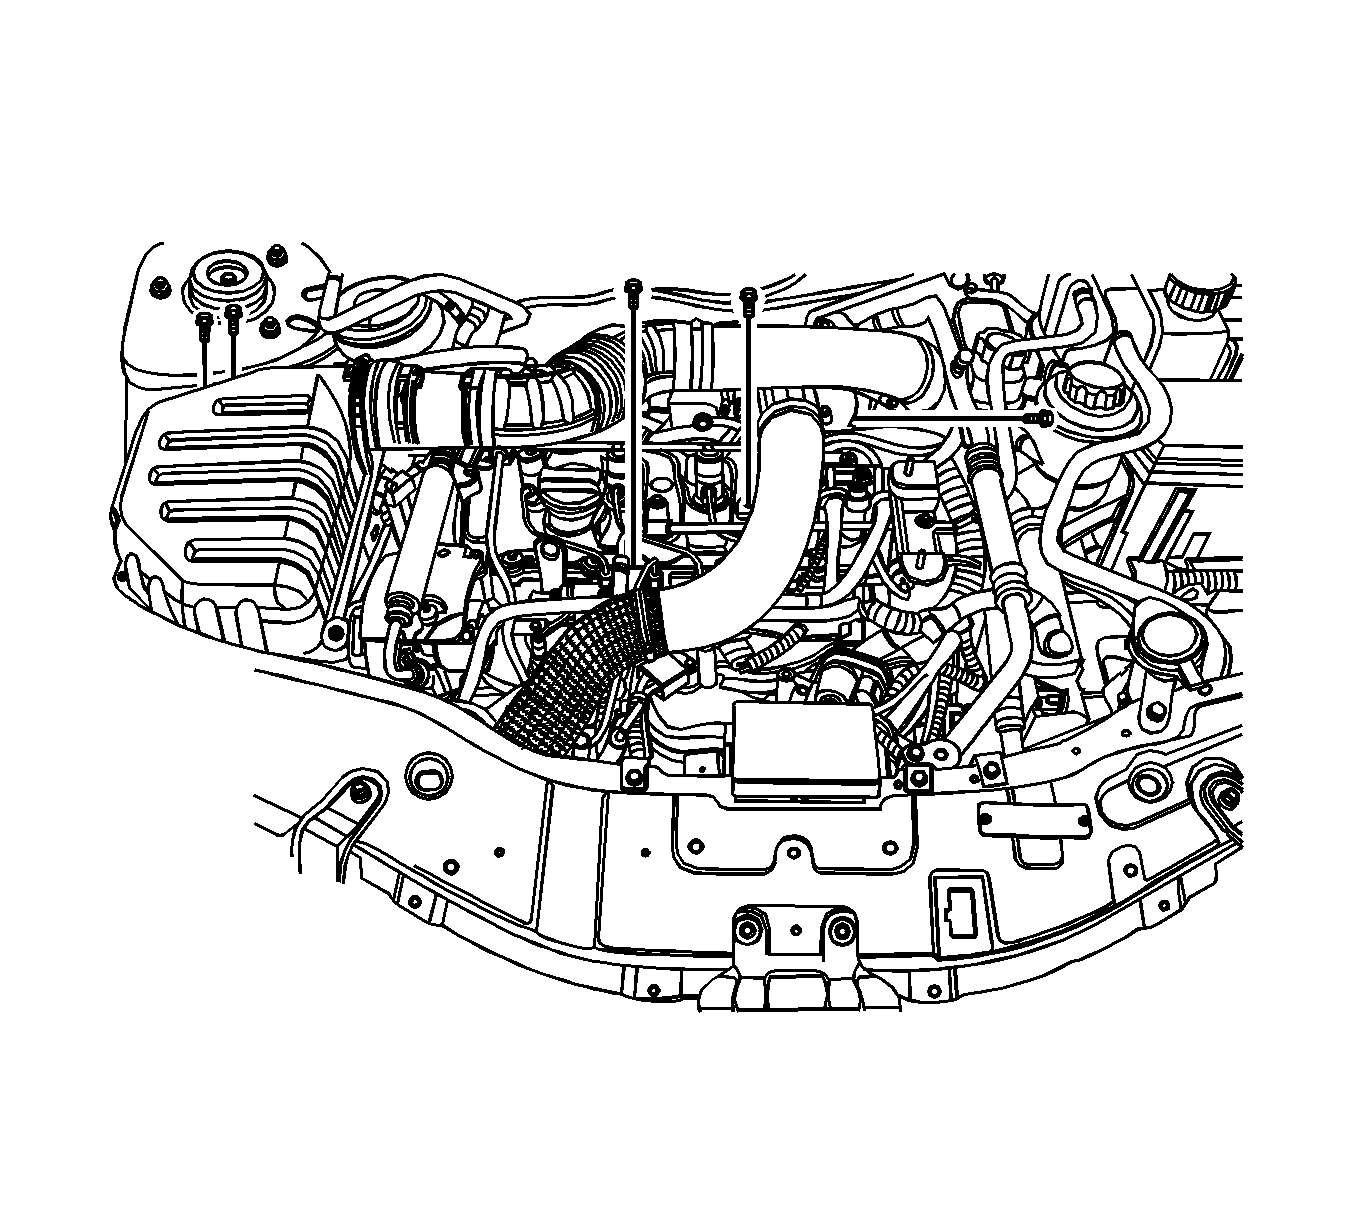
Removal Procedures
- Remove the engine cover. Refer to Engine Cover Replacement .
- Remove the charge air system pipes. Refer to Charge Air Cooler Inlet Pipe and Outlet Pipe Replacement .
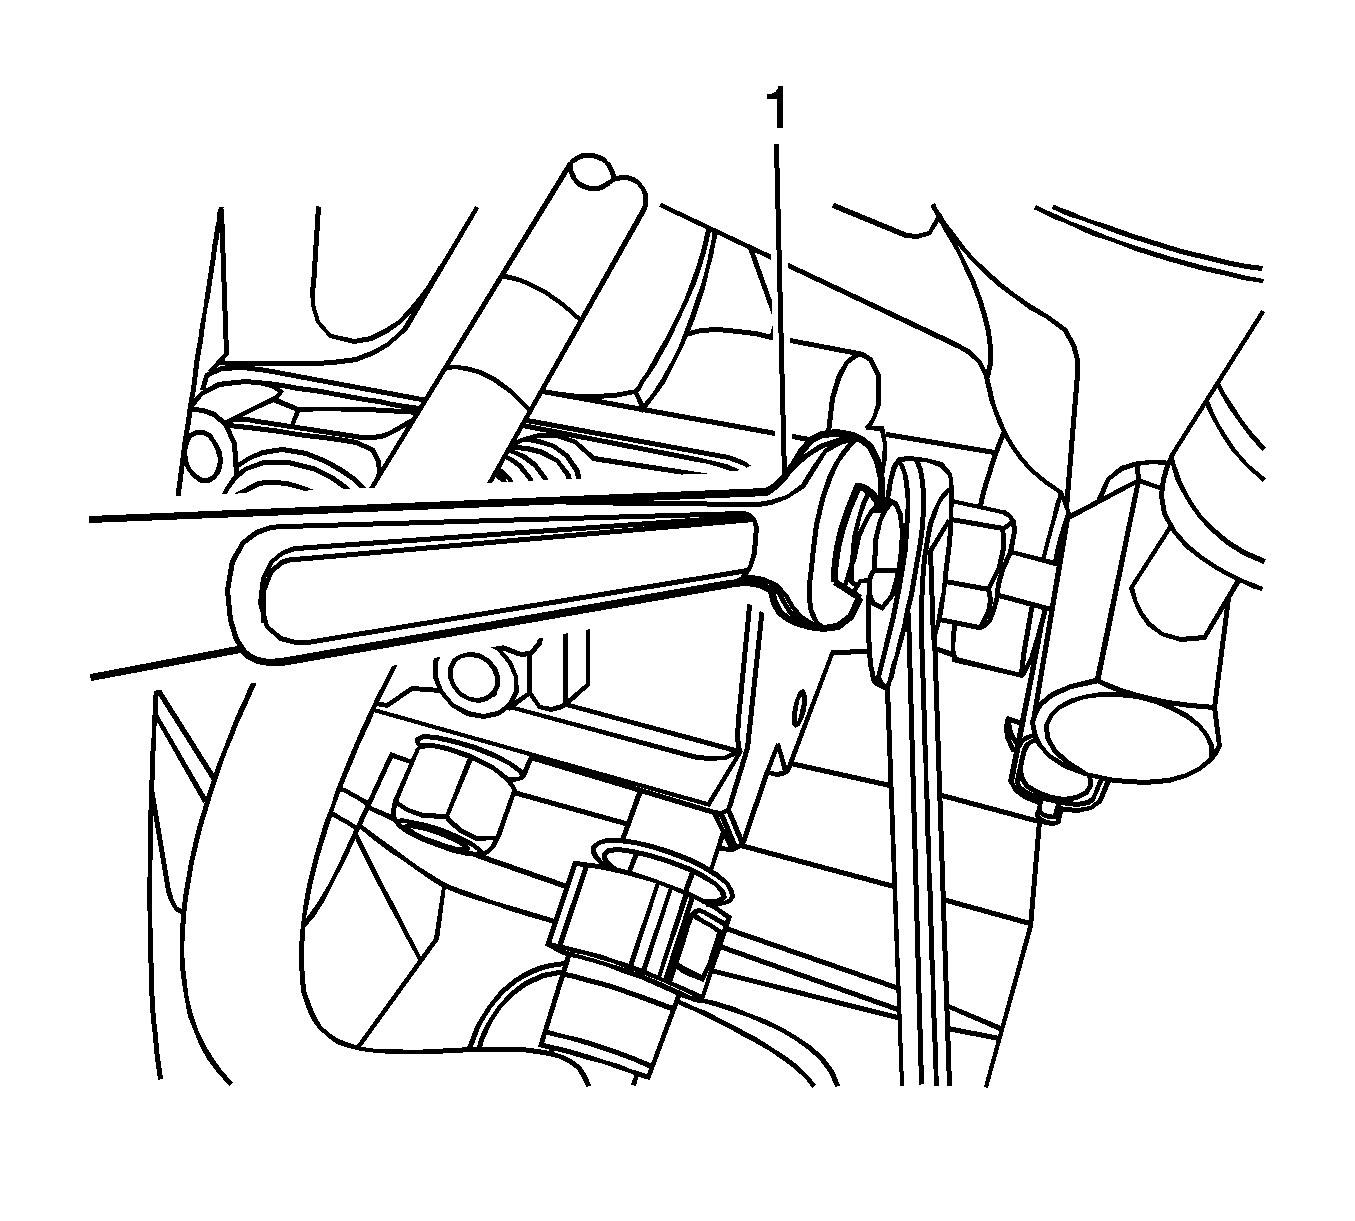
- Hold the injector pipe connector with a wrench (1) and unscrew the fuel pipe-to-injector nut (M14).
- Hold the injection pump pipe connector with a wrench (1) and unscrew the fuel pipe-to-common rail nut (M14).
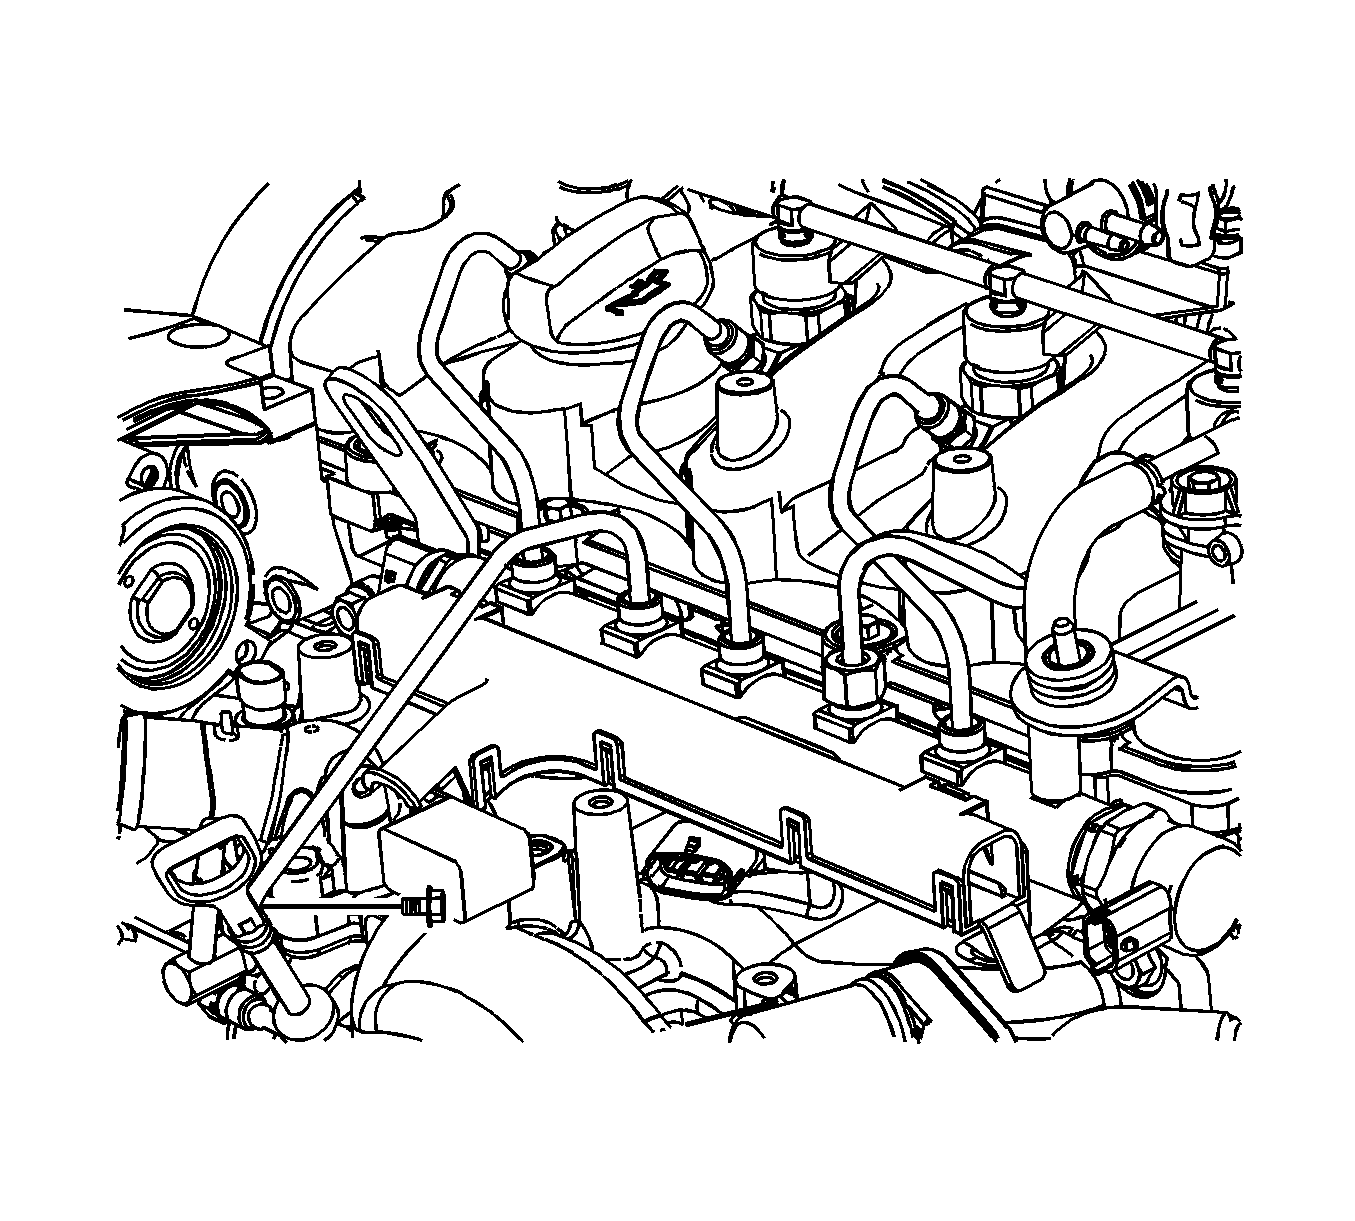
- Unscrew the fuel pipe-to-common rail nut (M17) and the fuel pipe-to-injector nuts (M17).
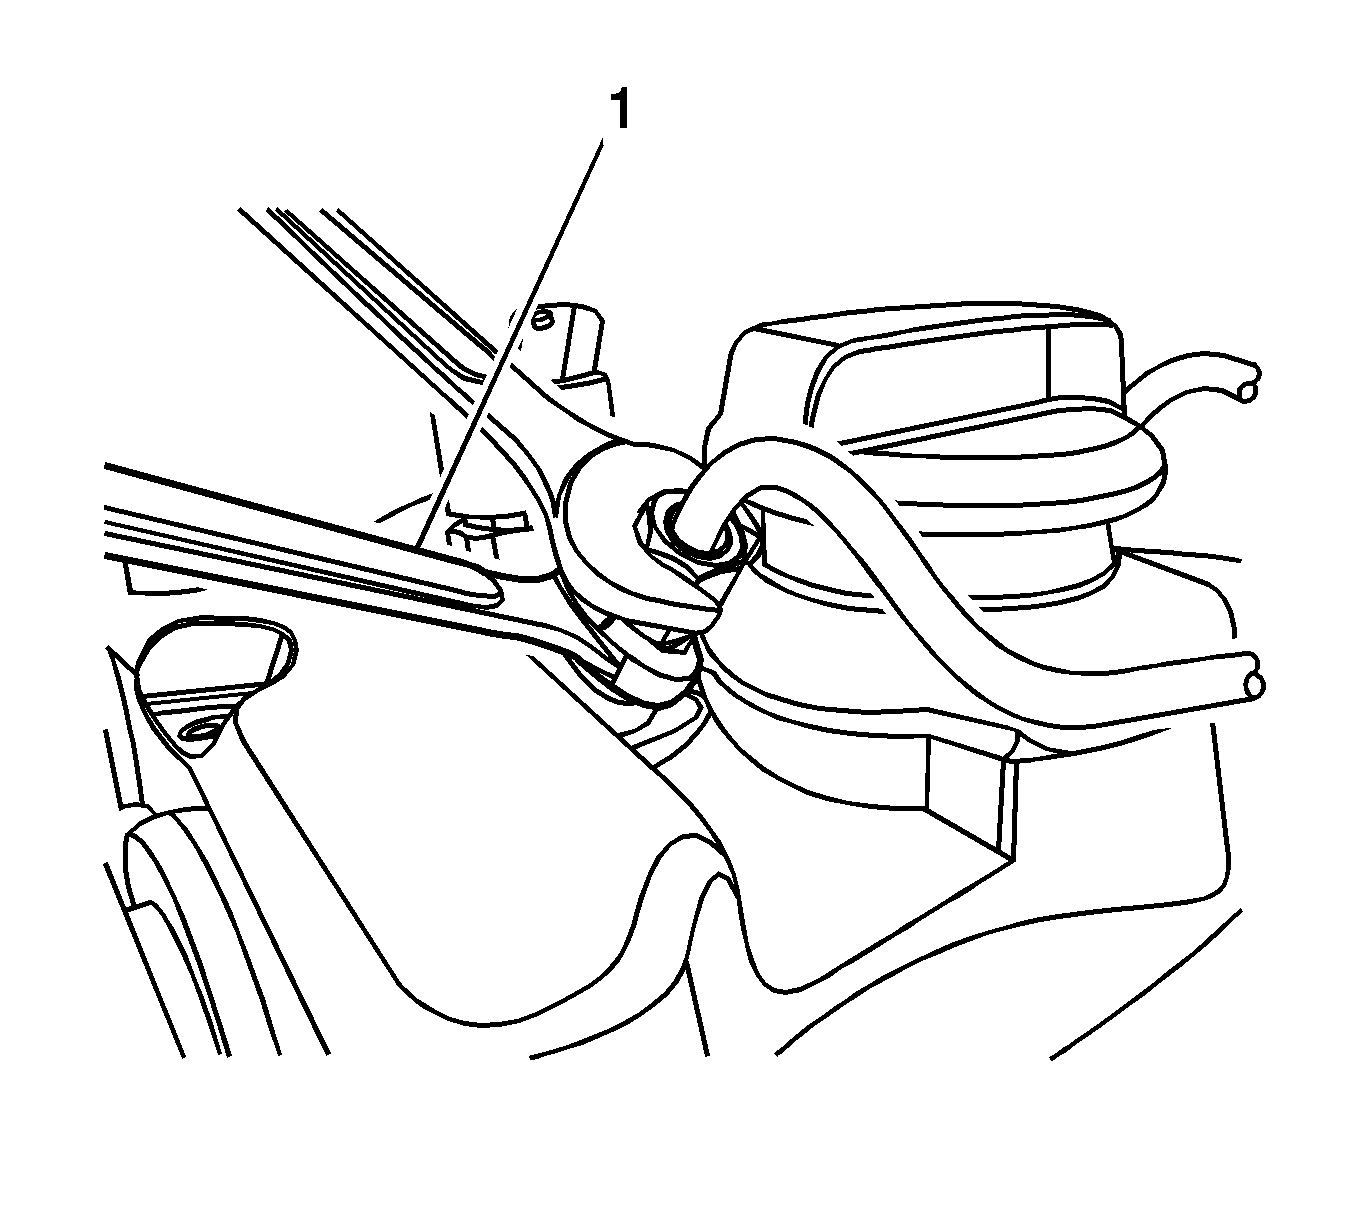
- Remove the fuel pipe-to-common rail retaining bolt from the thermostat housing.
- Remove the fuel pipe-to-common rail and the fuel pipe-to-injector pipes.
Caution: Gasoline or gasoline vapors are highly flammable. A fire could occur if an ignition source is present. Never drain or store gasoline or diesel fuel in an open container, due to the possibility of fire or explosion. Have a dry chemical (Class B) fire extinguisher nearby.
Important: To avoid fuel spillage or damage to the injector pipe connector, hold the injector pipe connector using tools and unscrew the pipe nut. And then, put a cap on the injector connector to avoid contamination from dust as soon as the fuel pipes are removed.
Important: Put a cap on the common rail pipe threads to avoid contamination from dust as soon as the pipes are removed.
Installation Procedure
- Clean the common rail pipe threads, if contaminated.
- Loosen the injector bracket bolts.
- Install the fuel pipes and tighten the nuts by hand between the injectors and the common rail.
- Install the injector bracket bolt .
- Hold the injector pipe connector with a wrench (1) and tighten the fuel pipe-to-injector nut (M14).
- Tighten the fuel pipe-to-injector nut (M17).
- Install the fuel pipe and tighten the nuts by hand between the common rail and the injection pump.
- Hold the injection pump pipe connector with a wrench (1) and tighten the fuel pipe-to-common rail nut (M14).
- Tighten the fuel pipe-to-common rail nut (M17).
- Install the charge air system pipes. Refer to Charge Air Cooler Inlet Pipe and Outlet Pipe Replacement .
- Install the engine cover. Refer to Engine Cover Replacement .
Important: Do not reuse the fuel pipes. If reused, the contaminated pipes may damage the injectors or cause leak from the pipes.
Notice: Refer to Fastener Notice in the Preface section.
Tighten
Tighten the injector bracket bolt to 28 N·m (20.7 lb ft).
Tighten
Tighten the fuel pipe-to-injector nut (M14) to 27 N·m (19.9 lb ft).
Tighten
Tighten the fuel pipe-to-injector nut (M17) to 20 N·m (14.8 lb ft).
Tighten
Tighten the fuel pipe-to-common rail nut (M14) to 20 N·m (14.8 lb ft).
Tighten
Tighten the fuel pipe-to-common rail nut (M17) to 20 N·m (14.8 lb ft).
