For 1990-2009 cars only
Tools Required
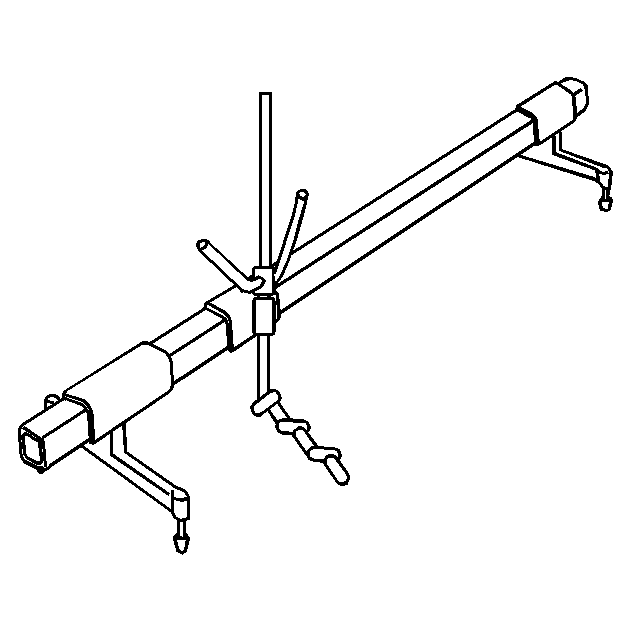
DW-110-060 Engine Assembly Support Fixture
Removal Procedure
- Remove the battery and the battery tray. Refer to Battery Tray Replacement .
- Remove the power steering oil reservoir mounting bolts and put the reservoir aside.
- Remove the pin and the clutch actuator cylinder pipe.
- Remove the upper transaxle-to-engine retaining bolts.
- Install the DW-110-060 .
- Raise and suitably support the vehicle. Refer to Lifting and Jacking the Vehicle .
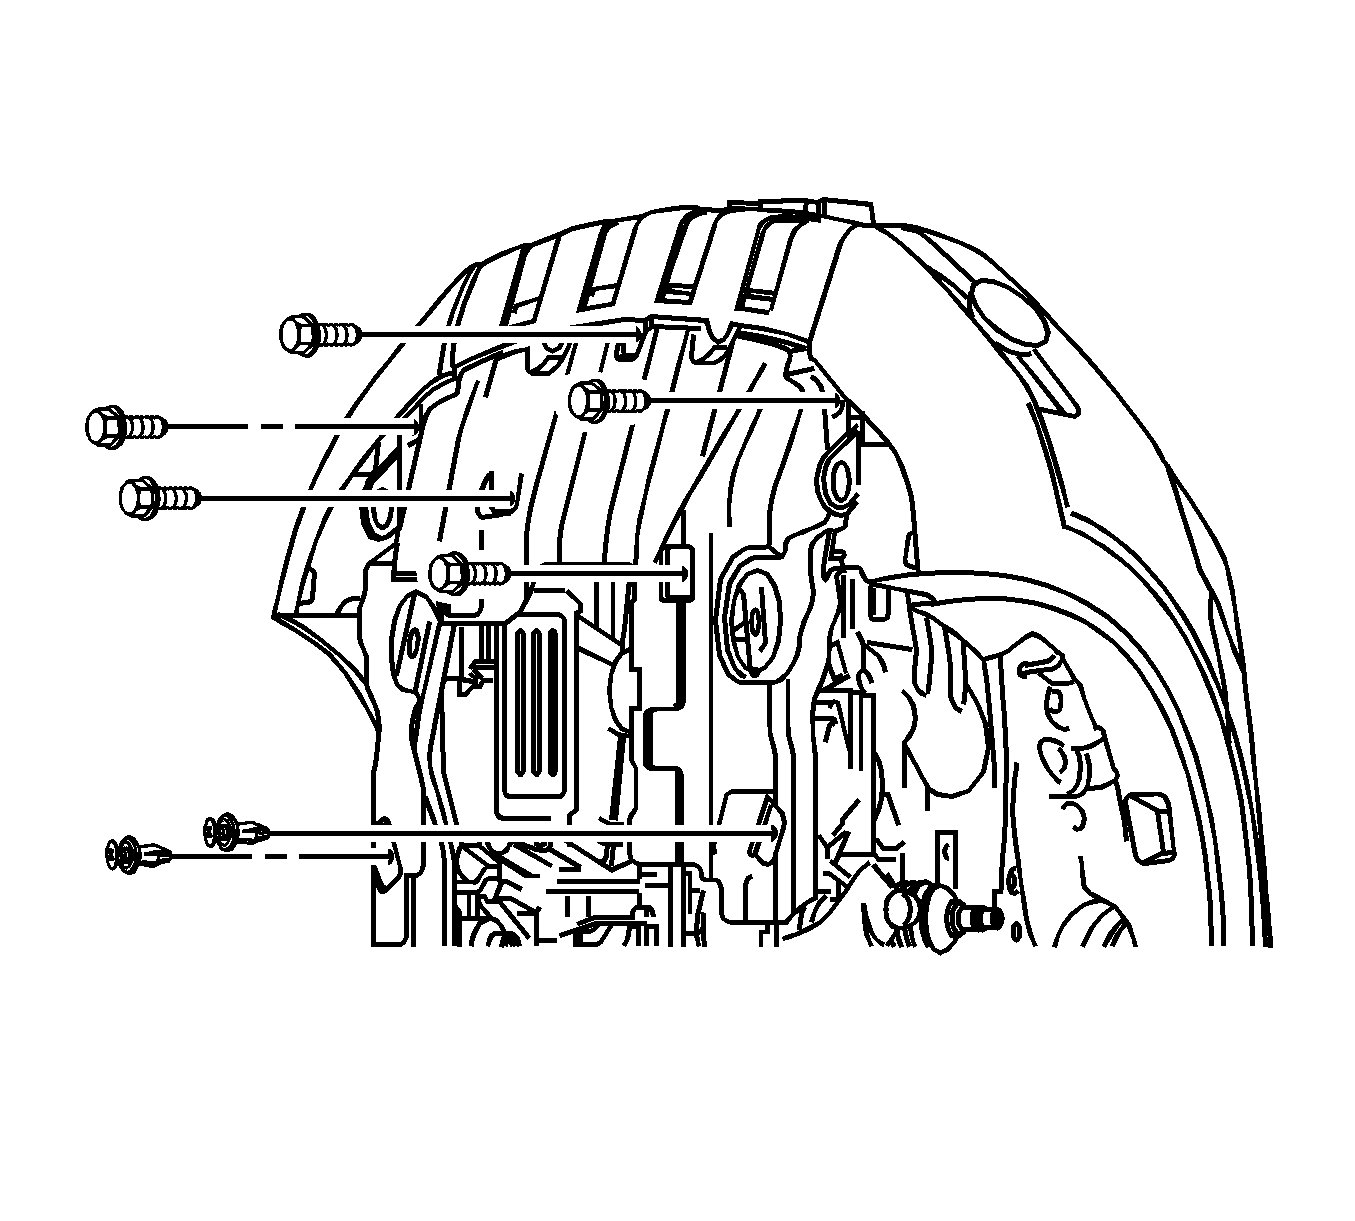
- Remove the engine under cover.
- Remove the left side dust cover.
- Remove the front exhaust pipe. Refer to Front Pipe Replacement .
- Carefully remove the frame from the vehicle. Refer to Frame Replacement .
- Remove the drive axle shafts.
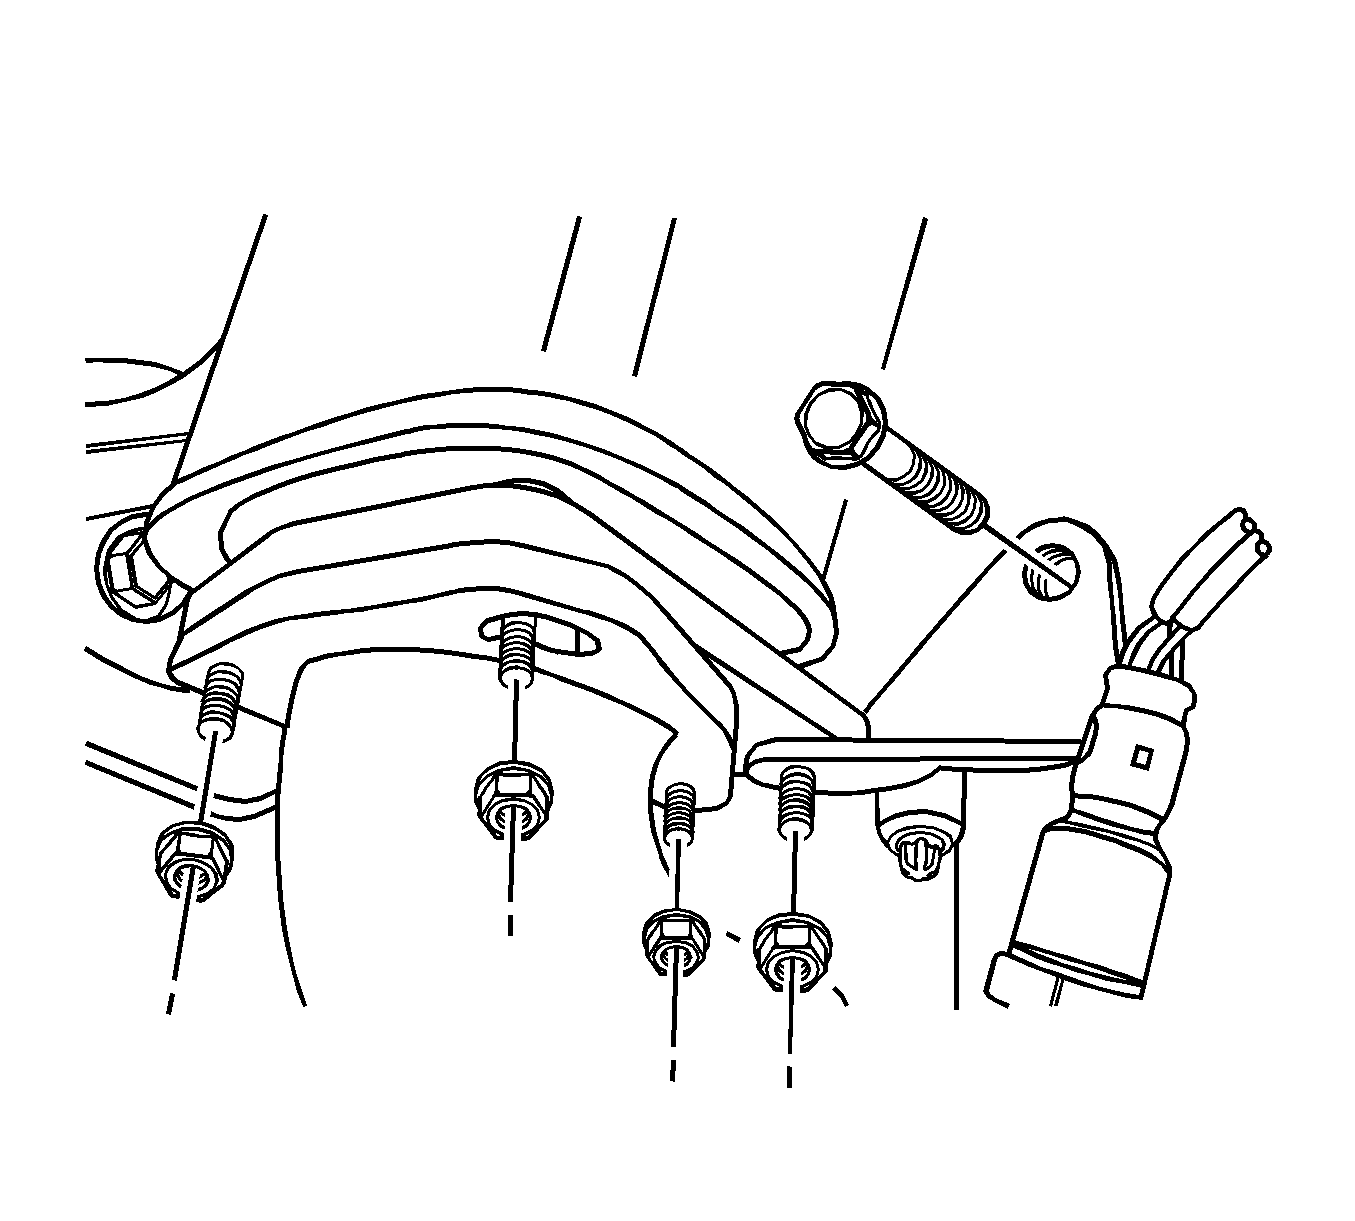
- Remove the shift control cables (1) from the transaxle.
- Remove the cables (2) from the shift control cable bracket.
- Disconnect the backup lamp switch electrical wiring connector.
- Remove the front damper bush mounting bolts and the front damper bush.
- Remove the rear transaxle mounting bracket bolts.
- Remove the rear damper bush and the rear transaxle mounting bracket.
- For AWD, remove the transfer case from the transaxle.
- Remove the starter. Refer to Starter Motor Replacement .
- Support the transaxle assembly using the supporting jack.
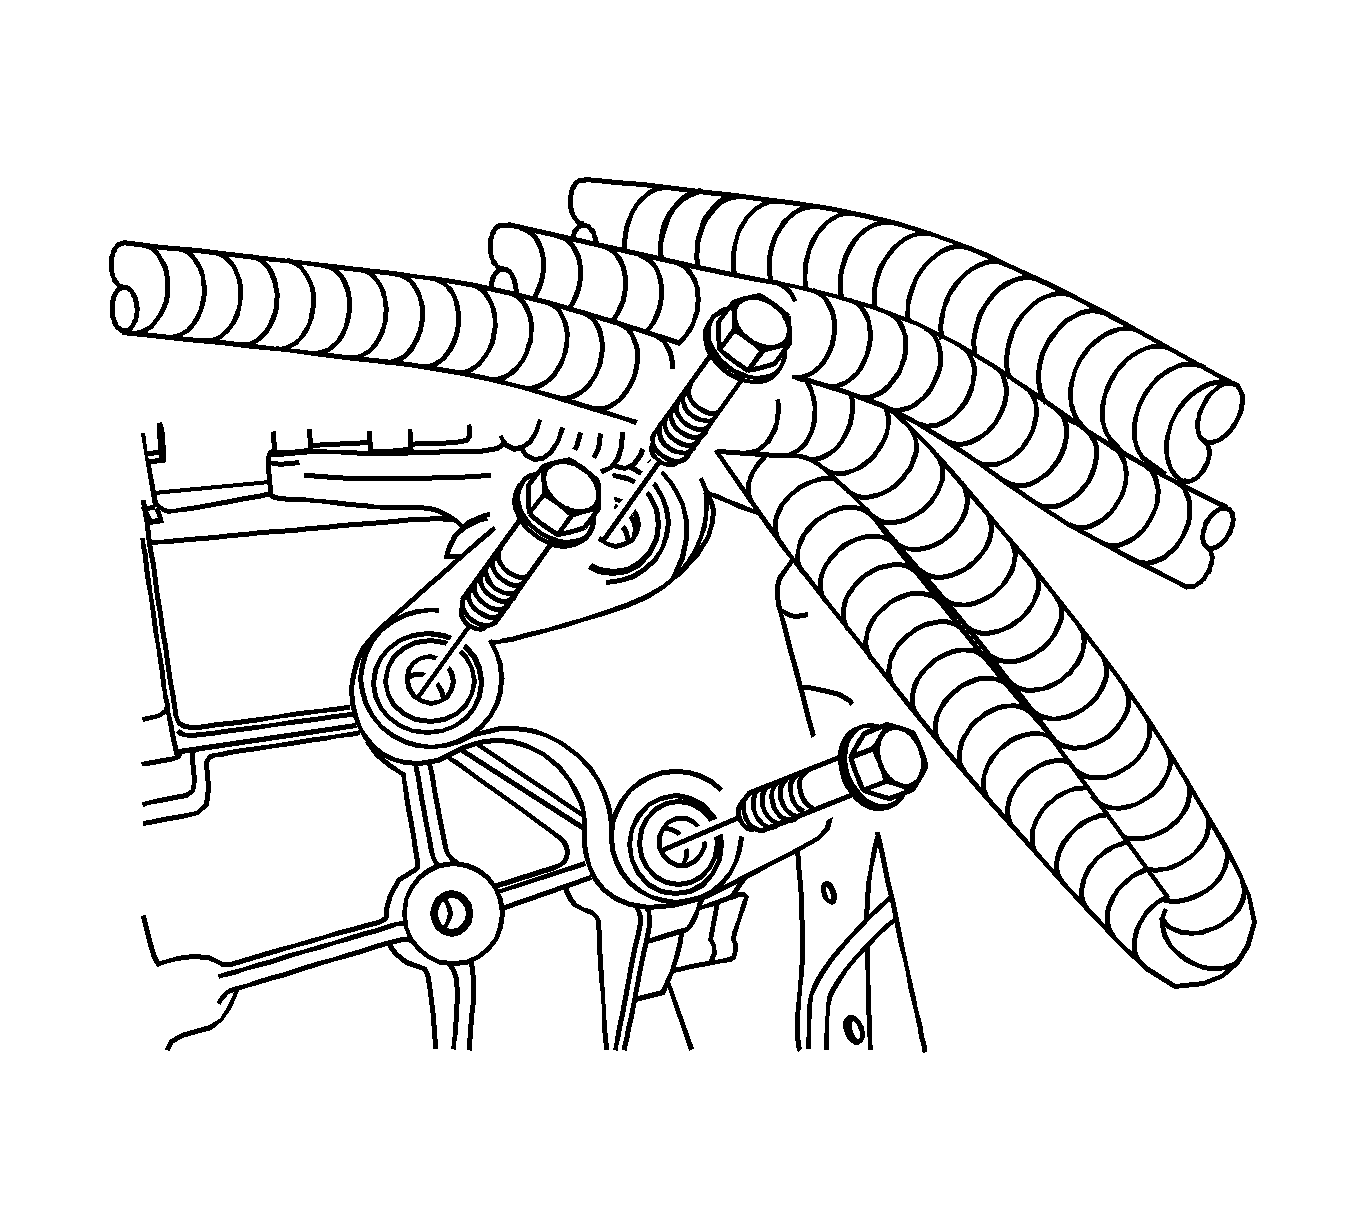
- Remove the oil pan flange-to-transaxle bolts (1).
- Remove the right lower engine-to-transaxle bolts (2) near the front damper bush.
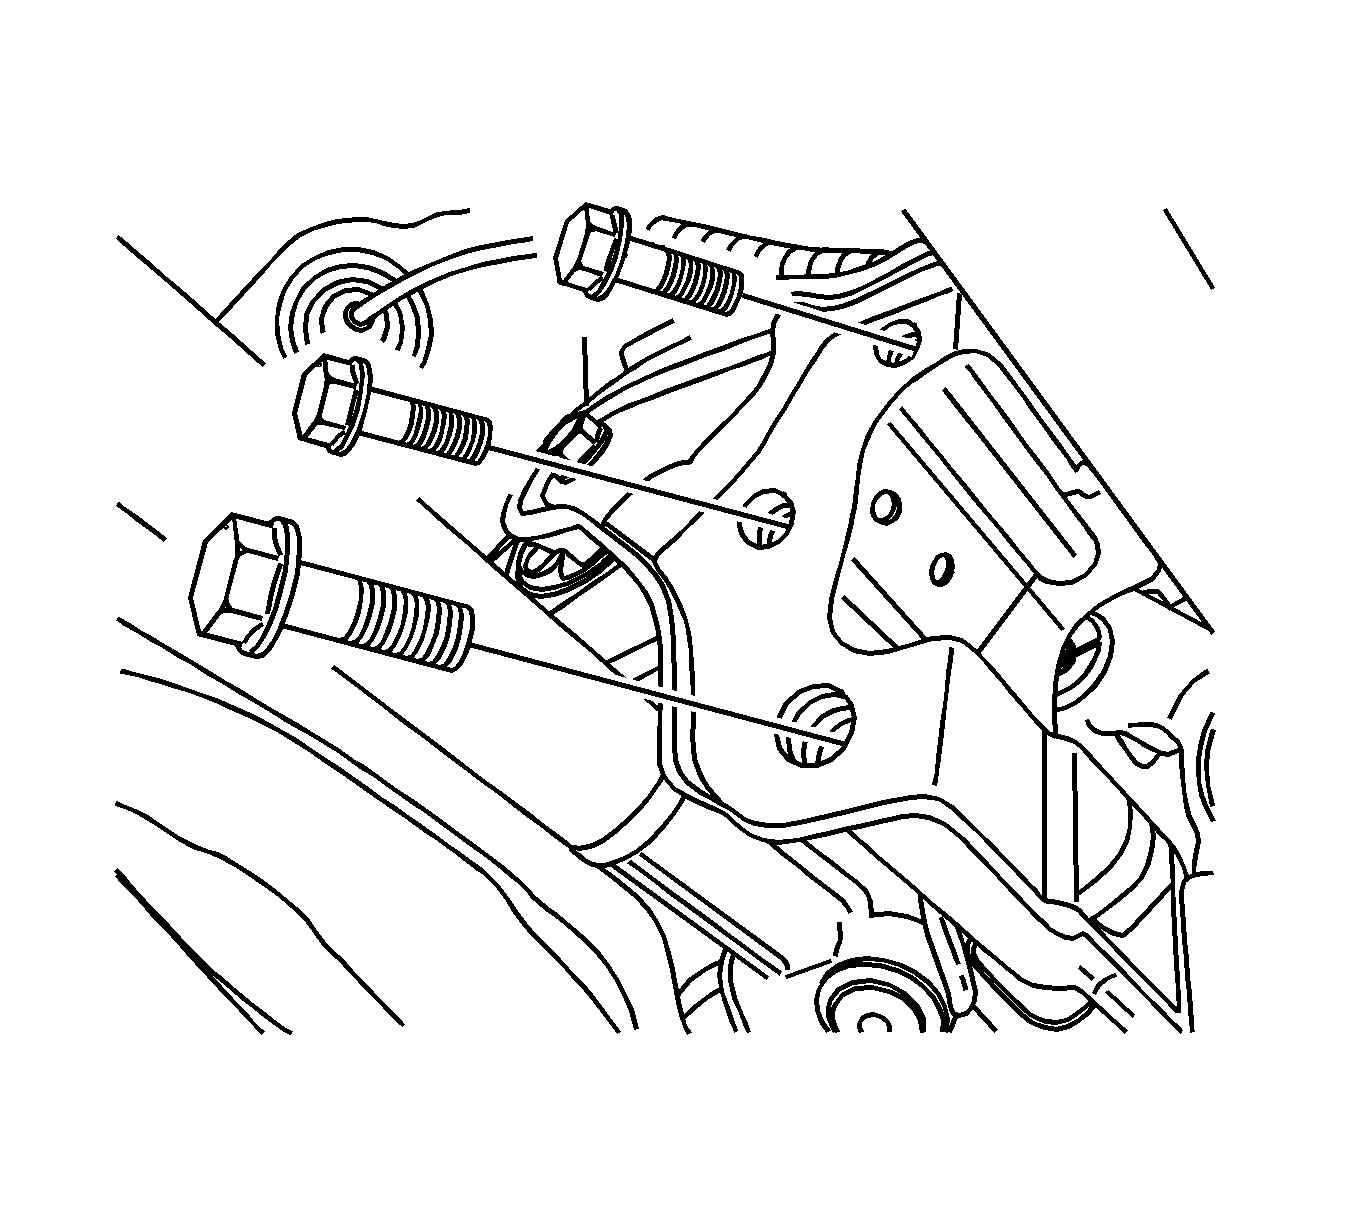
- Remove the left upper transaxle mounting bracket bolts.
- Carefully remove the transaxle assembly from the vehicle.


Installation Procedure
- Install the transaxle into the vehicle and support the transaxle assembly using the supporting jack.
- Install the four left upper transaxle mounting bracket bolts.
- Install the right lower engine-to-transaxle bolts near the front damper bush.
- Remove the transaxle support jack.
- Install the oil pan flange-to-transaxle bolts.
- Install the starter. Refer to Starter Motor Replacement .
- For AWD, install the transfer case into the transaxle.
- Install the rear damper bush and the rear transaxle mounting bracket.
- Install the rear transaxle mounting bracket bolts.
- Install the front damper bush and the front damper bush mounting bolts.
- Install the drive axle shafts.
- Connect the backup lamp switch electrical wiring connector.
- Install the cables (2) to the shift control cable bracket.
- Install the shift control cables (1) to the transaxle.
- Carefully install the frame into the vehicle. Refer to Frame Replacement .
- Install the front exhaust pipe. Refer to Front Pipe Replacement .
- Install the left side dust cover.
- Install the engine under cover.
- Lower the vehicle.
- Remove the DW-110-060 from the engine.
- Install the upper transaxle-to-engine bolts.
- Install the pin and the clutch actuator cylinder pipe.
- Install the power steering oil reservoir mounting.
- Install the battery and the battery tray. Refer to Battery Tray Replacement .
- Bleed the air from the hydraulic clutch. Refer to Hydraulic Clutch Bleeding .
- Adjust the shift control cable. Refer to Shift Linkage Adjustment .
- Check the fluid level. Refer to Transmission Fluid Inspection .
Notice: Refer to Fastener Notice in the Preface section.
Tighten
Tighten the left upper transaxle mounting bracket bolts to 50 N·m (37 lb ft).
Tighten
Tighten the right lower engine-to-transaxle bolts to 75 N·m (55 lb ft).
Tighten
Tighten the oil pan flange-to-transaxle bolts to 50 N·m (37 lb ft).
Tighten
Tighten the rear transaxle mounting bracket bolts to 90 N·m (66 lb ft).
Tighten
Tighten the front damper bush mounting bolts to 50 N·m (37 lb ft).

Tighten
| • | For 2.0L or 2.4L engines, tighten the upper transaxle-to-engine bolts to 75 N·m (55 lb ft). |
| • | For 2.8L, 3.2L, or 3.6L engines, tighten the upper transaxle-to-engine bolts to 50 N·m (37 lb ft). |
