For 1990-2009 cars only
Removal Procedure
- Disconnect the negative battery cable.
- Drain the fuel tank. Refer to Fuel Tank Draining . Ensure that the fuel level in the tank is less than 1/4 full. If necessary, drain the fuel tank to at least this level.
- Raise and support the vehicle. Refer to Lifting and Jacking the Vehicle .
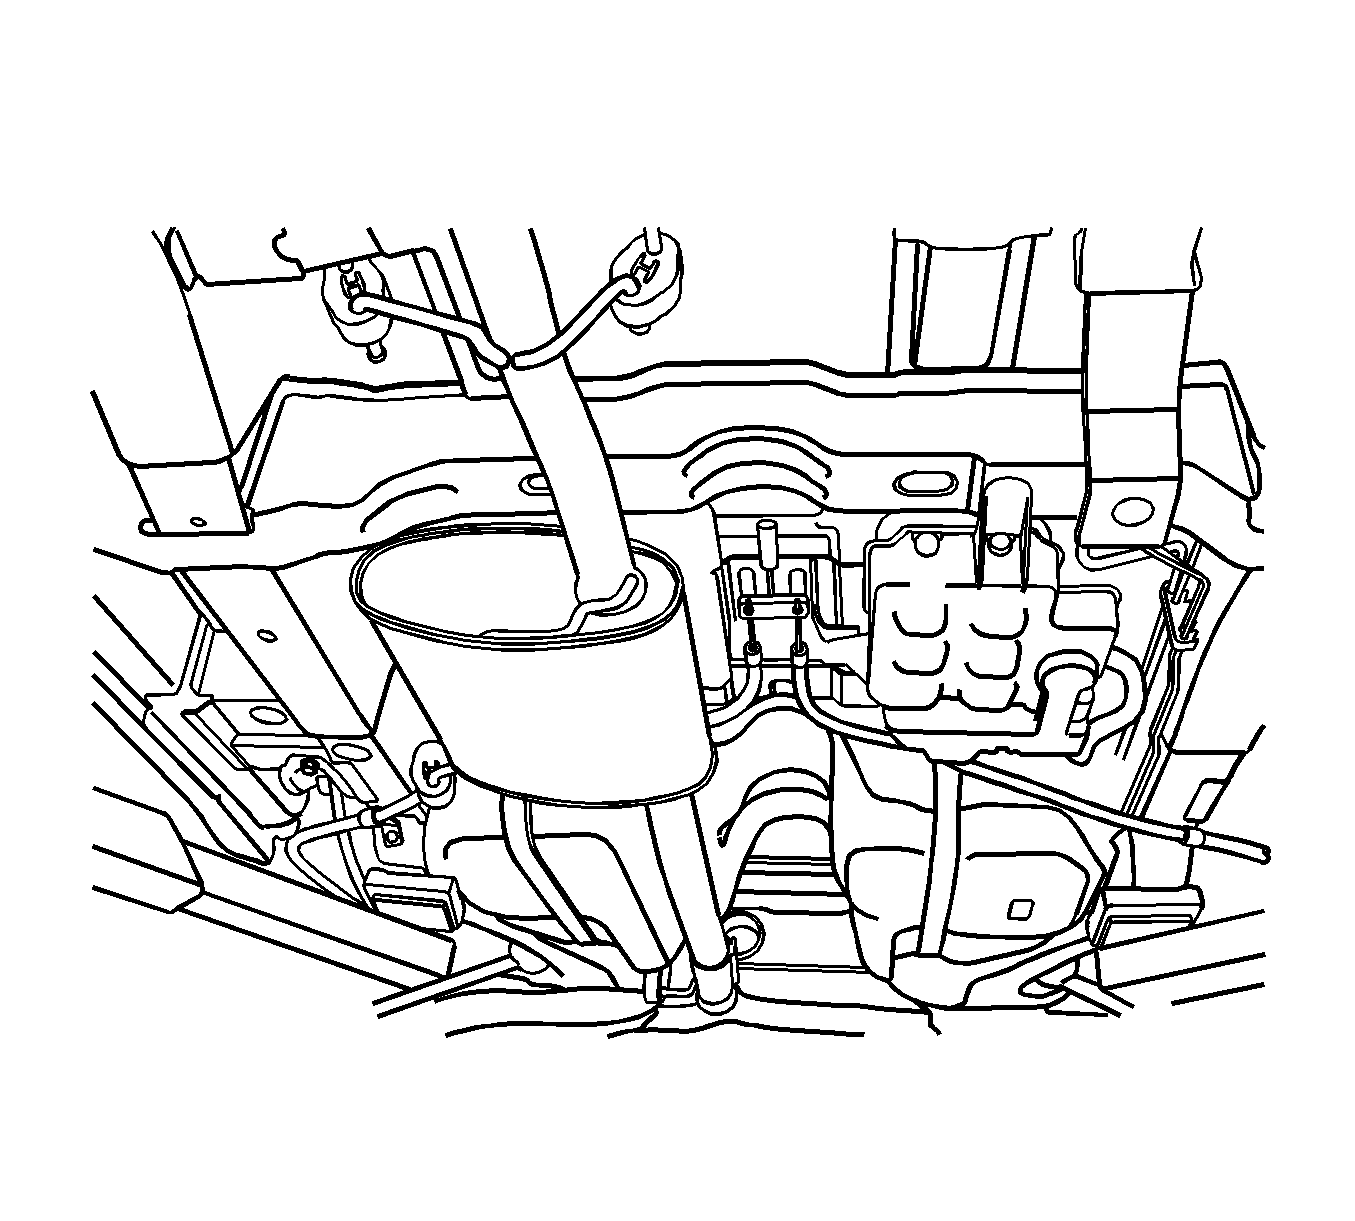
- Remove the front muffler. Refer to Muffler Replacement .
- Disconnect the fuel pump connector at the right rear side of the fuel tank.
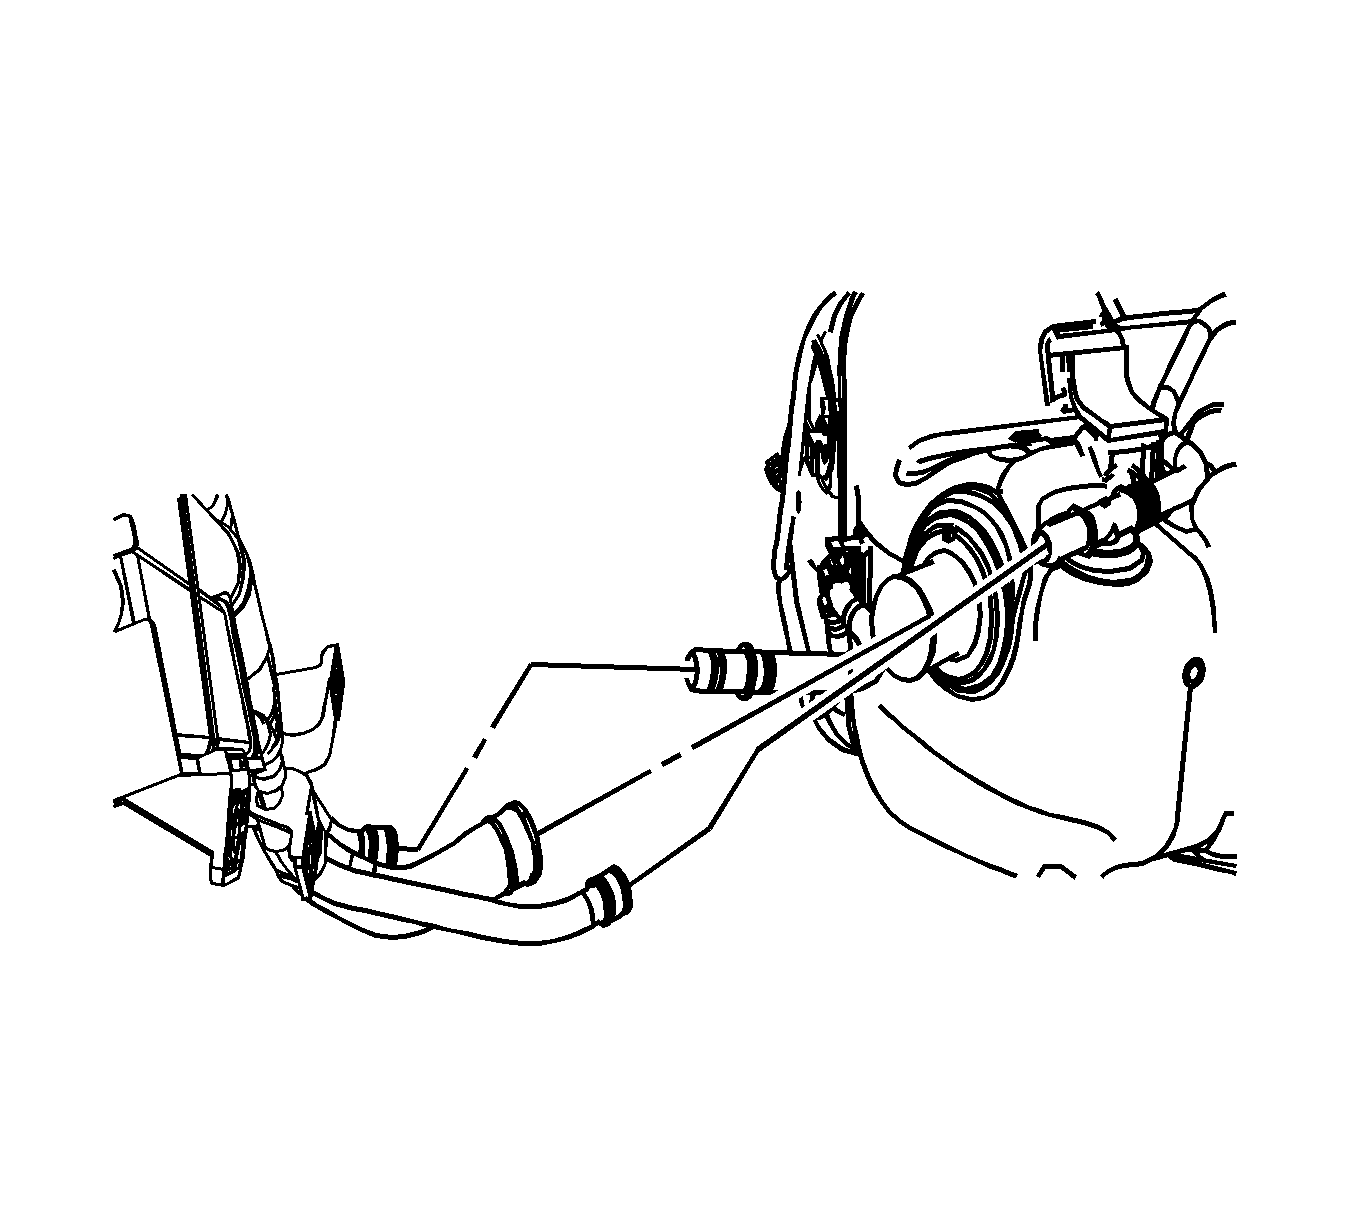
- Disconnect the fuel tank filler tube from the fuel tank.
- Disconnect the fuel feed and return line near the right front side of the fuel tank.
- Remove the rear drive axle, if equipped.
- Support the fuel tank.
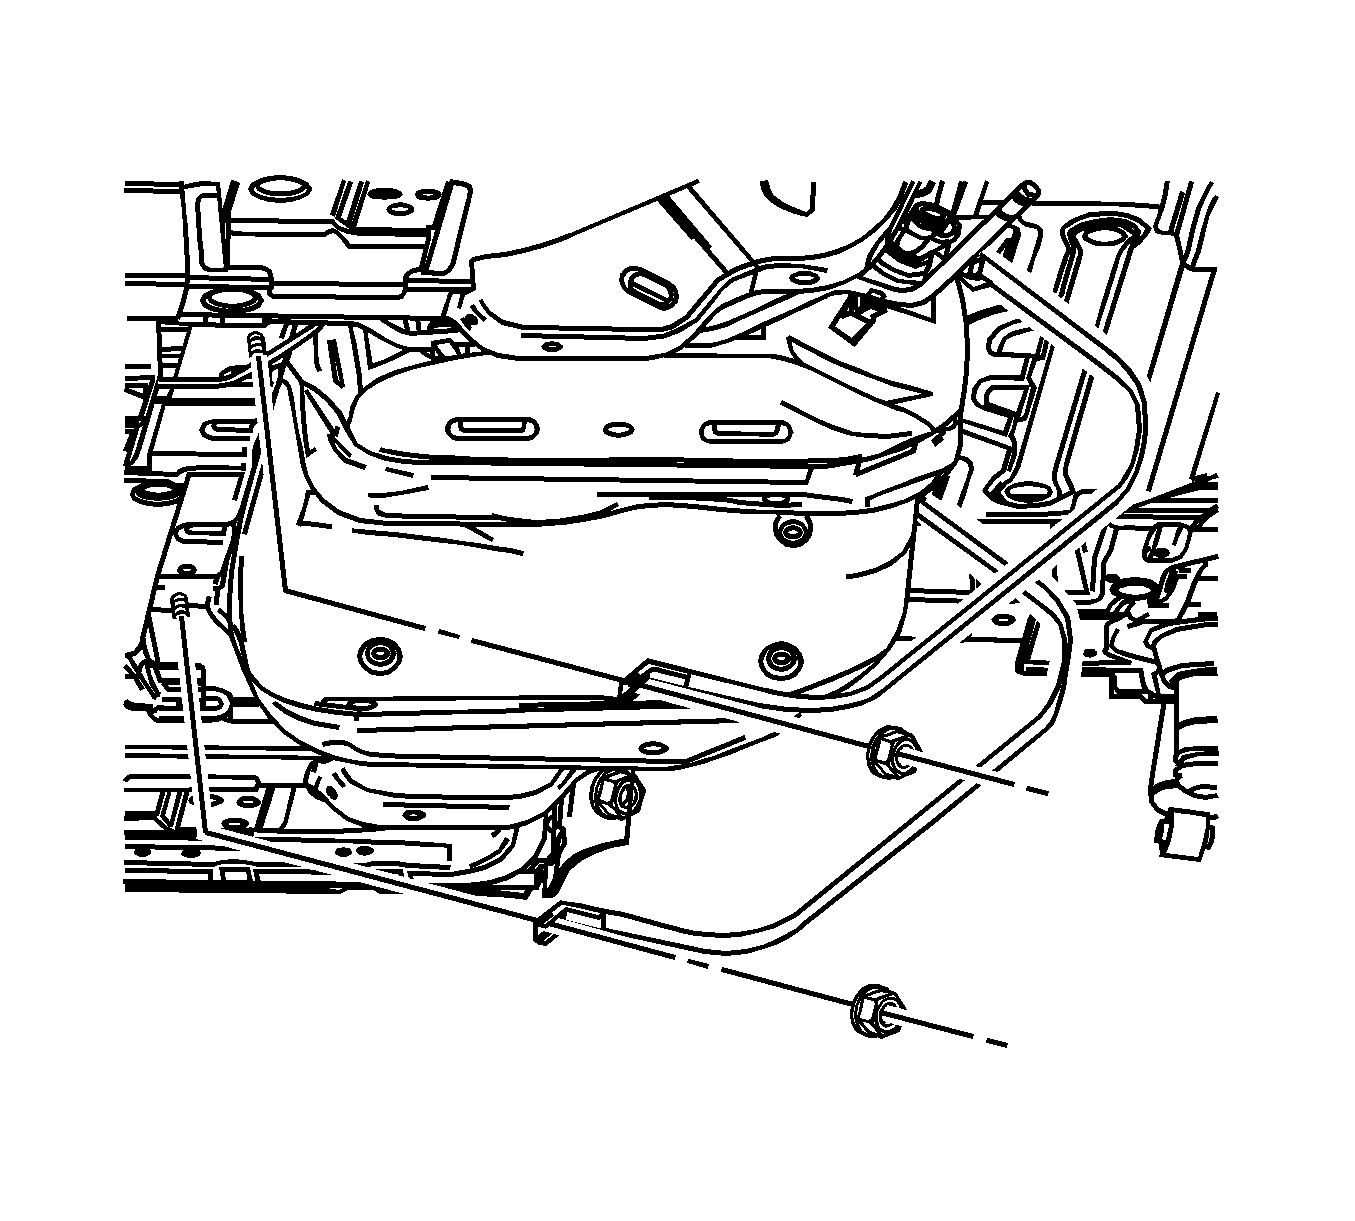
- Remove the fuel tank strap retaining nuts.
- Remove the fuel tank straps.
- Carefully lower the jack and move the front of the fuel pump downward while tilting the rear of the fuel pump upward.
- Remove the fuel tank.
Caution: Refer to Battery Disconnect Caution in the Preface section.
Caution: Gasoline or gasoline vapors are highly flammable. A fire could occur if an ignition source is present. Never drain or store gasoline or diesel fuel in an open container, due to the possibility of fire or explosion. Have a dry chemical (Class B) fire extinguisher nearby.

Installation Procedure
- Install the fuel tank in the position previously removed.
- Install the fuel tank straps.
- Connect the fuel feed and return line near the right front side of the fuel tank.
- Connect the fuel tank filler tube.
- Connect the fuel pump connector at the right rear side of the fuel tank.
- Install the rear drive axle, if equipped.
- Install the front muffler. Refer to Muffler Replacement .
Tighten
Tighten the fuel tank strap retaining nuts to 20 N·m (15 lb ft).

