Input Clutch Housing End Play Check FWD Only
Tools Required
| • | J 26958
Output Shaft Loading and Aligning Tool |
| • | J 33381-A
Final Drive Remover and Installer |
| • | J 38385
Output Shaft Loading Tool Adapter |
| • | J 43425
Output Shaft Loading Tool Adapter |
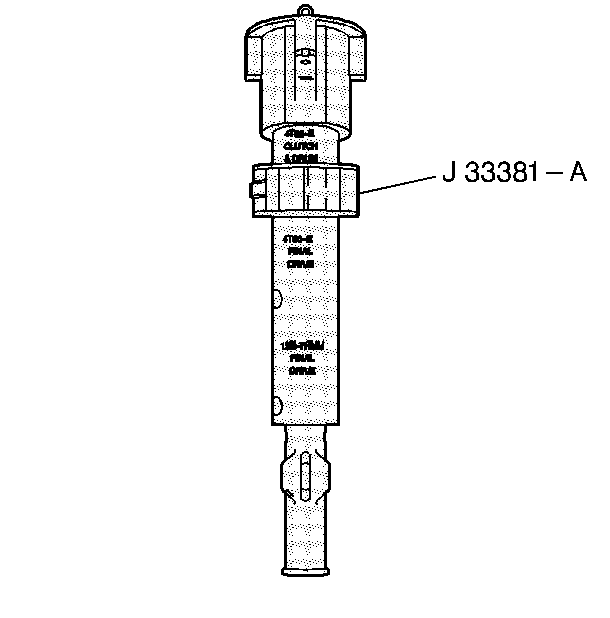
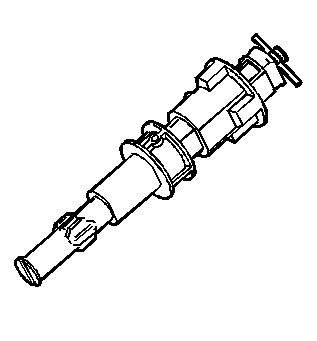
- Adjust the collar on tool
J 33381-A
to the 4T65-E CLUTCH & DRUM setting.
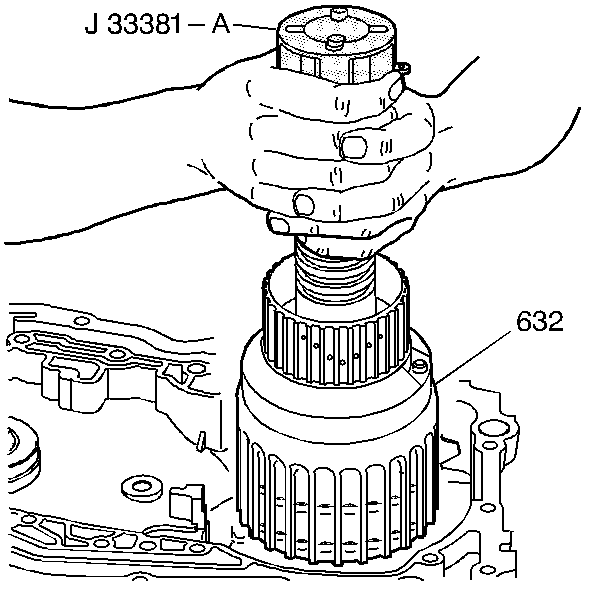
- Install
J 33381-A
into the input
clutch housing assembly (632).
- Tighten the threaded rod of
J 33381-A
until the rod is finger tight.
- Use
J 33381-A
in order to lift the input clutch housing assembly (632). The sprag clutch assemblies will also be attached.
- Install the assembly (632) into the case. Be sure that the assembly is down all the way.
- Remove
J 33381-A
from the assembly.
Important: The tool
J 38385
(3) is used on a standard duty transmission, and
J 43425
(3) is used on a heavy
duty transmission.
- Install
J 38385
(3) for a standard duty transmission or
J 43425
(3) for a heavy duty transmission.
Important: The tool
J 26958-10B
(2) is model specific and can be used on a standard duty and a heavy duty transmission. This tool has a small end (4) and a larger
end (5). Standard duty would use the smaller end (4) facing down, and a heavy duty would use the larger end (5) facing down.
- Install
J 26958-10B
(2) depending on model. Stadard duty uses this tool with the smaller end (4) facing down. Heavy duty uses this tool with the larger end (5) facing down.
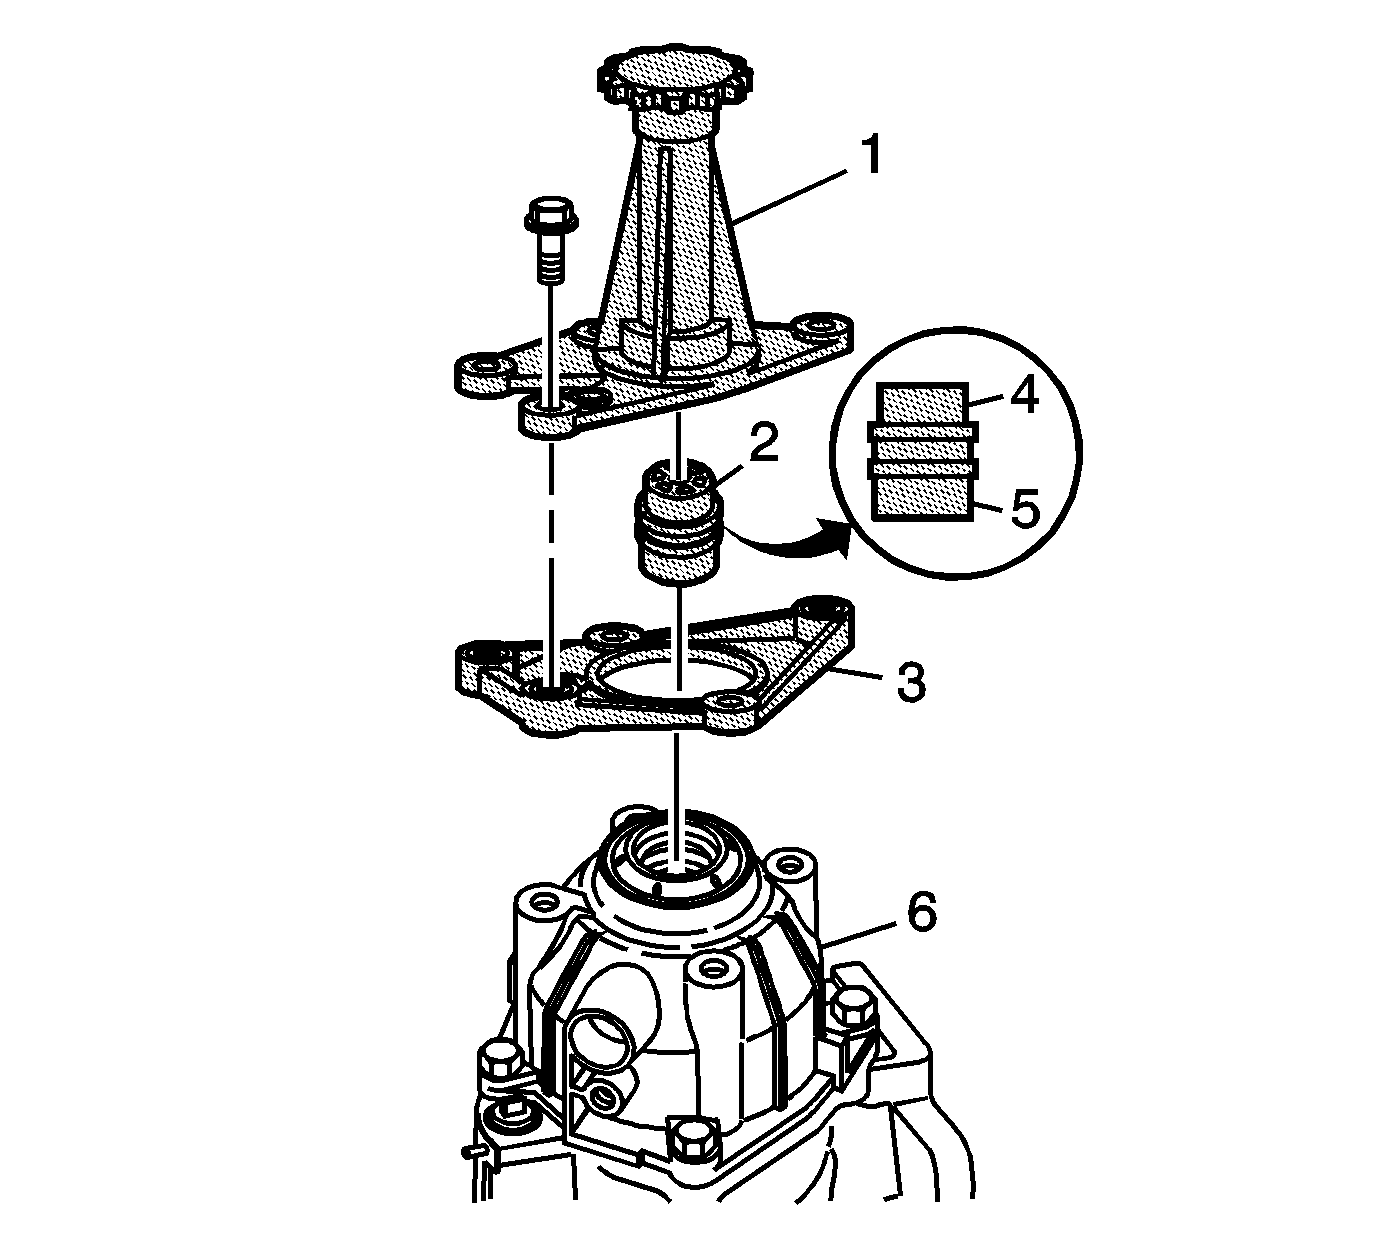
Important: Install bolts and tighten securely to prevent tool deflection during end play measurement.
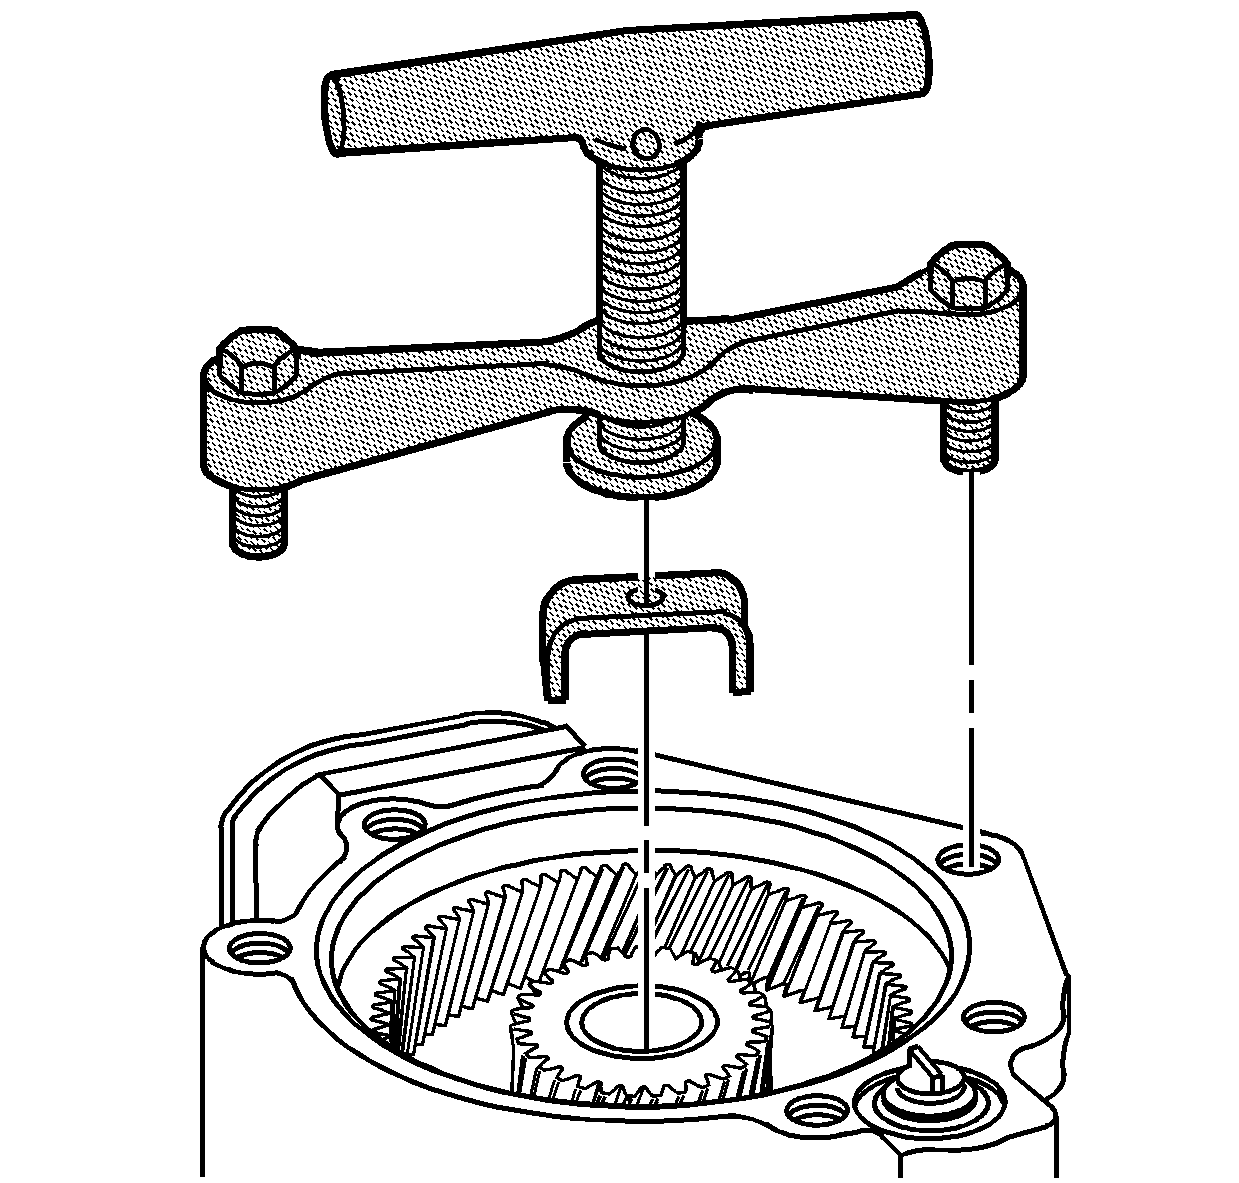
- Install
J 26958
(1) onto the case extension (6).
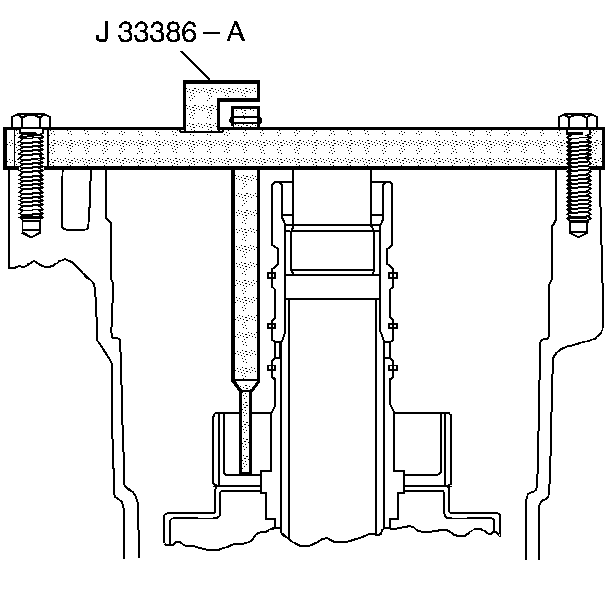
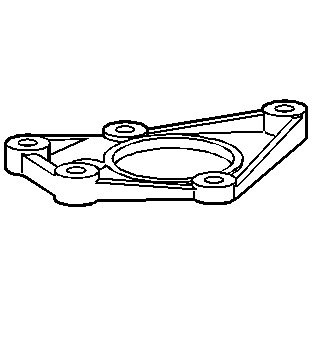
- Using two bolts, install
J 33386-A
onto the case.
- Tighten the bolts in order to securely hold
J 33386-A
.
- Tighten
J 26958
finger tight in order to eliminate differential carrier end play.
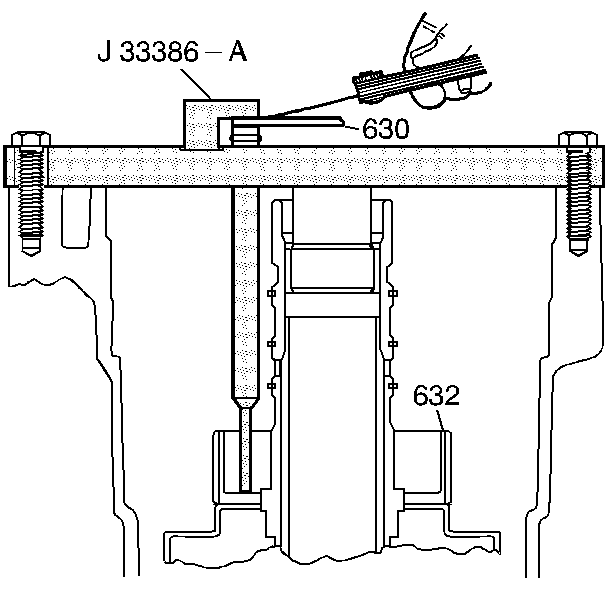
- Insert the thrust washer (630) from the input clutch housing into
J 33386-A
as indicated. If the thrush washer will not fit into
J 33386-A
, select the next size smaller thrust washer and recheck.
- Use a feeler gauge in order to measure the clearance between
J 33386-A
and the thrust washer (630).
| • | If the clearance is less than 0.1521 mm (0.006 in), use the current size thrust washer. |
| • | If the clearance is 0.1521 mm (0.006 in) or more, select the next size larger thrust washer and recheck. |
- Remove
J 33386-A
.
- Adjust the collar on tool
J 33381-A
to the 4T65-E CLUTCH & DRUM setting. Make sure that the threaded rod is fully loosened.
- Install
J 33381-A
into the input clutch housing (632).
- Tighten the threaded rod of
J 33381-A
until the rod is finger tight.
- Use
J 33381-A
in order to lift the input clutch housing assembly (632). The sprag clutch assemblies will also be attached.
- Remove the assembly (632) from the case.
- Position the transmission so that the oil pan is facing down.
- Remove
J 26958
(1),
J 26958-10B
(2), and
J 38385
(3) or
J 43425
(3).
Input Clutch Housing End Play Check F4WD Only
Tools Required
| • | J 33381-A
Final Drive Remover and Installer |

- Install the final drive sun gear shaft (689).
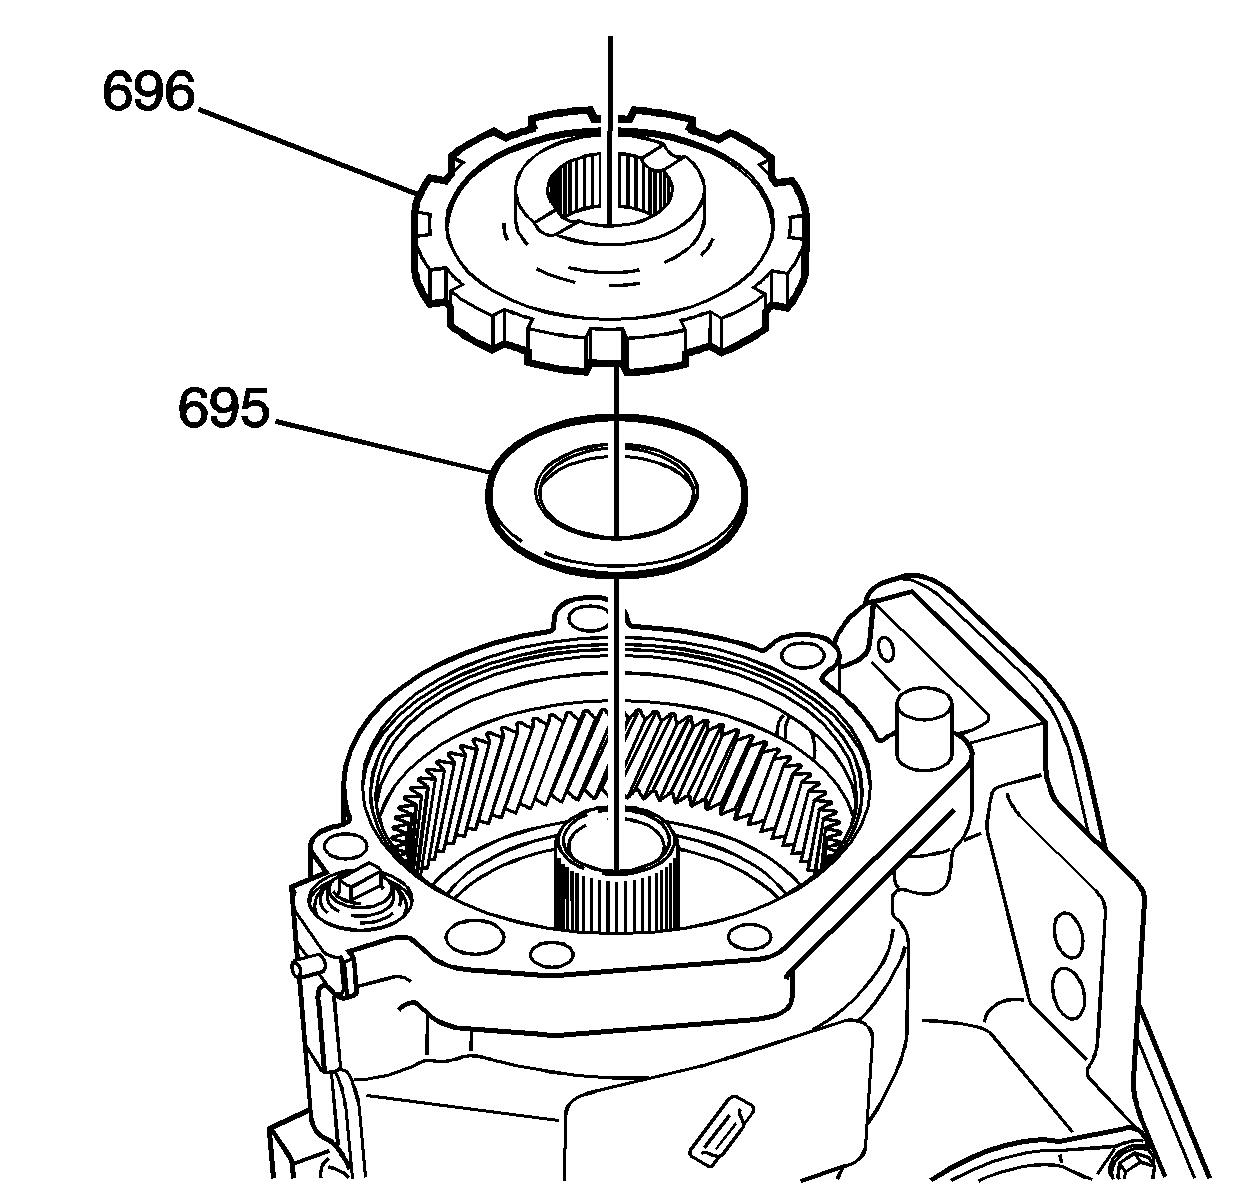
- Use
J 36850
or equivalent in order to retain the parking
gear thrust bearing (695) to the parking gear (696).
- Install the parking gear thrust bearing (695) and the parking gear (696).
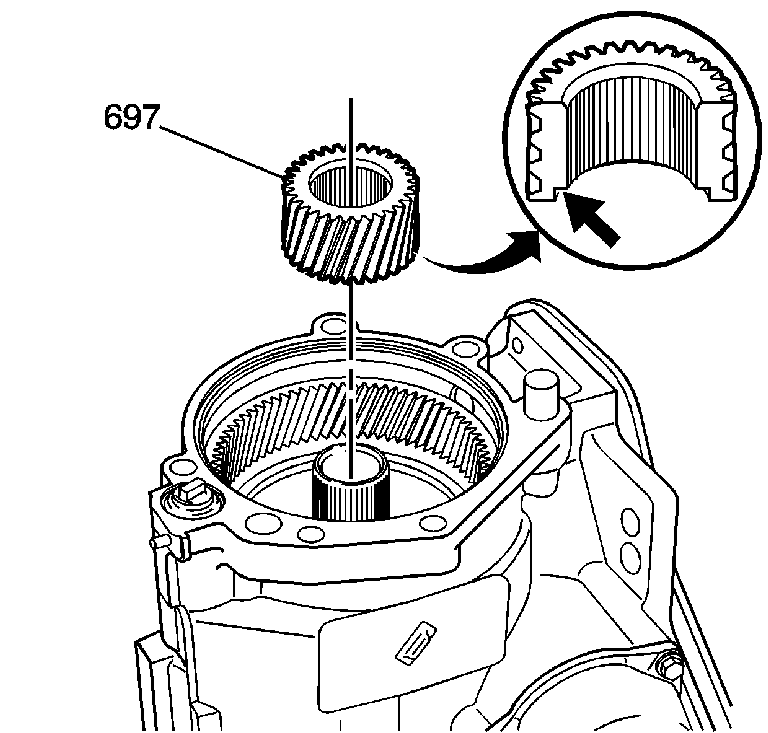
- Install the final drive sun gear (697).
Important: Install bolts and tighten securely to prevent tool deflection during end play measurement.
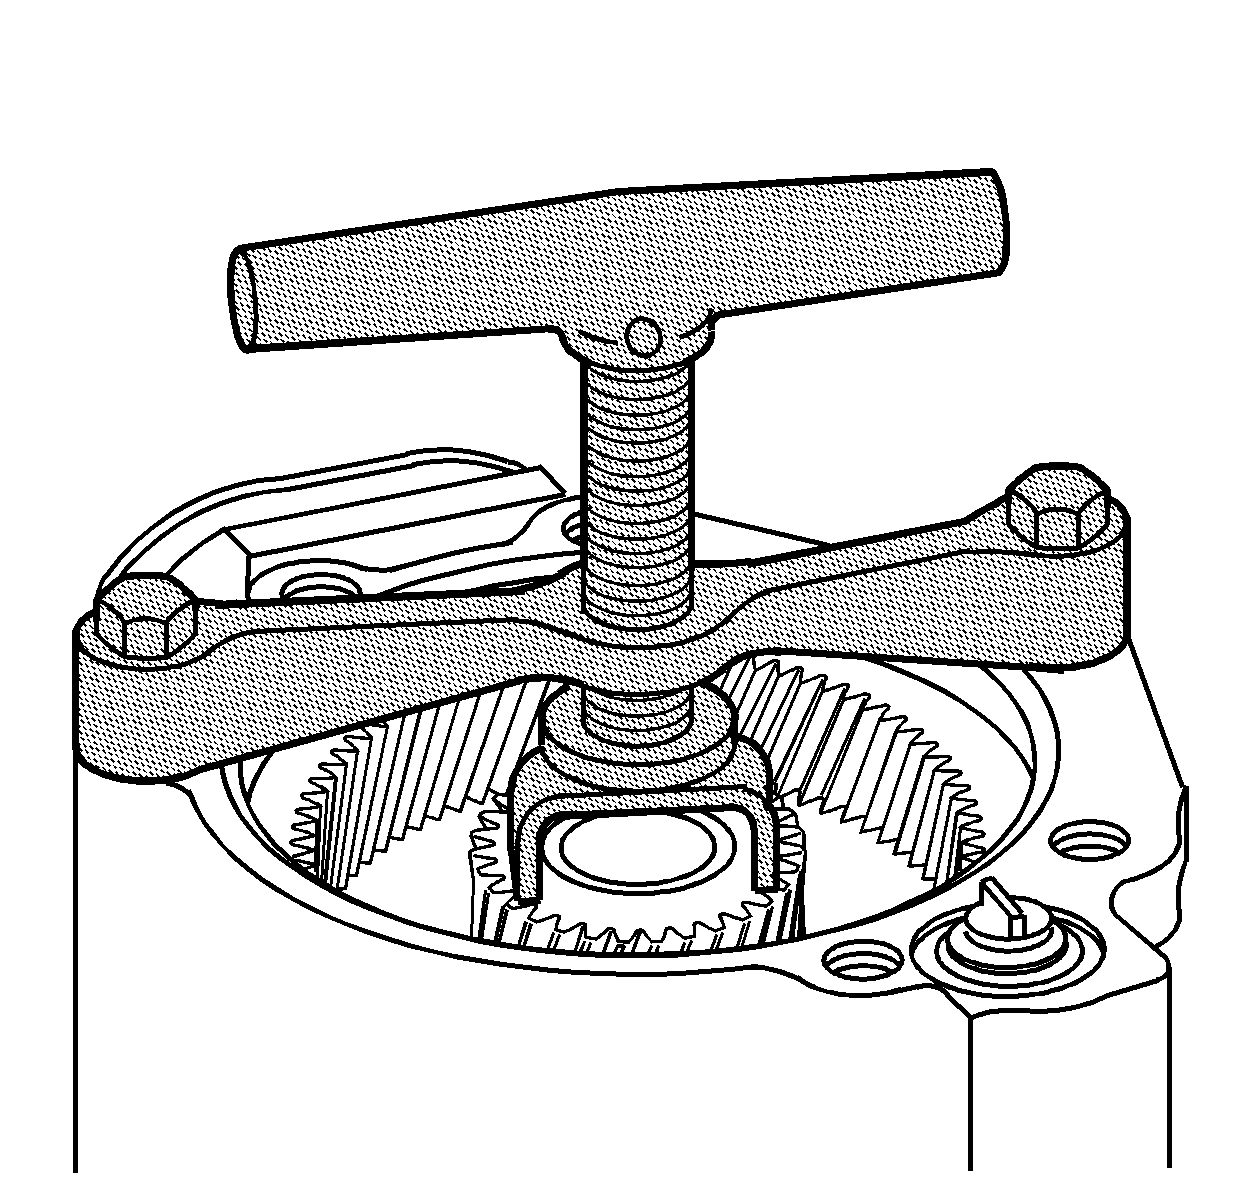
- Install
J 44472
.
- Adjust the collar on tool
J 33381-A
to the 4T65-E CLUTCH& DRUM setting.
- Install
J 33381-A
into the input
clutch housing assembly (632).
- Tighten the threaded rod of
J 33381-A
until the rod is finger tight.
- Use
J 33381-A
in order to lift the input clutch housing assembly (632). The sprag clutch assemblies will also be attached.
- Install the assembly (632) into the case. Be sure that the assembly is down all the way.
- Remove
J 33381-A
from the assembly.
- Using two bolts, install
J 33386-A
onto the case.
- Tighten the bolts in order to securely hold
J 33386-A
.
- Tighten
J 44472
finger tight in order to eliminate differential carrier end play.
- Insert the thrust washer (630) from the input clutch housing into
J 33386-A
as indicated. If the thrush washer will not fit into
J 33386-A
, select the next size smaller thrust washer and recheck.
- Use a feeler gauge in order to measure the clearance between
J 33386-A
and the thrust washer (630).
| • | If the clearance is less than 0.1521 mm (0.006 in), use the current size thrust washer. |
| • | If the clearance is 0.1521 mm (0.006 in) or more, select the next size larger thrust washer and recheck. |
- Remove
J 33386-A
.
- Adjust the collar on tool
J 33381-A
to the 4T65-E CLUTCH & DRUM setting. Make sure that the threaded rod is fully loosened.
- Install
J 33381-A
into the input clutch housing (632).
- Tighten the threaded rod of
J 33381-A
until the rod is finger tight.
- Use
J 33381-A
in order to lift the input clutch housing assembly (632). The sprag clutch assemblies will also be attached.
- Remove the assembly (632) from the case.
- Position the transmission so that the oil pan is facing down.
- Remove
J 44472
.
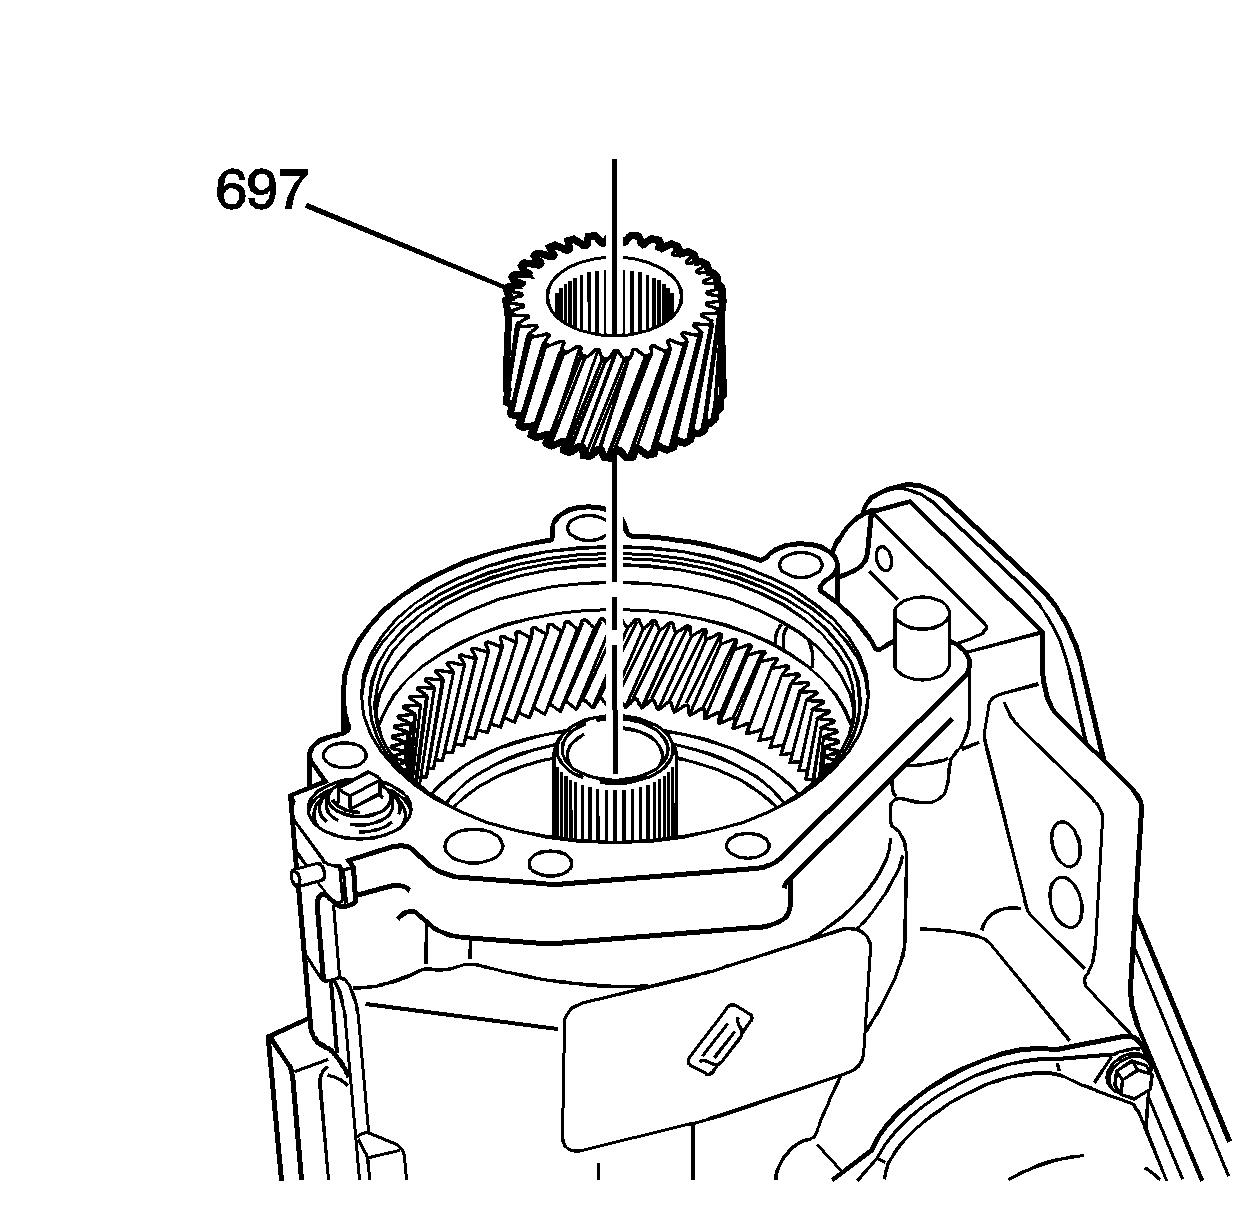
- Remove the final drive sun gear (697).
- Remove the parking gear (696) and the parking gear thrust bearing (695).
- Remove the final drive sun gear shaft (689).
