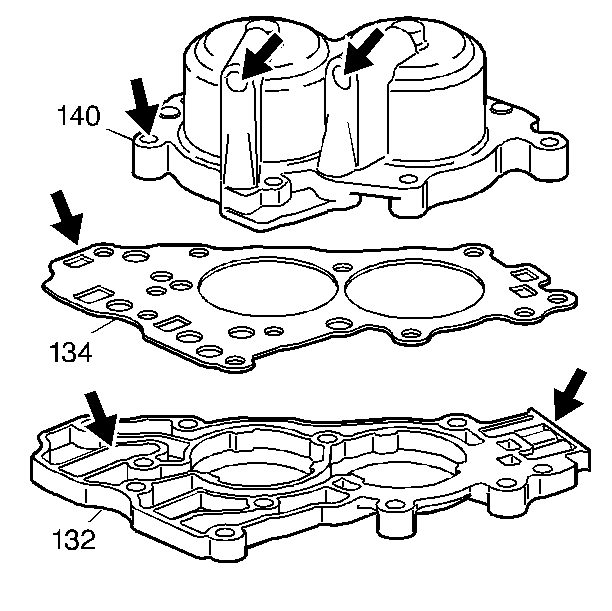
- Inspect the accumulator housing (140), the accumulator cover spacer plate assembly (134) and the accumulator cover (132) for the following conditions:
| • | Damaged lube and servo oil pipe holes in the accumulator cover (132) |
| • | Damaged, improperly machined or porous accumulator cover (132) |
| • | Bent or damaged accumulator cover spacer plate assembly (134) |
| • | Stripped or damaged bolt holes in the accumulator housing (140) |
| • | Damaged, worn, improperly machined or porous accumulator housing (140) |
| • | Leaking, loose or missing cup plugs in the accumulator housing (140) |
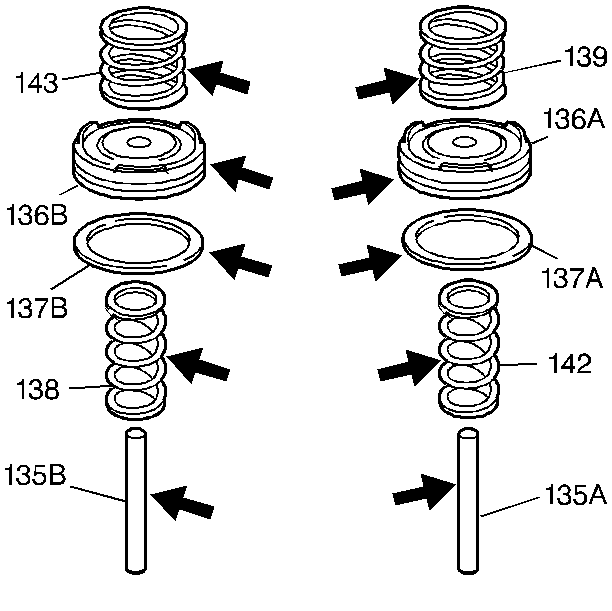
- Inspect the accumulator pistons, springs, seals and pins for the following conditions:
| • | Broken or collapsed piston outer springs (138, 142) |
| • | Broken or collapsed piston cushion springs (139, 143) |
| • | Bent or worn accumulator piston pins (135A/B) |
| • | Damaged, worn or porous accumulator pistons (136A/B) |
| • | Damaged accumulator piston seals (137A/B) |
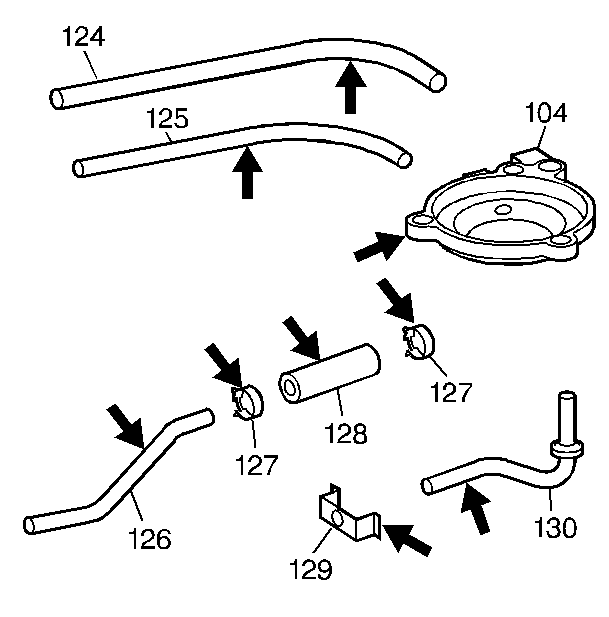
- Inspect the servo and lube oil pipe components (124-130) and the 2-1 manual band servo cover (104) for the following conditions:
| • | Damaged lube, and servo oil pipe holes in the servo cover (104) |
| • | Damaged, improperly machined or porous servo cover (104) |
| • | Bent, plugged or damaged lube and servo oil pipes (124, 125, 126, 130) |
| • | Plugged or damaged lube oil hose (128) |
| • | Damaged hose clamps (127) |
| • | Damaged lube oil pipe retainer (129) |
| • | Missing lube oil pipe washer (130) |
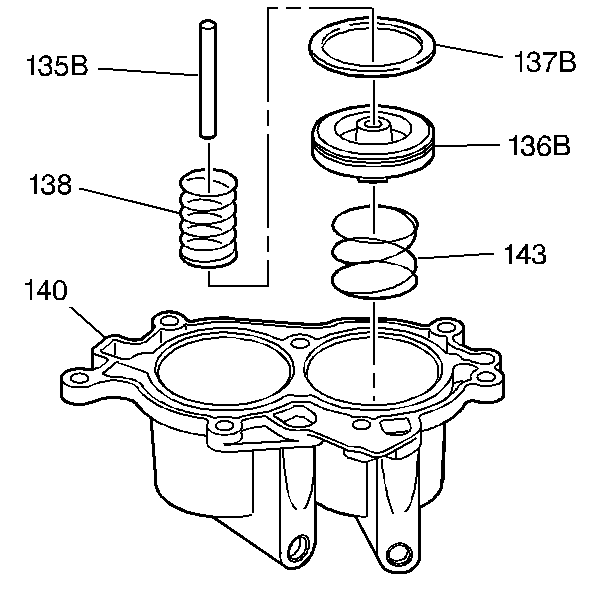
- Install the 2-3 accumulator piston oil seal ring (137B) onto the 2-3 accumulator piston (136B). Lubricate the oil seal ring with automatic transmission
fluid.
- Assemble the 2-3 accumulator piston pin (135B) and piston (136B).
Important: Do not mix up spring or pistons/springs. Be sure to install the correct springs in the correct bore.
- Install the 2-3 accumulator piston springs (138, 143) and piston assembly (136B) into the accumulator housing (140).
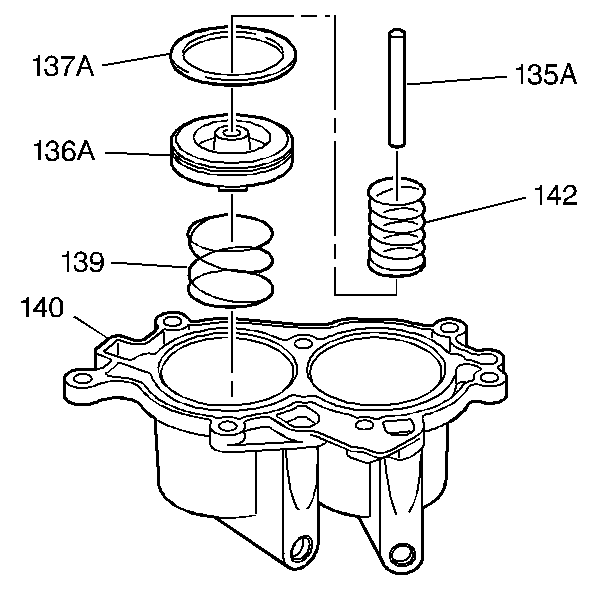
- Install the 1-2 accumulator piston oil seal ring (137A) onto the 1-2 accumulator piston (136A). Lubricate the oil seal ring with automatic transmission
fluid.
- Assemble the 1-2 accumulator piston pin (135A) and piston (136A).
Important: Do not mix up spring or pistons/springs. Be sure to install the correct springs in the correct bore.
- Install the 1-2 accumulator piston springs (139, 142) and the piston assembly (136A) into the accumulator housing (140).
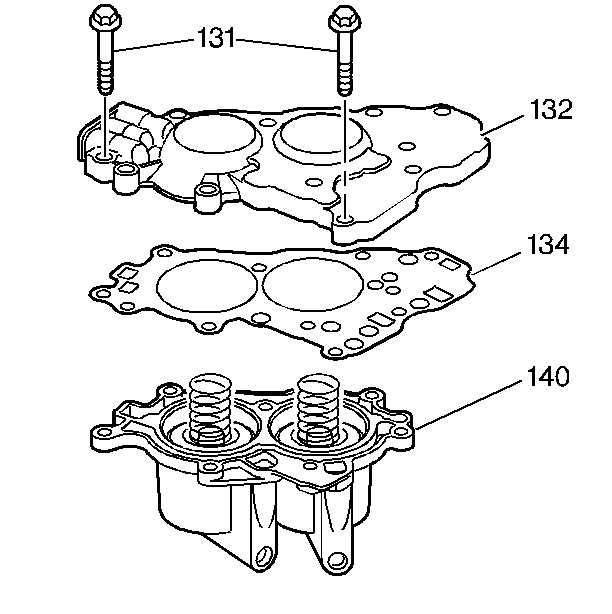
- Assemble the accumulator cover spacer plate assembly (134) and the accumulator cover (132) onto the accumulator housing (140).
Notice: Use the correct fastener in the correct location. Replacement fasteners
must be the correct part number for that application. Fasteners requiring
replacement or fasteners requiring the use of thread locking compound or sealant
are identified in the service procedure. Do not use paints, lubricants, or
corrosion inhibitors on fasteners or fastener joint surfaces unless specified.
These coatings affect fastener torque and joint clamping force and may damage
the fastener. Use the correct tightening sequence and specifications when
installing fasteners in order to avoid damage to parts and systems.
- Install seven accumulator cover bolts (131).
Tighten
Tighten the accumulator cover bolts to 12 N·m (106 lb in).
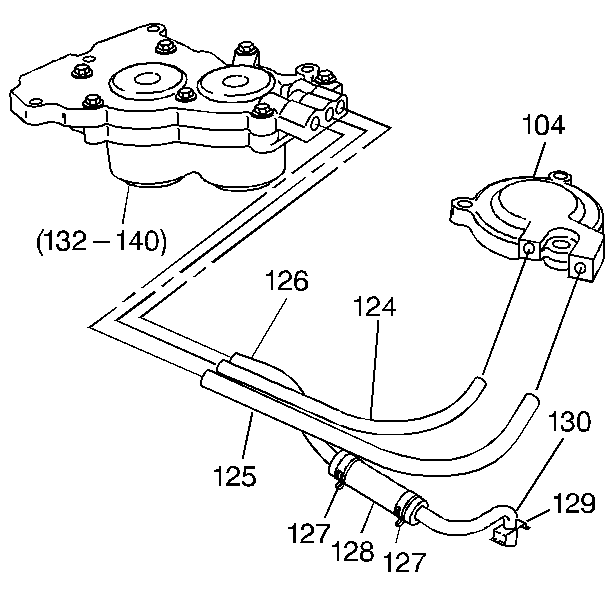
- Assemble the lube oil pipe (126), hose (128), hose clamps (127), pipe retainer (129) and pipe with washer (130).
- Assemble the 2-1 manual band servo and forward band servo oil pipes (124, 125) into the accumulator assembly (132-140).
- Assemble the 2-1 manual band servo and forward band servo oil pipes (124, 125) into the 2-1 manual band servo cover (104).
- Install the lube oil pipe assembly (126-130) into the accumulator assembly (132-140).
