Tire and wheel assembly vibrations are the next level of testing for low-frequency vibrations that are sensitive to vehicle speed. The tires, the wheels, the brake rotors and the wheel hubs should be systematically tested, according to the symptoms.
First-Order Tire and Wheel Assembly Vibration
The following are symptoms of first-order vibrations caused by tire and wheel assemblies:
| • | The vibration is always related to the speed of the vehicle. |
| If the vibration is affected by the speed of the engine, or if the vibration is eliminated by placing the transmission in Neutral, the vibration is NOT related to the tire and wheel assemblies. |
| • | The vibration will feel like a shake, usually in the steering wheel or the seat. |
| - | Tire and wheel vibrations that are felt in the steering wheel are most likely related to the front tire and wheel assemblies. |
| - | Tire and wheel vibrations that are felt in the seat or the floor are most likely related to the rear tire and wheel assemblies. |
| - | This may not always hold true, but this is a general rule that may serve to initially isolate a problem to the front or the rear of the vehicle. |
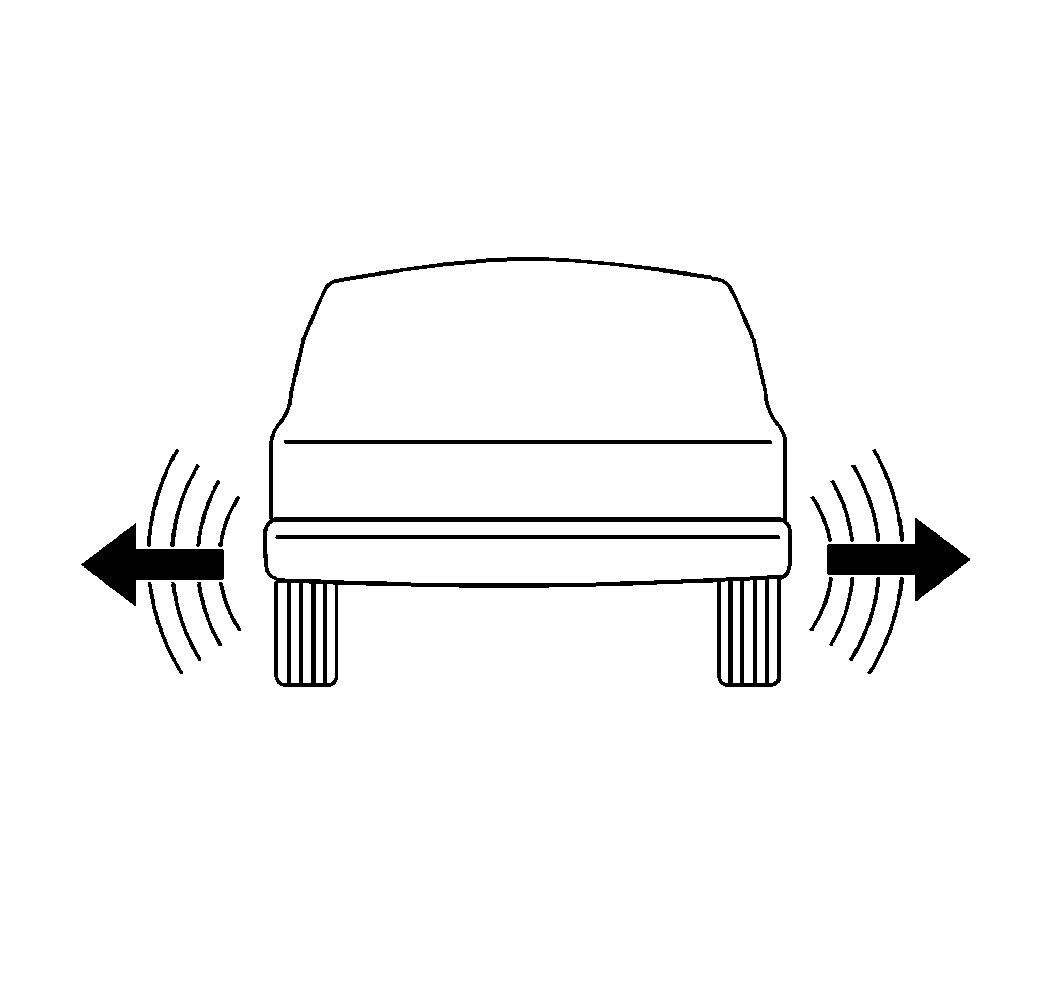
| • | The customer may complain of a waddle at low speeds of 8-56 km/h (5-35 mph). |
| • | The frequency on the EVA will correspond to the first-order of tire rotation. This frequency will usually be in the 10-20 Hz range, depending on the speed of the complaint and the size of the tire. The smaller the tire, the faster the tire will rotate at any given speed. |
| • | The range of the human ear begins at 20 Hz. For this reason, first-order tire vibrations rarely produce noise. The exception is when the tires display an irregular tread pattern or flat spots. This causes a growling or a slapping noise. |
Tire Runout Measurement
Correct the runout problem first, because the runout of a tire/wheel assembly will directly affect the amount of imbalance and radial force variation. As the amount of runout decreases, imbalance and force variation also decrease.
Important: Before measuring or attempting to correct excessive runout, carefully inspect the tire for an uneven bead seat. The distance from the edge of the ring to the concentric rim locating ring should be equal around the entire circumference. If the beads are not seated properly, remount the tire. Otherwise excessive runout and imbalance may result.
You can correct radial and lateral runout at the same time. Two methods are available for measuring runout of the tire/wheel assemblies:
| • | On the vehicle (mount the tire to the hub; the wheel bearing must be in good condition.) |
| • | Off the vehicle (mount the tire on a spin-type tire balancer) |
Make an initial on-car visual inspection prior to performing the off-car runout tests.
Measuring the tire/wheel runout off of the vehicle is the easier method for the following reasons:
| • | You can mount a dial indicator in the correct location easier. |
| • | Chances of water, snow, dirt, or slush getting on the dial indicator are decreased. (A dial indicator is a very fragile and expensive tool that you will use extensively in vibration repair work. Contamination from outside elements or from rough handling will usually result in breakage). |
Once you have measured and corrected the runout off the vehicle, a quick examination of runout on the vehicle will indicate if any further problems exist.
If the off-vehicle measurement differs significantly from the on-vehicle measurement, the runout problem is due to one of the following:
| • | Stud circle runout |
| • | Hub flange runout |
| • | A mounting problem between the wheel and the vehicle. Refer to Wheel Hub/Axle Flange Runout, and Wheel Stud (Stud Circle) Runout procedures. |
Measuring Tire Runout
If the vehicle has been sitting in one place for a long time, flat spots may exist at the point where the tires were resting on the ground. These flat spots will affect the runout readings. Before you take any runout measurements, eliminate these flat spots by driving the vehicle long enough to warm up the tires.
- Lift the vehicle on a hoist or support the vehicle with jackstands. Refer to Lifting and Jacking the Vehicle in General Information.
- In order to get an initial indication of how much runout exists, spin each tire and wheel on the vehicle by hand. You may also use the engine at a slow speed in order to drive the wheels. Visually inspect the amount of runout from the front or the rear.
- Mark the location of each tire/wheel assembly in relation to the wheel studs and to their position on the vehicle for future reference.
- Remove the tire/wheel assemblies one at a time. Mount each assembly on a spin-type wheel balancer. Locate the tire/wheel assembly on the balancer with a cone through the back side of the center pilot hole.
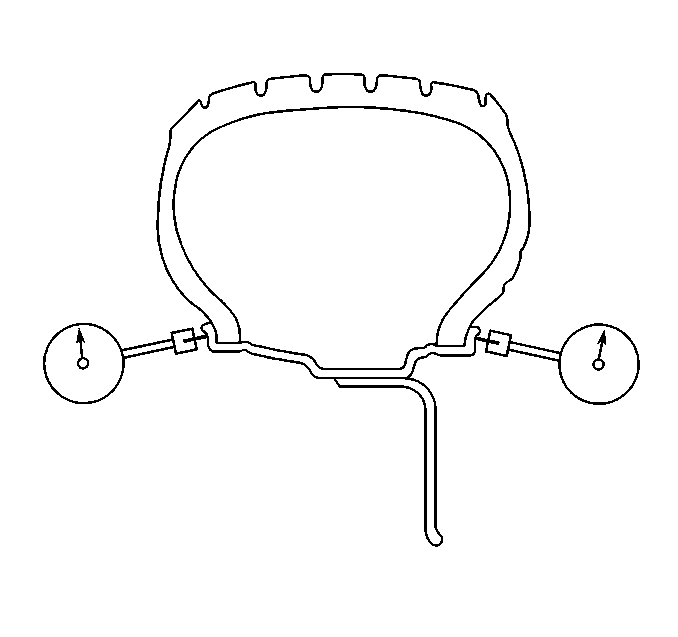
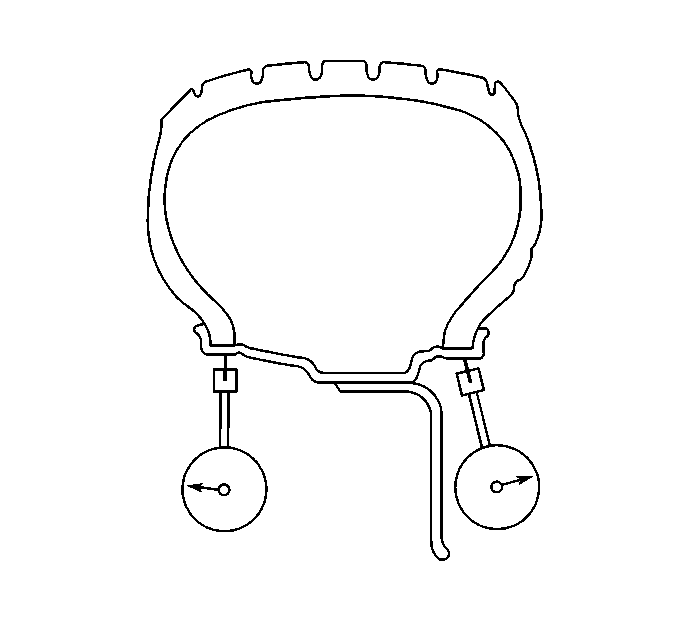
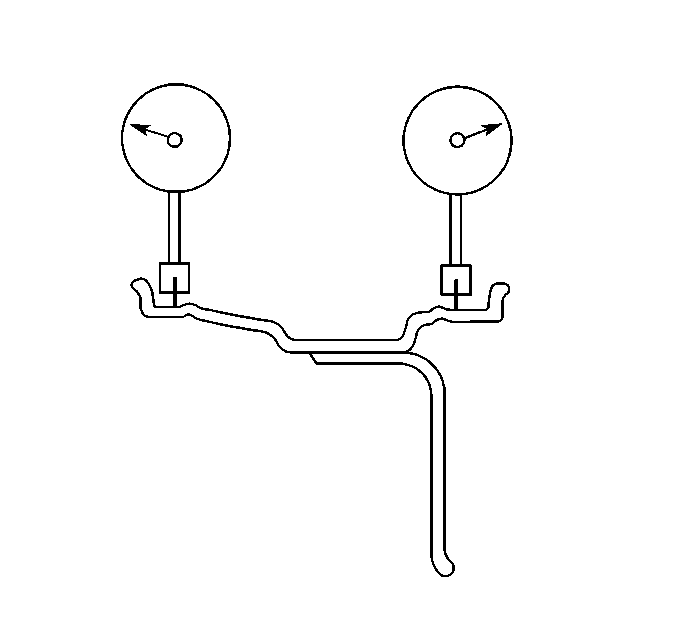
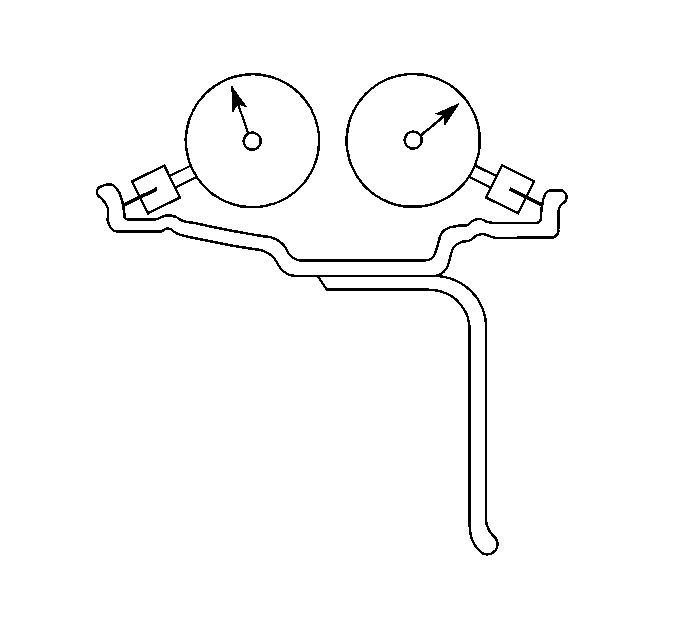
- For lateral runout place the dial indicator in a smooth area on the tire sidewall as close to the tread as possible.

Measure the tire/wheel assembly runout as shown in the figure.
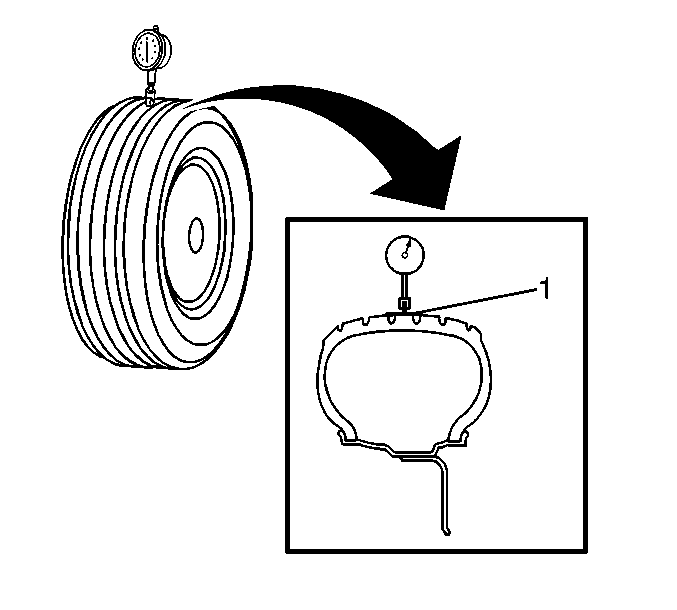
For radial runout, wrap the outer circumference with tape when you measure the radial runout. This allows for a smooth reading from the dial indicator.
Ignore any jumps or dips due to sidewall splices.
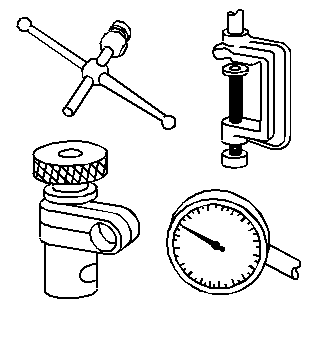
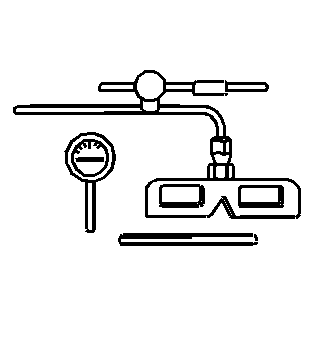
Use either of the following dial indicator sets with roller contact point J 23672 when applying this procedure:
| • | J 8001 |
| • | J 7872 |
- Load the indicator and slowly rotate the assembly one complete revolution.
- Set the indicator to zero on the low spot.
- Rotate the assembly one more complete revolution and note the total amount of runout indicated. The maximum allowable assembly radial and lateral runout is 0.050 inch when measured off the vehicle and 0.060 inch when measured on the vehicle.
Vectoring (Match Mounting)
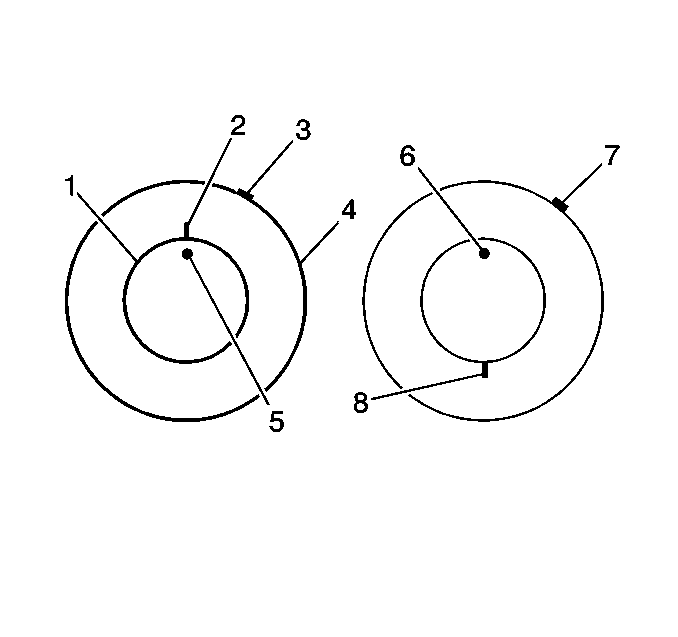
If the runout is excessive, mark the location of the high spot (3) and the low spot on the tire. Next, determine if the runout problem exists in the tire, the wheel, or a combination of both. Then, correct the problem. This procedure, called match-mounting or vectoring, uses the following steps:
- Place a mark (2) on the tire sidewall at the location of the valve stem (5). This mark is the 12 o'clock position. Always refer to the location of the high spot (3) in relation to its clock position on the wheel.
- Mount the tire/wheel assembly on a tire machine and break down the bead. Do not dismount the tire from the wheel at this time.
- Rotate the tire 180 degrees on the rim so that the valve stem reference mark (8) is now at the 6 o'clock position in relation to the valve stem (6) itself. You may need to lubricate the bead in order to easily rotate the tire on the wheel.
- Reinflate the tire and seat the bead properly.
- Mount the assembly on the tire balancer and remeasure the runout. Mark the new location of the runout high point on the tire.
- If runout is now within tolerance, no further steps are necessary. Balance and mount the tire on the vehicle. Refer to Tire and Wheel Balancing
Important: After replacing a tire or a wheel, remeasure the tire/wheel assembly runout in order to verify that the runout is within tolerance.
| • | If the clock location of the high spot remained at or near the clock location of the original high spot (7), the wheel is the major contributor to the runout problem. Refer to Wheel Runout Measurement. |
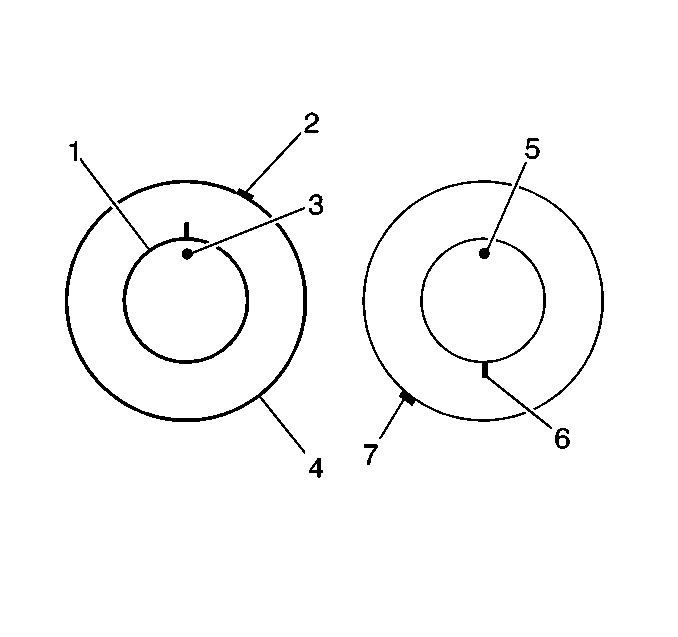
| • | If the high spot (7) is now at or near a position 180 degrees (6 hours) from the original high spot, the tire is the major contributor to the runout problem. Replace the tire. |
| • | If the high spot is in between the two extremes, then both the tire and the wheel are contributing to the runout. Rotate the tire an additional 90 degrees (3 hours) in both the clockwise and the counterclockwise directions. |
Wheel Runout Measurement
Lateral Wheel Runout
Radial Wheel Runout
Complete the following steps if you cannot bring runout within tolerance by match-mounting:
- Dismount the tire from the wheel.
- Measure the radial wheel runout and the lateral wheel runout.
Radial Wheel Runout (Tire Removed)
Lateral Wheel Runout (Tire Removed)
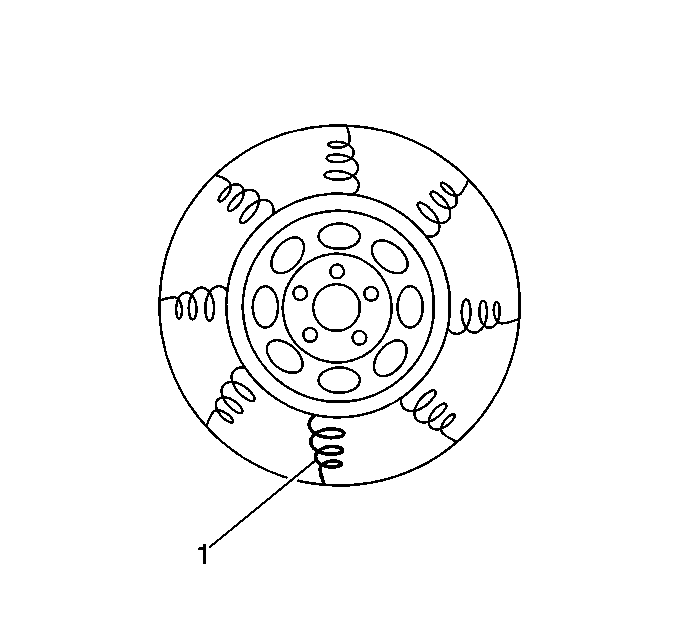
You can measure rim runout more accurately on the inside bead area of the wheel. Measure wheel runout using the same procedure as tire runout. Ignore any jumps or dips due to paint drips, chips, or welds.
Measure both the inboard flange and outboard flange as shown. The tolerances for wheel runout are as follows:
| • | Steel Wheels: |
| - | Radial runout--0.040 in |
| - | Lateral runout--0.045 in |
| • | Aluminum Wheels: |
| - | Radial runout--0.030 in |
| - | Lateral runout--0.030 in |
If the runout of the wheel is beyond the tolerance, replace the wheel.
Important: Always measure the runout of new wheels. DO NOT assume that a new wheel is automatically good.
When replacing a wheel, refer to the wheel code that is stamped next to the valve stem. Cross-reference the letter code with the parts book.
If the runout of the wheel is within tolerance, and the tire/wheel assembly runout cannot be reduced to an acceptable level by using the match-mounting technique, replace the tire.
Important: Always remeasure the tire/wheel assembly runout after you replace the tire.
If you notice a large difference in runout measurements between on-vehicle testing and off-vehicle testing, the runout problem is due to one of the following:
| • | Stud circle runout |
| • | Hub flange runout |
| • | A mounting problem between the wheel and the vehicle |
The listed tolerances should serve only as a guideline. If runout measurements are within tolerance but are marginal, some sensitive vehicles may still be affected. Always reduce runout to as little as possible in order to attain optimum results under all conditions.
Radial Force Variation
Radial force variation is the difference in the stiffness of a tire (1) as the tire rotates and contacts the road. The tire and wheel assemblies have some variation due to splices in the tire plies. These splices do not cause a problem unless the force variation is excessive. These stiff spots in the tire can deflect the tire and wheel assembly upward as the assembly contacts the road.
If the tire has only one stiff spot, the spot will deflect the spindle once per each revolution of the tire and wheel assembly, thus causing a first-order tire/wheel vibration. If the tire has two stiff spots, the spots cause a second-order vibration. First-order and second-order tire/wheel vibrations are the most common as a result of radial force variation. Third-order, fourth-order, or higher are possible but rarely occur.
Ensure that the tire and wheel assembly runout is at an absolute minimum. This is the most effective way to minimize the possibility of force variation as a factor in tire and wheel assembly vibrations. However, some tire and wheel assemblies exhibit vibration-causing force variation even though they are within runout and balance tolerances. These instances are becoming increasingly rare due to tighter tolerances and higher standards in manufacturing.
If you suspect force variation as a factor in tire and wheel assembly vibration complaints, substitute one or more known good tire and wheel assemblies.
You may buff the tires on a tire matching machine in order to eliminate spindle deflection. This type of equipment, not currently in widespread use, is designed to remove small amounts of rubber from the outer rows of the tread blocks at the location of the stiff spots under load. Do not use any tool that is designed to make the tire perfectly round. These tools will not correct the condition.
You may substitute one or more known good tire and wheel assemblies when a tire manufacturer is not available locally.
Lateral Force Variation
Lateral force variation tends to deflect the vehicle to the side, or laterally. Lateral force variation is based on the same concept as radial force variation. A snaky belt inside the tire may be the cause of lateral force. Test the vehicle with substitute tires before installing replacement tires.
A lateral force variation condition is rare. The best way to eliminate lateral force variation is to ensure that the lateral runout of the tire and wheel assemblies is at an absolute minimum.
The vehicle will wobble or waddle at slow speeds of 8-40 km/h (5-25 mph) when lateral force variation is excessive. This condition is usually related to the first-order of tire and wheel rotation.
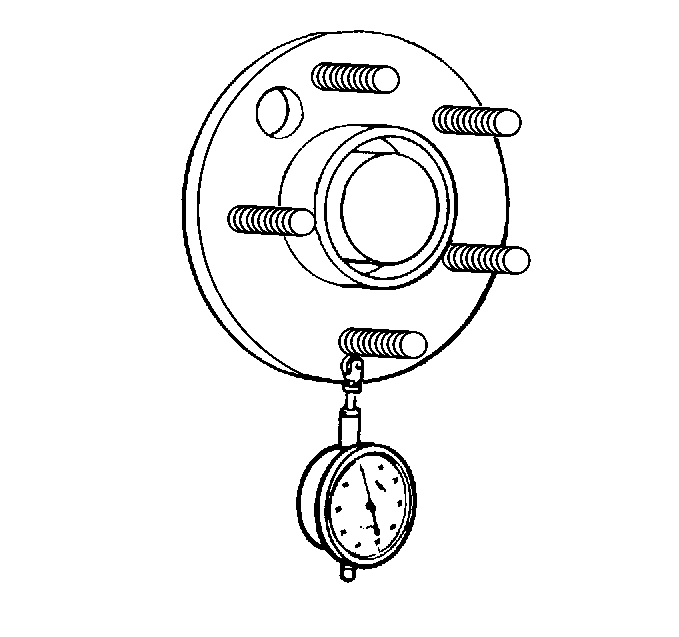
Wheel Hub/Axle Flange Runout
When lateral runout occurs, inspect the wheel hub/axle flange runout if you are performing an on-vehicle test procedure, but not during off-vehicle testing. The tolerances provided are only guidelines. Perform corrections only if the on-vehicle runout cannot be brought to within tolerance.
- Position the dial indicator on the machined surface of the hub, the axle flange, or the rotor outside of the wheel studs.
- Rotate the hub in order to find the low spot.
- Set the dial indicator to zero at the low spot.
- Rotate the hub again and check the total amount of runout.
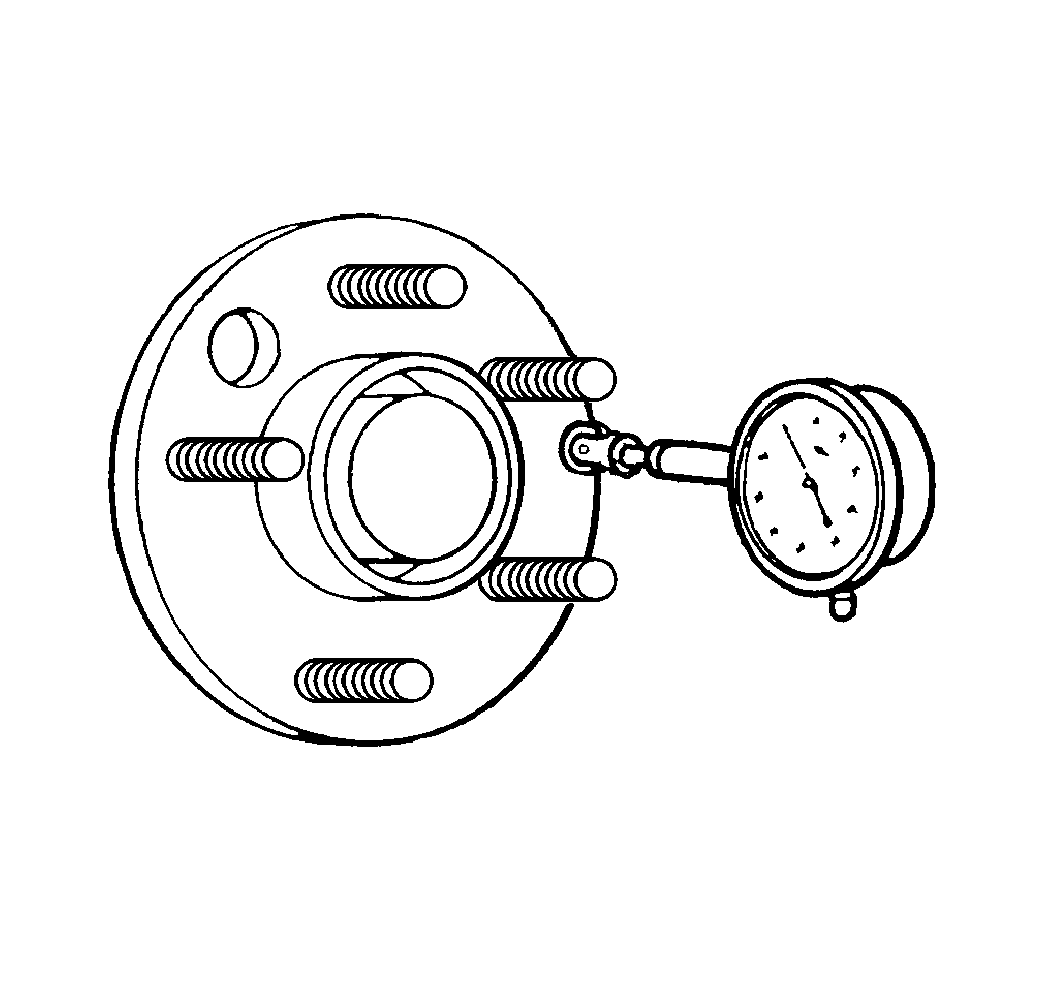
Specification (Guideline)
Runout tolerance: 0.130 mm (0.0050 in)
Wheel Stud (Stud Circle) Runout
Use the wheel stud runout procedure whenever the following conditions occur:
| • | The off-vehicle radial runout differs significantly from the on-vehicle radial runout |
| • | Earlier attempts to correct the tire and wheel vibration condition have been unsuccessful |
- Position the dial indicator in order to contact the wheel mounting studs.
- Turn the hub to register on each of the studs.
- Zero the dial indicator on the lowest stud.
- Rotate the hub again and check the total amount of runout.
Measure the stud runout as close to the flange as possible.
Specification (Guideline)
Runout tolerance: 0.80 mm (0.030 in)
