Removal Procedure
- In order to ease in the removal of the adjuster, raise the seat
back to the fully inclined (up) position before you remove the seat
- Remove the seat. Refer to
Seat Replacement
.
- Place the seat on a clean, protected surface.
- Remove the adjusters.
- Disconnect the air lines, if necessary.
- Remove the following components, if necessary.
| • | The side trim panel fasteners |
| • | The front trim panel fasteners |
- Disconnect the recliner switch electrical connectors, if necessary.
- Remove the panels, if necessary.
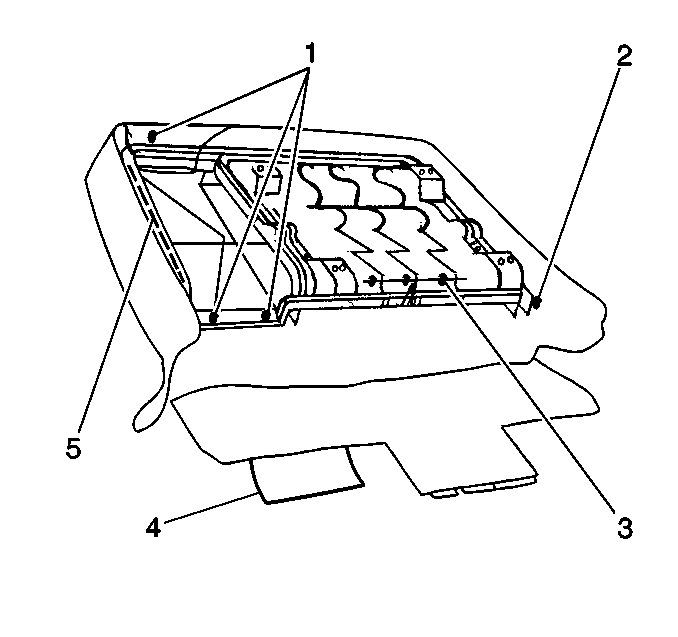
- Remove the hog rings (1,
2, 3) from the seat cover.
- Disconnect the J-section retainers (5).
- Pull the seat cover back to access the pivot bolts.
- Remove the recliners. Refer to
Front Seat Power Recliner Replacement
or
Seat Back Recliner Replacement
.
- Remove the right pivot bolt.
- Remove the left pivot bolt.
- Note the routing of the air lines.
- Remove the seat back.
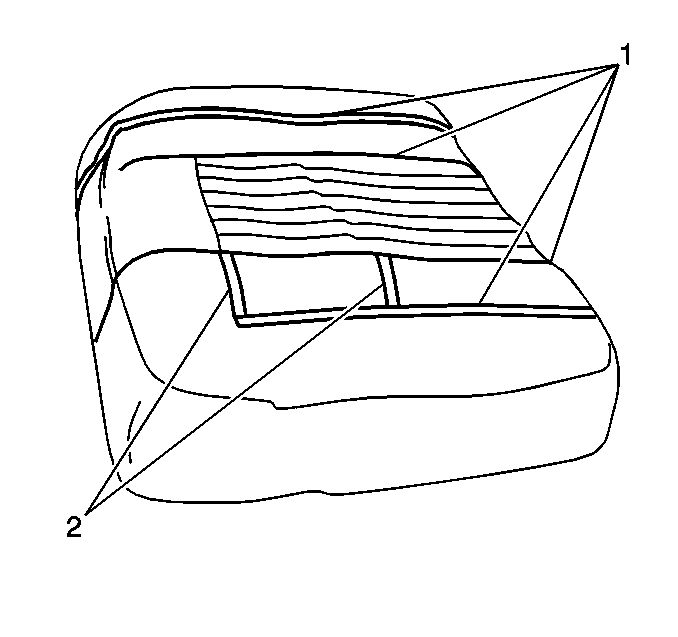
- Disengage the hook and
loop strips (2).
- Remove the seat cover from the cushion.
- Remove the hog rings retaining the cushion.
- Remove the cushion.
Installation Procedure
- Install the cushion to
the frame.
- Install the hog rings to the cushion.
- Install the seat cover (1) to the cushion.
Smooth out the wrinkles.
- Install the seat back.
Check air line routing.
- Install the left pivot bolt.
- Install the right pivot bolt.
- Install the recliners. Refer to
Front Seat Power Recliner Replacement
or
Seat Back Recliner Replacement
.
- Connect the J-section
retainers (5).
- Install the hog rings (1, 2, 3) to the seat cover.
- Install the panels, if necessary.
- Connect the recliner switch electrical connectors, if necessary.
- Install the following components, if necessary:
| • | The front trim panel fasteners |
| • | The side trim panel fasteners |
- Connect the air lines, if necessary.
- Install the following components to the seat:
- Install the seat. Refer to
Seat Replacement
.
