For 1990-2009 cars only
Tools Required
| • | J 42038 Camshaft Holding Fixture |
| • | J 36660-A Electronic Torque Angle Meter |
| • | J 42042 Timing Chain/Sprocket Holding Fixture |
Removal Procedure
- Remove the right camshaft cover. Refer to Camshaft Cover Replacement - Right Side .
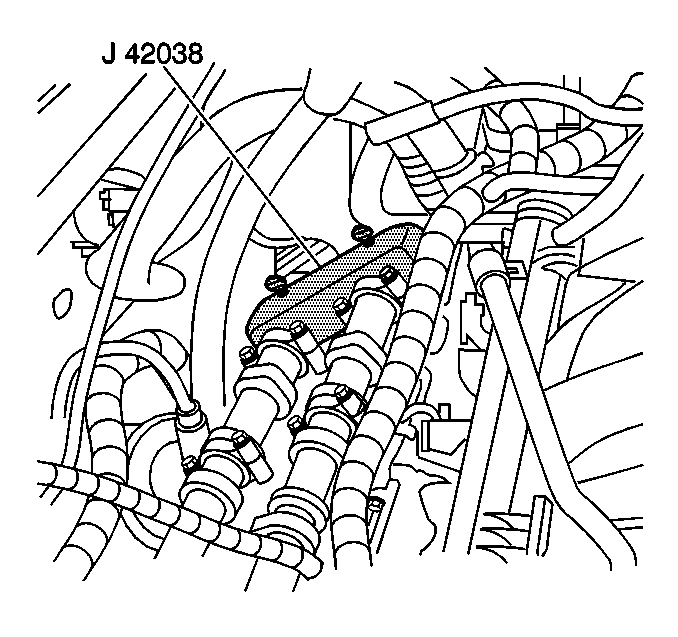
- Install the J 42038 on to the right camshafts.
- Remove the camshaft position sensor. Refer to Camshaft Position Sensor Replacement in Engine Controls-3.5L.
- Compress the left secondary drive chain tensioner with your hand.
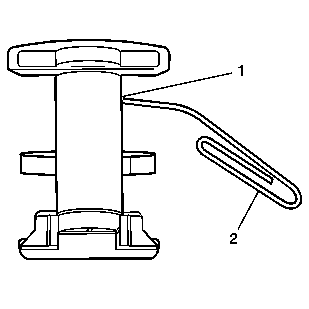
- Lock the left secondary drive chain tensioner by inserting a piece of wire (2) into the access hole in the side of the tensioner.
- Slowly release the pressure from the left secondary drive chain tensioner shoes. The tensioner should remain compressed.
- Remove the camshaft sprocket bolts.
- Install the J 42042 on to the right cylinder head.
- Evenly slide the secondary drive chain and camshaft sprockets off the camshafts on to the J 42042 .
- Remove the secondary camshaft timing sprocket.
- Inspect the secondary drive chain tensioner.
Installation Procedure
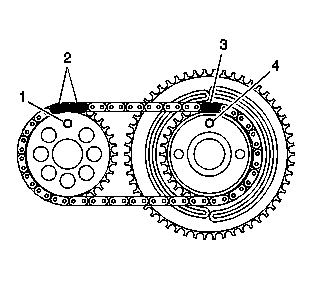
- Install the secondary timing chain sprocket to the timing chain. Align the drive pins (1,4) as shown.
- Slide the intake and exhaust camshaft sprockets off of the J 42042 and onto their respective camshafts and align the drive pins (1) in the camshafts.
- Remove the J 42042 from the right cylinder head.
- Install the intake camshaft sprocket bolt and exhaust camshaft sprocket bolt.
- Tighten the camshaft sprocket bolts to 25 N·m (18 lb ft).
- Use the J 36660-A in order to tighten the camshaft sprocket bolts an additional 45 degrees.
- Remove the locking wire from the left secondary drive chain tensioner allowing the tensioner shoes to expand and apply pressure to the drive chain.
- Remove the J 42038 from the right camshafts.
- Install the camshaft position sensor. Refer to Camshaft Position Sensor Replacement in Engine Controls-3.5L.
- Install the right camshaft cover. Refer to Camshaft Cover Replacement - Right Side .
Notice: Use the correct fastener in the correct location. Replacement fasteners must be the correct part number for that application. Fasteners requiring replacement or fasteners requiring the use of thread locking compound or sealant are identified in the service procedure. Do not use paints, lubricants, or corrosion inhibitors on fasteners or fastener joint surfaces unless specified. These coatings affect fastener torque and joint clamping force and may damage the fastener. Use the correct tightening sequence and specifications when installing fasteners in order to avoid damage to parts and systems.
Tighten
