Tools Required
J 38778 Door Trim Pad and Garnish Clip Remover
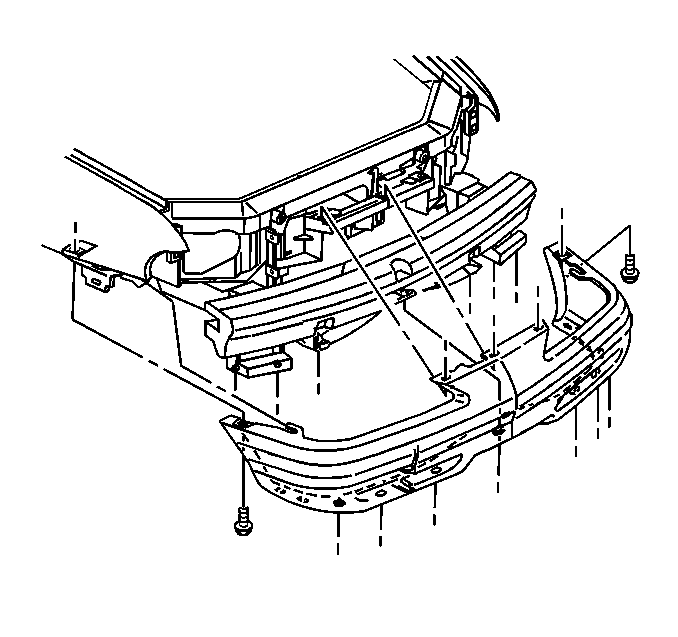
Removal Procedure
- Remove the headlight assemblies. Refer to Headlamp Assembly or Headlamp Bulb and/or Cornering, Sidemarker, Park, Turn Signal Bulb Replacement in Lighting Systems.
- Raise and suitably support the front of the vehicle. Refer to Lifting and Jacking the Vehicle in General Information.
- Remove the front tire and wheel assemblies. Refer to Tire and Wheel Removal and Installation in Tires and Wheels.
- Remove the screws which secure the front fender liner to the front bumper fascia.
- Remove the bolts which secure the front bumper fascia to the front fender.
- Remove the bolts which secure the front bumper fascia to the radiator air baffle.
- UseJ 38778 in order to remove the push-in retainers from the lower support of the front bumper fascia.
- Remove the bolt from the upper support of the front bumper fascia.
- Use J 38778 in order to remove the push-in retainers which secure the front bumper fascia to the upper support.
- Remove the front bumper fascia from the vehicle.
Notice: When removing body panels, apply tape to corners of panel and adjacent surfaces to help prevent paint damage.

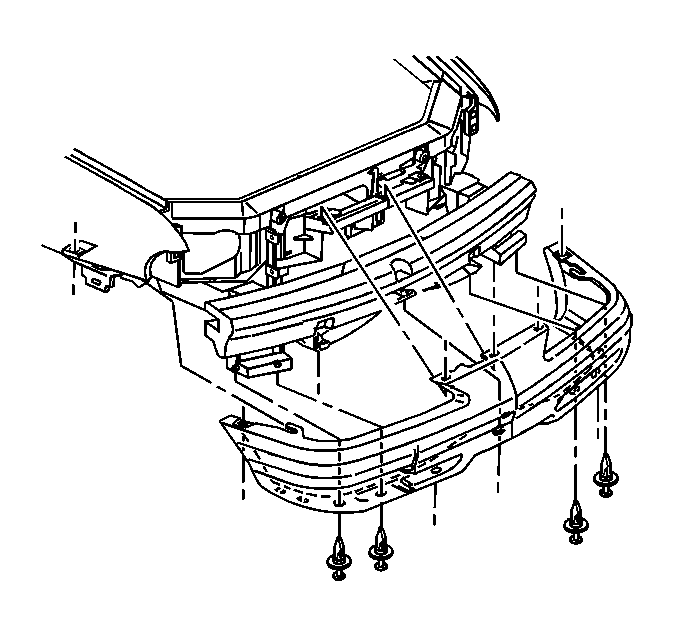


Installation Procedure
- Install the front bumper fascia to the vehicle
- Install the push-in retainers which secure the front bumper fascia to the upper support.
- Install the push-in retainers which secure the front bumper fascia to the lower support.
- Install the bolts which secure the front bumper fascia to the front fender.
- Install the bolts which secure the front bumper fascia to the radiator air baffle.
- Install the screws which secure the front bumper fascia to the front fender liner.
- Install the headlight assemblies. Refer to Headlamp Assembly or Headlamp Bulb and/or Cornering, Sidemarker, Park, Turn Signal Bulb Replacement in Lighting Systems.
- Install the front tire and wheel assemblies. Refer to Tire and Wheel Removal and Installation in Tires and Wheels.
- Lower the vehicle.
- Remove any protective tape applied during the removal procedure.
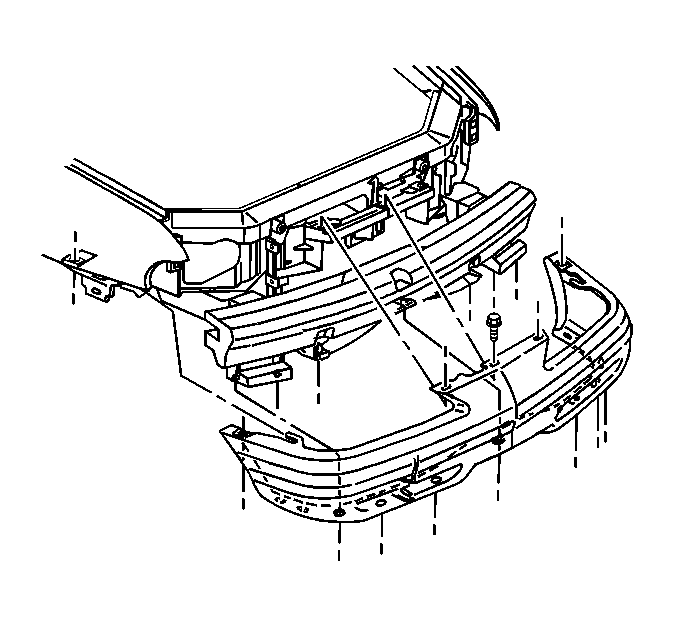
Notice: Use the correct fastener in the correct location. Replacement fasteners must be the correct part number for that application. Fasteners requiring replacement or fasteners requiring the use of thread locking compound or sealant are identified in the service procedure. Do not use paints, lubricants, or corrosion inhibitors on fasteners or fastener joint surfaces unless specified. These coatings affect fastener torque and joint clamping force and may damage the fastener. Use the correct tightening sequence and specifications when installing fasteners in order to avoid damage to parts and systems.
Tighten
Tighten the bolts to 10 N·m (89 lb in).
Tighten
Tighten the bolts to 2 N·m (18 lb in).
Tighten
Tighten the screws to 2 N·m (18 lb in).
