Refer to Engine Controls Schematics
A/C Pressure Switch, TPS, MAP, ECT and IAT
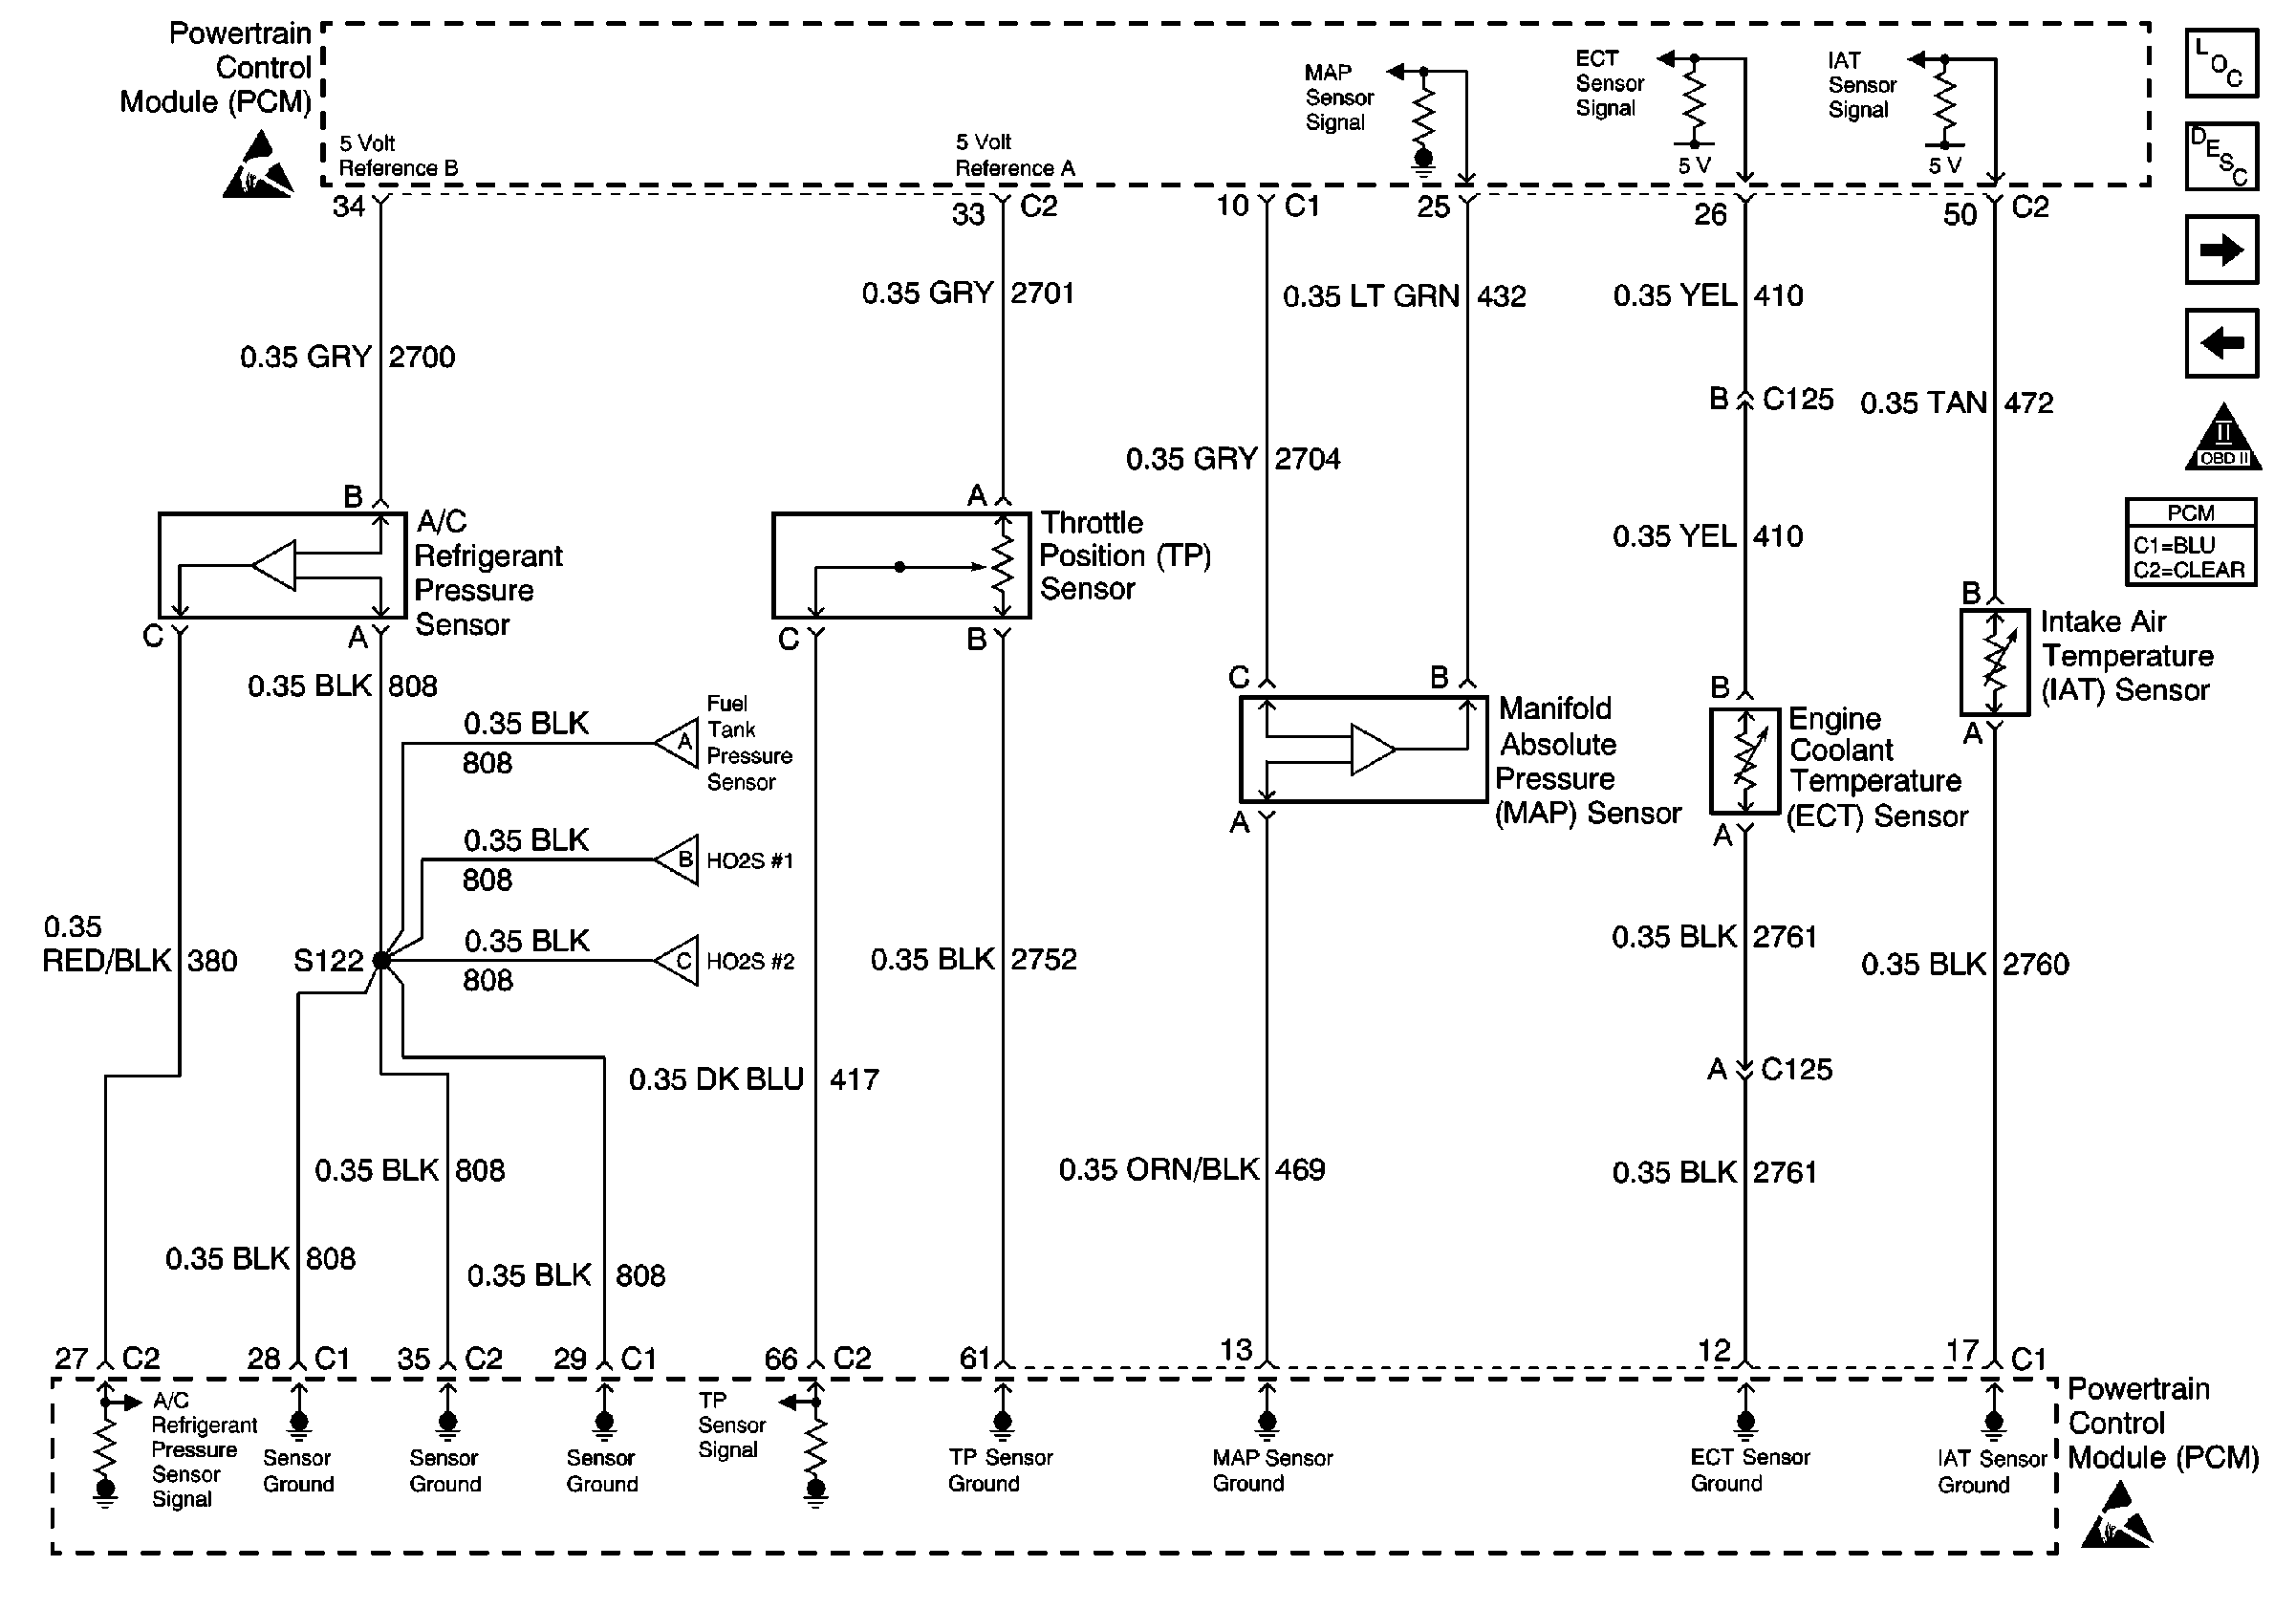
.
Circuit Description
The manifold absolute pressure (MAP) sensor is mounted to the top of the intake manifold. The MAP sensor measures pressure changes within the intake manifold which are an indication of engine load. The MAP sensor has a 5.0 volt reference, a ground, and a signal circuit.
The MAP sensor contains a diaphragm which changes resistance based on pressure. When manifold pressure is low, or the vacuum is high, sensor output voltage is low. When manifold pressure is high, or the vacuum is low, sensor output voltage is high. MAP sensor voltage, depending on altitude, can range from below 2 volts at idle to above 4 volts at wide open throttle (WOT) or with the engine not running.
The MAP sensor signal is also used at initial key-up to determine barometric pressure (BARO).
Conditions for Running the DTC
| • | No throttle position (TP) sensor DTCs present. |
| • | The engine is running. |
| • | The idle speed is steady. |
| • | The throttle angle above 0 percent, if engine speed is less than 1000 RPM. |
| • | The throttle angle above 10 percent, if engine speed is more than 1000 RPM. |
Conditions for Setting the DTC
| • | The manifold absolute pressure (MAP) sensor signal voltage is less than 0.1 volt. |
| • | The above conditions present for approximately 10 seconds. |
Action Taken When the DTC Sets
| • | The PCM illuminates the malfunction indicator lamp (MIL) on the second consecutive ignition cycle that the diagnostic runs and fails. |
| • | The PCM records the operating conditions at the time the diagnostic fails. The first time the diagnostic fails, the PCM stores this information in the Failure Records. If the diagnostic reports a failure on the second consecutive ignition cycle, the PCM records the operating conditions at the time of the failure. The PCM writes the conditions to the Freeze Frame and updates the Failure Records. |
Conditions for Clearing the MIL/DTC
| • | The PCM turns the MIL OFF after 3 consecutive drive trips during which the diagnostic runs and passes. |
| • | A last test failed, or the current DTC, clears when the diagnostic runs and passes. |
| • | A History DTC clears after 40 consecutive warm-up cycles, if no other emission related diagnostic failures are reported. |
| • | Use a scan tool in order to clear the MIL diagnostic trouble code. |
| • | Interrupting the PCM battery voltage may or may not clear DTCs. This practice is not recommended. Refer to Powertrain Control Module Description , Clearing Diagnostic Trouble Codes. |
Diagnostic Aids
Notice: Use the connector test adapter kit J 35616-A for any test that
requires probing the following items:
• The PCM harness connectors • The electrical center fuse/relay cavities • The component terminals • The component harness connector
If DTC P0107 cannot be duplicated, the information included in the Fail Records data can be useful in determining the vehicle mileage since the DTC was last set.
If the problem is intermittent, refer to Intermittent Conditions .
Test Description
Numbers below refer to the step numbers on the diagnostic table:
Step | Action | Value(s) | Yes | No |
|---|---|---|---|---|
1 | Did you perform the Powertrain On-Board Diagnostic (OBD) System Check? | -- | ||
2 | Observe the MAP value displayed on the scan tool. Is MAP value near the specified value? | 0 V | ||
3 |
Does the scan tool indicate DTC P0107 failed this ign? | -- | Go to Diagnostic Aids. | |
4 |
Is the MAP value more than the specified value? | 4.6 V | ||
5 |
Is the MAP value near the specified value? | 4.6 V | ||
6 |
Was a problem found and corrected? | -- | ||
7 |
Was a problem found and corrected? | -- | ||
8 |
Was a problem found and corrected? | -- | ||
9 |
Was a problem found and corrected? | -- | ||
10 | Replace the MAP sensor. Refer to Manifold Absolute Pressure Sensor Replacement . Is the action complete? | -- | -- | |
|
Important: The replacement PCM must be programmed. Replace the PCM. Refer to Powertrain Control Module Replacement/Programming . Is the action complete? | -- | -- | ||
12 |
Does the scan tool indicate that this test ran and passed? | -- | ||
13 | Review Captured Info using the scan tool. Are there any DTCs that have not been diagnosed? | -- | Go to the applicable DTC table | System OK |
