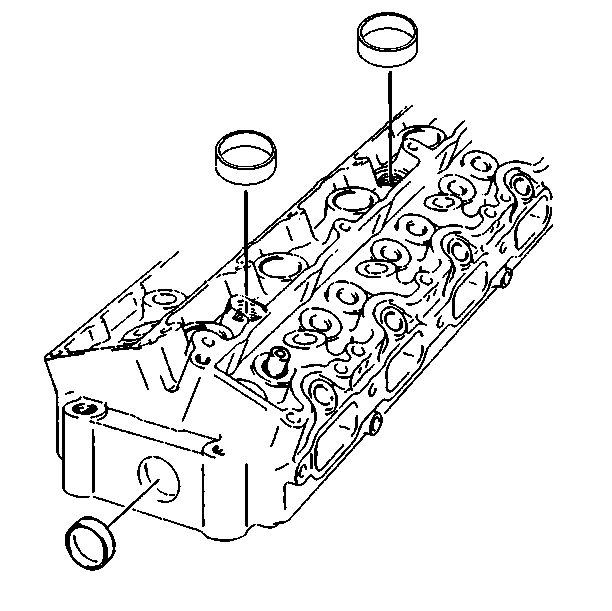
- Install
the new cylinder head cup plug if necessary. Coat the plugs with Sealer GM P/N 12345382
or an equivalent.
Notice: In order to avoid damage, install the spark plugs after the cylinder
head has been installed on the engine.
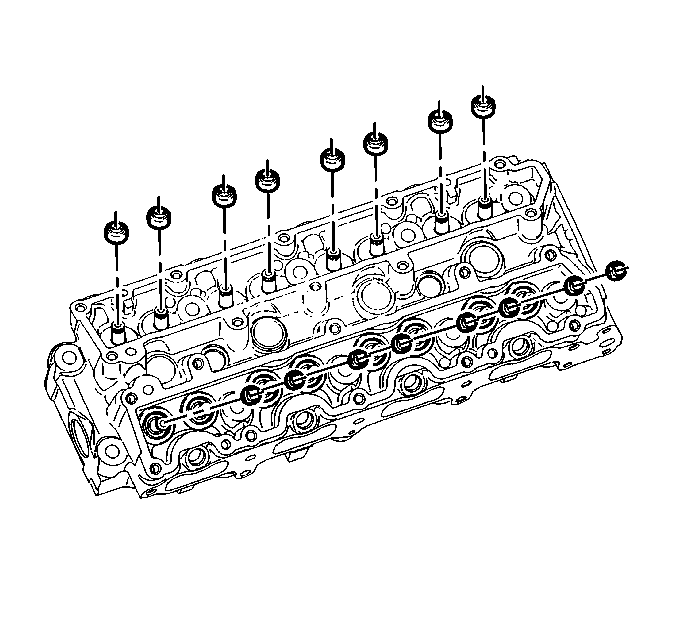
- Install the valve mechanism.
- Install the valve spring retainers.
Notice: Clean the valve guides before reaming. Packing of chips or carbon may
result in the reamer jamming into the valve guide or broken reamer flutes.
- Use the following steps to measure the valve guide clearance:
| 4.1. | With a hole gauge, measure the valve guide ID with a micrometer, measure
the valve stem. Compare the valve guide ID and the valve stem measurements. Refer
to engine specifications for allowable clearance. |
| 4.2. | The valve guides may be reamed oversize and an oversized valve may be
installed. Do not knurl the valve guides. |
- Inspect the valve springs. Refer to engine specifications for the tolerances.
- Look for the following conditions
when inspecting the valve springs:
| • | Spring tension using J 9666
. |
- Inspect the valve spring seating surface of the valve rotators and spring
seats for wear or gouging. Replace as required.
- Assemble the valves.
- Use the following steps to measure valve runout:
| 9.1. | Apply a dab of Prussian blue on the entire valve face. Seat the valve,
but do not rotate the valve. The Prussian blue traces transferred to the valve
seat are an indication of concentricity of the valve seat. |
| 9.2. | Clean all traces of Prussian blue. |
| 9.3. | Apply a dab of Prussian blue on the valve seat and repeat the check.
The traces of Prussian blue transferred to the valve face indicates valve face
concentricity. |
| 9.4. | Recondition the valve seat or replace the valves, if required. |
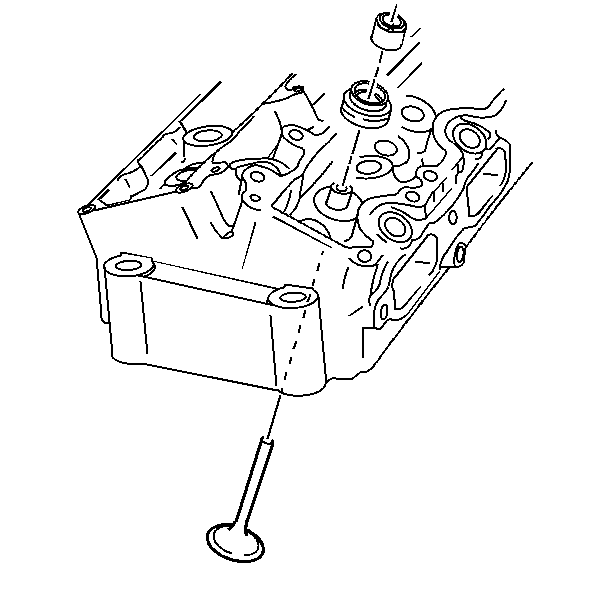
- Install the rotator (intake valves only).
- Install the spring valve (intake valves
only).
- Install the new valve seals. Fully seat
the seals on the valve guides.
- Install the spring seat (exhaust valves only).
- Install the spring.
- Install the retainer.
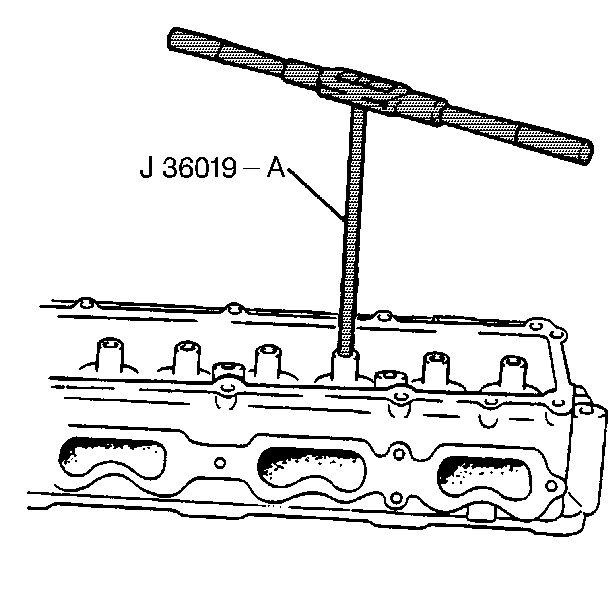
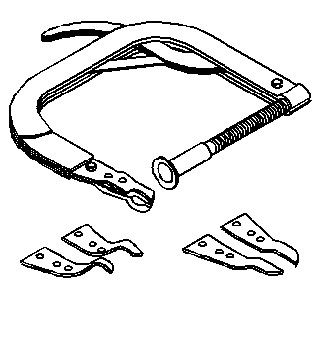
- Compress the valve spring. Use the J 8062
.
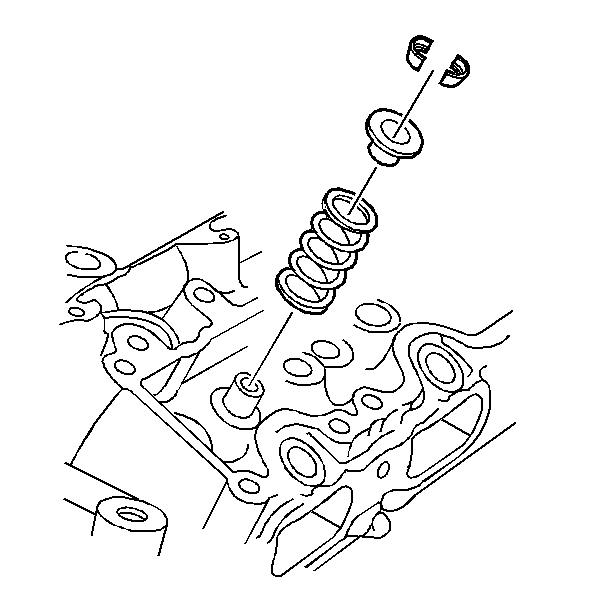
- Install the valve keys.
- Slowly release the J 8062
from
the valve/spring assembly.
- Inspect for proper valve key seating.

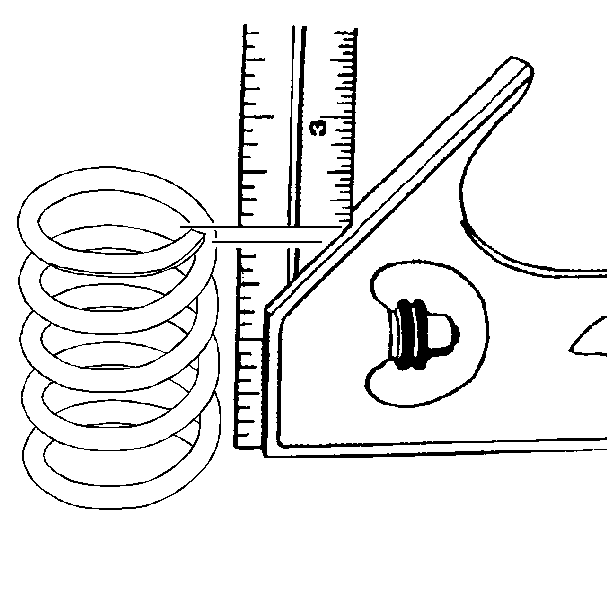
- Measure the valve installed height using a ruler. Measure from the base of the
valve spring to the top of the valve. Refer to
Engine Mechanical Specifications
for
the correct specification.
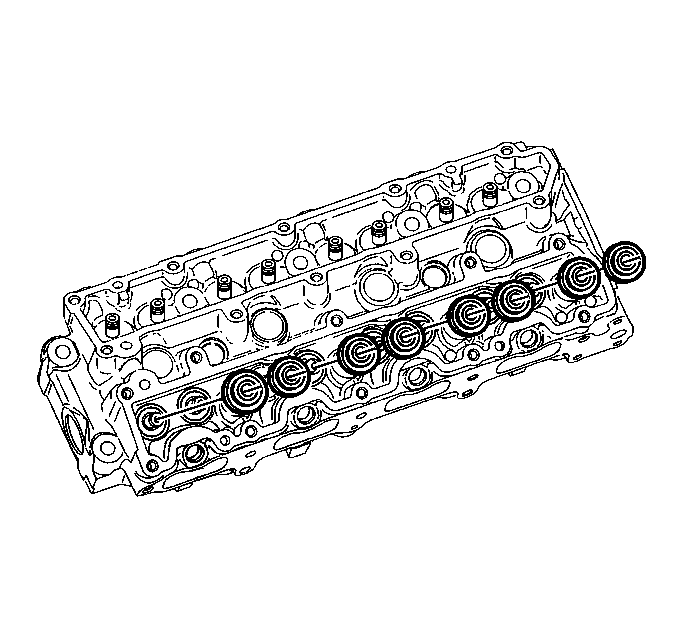
- Install the remaining valves, springs, and other components.

- Inspect
the O-ring for damage. If the O-ring is damaged, replace the O-ring.
Notice: Use the correct fastener in the correct location. Replacement fasteners
must be the correct part number for that application. Fasteners requiring
replacement or fasteners requiring the use of thread locking compound or sealant
are identified in the service procedure. Do not use paints, lubricants, or
corrosion inhibitors on fasteners or fastener joint surfaces unless specified.
These coatings affect fastener torque and joint clamping force and may damage
the fastener. Use the correct tightening sequence and specifications when
installing fasteners in order to avoid damage to parts and systems.
- Install the coolant outlet.
Tighten
Tighten the bolts to 26 N·m (19 lb ft).
