For 1990-2009 cars only
Removal Procedure
- Disable the supplemental inflatable restraint (SIR) system. Refer to Disabling the SIR System in SIR.
- Remove the accessory switch panel. Refer to Door Lock and Side Window Switch Replacement - Driver Side .
- Remove the door trim panel. Refer to Front Side Door Trim Panel Replacement .
- Remove the outer belt sealing strip. Refer to Front Side Door Window Belt Outer Sealing Strip Replacement .
- Remove the inside door handle. Refer to Door Inside Handle Replacement .
- Remove the speaker. Refer to Radio Front Side Door Speaker Replacement in Entertainment.
- Remove the water deflector. Refer to Front Side Door Water Deflector Replacement .
- Remove the outside rear view mirror (ORVM). Refer to Outside Rearview Mirror Replacement .
- Remove the window. Refer to Front Side Door Window Replacement .
- Remove the weatherstrip run channel. Refer to Front Side Door Window Channel Replacement .
- Remove the window regulator. Refer to Front Side Door Window Regulator Replacement .
- Remove the door latch assembly. Refer to Front Side Door Latch Replacement .
- Remove the side door SIR sensor. Refer to Inflatable Restraint Side Impact Sensor Replacement in SIR.
- Remove the outside door handle. Refer to Front Side Door Outside Handle Replacement .
- Remove the check link. Refer to Door Check Link Replacement .
- Remove the wire harness from the door. Refer to Front Side Door Wiring Harness Replacement .
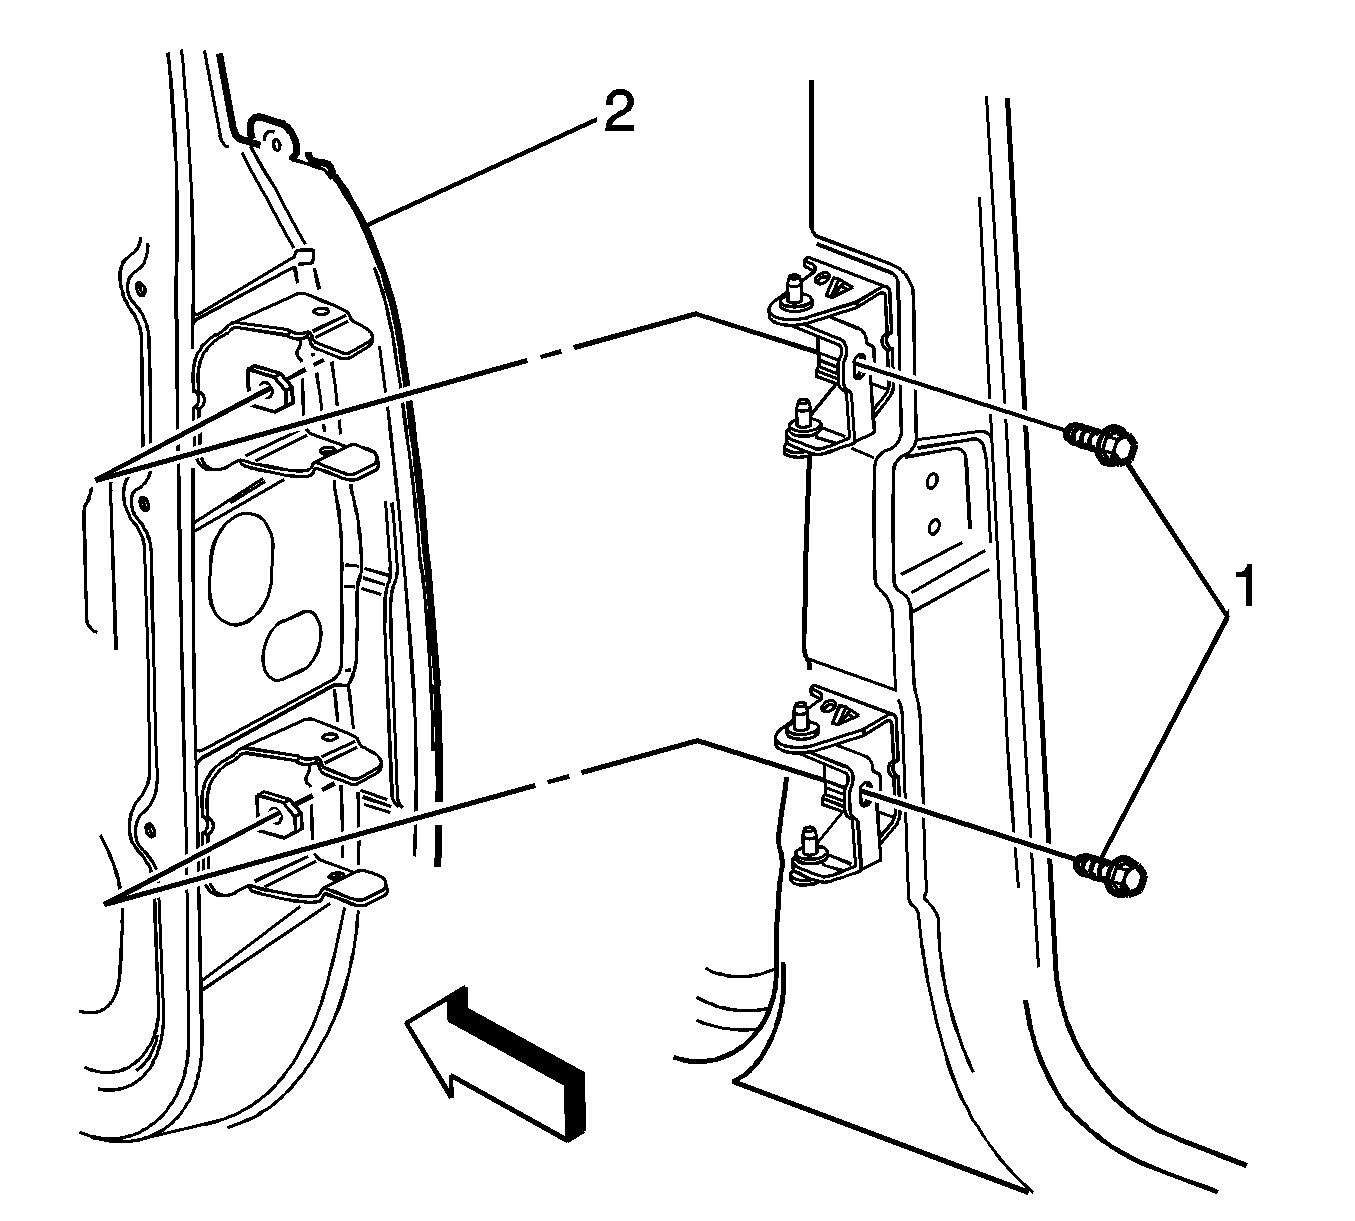
- Remove the bolts that retain the door to the hinge plates.
- Remove the door from the vehicle with an assistant.

Installation Procedure
- Install the door to the vehicle with an assistant.
- Apply LOCTITE Blue GM P/N 12345382 or equivalent to the fastener prior to installation.
- Install the bolts that retain the door to the hinge plates.
- Install the wire harness to the door. Refer to Front Side Door Wiring Harness Replacement .
- Install the check link. Refer to Door Check Link Replacement .
- Install the outside door handle. Refer to Front Side Door Outside Handle Replacement .
- Install the side door SIR sensor. Refer to Inflatable Restraint Side Impact Sensor Replacement in SIR.
- Install the door latch assembly. Refer to Front Side Door Latch Replacement .
- Install the window regulator. Refer to Front Side Door Window Regulator Replacement .
- Install the weatherstrip run channel. Refer to Front Side Door Window Channel Replacement .
- Install the window. Refer to Front Side Door Window Replacement .
- Install the ORVM. Refer to Outside Rearview Mirror Replacement .
- Install the water deflector. Refer to Front Side Door Water Deflector Replacement .
- Install the speaker. Refer to Radio Front Side Door Speaker Replacement in Entertainment.
- Install the inside door handle. Refer to Door Inside Handle Replacement .
- Install the outer belt sealing strip. Refer to Front Side Door Window Belt Outer Sealing Strip Replacement .
- Install the door trim panel. Refer to Front Side Door Trim Panel Replacement .
- Install the accessory switch panel. Refer to Door Lock and Side Window Switch Replacement - Driver Side .
- Enable the SIR. Refer to Enabling the SIR System in SIR.

Notice: Use the correct fastener in the correct location. Replacement fasteners must be the correct part number for that application. Fasteners requiring replacement or fasteners requiring the use of thread locking compound or sealant are identified in the service procedure. Do not use paints, lubricants, or corrosion inhibitors on fasteners or fastener joint surfaces unless specified. These coatings affect fastener torque and joint clamping force and may damage the fastener. Use the correct tightening sequence and specifications when installing fasteners in order to avoid damage to parts and systems.
Tighten
Tighten the bolts to 15 N·m (11 lb ft).
