For 1990-2009 cars only
Removal Procedure
- Remove the seat from the vehicle. Refer to Rear Number 2 Seat Replacement .
- Remove the seat latch rod. Refer to Rear Seat Latch Rod Replacement - Rear Seat Number 2 .
- Remove the seat riser latch assembly. Refer to Rear Seat Number 2 Riser Latch Assembly Replacement .
- Remove the seat adjuster cross bar. Refer to Rear Seat Adjuster Cross Bar Replacement - Rear Seat Number 2 .
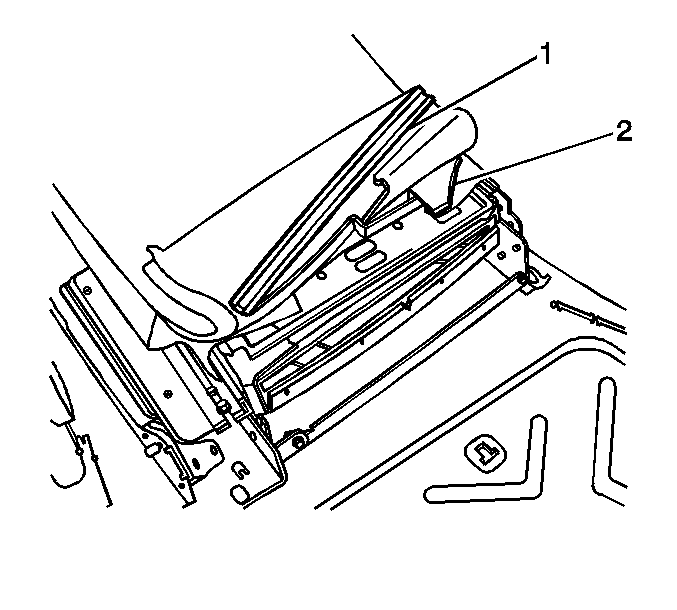
- Unhook the J-strip (1) from the bottom of the seat back cover.
- Remove the hog rings (2) from the seat back cover flaps.
- Pull the seat cover up to expose the seat back mounting bolts.
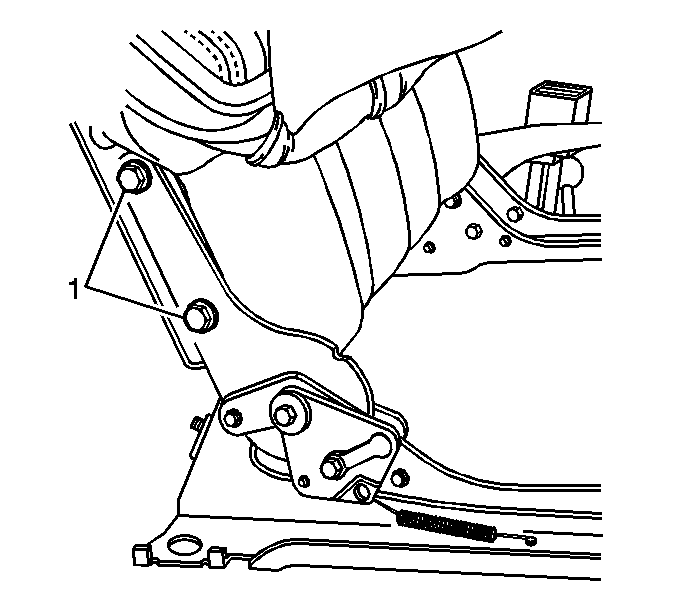
- Remove the two seat back mounting bolts (1) securing the outer riser assembly to the seat back frame.
Installation Procedure
- Install the two seat back mounting bolts (1) securing the outer riser assembly to the seat back frame.
- Pull the seat cover back down over the seat pad.
- Secure the seat back cover flaps to the pad with the hog rings (2).
- Install the J-strip (1) on the bottom of the seat back cover.
- Install the seat adjuster cross bar. Refer to Rear Seat Adjuster Cross Bar Replacement - Rear Seat Number 2 .
- Install the seat riser latch assembly. Refer to Rear Seat Number 2 Riser Latch Assembly Replacement .
- Install the seat latch rod. Refer to Rear Seat Latch Rod Replacement - Rear Seat Number 2 .
- Install the seat in the vehicle. Refer to Rear Number 2 Seat Replacement .
Notice: Refer to Fastener Notice in the Preface section.
Tighten
Tighten the seat back mounting bolts to 25 N·m (18 lb ft).
