The screen method is preferred for aiming headlamps.
Headlamp aiming is done with the vehicle low beam lamps. The high beam lamps will be correctly aimed if the low beam lamps are aimed properly.
Screen Method for Headlamp Aiming (Visual Aim)
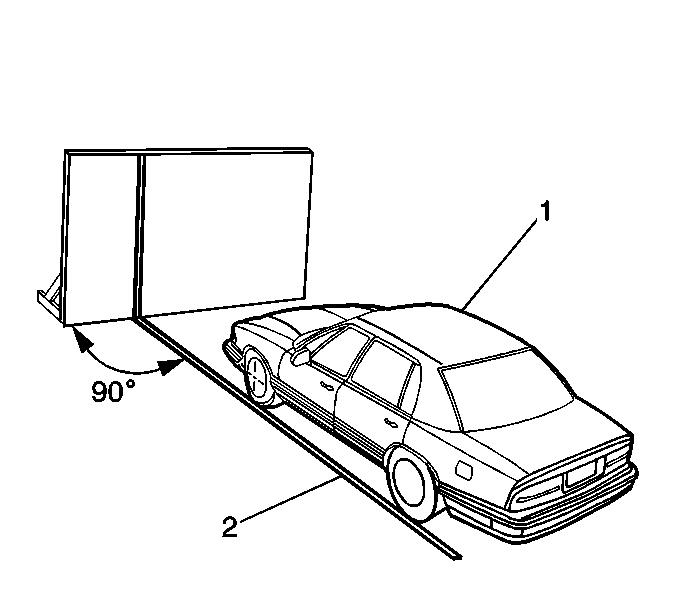
The screen method requires an area set up specifically for headlamp aim.

The area should consist of a level surface large enough to allow for a vehicle and an additional 7.62 m (25 ft) as measured from the face of the headlamps to the aiming screen.
The screen (1) should be a wall or other flat surface that is at least 1.52 m (5 ft) high by 3.66 m (12 ft) wide.
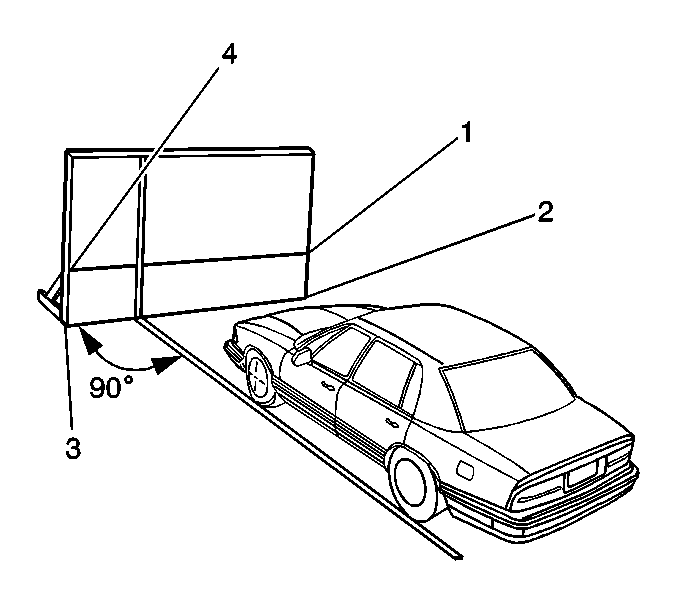
It should have a matte white surface and be in an area with low ambient light. The aiming surface should be 90 degrees (or perpendicular) to the floor. The screen should be provided with a permanent vertical reference line (2) 2 feet from the left edge of the screen.

After the aiming screen has been set up and located, paint or tape a reference line (4) on the floor 15.24 m (50 ft) from the vertical reference line (7) on the screen. This line should be perpendicular to the aiming screen and a mark (5) placed at 7.62 m (25 ft) from the screen.
Ensure the reference line (4) is straight by performing the following steps:
| • | Measure 7.62 m (25 ft) to the right of the reference line (4) and make a temporary mark on the floor (2). |
| • | Measure 7.62 m (25 ft) to the left of the reference line (4) and make a temporary mark on the floor (6). |
| • | Place a temporary mark (3) anywhere on the reference line (4). |
| • | Measure from point 2 to point 3, and from point 6 to point 3. The measurements should be equal. |
Headlamp Aiming Procedure
- Complete the following before adjusting the headlamps:
- Align the left tires of the vehicle (1) with the reference line (2) extending from the screen.
- Ensure that the headlamps are even with the 7.62 m (25 ft) mark on the reference line.
- Measure from the floor (2) to the headlamp aiming dot located at the center of the low beam headlamp in order to obtain the distance between point 1 and point 2.
- Using the measurement obtained from step 4, measure from the floor (3) to the screen (4) and from the floor (2) to the screen (1) and make temporary markings on the screen (1 and 4).
- Use a piece of tape between 1 and 4 in order to create the horizontal line on the screen.
- Measure the difference between the headlamp aiming dot and the reference line (3).
- Transfer that measurement to the aiming screen (1) in order to determine the left vertical line.
- Measure the distance between the left headlamp aiming dot (3) and the right headlamp aiming dot (2).
- Use that measurement on the aiming screen (4) in order to determine the positioning of the right vertical line.
- Set the park brake.
- Start the vehicle.
- Turn the headlamps on.
- This illustration represents the visual optics left (VOL) pattern.
- This illustration represents the visual optics right (VOR) pattern.
| • | Remove any snow, ice or mud from the vehicle. |
| • | The tires must be properly inflated. |
| • | The vehicle must be fully assembled and all other work stopped while the headlamp aiming is being done. |
| • | The vehicle should contain cargo or be loaded to represent normal vehicle use. |
| • | The suspension should be completely settled. |


Important: If it is difficult to differentiate between the separate headlight patterns, it may be necessary to block the path of light of the headlamp not being adjusted. Do not cover headlamp, this may cause excessive heat build up.

