Tools Required
J 44212 Camshaft Holding Tool
Removal Procedure
- Remove the right secondary camshaft drive chain. Refer to Secondary Camshaft Drive Chain Replacement - Right Side .
- Remove the left secondary drive chain tensioner. Refer to Secondary Camshaft Drive Chain Tensioner Replacement - Left Side .
- Remove the left camshaft cover. Refer to Camshaft Cover Replacement - Left Side .
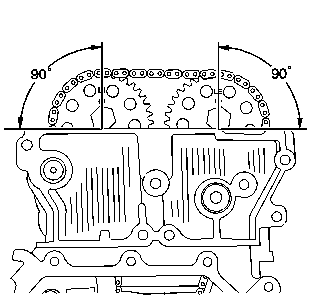
- Ensure both camshaft sprocket drive pins are at the top of their rotation.
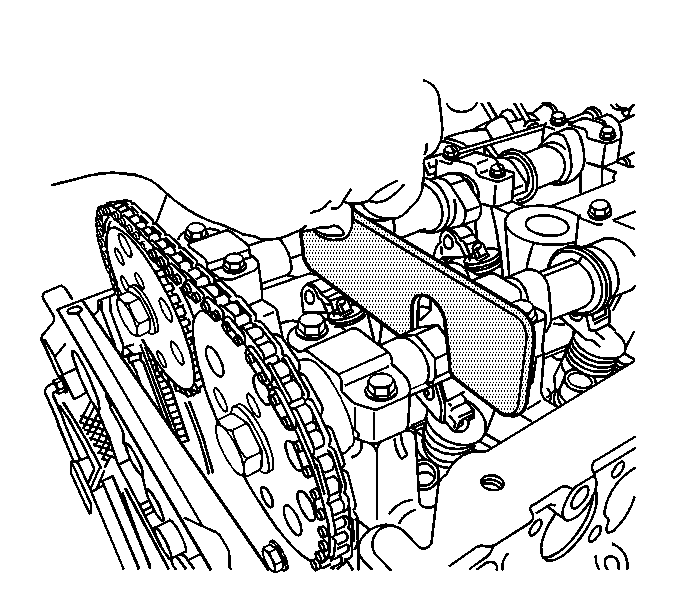
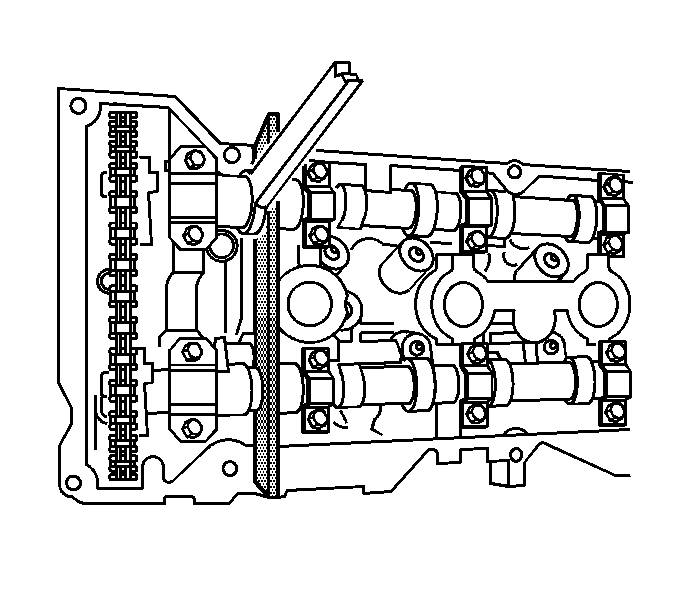
- Install the J 44212 over the camshafts.
- Use an open end wrench on the hex cast into the camshaft in order to prevent the camshaft from rotating when removing the camshaft sprocket bolt.
- Remove the left intake camshaft sprocket bolt.
- Slide the left intake camshaft sprocket off of the camshaft and remove the left secondary camshaft drive chain from the camshaft sprocket teeth.
- Lift the left secondary camshaft drive chain from the camshaft intermediate drive shaft sprocket teeth.
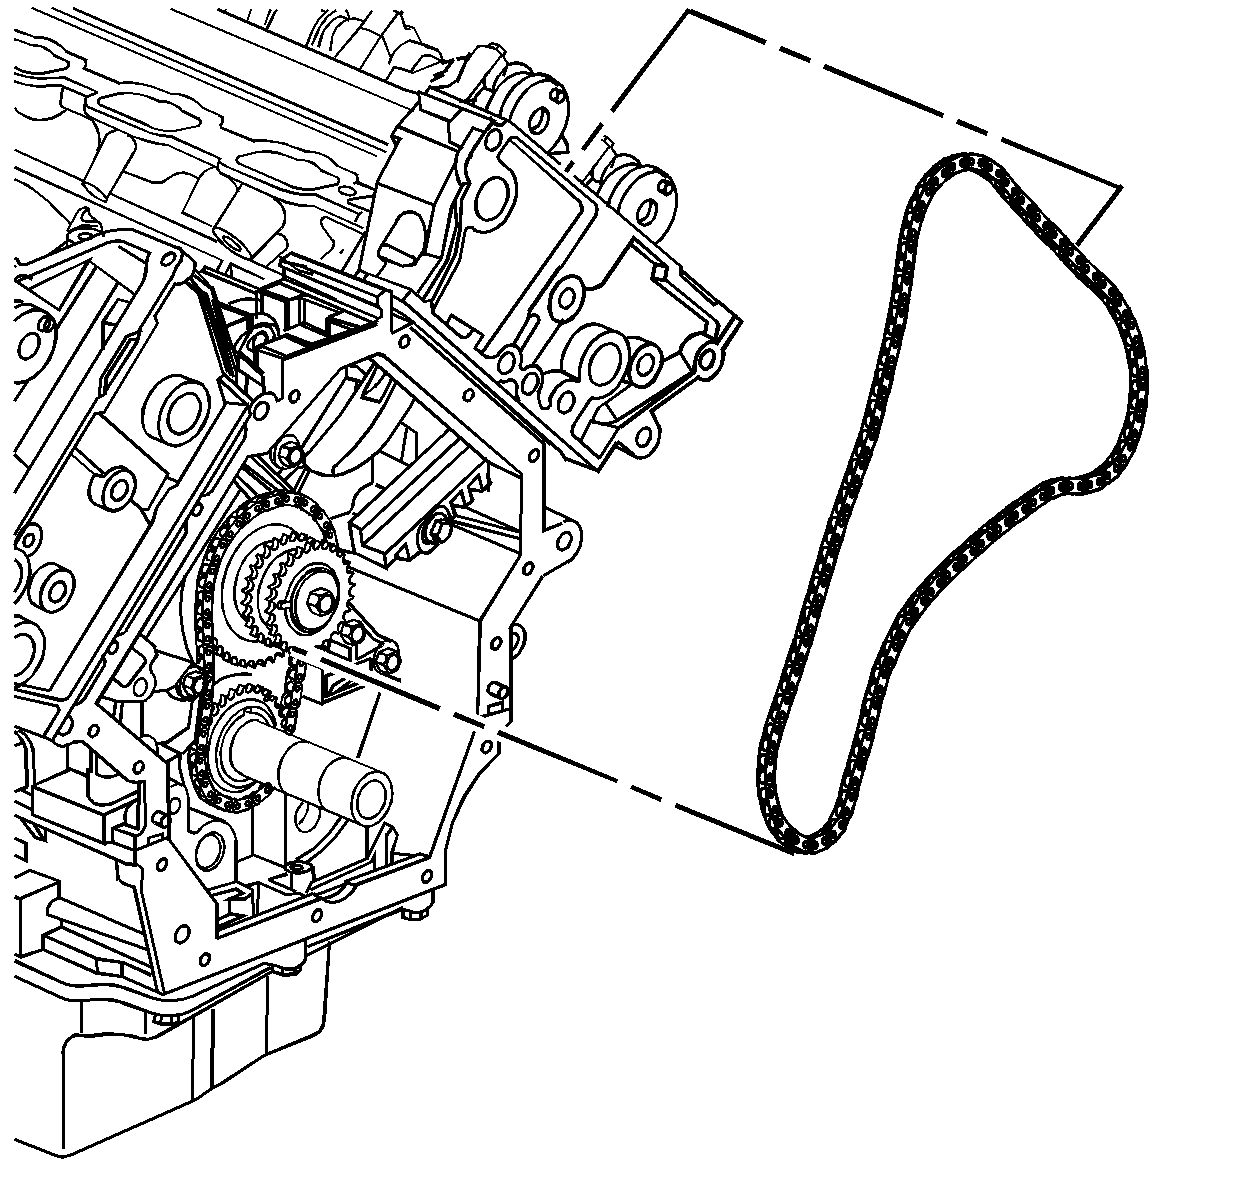
- Remove the left secondary camshaft drive chain from the engine.
- Clean and inspect the camshaft timing drive components. Refer to Camshaft Timing Drive Components Cleaning and Inspection .
Caution: The camshaft holding tools must be installed on the camshafts to prevent camshaft rotation. When performing service to the valve train and/or timing components, valve spring pressure can cause the camshafts to rotate unexpectedly and can cause personal injury.
Installation Procedure
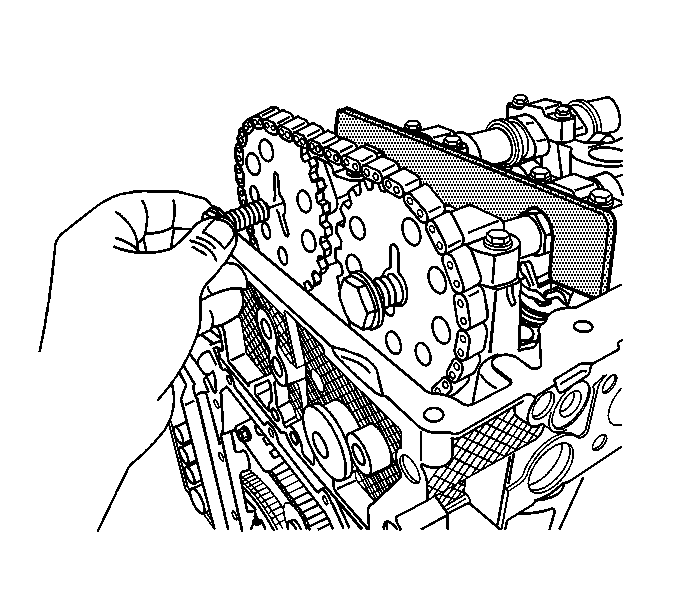
- Install the left secondary camshaft drive chain by sliding the chain down through the left cylinder head and placing the chain on the left exhaust camshaft sprocket.
- Route the left secondary camshaft drive chain around the inner row of the camshaft intermediate drive shaft sprocket teeth.
- Install the left intake camshaft sprocket into the left secondary camshaft drive chain.
- Install the left intake camshaft sprocket onto the camshaft. The camshaft sprocket notch marked LI (left intake) engages the intake camshaft pin.
- Use an open end wrench on the hex cast into the camshaft in order to prevent the camshaft from rotating when tightening the camshaft sprocket bolt.
- Install the left intake camshaft sprocket bolt.
- Remove the J 44212 from the camshafts.
- Install the left camshaft cover. Refer to Camshaft Cover Replacement - Left Side .
- Install the left secondary drive chain tensioner. Refer to Secondary Camshaft Drive Chain Tensioner Replacement - Left Side .
- Install the right secondary camshaft drive chain. Refer to Secondary Camshaft Drive Chain Replacement - Right Side .
Notice: Use the correct fastener in the correct location. Replacement fasteners must be the correct part number for that application. Fasteners requiring replacement or fasteners requiring the use of thread locking compound or sealant are identified in the service procedure. Do not use paints, lubricants, or corrosion inhibitors on fasteners or fastener joint surfaces unless specified. These coatings affect fastener torque and joint clamping force and may damage the fastener. Use the correct tightening sequence and specifications when installing fasteners in order to avoid damage to parts and systems.
Tighten
Tighten the camshaft sprocket bolt to 120 N·m (89 lb ft).
