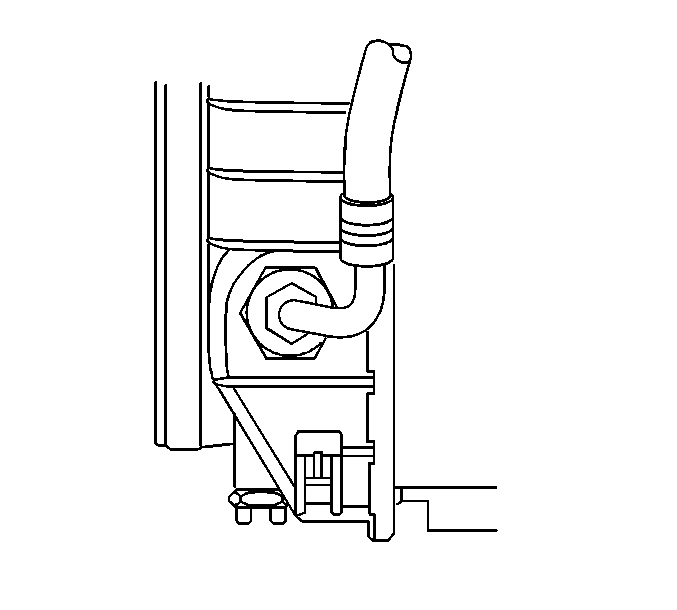
- Position the lower transaxle oil cooler pipe into the engine compartment.
Notice: Use the correct fastener in the correct location. Replacement fasteners
must be the correct part number for that application. Fasteners requiring
replacement or fasteners requiring the use of thread locking compound or sealant
are identified in the service procedure. Do not use paints, lubricants, or
corrosion inhibitors on fasteners or fastener joint surfaces unless specified.
These coatings affect fastener torque and joint clamping force and may damage
the fastener. Use the correct tightening sequence and specifications when
installing fasteners in order to avoid damage to parts and systems.
- Connect the lower
transaxle oil cooler pipe to the radiator.
Important: Ensure the lower transaxle oil cooler pipe is positioned upwards while
tightening.
Tighten
Tighten the transaxle oil cooler pipe fitting to 25 N·m
(18 lb ft).
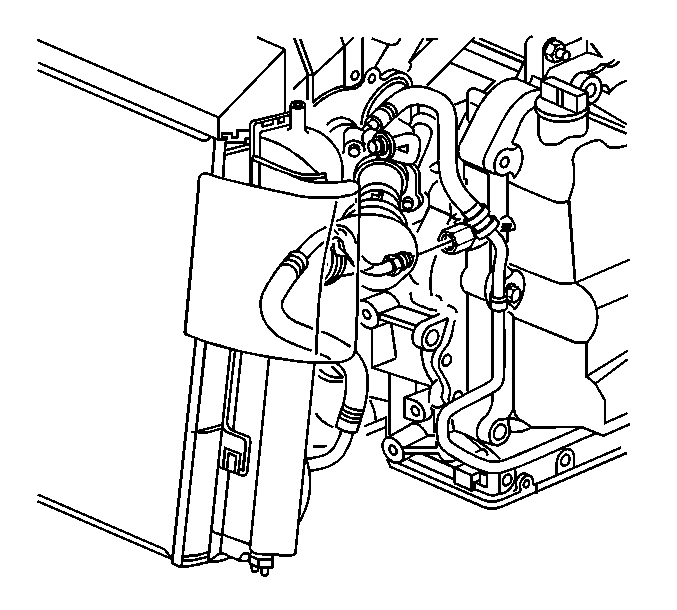
- Connect the lower transaxle
oil cooler pipe to the front of the transaxle utilizing one of the following
methods.
| 3.1. | If equipped with a threaded fitting. |
| 3.1.1. | Hold the transaxle oil cooler pipe adapter in order to prevent
the adapter from turning. |
| 3.1.2. | Install the transaxle oil cooler pipe to the oil cooler pipe adapter. |
Tighten
Tighten the transaxle oil cooler pipe fitting to 35 N·m
(26 lb ft).
| 3.2. | If equipped with a quick connect fitting. |
| 3.2.1. | Push the transaxle oil cooler pipe into the transaxle quick connect
fitting, until a "click" is heard. |
| 3.2.2. | Tug gently on the cooler pipe to ensure proper retention. |
| 3.2.3. | Slide the plastic cap over the quick connect fitting. |
- Raise and support the vehicle. Refer to
Lifting and Jacking the Vehicle
in General Information.
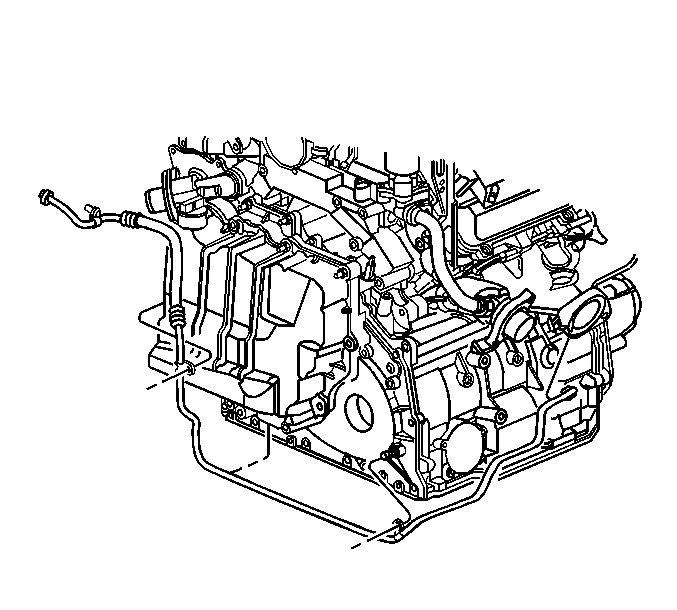
- Position the upper transaxle
oil cooler pipe in the proper location.
- Install the upper transaxle oil cooler pipe retainers to the transaxle.
- Connect the upper transaxle oil cooler pipe to the rear of the
transaxle utilizing one of the following methods.
| 7.1. | If equipped with a threaded fitting. |
| 7.1.1. | Hold the transaxle oil cooler pipe adapter in order to prevent
the adapter from turning. |
| 7.1.2. | Install the transaxle oil cooler pipe to the oil cooler pipe adapter. |
Tighten
Tighten the transaxle oil cooler pipe fitting to 35 N·m
(26 lb ft).
| 7.2. | If equipped with a quick connect fitting. |
| 7.2.1. | Push the transaxle oil cooler pipe into the transaxle quick connect
fitting, until a "click" is heard. |
| 7.2.2. | Tug gently on the cooler pipe to ensure proper retention. |
| 7.2.3. | Slide the plastic cap over the quick connect fitting. |
- Install the rear exhaust manifold pipe. Refer to
Exhaust Manifold Rear Pipe Replacement
in Engine Exhaust.
- Lower the vehicle.
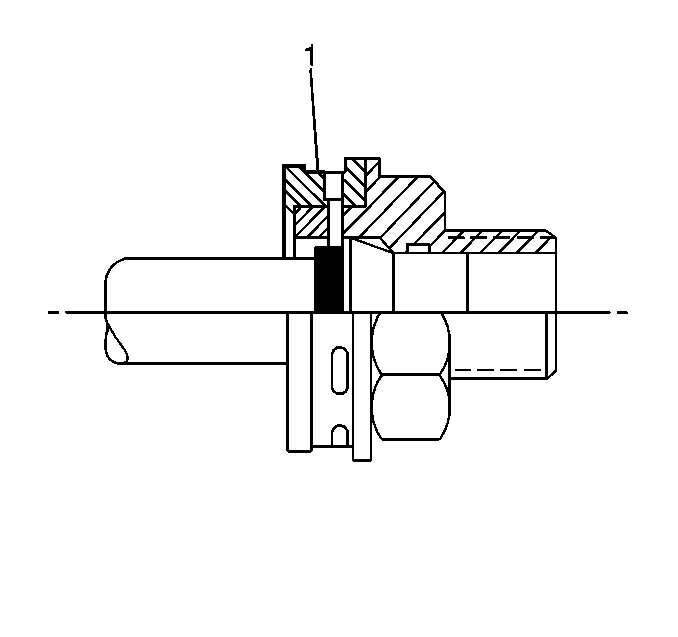
- Push the upper transaxle
oil cooler pipe into the radiator quick connect fitting, until a "click"
is heard.
- Tug gently on the cooler pipe to ensure proper retention.
- Slide the plastic cap (1) over the quick connect joint.
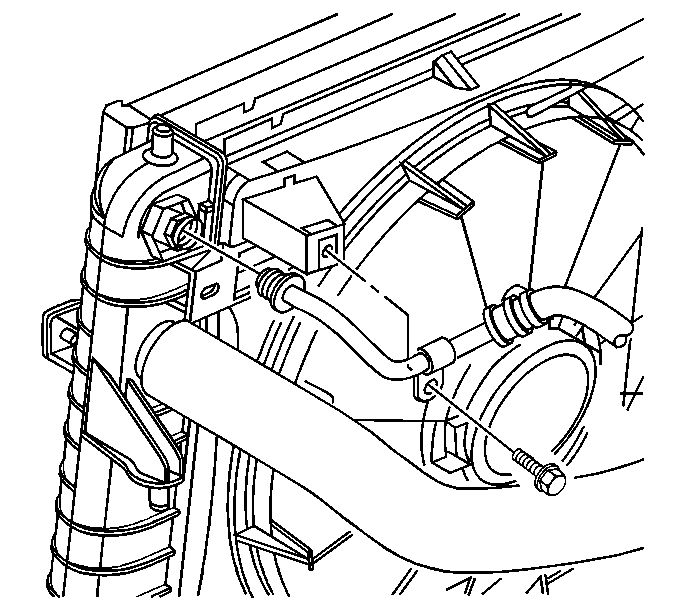
- Install the upper transaxle
oil cooler pipe retaining bolt to the fan shroud.
Tighten
Tighten the transaxle oil cooler pipe retaining bolt to 6 N·m
(53 lb in).
- Install the air cleaner assembly. Refer to
Air Cleaner Assembly Replacement
in Engine Controls-4.0 L.
Notice: Do NOT overfill the transaxle. The overfilling of the transaxle
causes foaming, loss of fluid, shift complaints, and possible damage to the
transaxle.
- Adjust the fluid level. Refer to
Transmission Fluid Check
.
- Inspect for fluid leaks.


