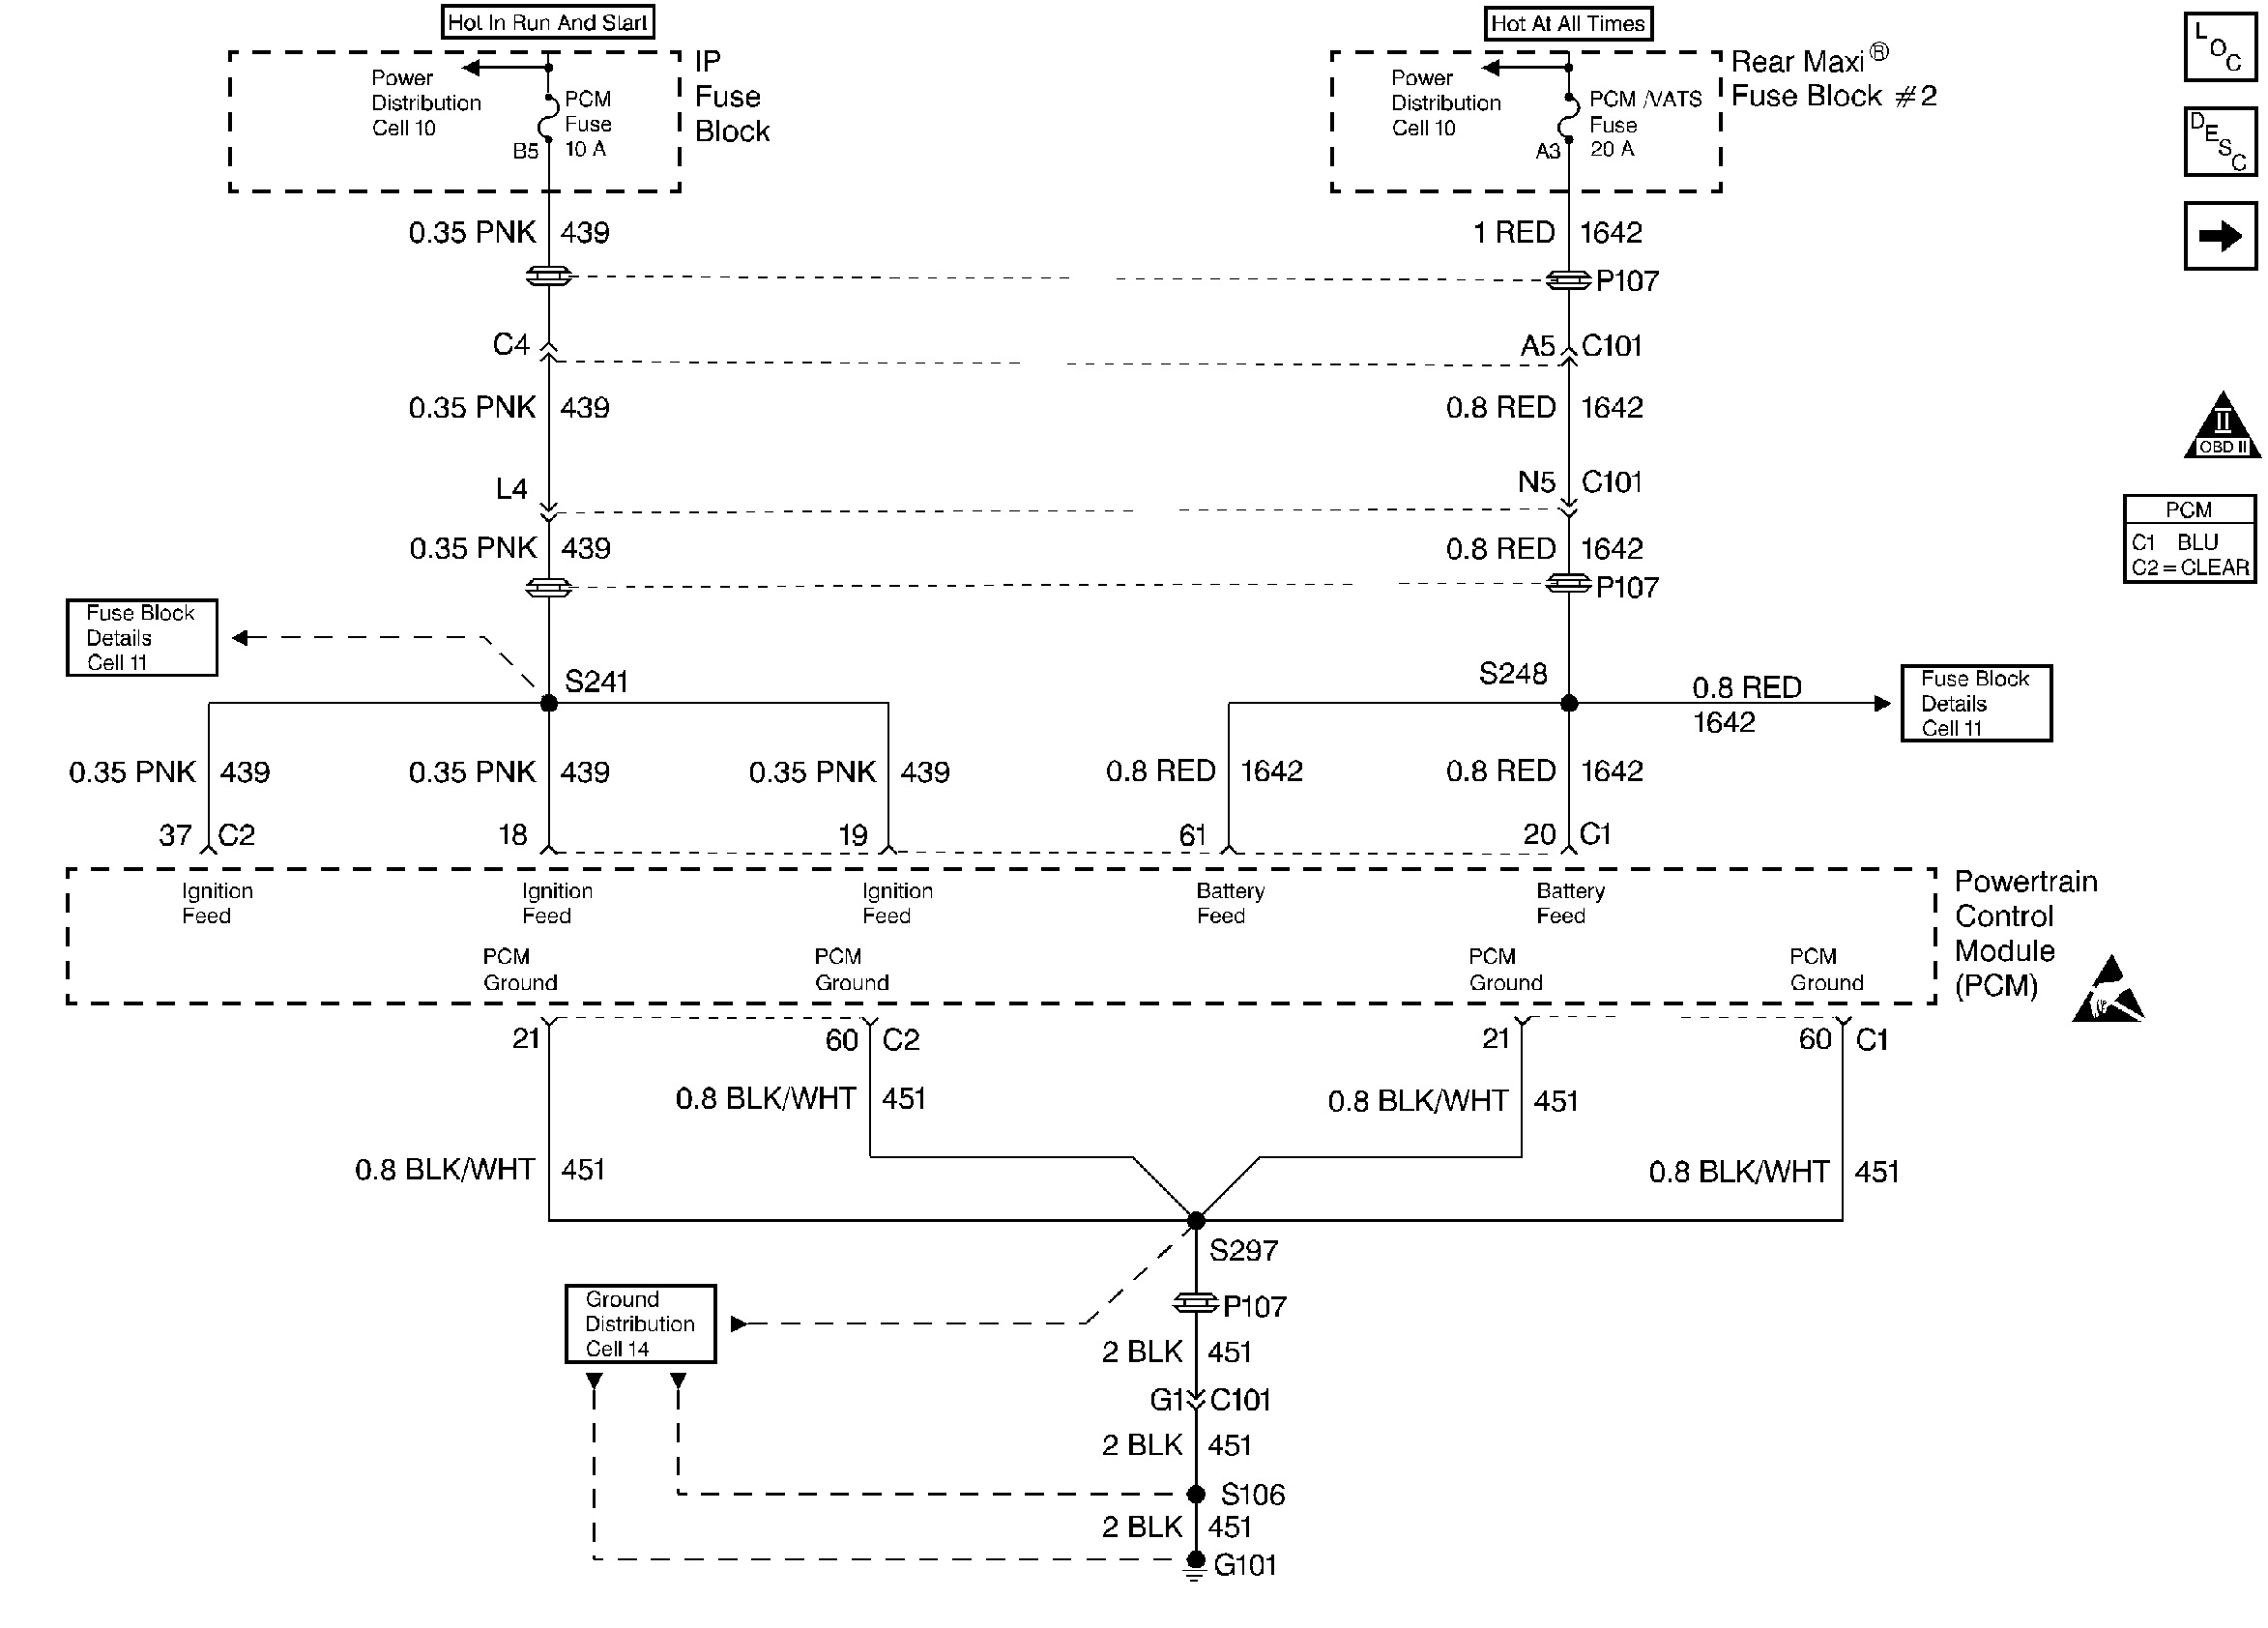
Refer to
PCM Power and Grounds

for wiring view .
Circuit Description
The PCM contains chips called Output Driver Modules that provide 7 switchable ground outputs for operating solenoids, relays, telltales, and other devices. Each of these ground outputs has fault lines that feed back to the PCM's microprocessor. ODM #2 can also sense high voltage coming in which might damage the chip. DTC P1640 is used to monitor ODM #2's overvoltage sense line.
Conditions for Setting the DTC
Test Condition
Engine running at least 10 seconds.
Failure Condition
Overvoltage is sensed for 2 seconds.
Action Taken When the DTC Sets
| • | The PCM will illuminate the malfunction indicator lamp (MIL) when the diagnostic runs and fails. |
| • | The PCM will record operating conditions at the time the diagnostic fails. This information will be stored in the Freeze Frame and Failure Records. |
Conditions for Clearing the MIL/DTC
| • | The PCM will turn the MIL OFF after three consecutive drive trips that the diagnostic runs and does not fail. |
| • | A Last Test Failed (current) DTC will clear when the diagnostic runs and does not fail. |
| • | A History DTC will clear after forty consecutive warm-up cycles with no failures of any emission related diagnostic test. |
| • | Use a scan tool to clear DTCs. |
| • | Interrupting PCM battery voltage may or may not clear DTCs. This practice is not recommended. Refer to Clearing Diagnostic Trouble Codes in PCM Description and Operation. |
Diagnostic Aids
Since an overvoltage at ODM #2 should also trigger DTC P0563, the diagnosis for DTC P0563 may be used if vehicle voltage is actually too high.
A loose or faulty connection at generator L terminal may cause DTC P1650 to set intermittently.
Test Description
Number(s) below refer to the step number(s) on the Diagnostic Table.
-
If ignition voltage and IPC battery voltage are within 1.5 volt of each other, there may be a system voltage problem. If they are not within 1.5 volt of each other, find out why the PCM is different.
-
Checking if PCM ignition voltage is actually displaying system voltage.
Step | Action | Value(s) | Yes | No |
|---|---|---|---|---|
1 | Was the Powertrain On Board Diagnostic (OBD) System Check performed? | -- | Go to A Powertrain On Board Diagnostic (OBD) System Check | |
Are PCM and vehicle voltage readings different by more than the value specified? | 1.5 volts | Fault not present. Refer to Diagnostic Aids | ||
Using DVM J 39200 measure voltage to ground on PCM fuse (installed). Is voltage measured and the Ignition 1 voltages different by more than the value specified? | 1.5 volts | Perform Charging System Check | ||
4 |
Was a repair made to CKT 439? | -- | Go to Powertrain Control Module Diagnosis for Verify Repair | |
5 |
Was terminal contact repaired? | -- | Go to Powertrain Control Module Diagnosis for Verify Repair | |
6 | Replace the PCM (Go to PCM Replacement/Programming ). Is the replacement complete? | -- | Go to Powertrain Control Module Diagnosis for Verify Repair | -- |
