For 1990-2009 cars only
Tools Required
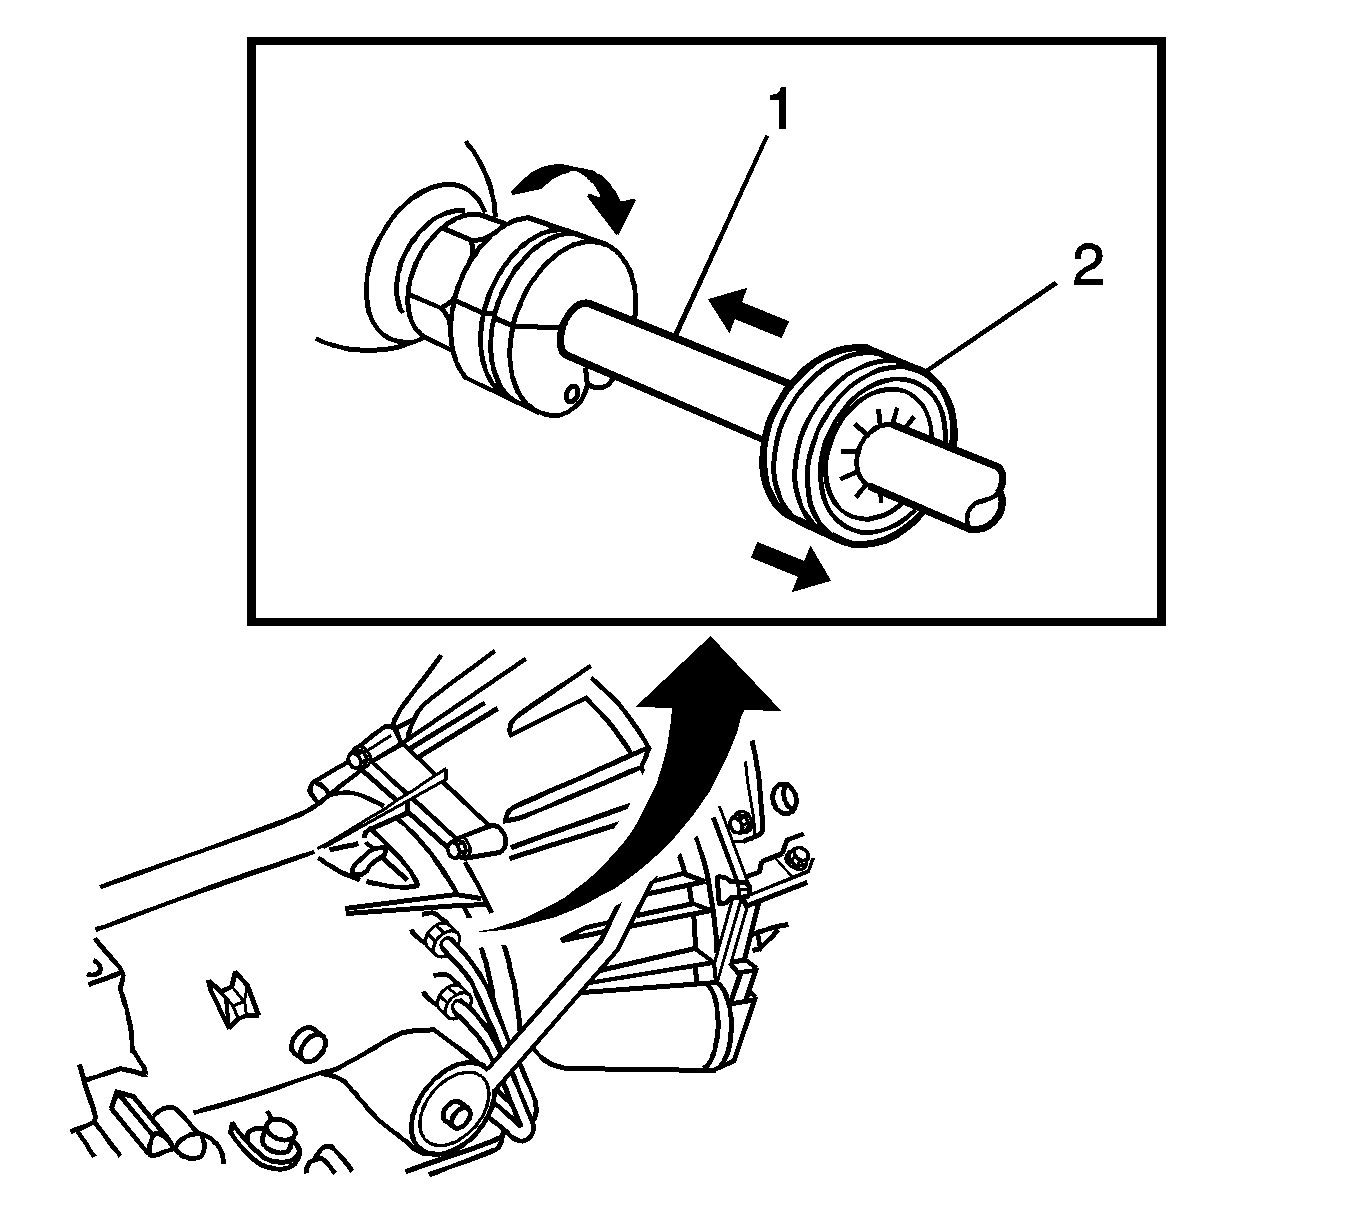
J 41623-B Cooler Line Release Tool
Removal Procedure
- Disconnect the upper and lower oil cooler pipes from the quick disconnect fittings at the radiator.
- Raise and suitably support the vehicle. Refer to Lifting and Jacking the Vehicle.
- Plug all openings to prevent the system from contamination.
- Remove the retaining bolt securing the transmission cooler pipes to the left hand front side of the engine.
- Remove the retaining bolt securing the transmission cooler pipes to the Park/Neutral Position (PNP) switch.
- Remove the transmission mount. Refer to Transmission Mount Replacement.
- Slightly lower the transmission to gain access to the transmission cooler pipes.
- Release the verifier disc (2) by pulling it backwards down the pipe.
- Using J-41623-B, remove the transmission cooler pipes from the transmission.
- Remove the transmission cooler pipes from the vehicle; separate the pipes, as necessary.
Caution: Refer to Safety Glasses Caution in the Preface section.
Caution: Refer to Vehicle Lifting Caution in the Preface section.
Installation Procedure
- Position the transmission cooler pipes in the vehicle.
- Remove the plugs from the cooler pipes; then wipe the pipe connector ends with a clean towel.
- Apply a small amount of clean transmission fluid on the end of the pipes; then insert the pipes into the quick connect fittings on the radiator.
- Apply a small amount of clean transmission fluid on the end of the pipes; then insert the pipes into the quick connect fittings in the transmission.
- Push the verifier discs (2) over the transmission quick disconnect fittings to make sure that the pipes are seated correctly.
- Install the retaining bolt securing the transmission cooler pipes to the left hand front side of the engine.
- Install the retaining bolt securing the transmission cooler pipes to the PNP switch.
- Install the transmission mount. Refer to Transmission Mount Replacement.
- Lower the vehicle.
- Fill the transmission to the proper level with DEXRON® VI transmission fluid. Refer to Transmission Fluid Check.
- Ensure that the engine can only be started in the PNP positions, if adjustment is necessary, refer to Park/Neutral Position Switch Adjustment.
- Check the reverse lamps for proper operation; if adjustment is necessary, refer to Park/Neutral Position Switch Adjustment.
Notice: Refer to Fastener Notice in the Preface section.
Tighten
Tighten the bolt to 10 N·m (84 lb in).
Tighten
Tighten the bolt to 25 N·m (18 lb ft).
