For 1990-2009 cars only
Removal Procedure
- Raise and support the vehicle. Refer to Lifting and Jacking the Vehicle.
- Remove the front wheel. Refer to Tire and Wheel Removal and Installation.
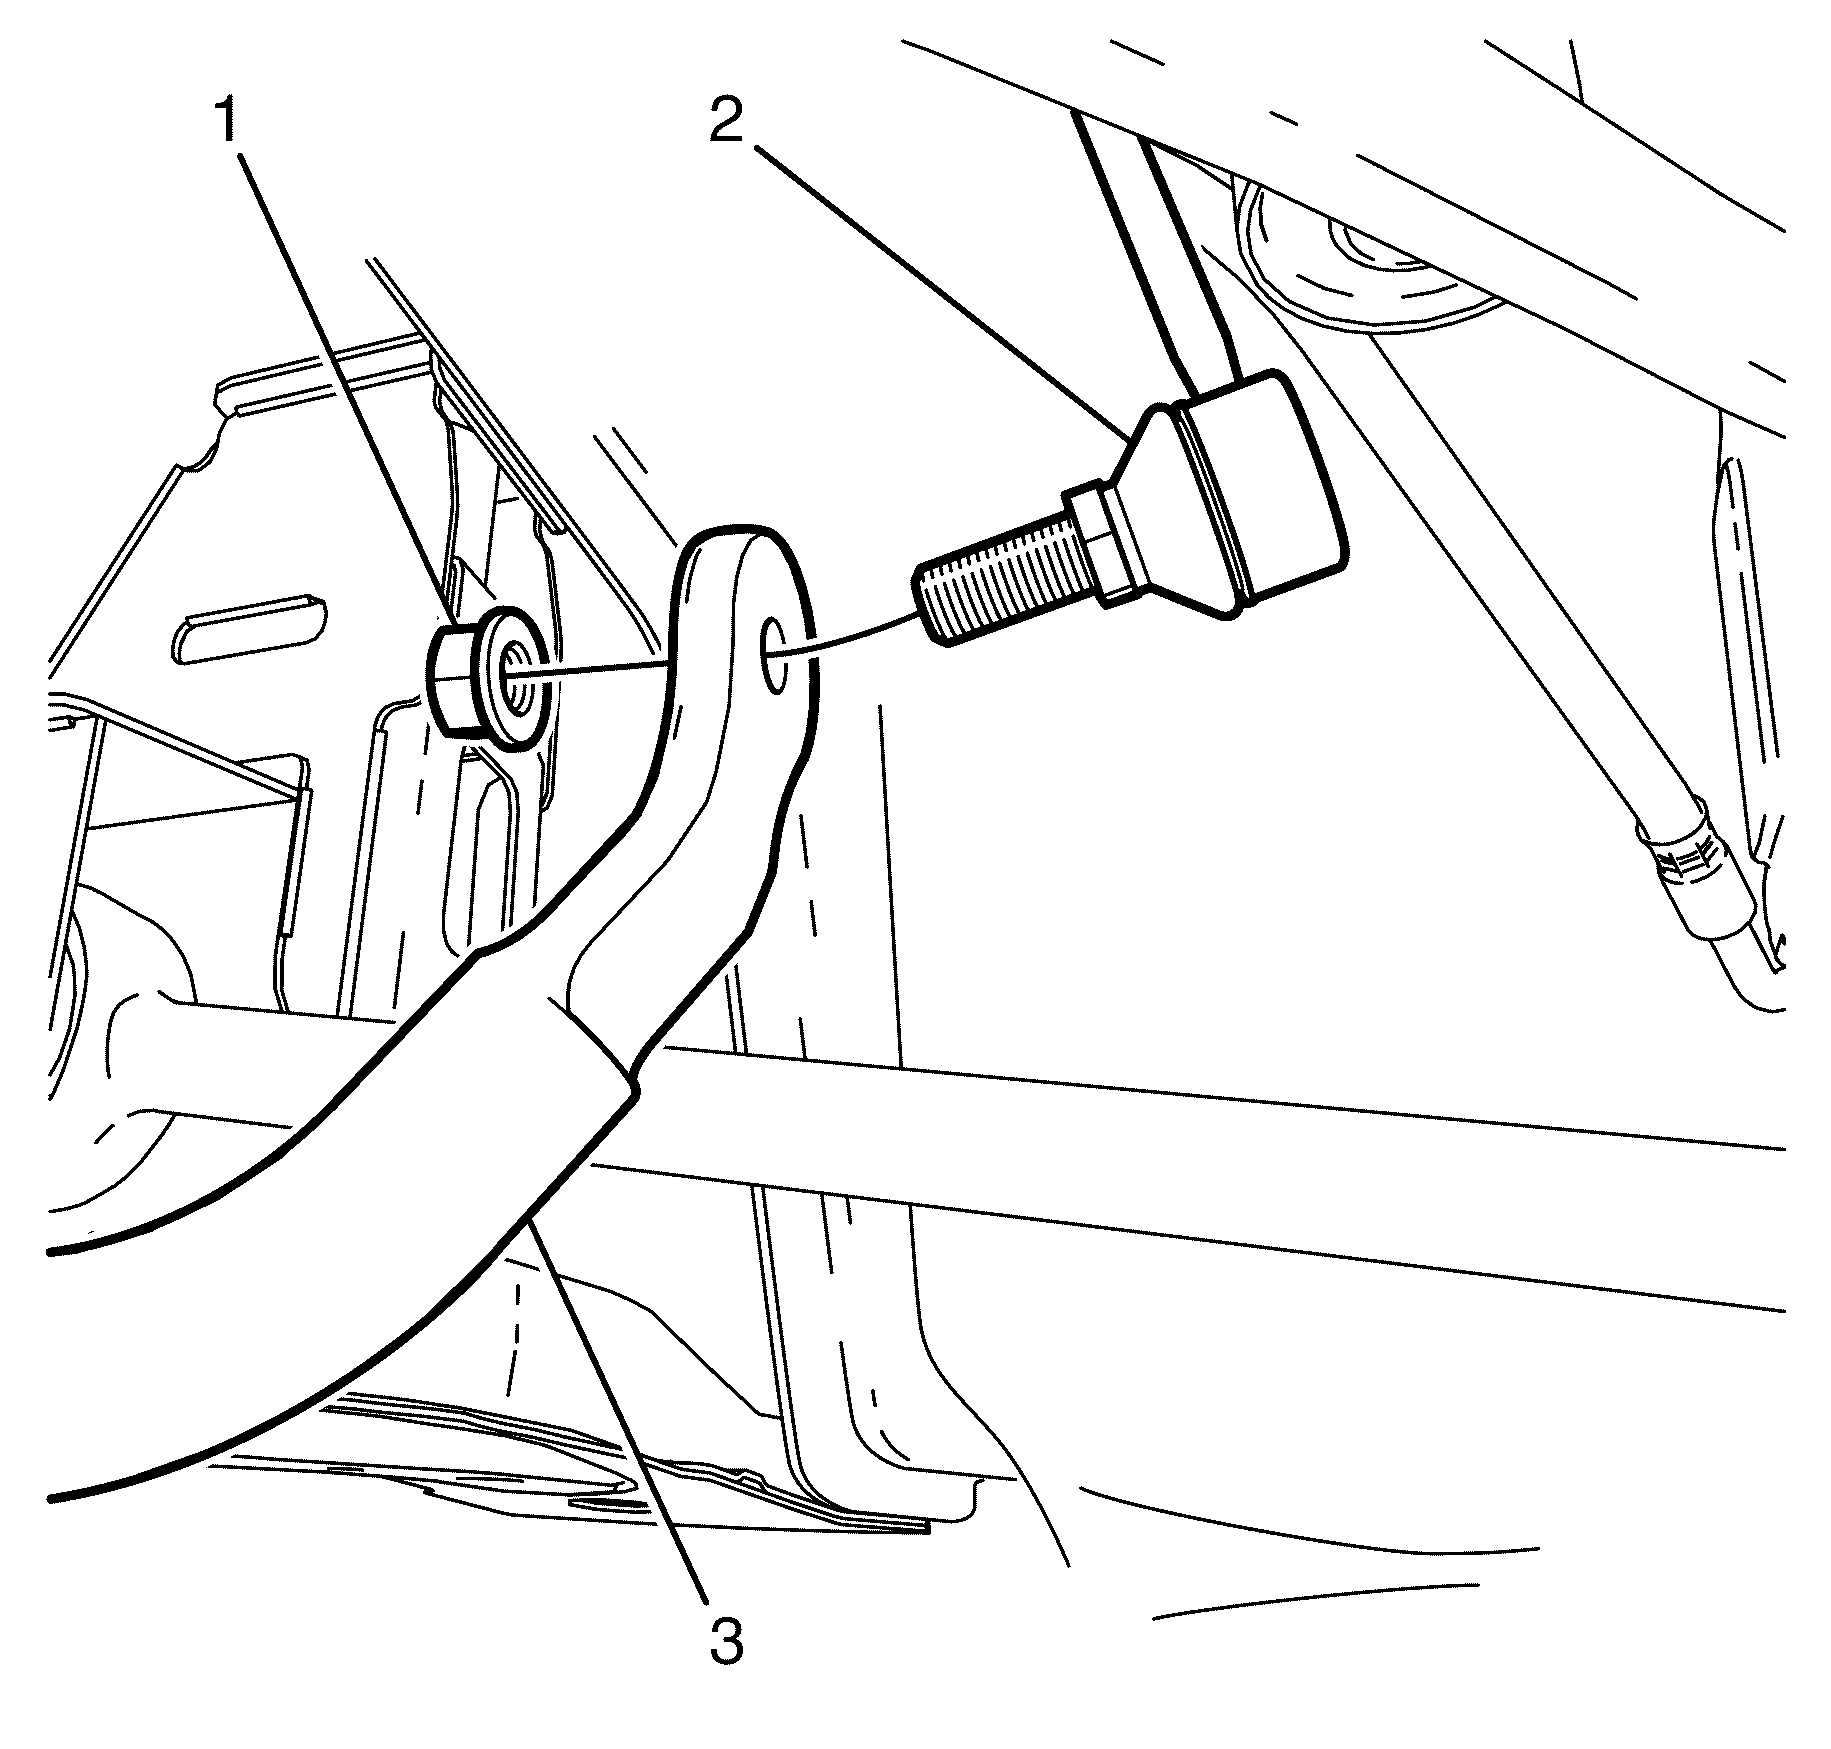
- Remove the stabiliser bar link to stabiliser bar retaining nut (1).
- Disconnect the stabiliser bar link (2) from the stabiliser bar (3).
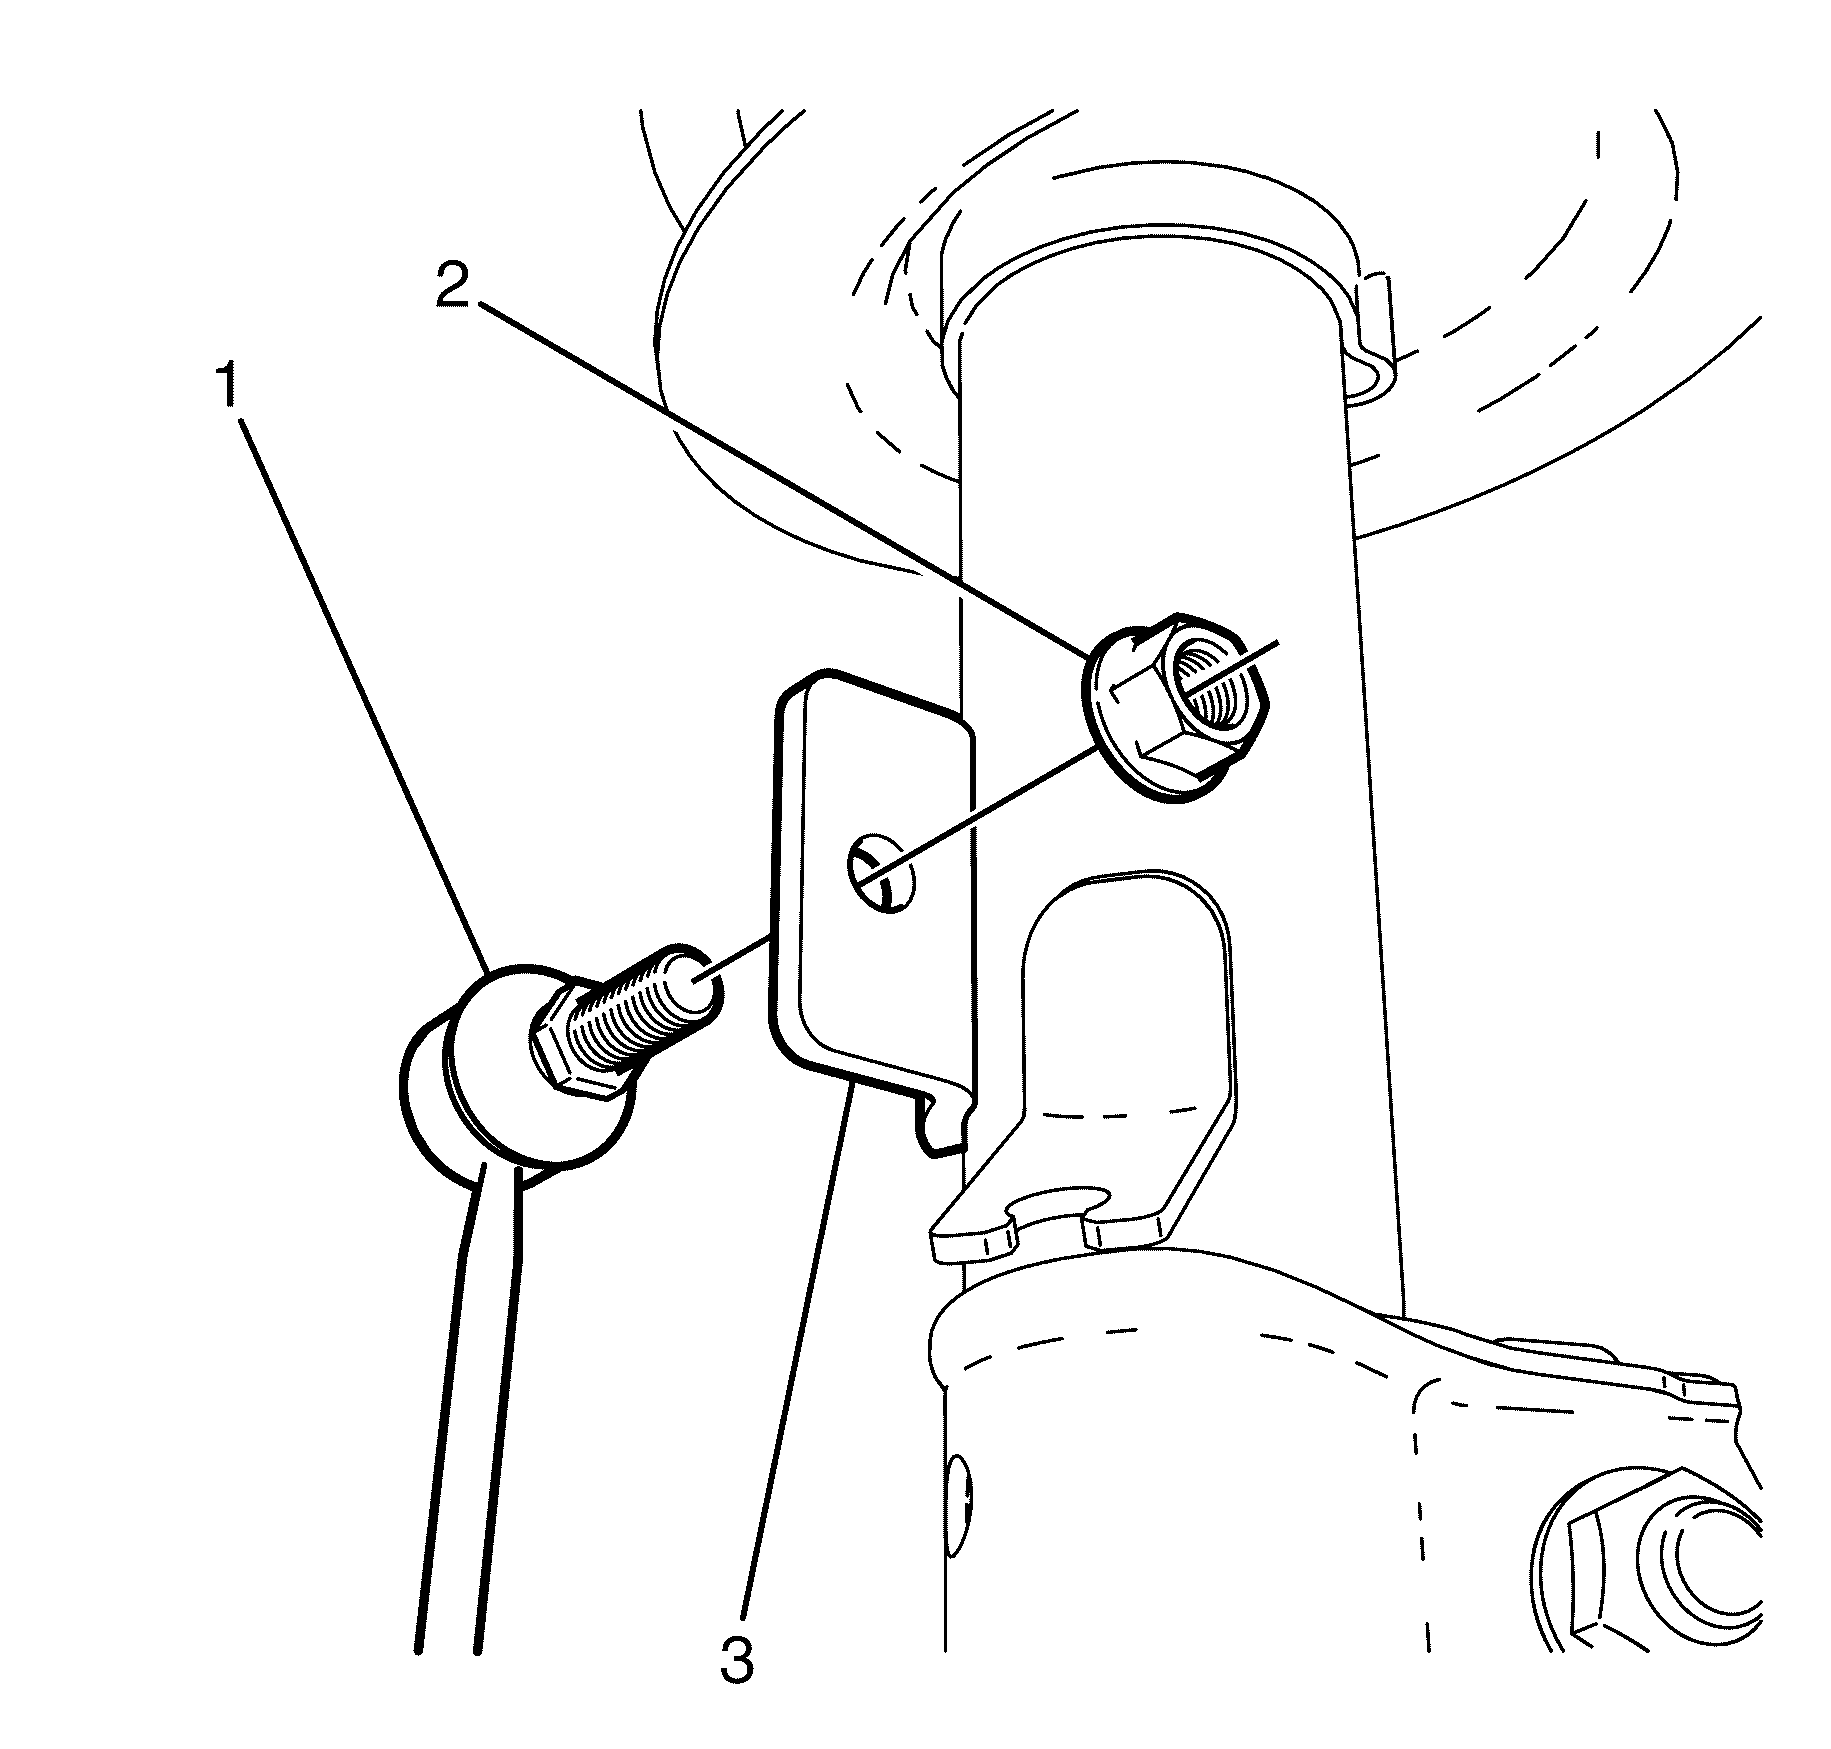
- Remove the stabiliser bar link to strut assembly retaining nut (2).
- Remove the stabiliser link bar (1) from the strut assembly bracket (3).
- Inspect all parts for wear and damage.
Caution: Refer to Safety Glasses Caution in the Preface section.
Caution: Refer to Vehicle Lifting Caution in the Preface section.

Important: Nuts with micro-encapsulated thread sealant must be discarded after removal.
Discard the nut.

Discard the nut.
Installation Procedure
- Install the stabiliser bar link (2) to the stabiliser bar (3).
- Install the NEW stabiliser bar link to stabiliser bar retaining nut (1).
- Install the stabiliser bar link (1) to the strut assembly bracket (3).
- Install the NEW stabiliser bar link to strut assembly retaining nut (2).
- Install the front wheel. Refer to Tire and Wheel Removal and Installation.
- Remove the safety stands.
- Lower the vehicle to the ground.

Important: Install the shorter link end to the stabilizer bar.
Caution: Refer to Fastener Notice in the Preface section.
Tighten
Tighten the nut to 50 N·m (37 lb ft).

Important: Install the longer link end to the strut.
Tighten
Tighten the nut to 50 N·m (37 lb ft).
