Special Tools
| • | J 28467-B (DW-117) Universal Engine Support Fixture |
| • | J 45059 Angle Meter or |
| • | KM-470-B Angular Torque Gage |
Removal Procedure
- Remove the fuel pump fuse.
- Start the engine and wait for it to stall.
- Crank the engine for 10 seconds to rid the fuel system of fuel pressure.
- Disconnect the negative battery cable.
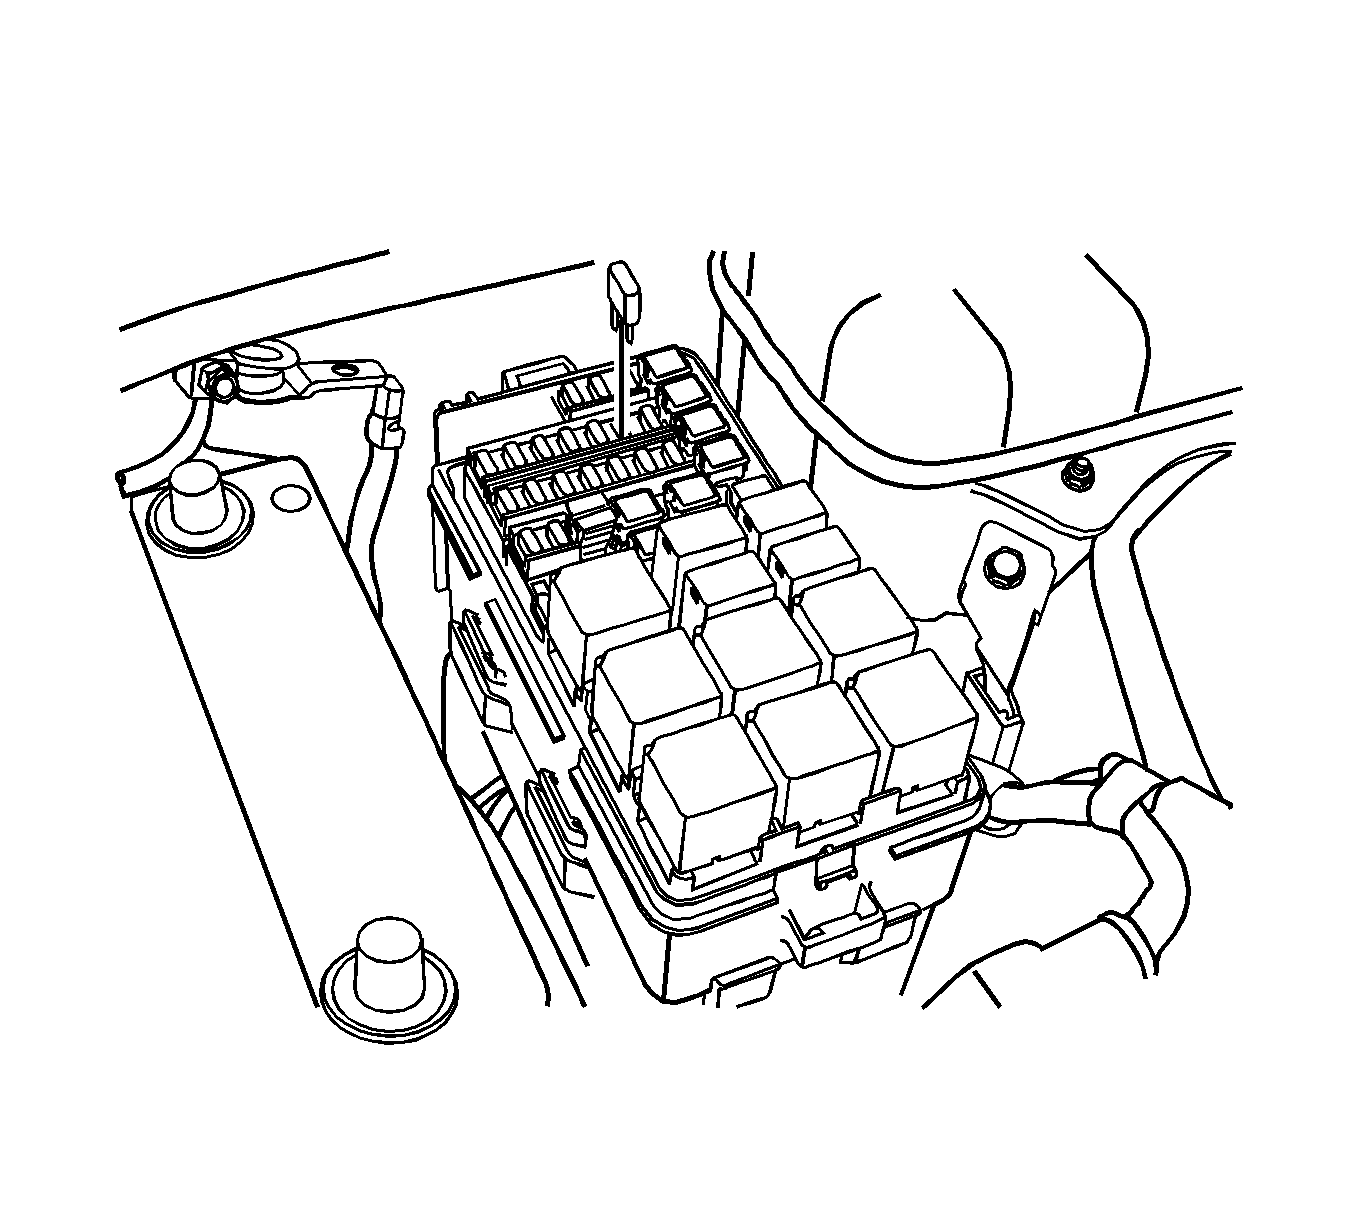
- Disconnect the engine control module (ECM) ground terminal.
- Drain the engine coolant. Refer to Cooling System Draining and Filling.
- Disconnect the manifold air temperature (MAT) sensor connector.
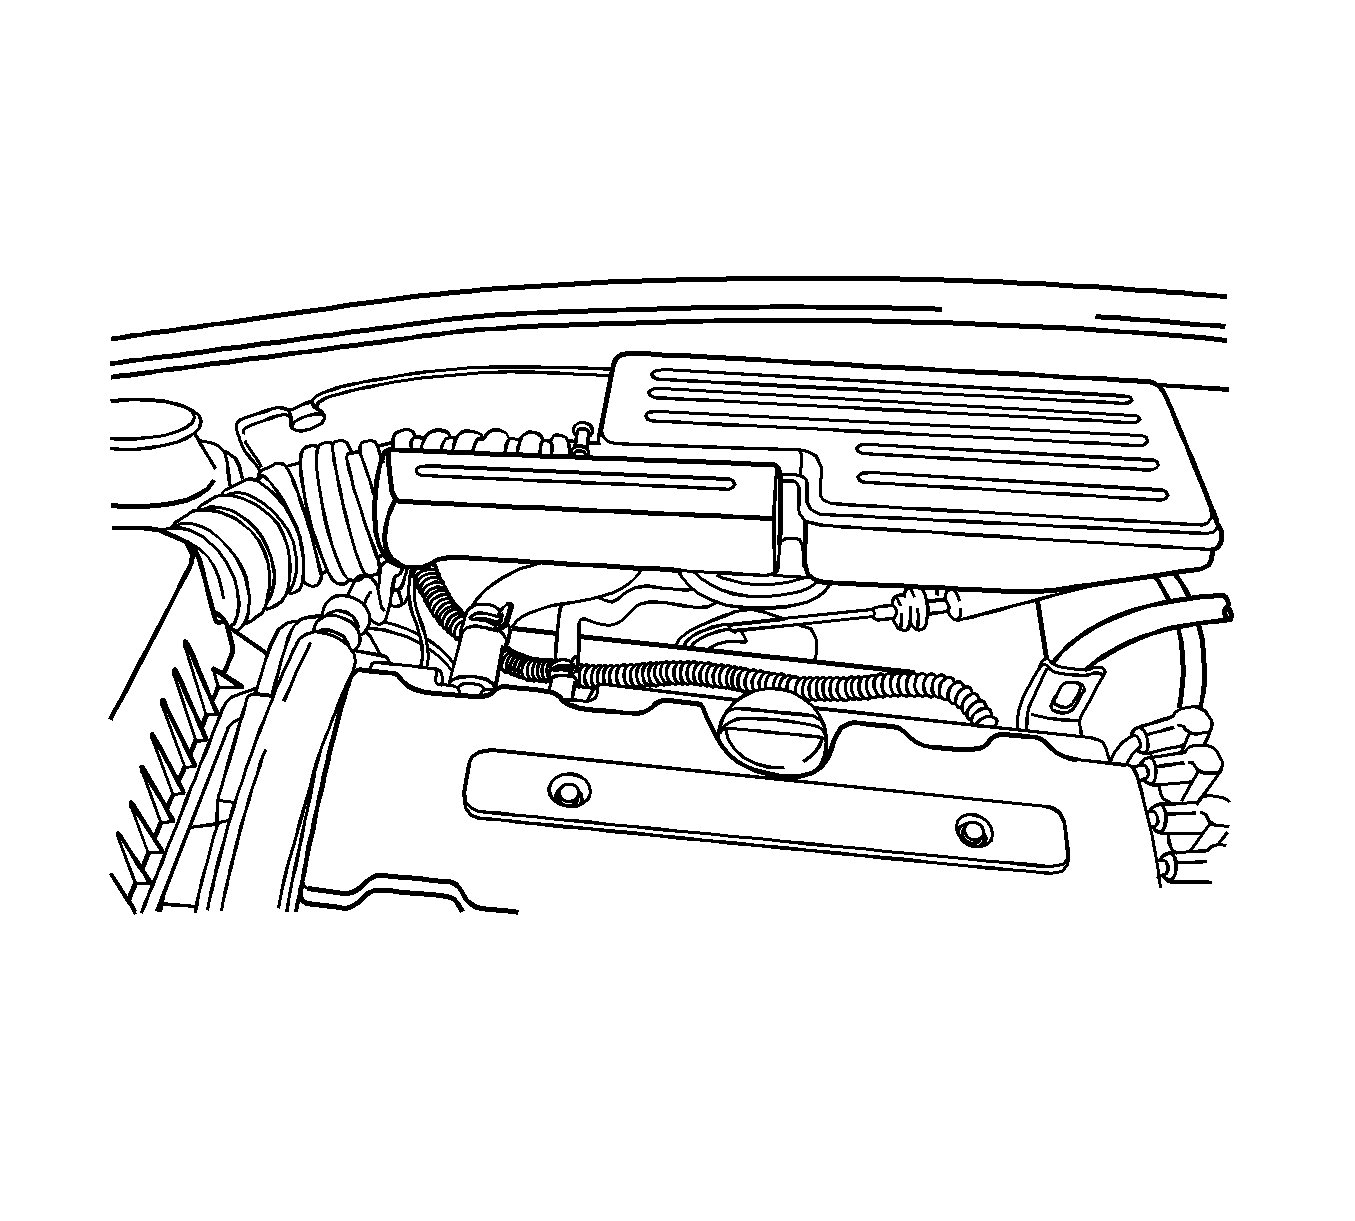
- Disconnect the breather tube from the valve cover.
- Remove the air intake tube from the throttle body.
- Disconnect the ignition coil connector.
- Disconnect the oxygen sensor connector.
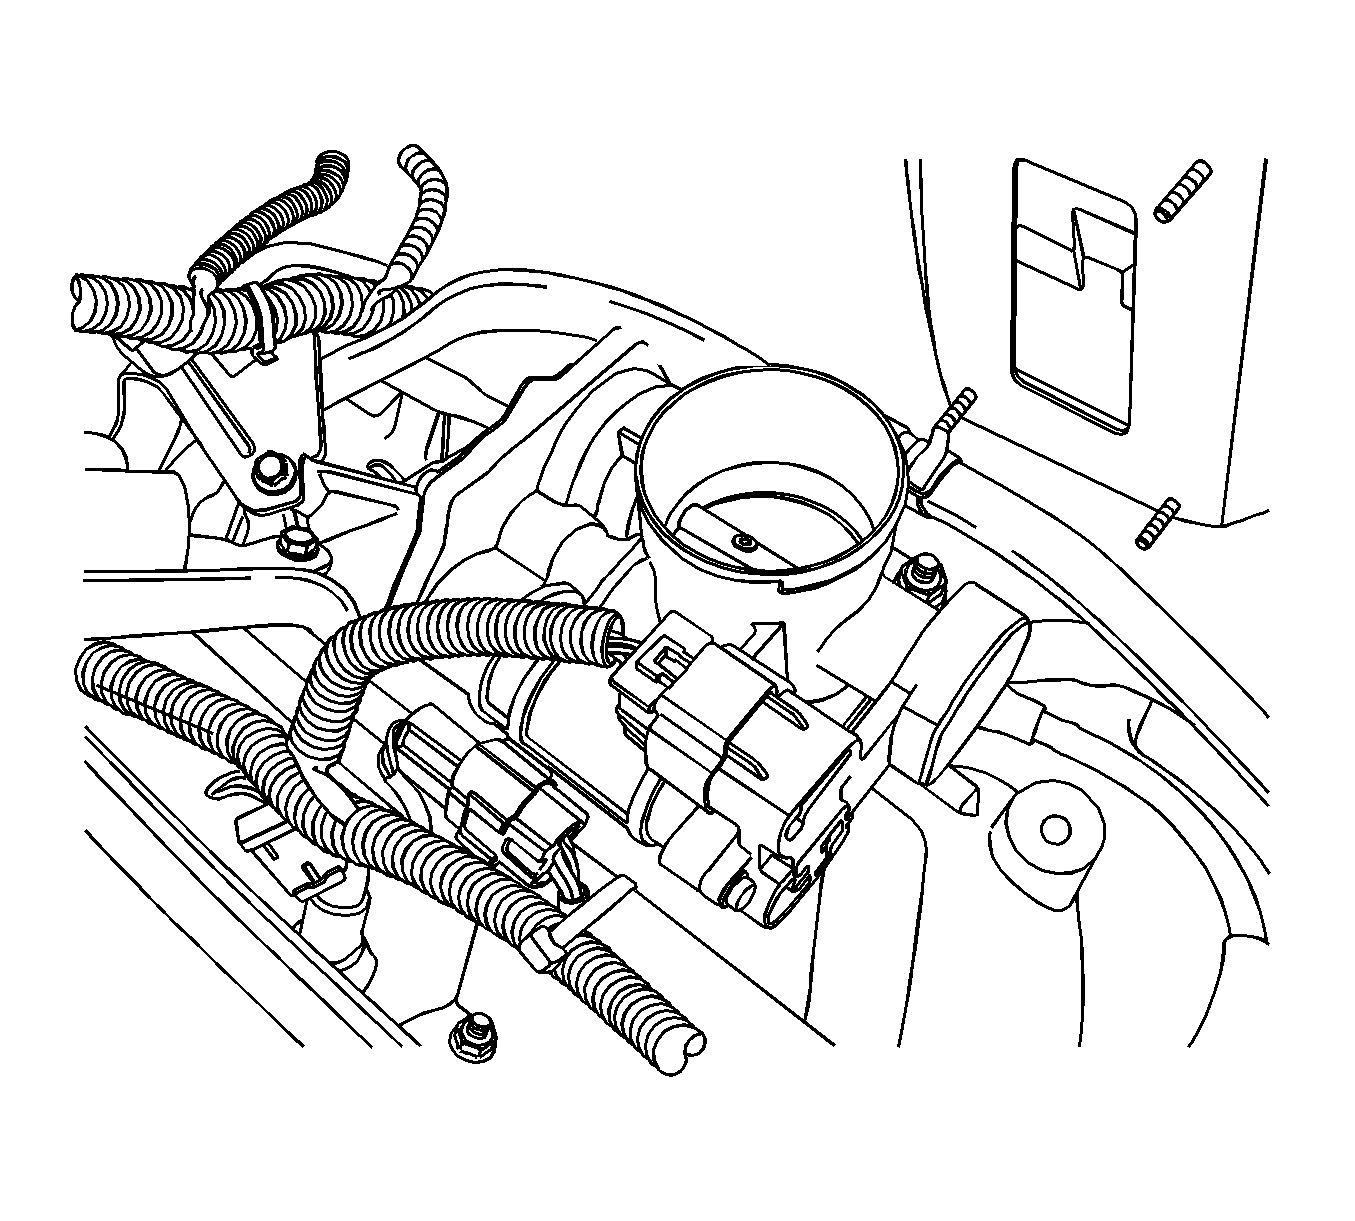
- Disconnect the idle air control (IAC) valve connector.
- Disconnect the electronic throttle control (ETC) sensor connector.
- Disconnect the engine coolant temperature (ECT) sensor connector.
- Disconnect the coolant temperature sensor (CTS) connector.
- Disconnect the camshaft position (CMP) sensor connector.
- Remove the air cleaner housing bolts.
- Remove the air cleaner housing.
- Remove the right front wheel. Refer to Tire and Wheel Removal and Installation.
- Remove the right front wheel well splash shield. Refer to Wheelhouse Splash Shield Replacement.
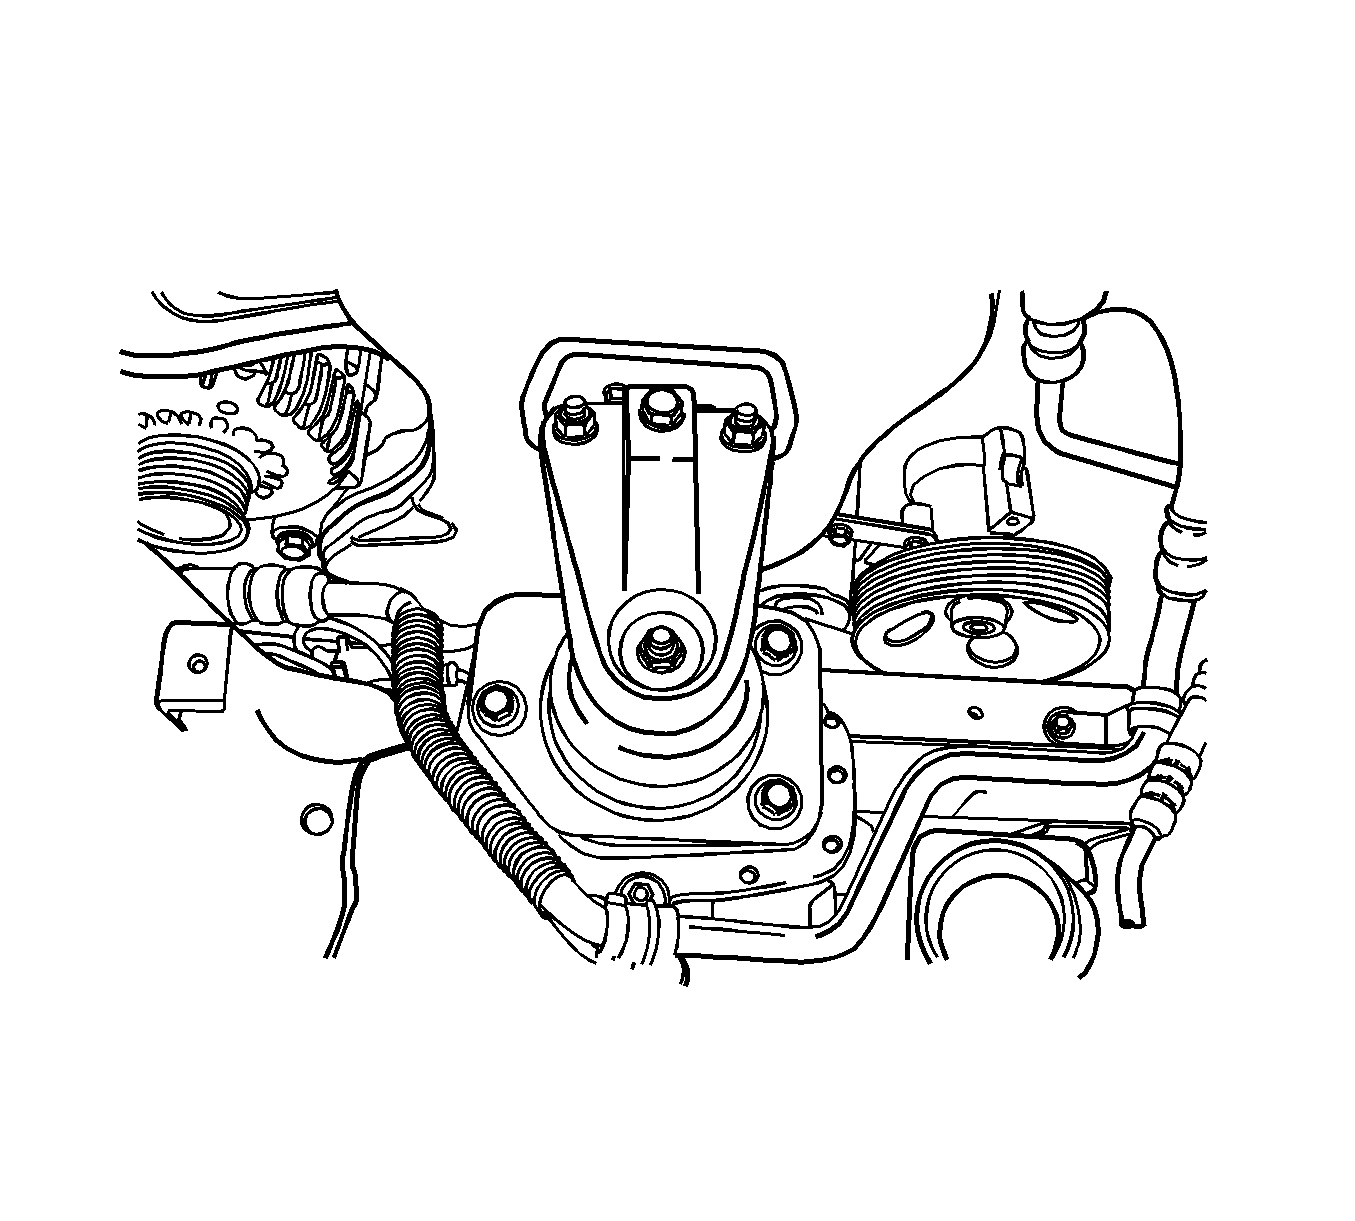
- Install the J 28467-B .
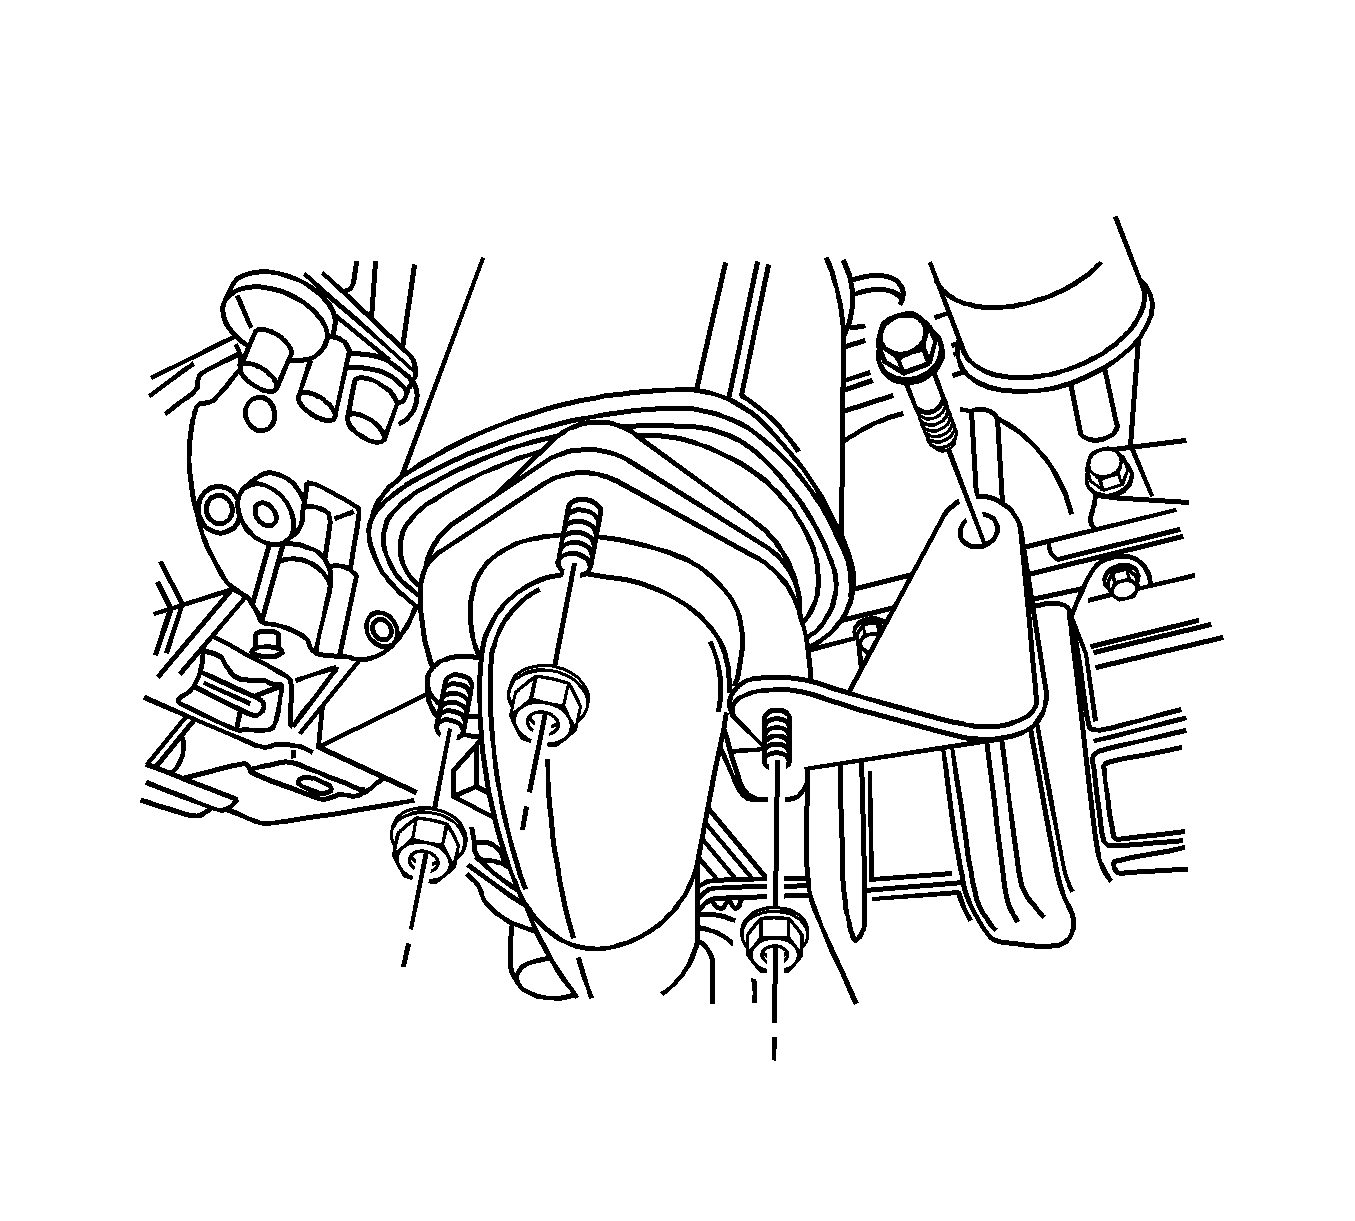
- Remove the right engine mount bracket and the retaining bolt and nuts. Refer to Engine Mount Replacement.
- Disconnect the upper radiator hose at the thermostat housing.
- Remove the power steering pump drive belt. Refer to Power Steering Pump Belt Replacement.
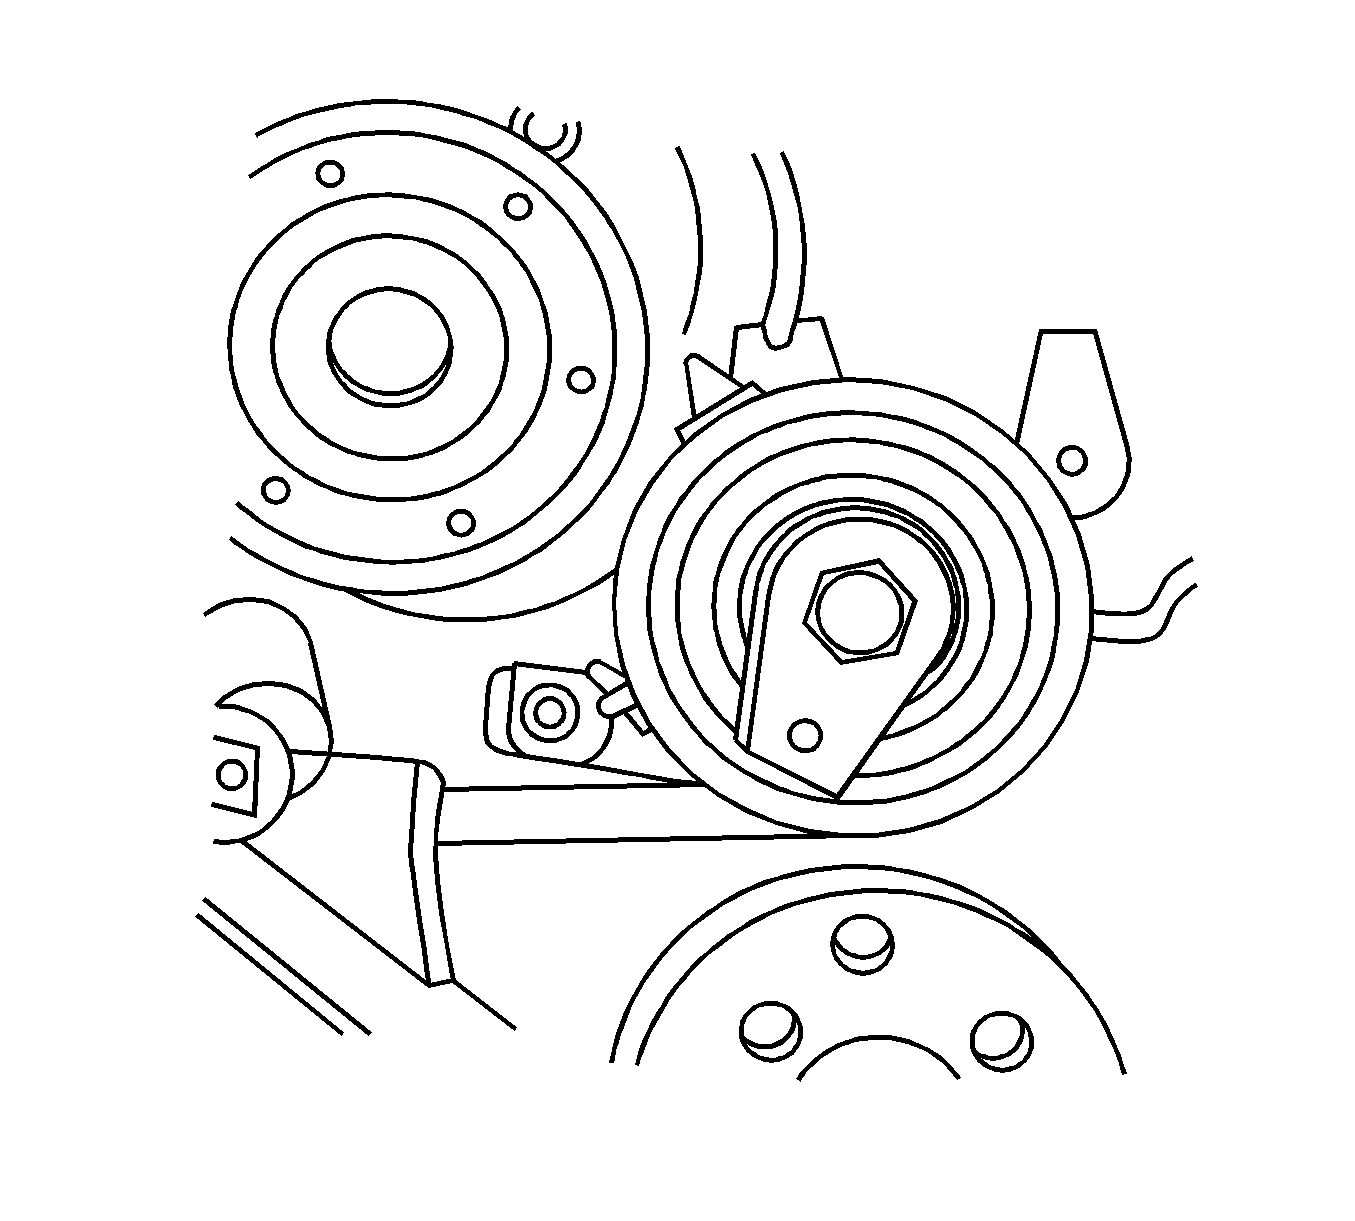
- Remove the crankshaft pulley bolts.
- Remove the crankshaft pulley.
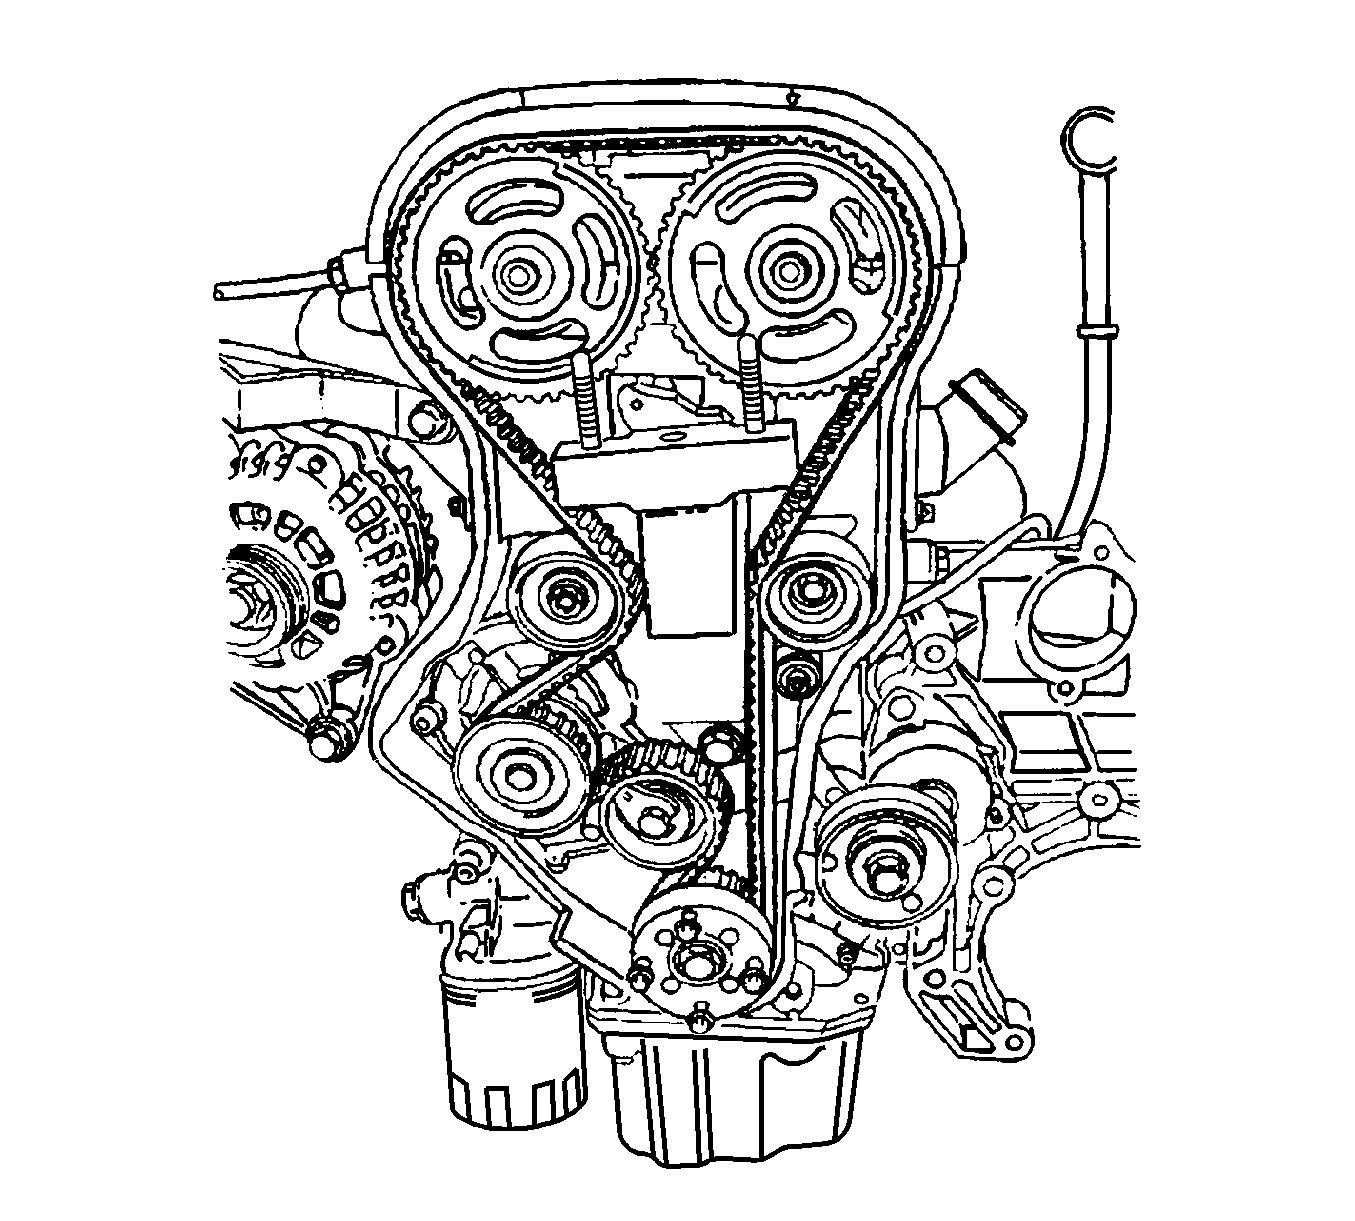
- Remove the front timing belt cover bolts.
- Remove the front timing belt cover.
- Remove the timing belt. Refer to Timing Belt Replacement.
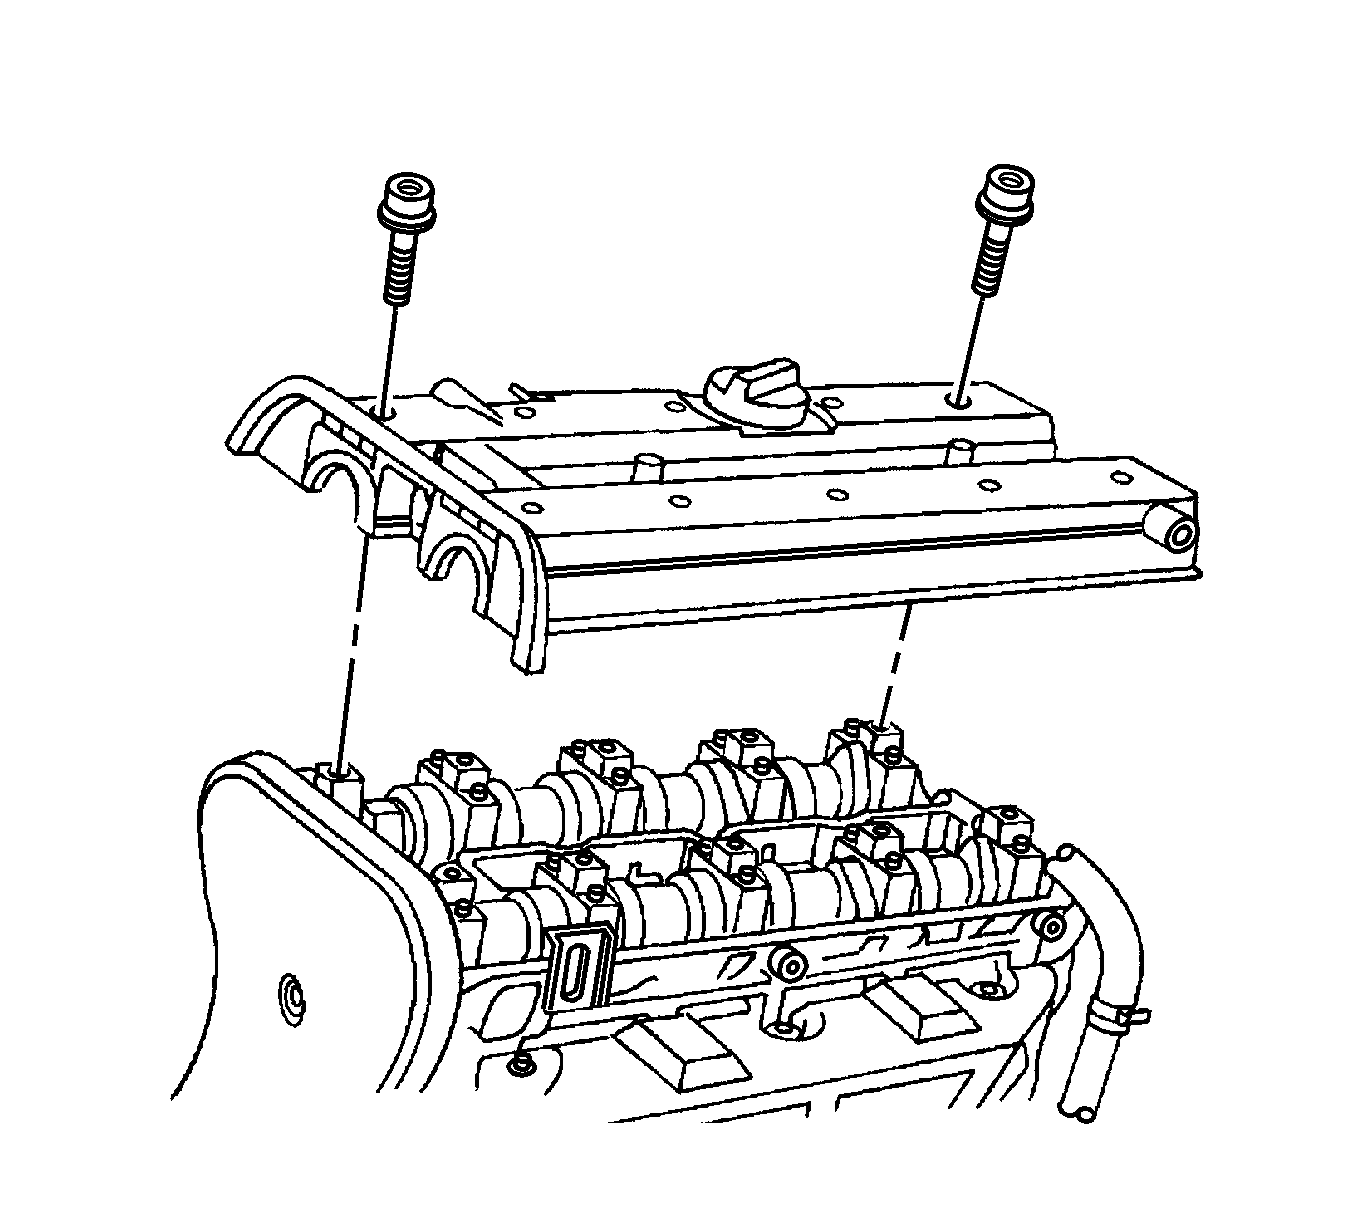
- Disconnect the breather tube at the camshaft cover.
- Remove the spark plug cover bolts.
- Remove the spark plug cover.
- Disconnect the ignition wires from the spark plugs.
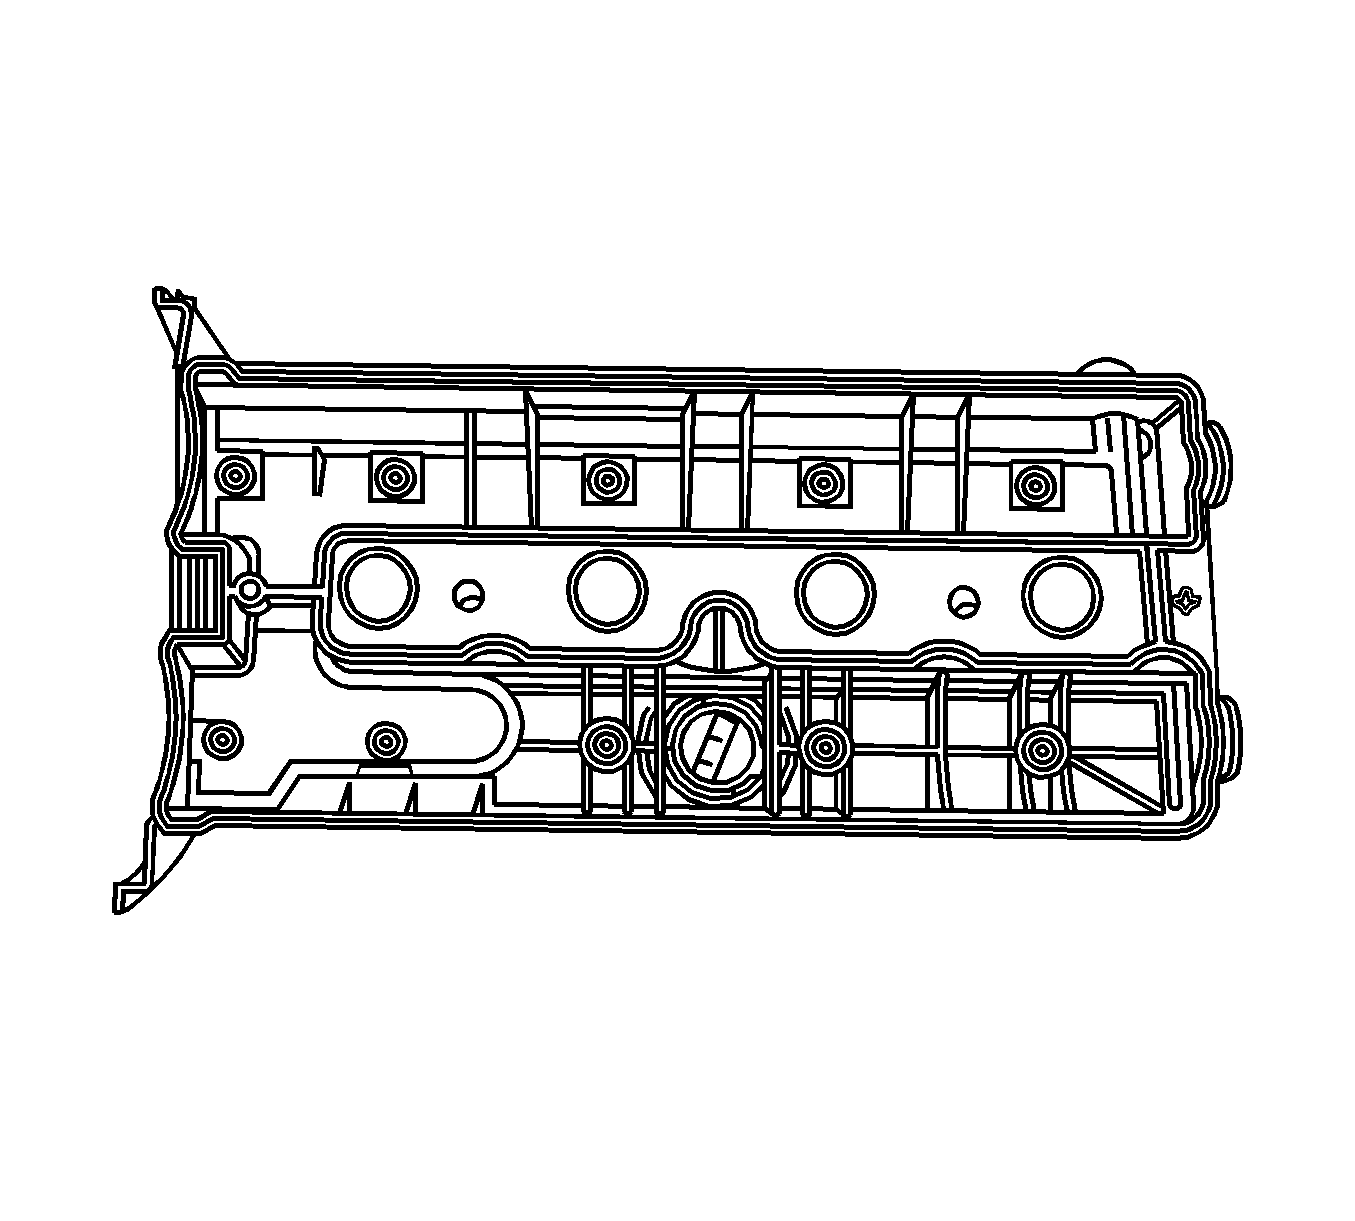
- Remove the valve cover bolts.
- Remove the valve cover and the valve cover gasket.
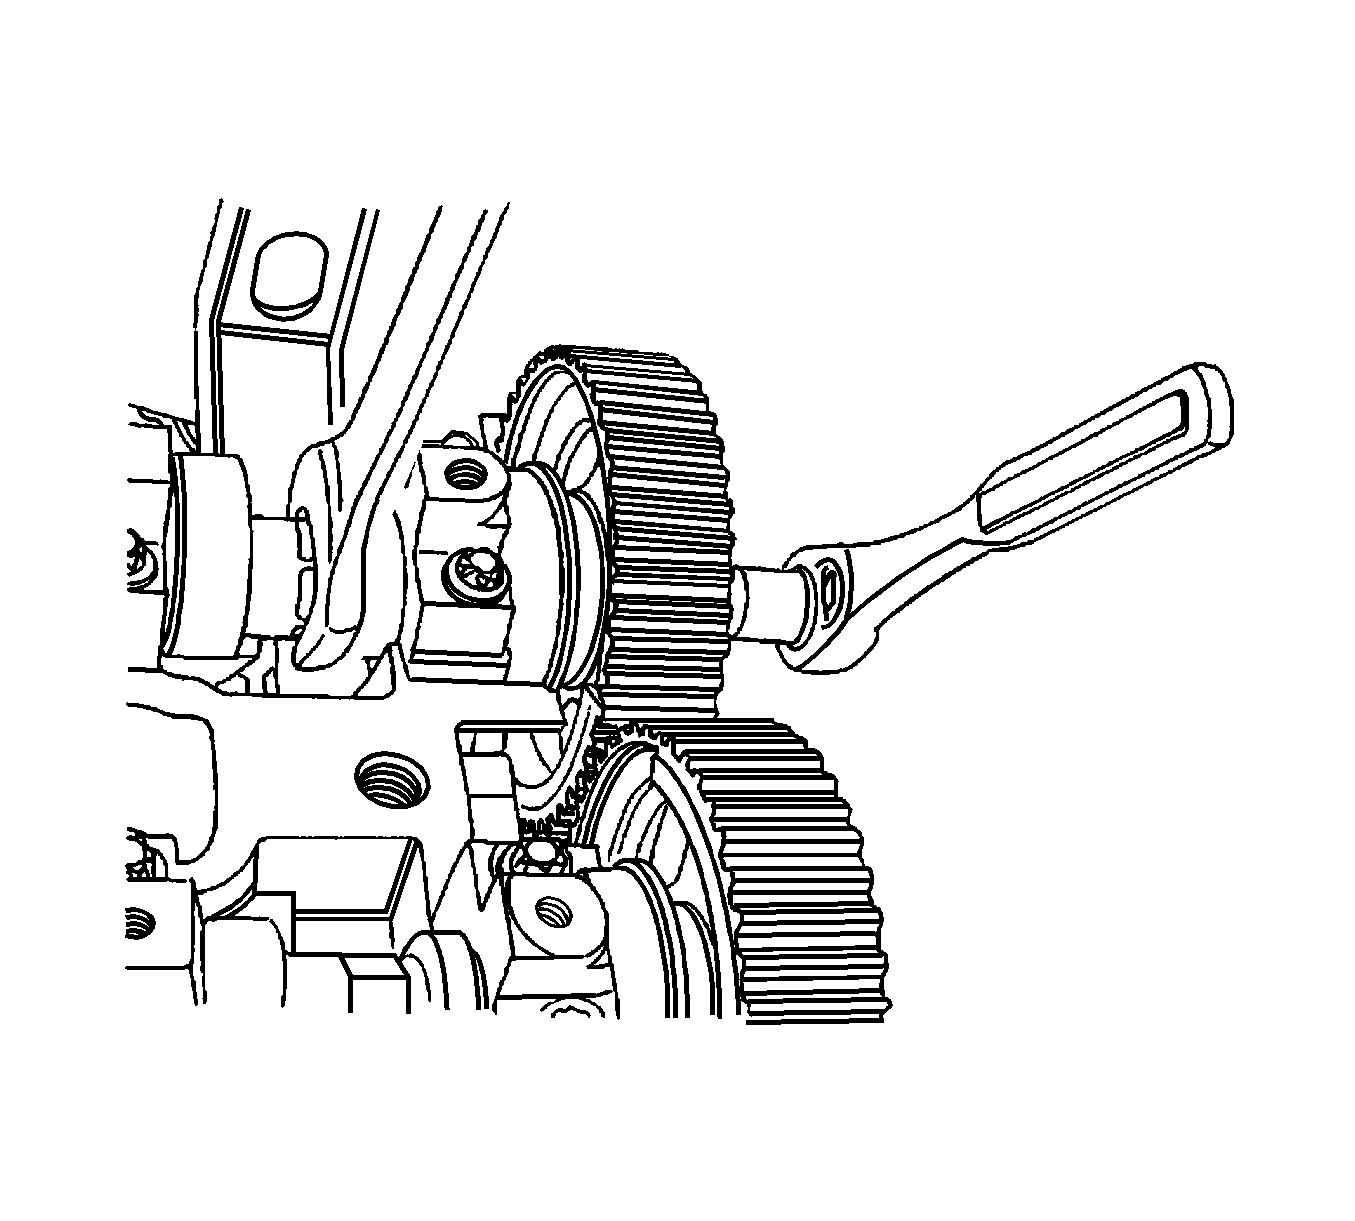
- While holding the intake camshaft firmly in place, remove the intake camshaft gear bolt.
- Remove the intake camshaft gear.
- While holding the exhaust camshaft firmly in place, remove the exhaust camshaft gear bolt.
- Remove the exhaust camshaft gear.
- Remove the timing belt tensioner bolts.
- Remove the timing belt tensioner.
- Remove the timing belt idler pulley bolt and nut.
- Remove the timing belt idler pulleys.
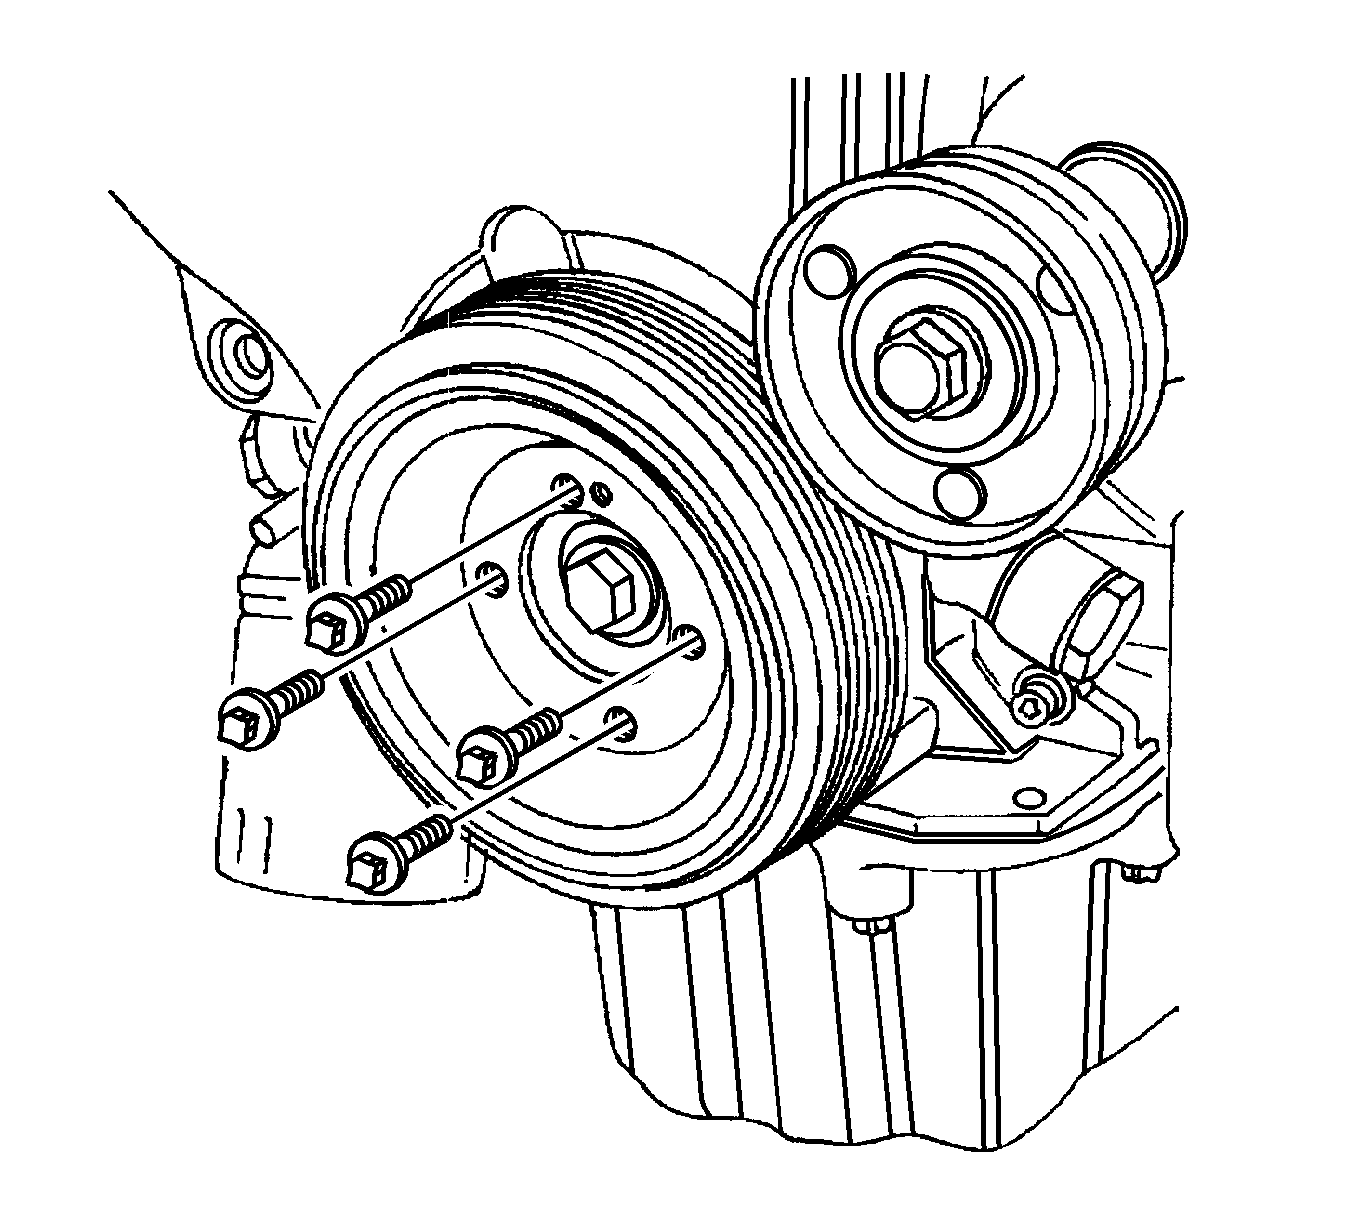
- Remove the engine mount bolts.
- Remove the engine mount.
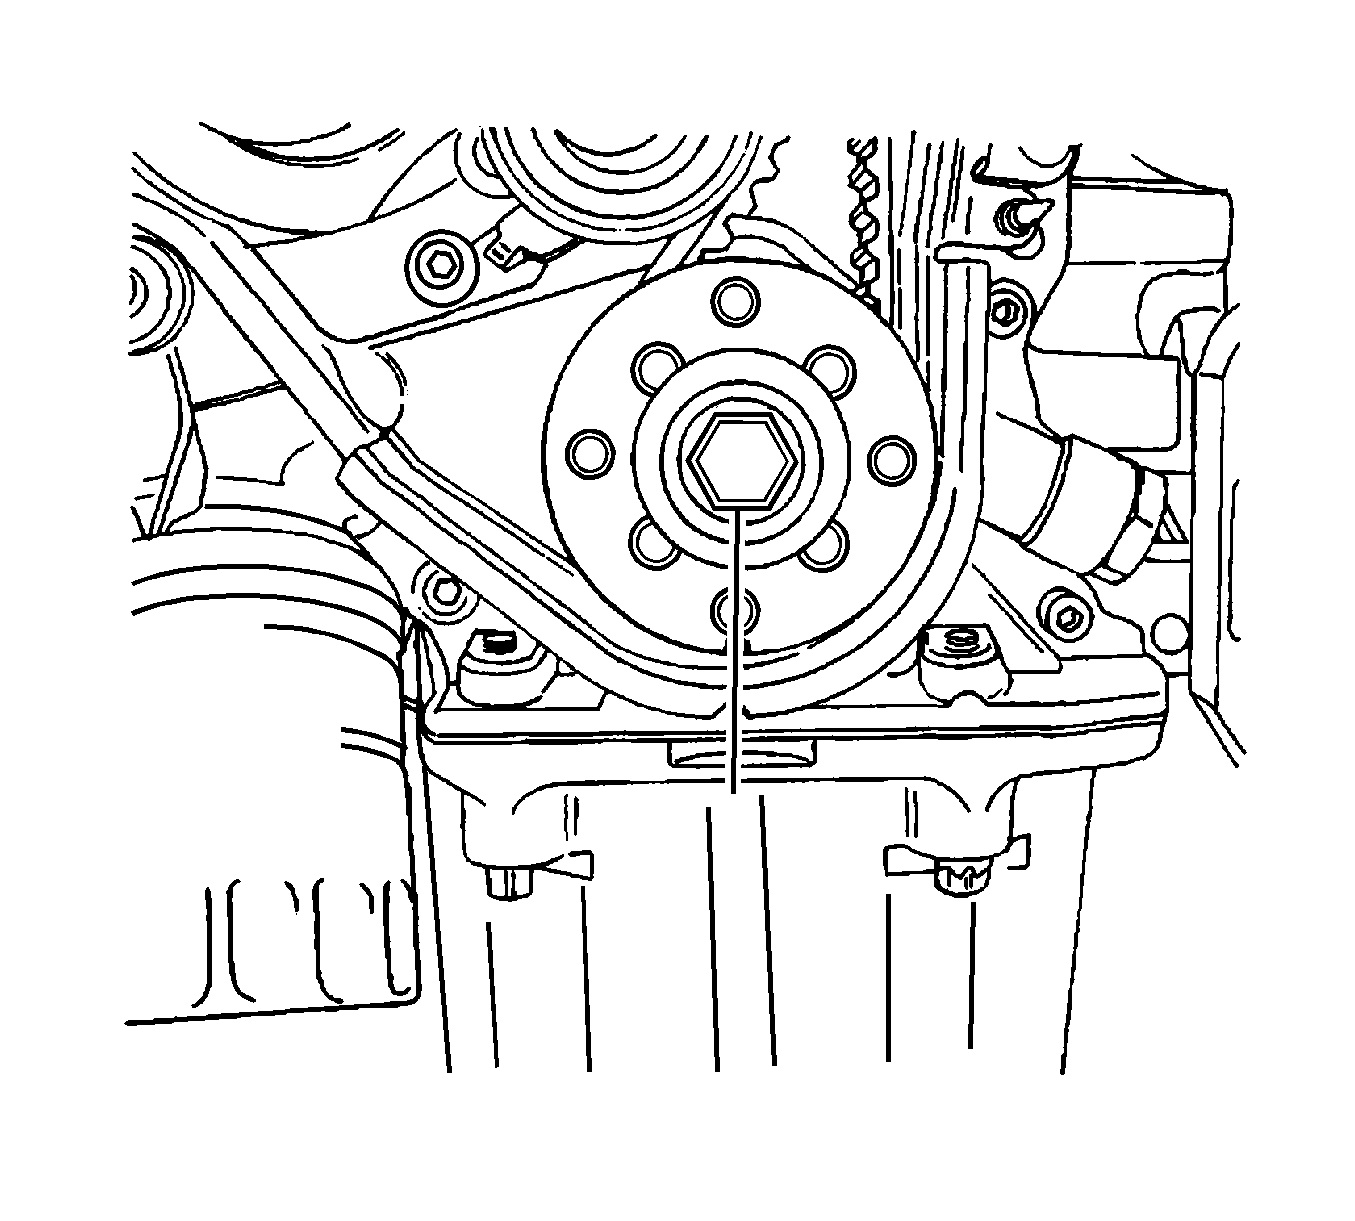
- Remove the crankshaft gear.
- Remove the camshaft position CMP sensor.
- Remove the water pump. Refer to Coolant Pump Replacement.
- Remove the rear timing belt cover bolts.
- Remove the exhaust flex pipe retaining nuts from the exhaust manifold studs.
- Disconnect the vacuum hoses, as needed.
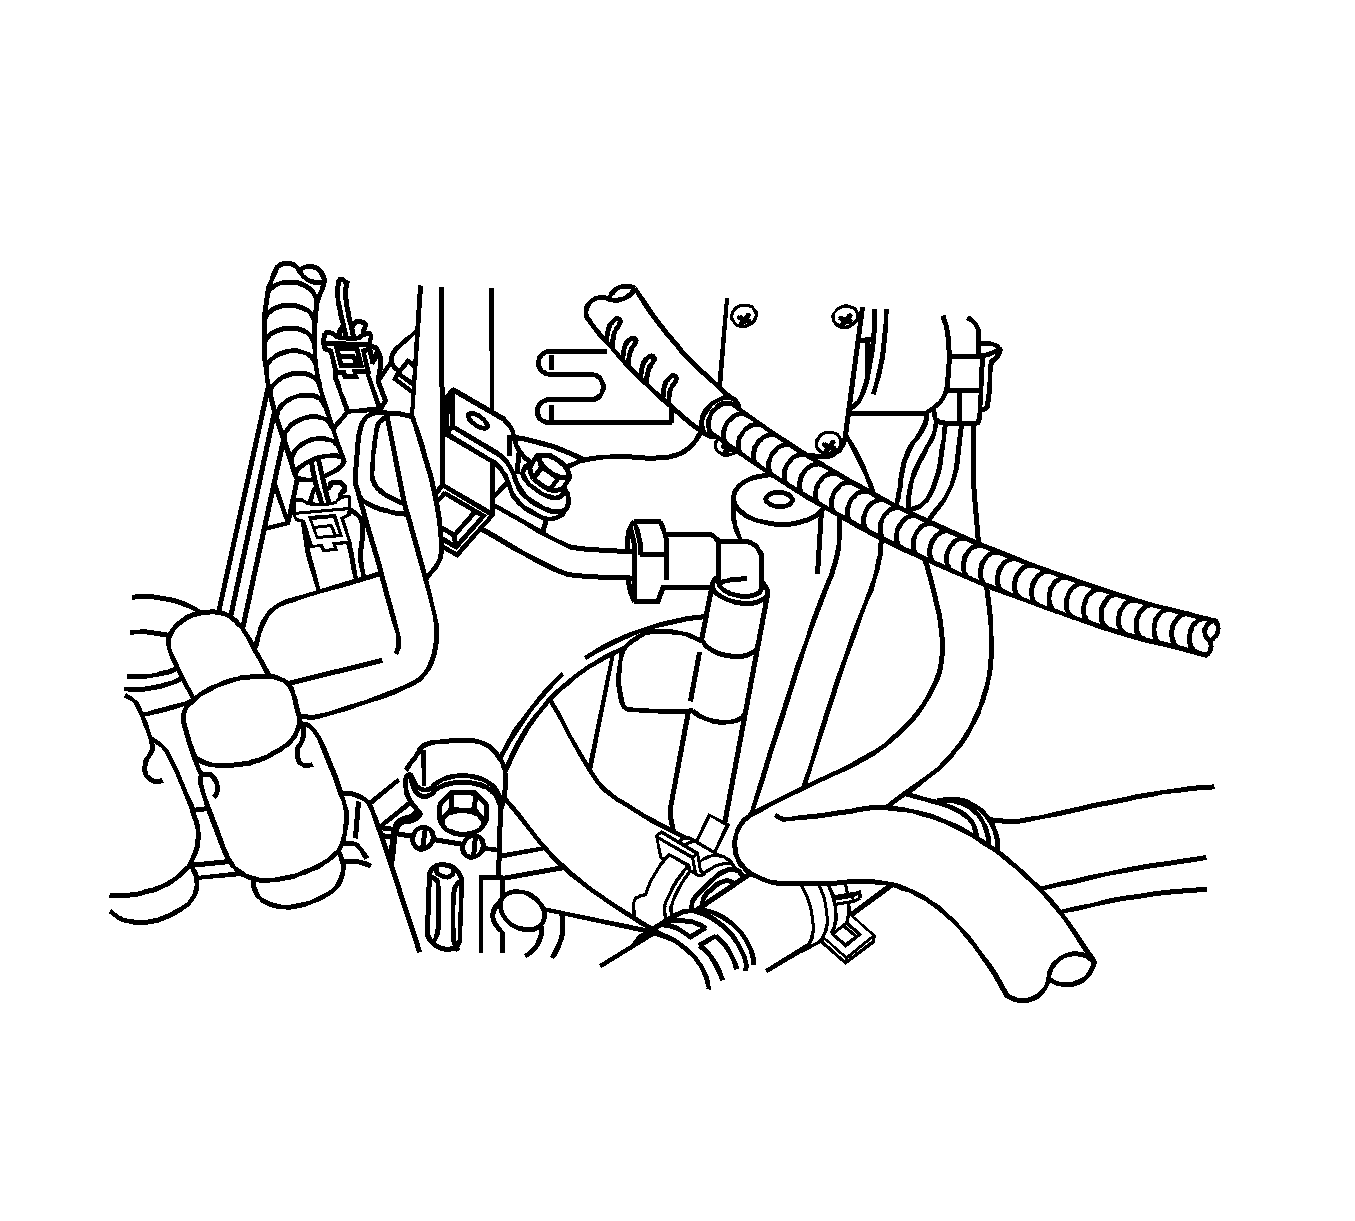
- Disconnect the fuel return line at the fuel pressure regulator.
- Remove the alternator adjusting bracket retaining bolt and bracket.
- Disconnect the fuel feed line at the fuel rail.
- Disconnect the coolant hose at the rear cylinder head and ignition coil exhaust gas recirculation (EGR) bracket.
- Disconnect the surge tank coolant hose at the throttle body.
- Remove the fuel rail assembly. Refer to Fuel Injection Fuel Rail Assembly Replacement.
- Remove the alternator-to-intake manifold support bracket bolts at the cylinder head coolant bypass and the intake manifold.
- Remove the alternator support bracket.
- Remove the intake manifold-to-alternator strap bracket bolt and loosen the bolt on the alternator.
- Move the strap clear of the intake manifold.
- Remove the canister purge solenoid bracket bolt and move the bracket clear, if equipped.
- Disconnect the throttle cable at the throttle body and the intake manifold.
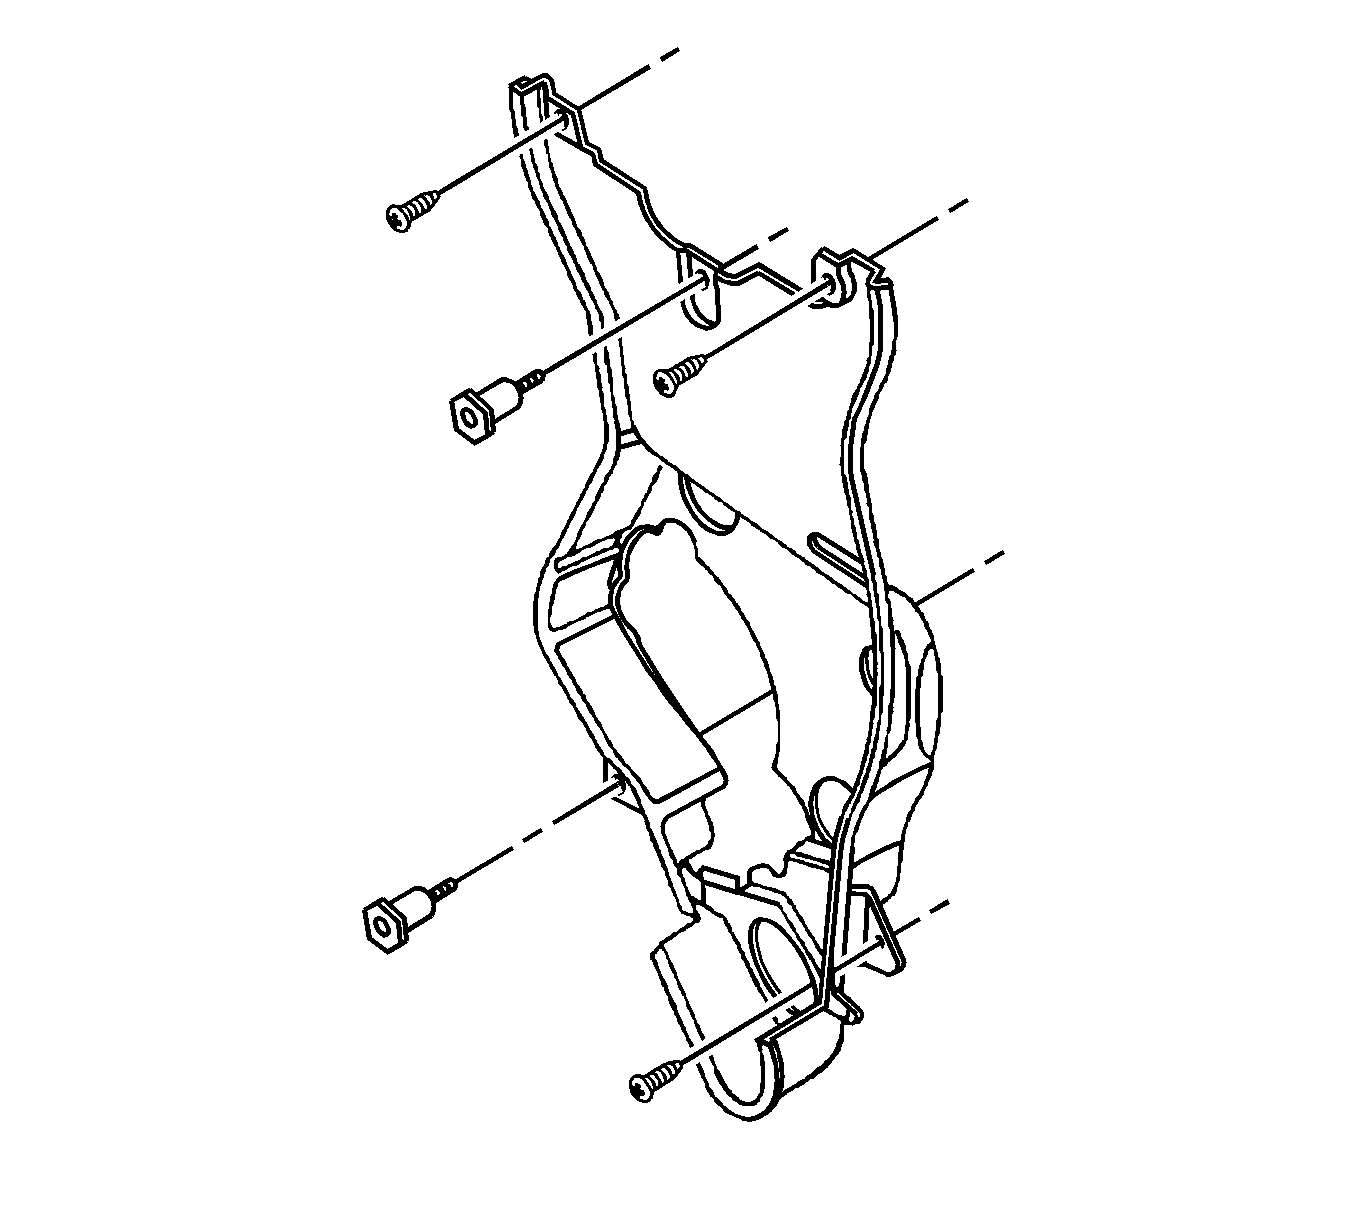
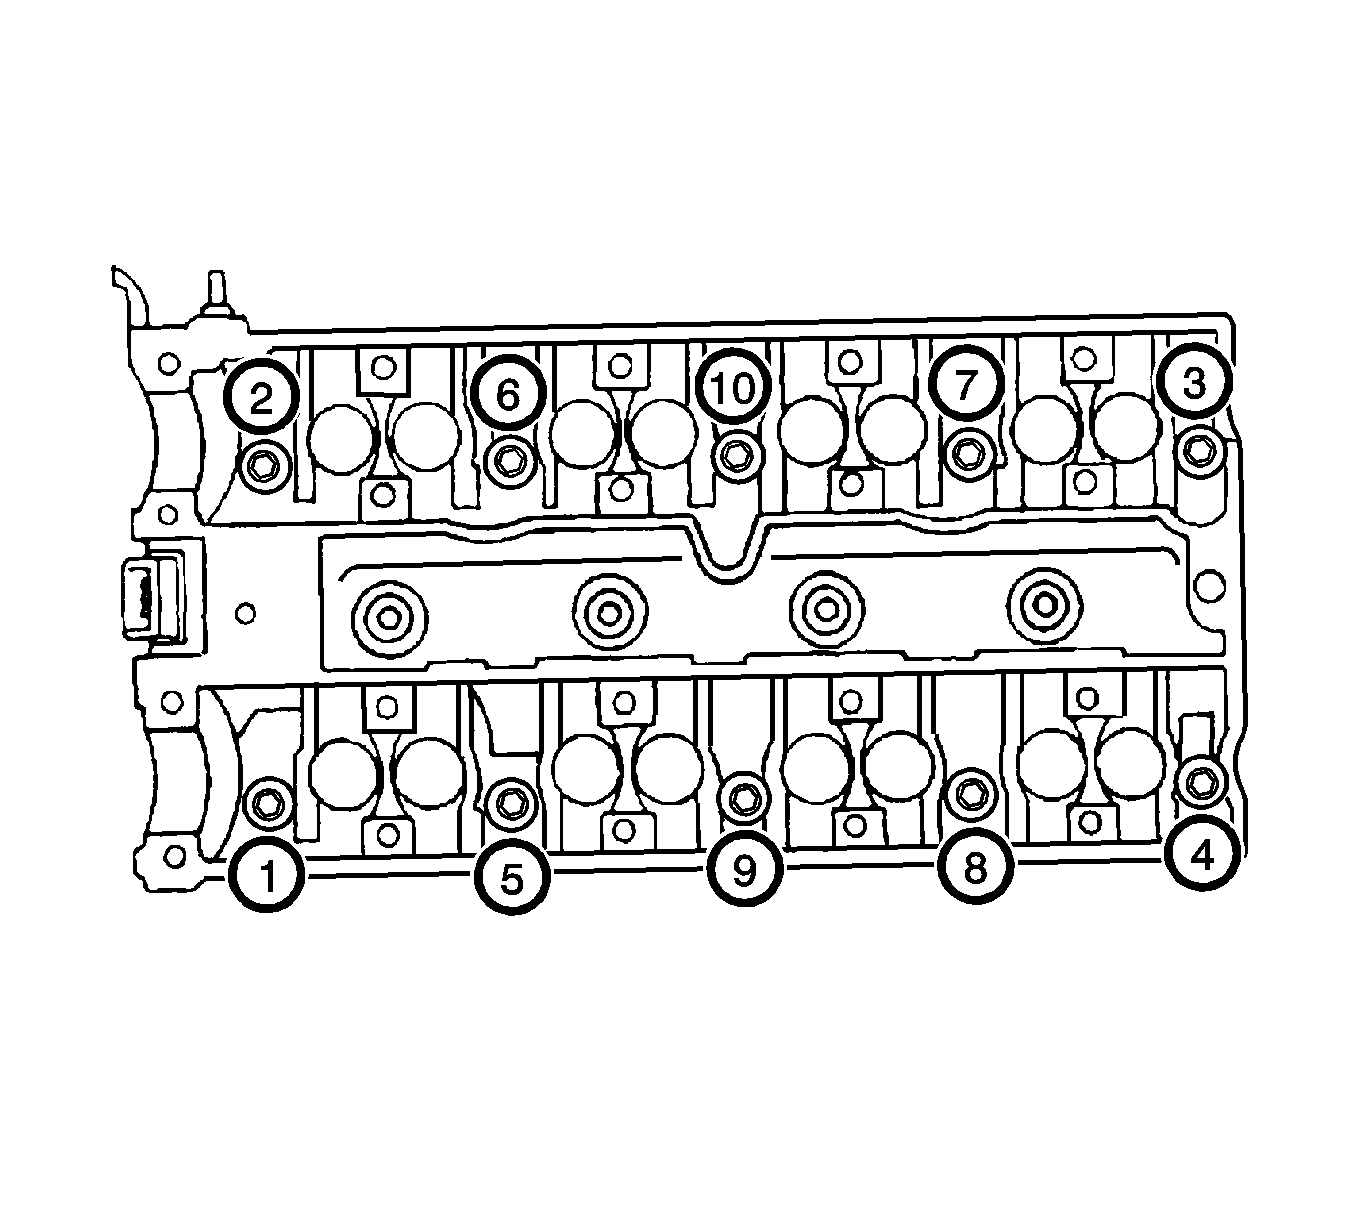
- Loosen all of the cylinder head bolts gradually and in the sequence shown.
- Remove the camshaft.
- Remove the cylinder head bolts.
- Remove the cylinder head with the intake manifold and the exhaust manifold attached.
- Remove the cylinder head gasket.
- Clean the gasket surfaces of the cylinder head and the engine block. Refer to Cylinder Head Cleaning and Inspection.
Warning: Refer to Compressed Valve Spring Warning in the Preface section.
Warning: Refer to Safety Glasses Warning in the Preface section.
Warning: Refer to Battery Disconnect Warning in the Preface section.
Caution: Refer to Belt Dressing Caution in the Preface section.

Caution: Use extreme care when installing the camshaft not to nick, scratch, or damage the camshaft lobes or bearing surfaces.


Note: Prevent any engine oil or coolant from entering the cylinders when removing the cylinder head.
Installation Procedure
- Install the cylinder head gasket.
- Install the cylinder head with the intake manifold and the exhaust manifold attached.
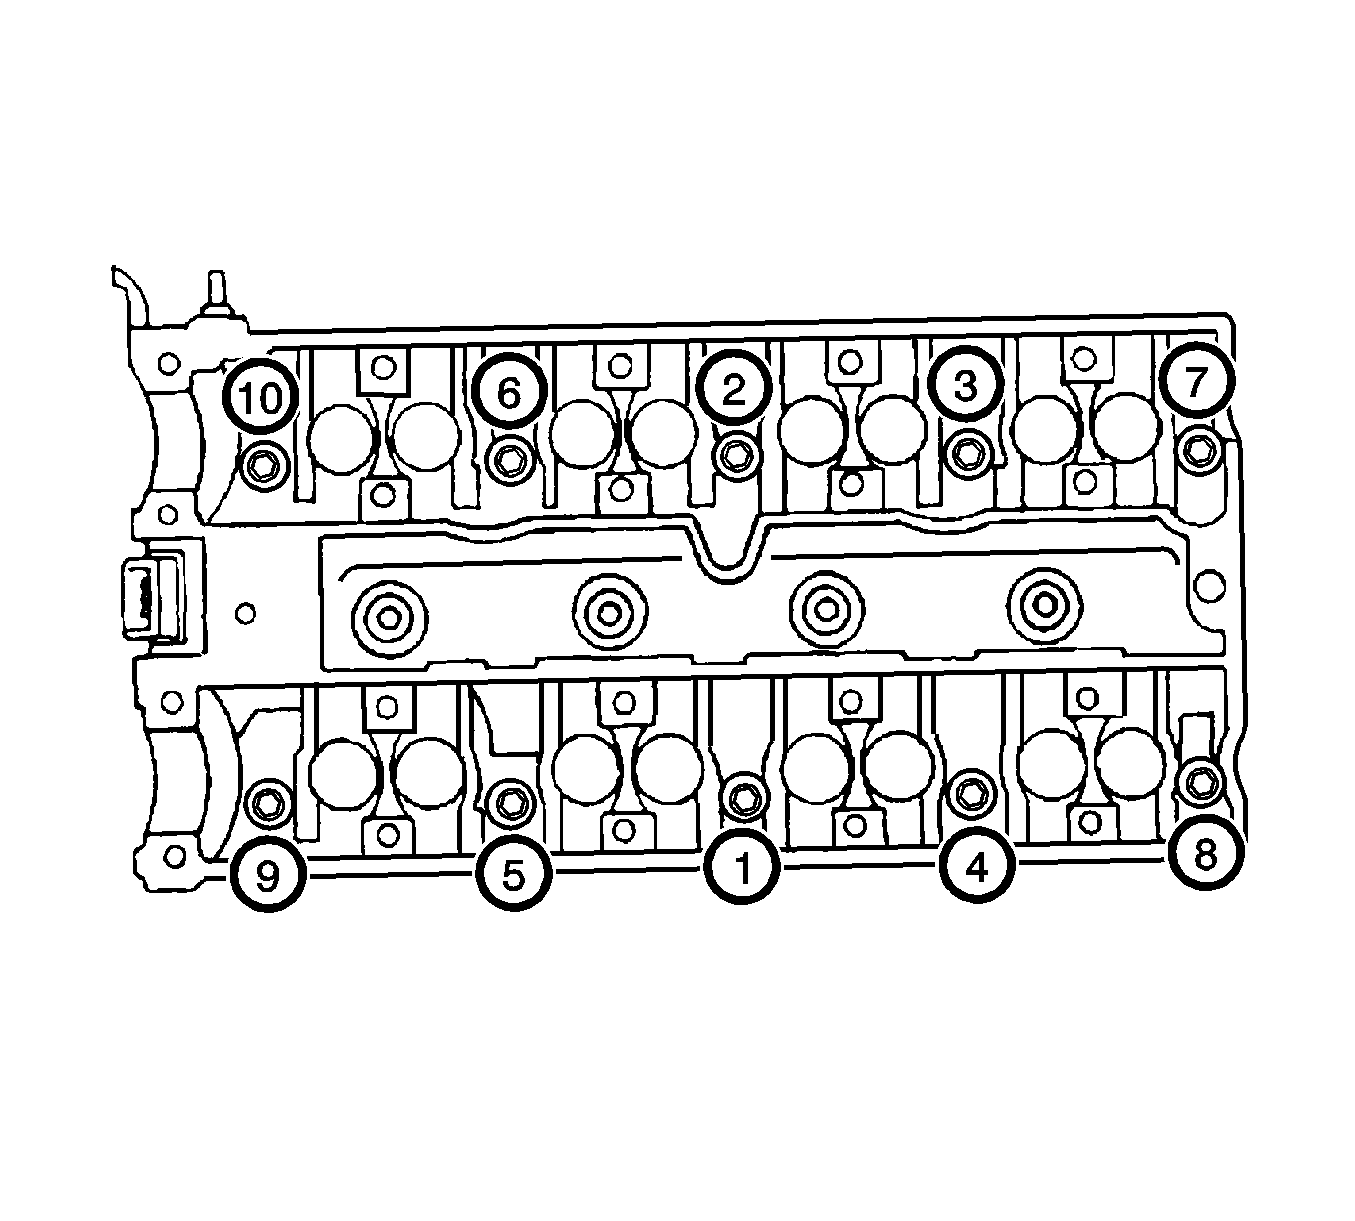
- Install the cylinder head bolts.
- Tighten the cylinder head bolts gradually and in the sequence shown.
- Install the camshaft.
- Connect the throttle cable at the throttle body and the intake manifold.
- Install the alternator-to-intake manifold support bracket.
- Install the alternator-to-manifold support bracket bolts.
- Install the intake manifold support bracket bolts to the alternator.
- Connect the surge tank coolant hose at the throttle body.
- Connect the coolant hose to the rear cylinder head and ignition coil EGR bracket.
- Connect the fuel feed line at the fuel rail.
- Connect the fuel return line at the fuel rail.
- Connect all of the necessary vacuum hoses.
- Install the fuel rail assembly. Refer to Fuel Injection Fuel Rail Assembly Replacement.
- Install the exhaust flex pipe retaining nuts to the exhaust manifold studs.
- Install the rear timing belt cover bolts.
- Install the engine mount and engine mount bolts.
- Install the camshaft position CMP sensor.
- Install the crankshaft gear.
- Install the water pump. Refer to Coolant Pump Replacement.
- Install the tensioner.
- Install the tensioner bolt.
- Install the timing belt idler pulleys.
- Install the timing belt idler pulley bolt and nut.
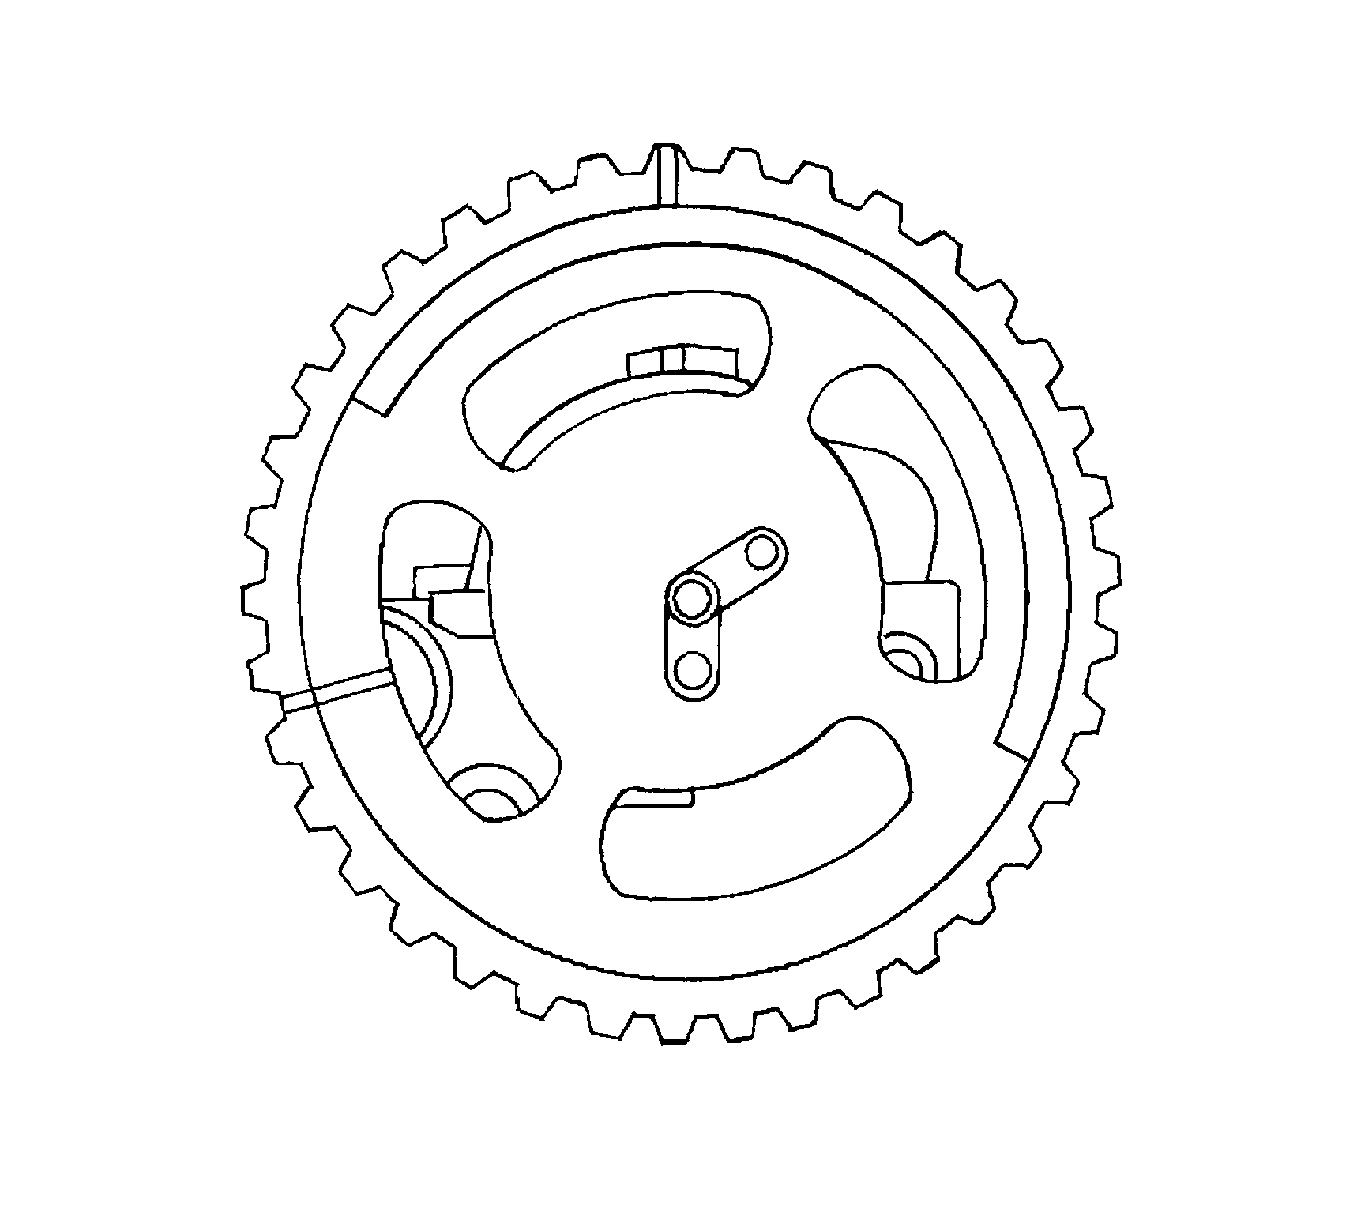
- Install the camshaft gears with the timing marks at the front.
- Insert the guide pin of the intake camshaft into the IN bore.
- Insert the guide pin of the exhaust camshaft into the EX bore.
- Install the camshaft gears by counterholding on the hex of the camshaft with an open-ended wrench.
- Install the intake camshaft gear with a new bolt to the camshaft.
- While holding the exhaust camshaft firmly in place, install the exhaust camshaft gear bolt.
- Apply a small amount of gasket sealant to the corners of the front camshaft caps and to the top of the rear valve cover-to-cylinder head seal.
- Install the valve cover and the valve cover gasket.
- Install the valve cover washers.
- Install the valve cover bolts.
- Connect the ignition wires to the spark plugs.
- Install the spark plug cover.
- Install the spark plug cover bolts.
- Connect the breather tube to the valve cover.
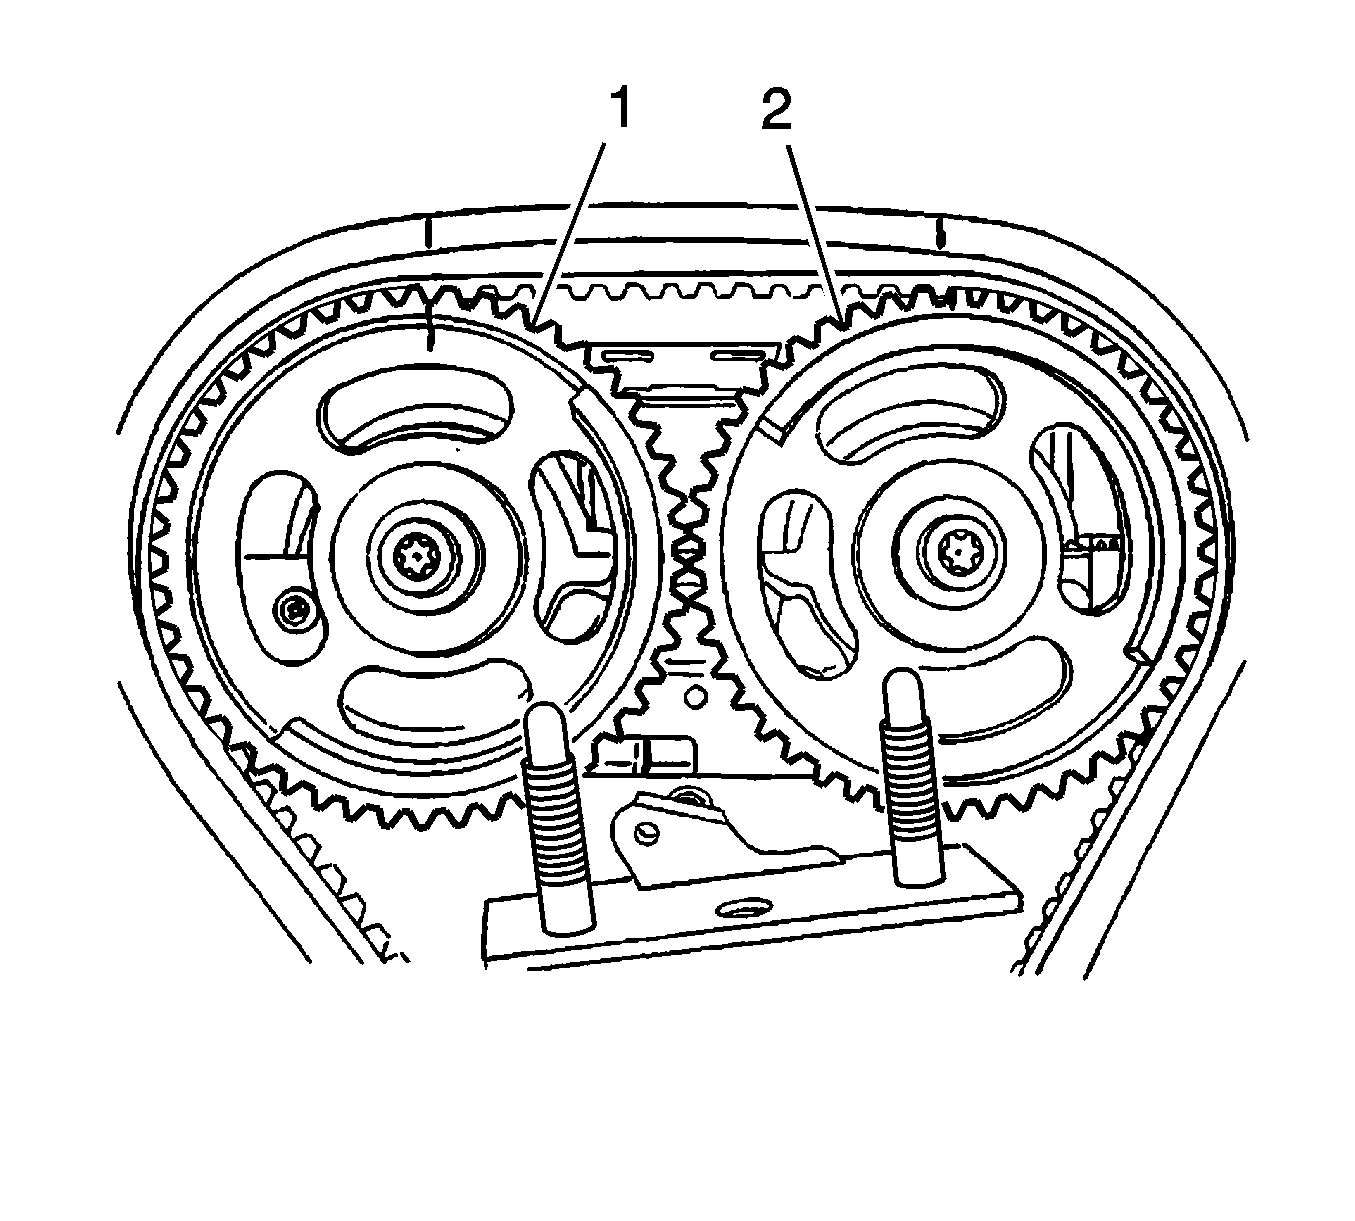
- Align the timing marks on the camshaft gears to the notches on the valve cover, using the intake gear (1) mark for the intake gear and the exhaust gear mark for the exhaust gear (2).
- Align the mark on the crankshaft gear with the notch at the bottom of the rear timing belt cover.
- Install the timing belt. Refer to Timing Belt Replacement.
- Check and adjust the timing belt tension. Refer to Timing Belt Inspection.
- Install the front timing belt cover.
- Install the front timing belt cover bolts.
- Install the crankshaft pulley.
- Install the crankshaft pulley bolts.
- Install the right engine mount bracket, the retaining bolts, and the nut.
- Remove the J 28467-B .
- Install the power steering pump. Refer to Power Steering Pump Belt Replacement.
- Connect the upper radiator hose to the thermostat housing.
- Install the front wheel well splash shield. Refer to Wheelhouse Splash Shield Replacement.
- Install the right front wheel. Refer to Tire and Wheel Removal and Installation.
- Install the air cleaner housing.
- Install the air cleaner housing bolts.
- Connect the air intake tube to the throttle body.
- Connect the breather tube to the valve cover.
- Connect the MAT sensor connector.
- Connect the CTS connector.
- Connect the engine CTS connector.
- Connect the IAC valve connector.
- Connect the electronic throttle control (ETC) connector.
- Install the canister purge solenoid bracket bolt.
- Connect the ignition coil connector.
- Connect the oxygen sensor connector.
- Connect the ECM ground terminal.
- Install the fuel pump fuse.
- Connect the negative battery ground cable.
- Refill the engine cooling system. Refer to Cooling System Draining and Filling.
Warning: Refer to Compressed Valve Spring Warning in the Preface section.
Caution: Refer to Fastener Caution in the Preface section.
Tighten
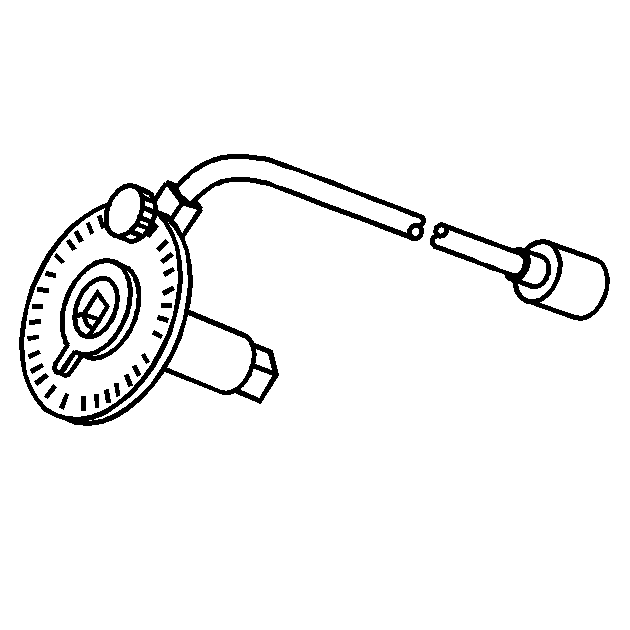
Tighten the cylinder head bolts to 25 N·m (18 lb ft) and turn the bolts another 3 turns of 90 degrees using
J 45059
or the
KM-470-B
.
Tighten
Tighten the alternator-to-intake manifold support bracket bolts at the intake manifold to 37 N·m (27 lb ft).
Tighten
Tighten the alternator-to-intake manifold support bracket bolts at the alternator to 22 N·m (16 lb ft).
Tighten
Tighten the exhaust flex pipe retaining nuts to 35 N·m (26 lb ft).
Tighten
Tighten the rear timing belt cover bolts to 7 N·m (62 lb in).
Tighten
Tighten the engine mount bolts to 45 N·m (33 lb ft).
Tighten
Tighten the tensioner bolt to 25 N·m (18 lb ft).
Tighten
Tighten the idler pulley bolt to 25 N·m (18 lb ft).
Tighten
Tighten the intake camshaft gear bolt to 50 N·m (37 lb ft), turn the bolt another 60 degrees and 15 degrees using the
J 45059
or
the
KM-470-B
.
Tighten
Tighten the exhaust camshaft gear bolt to 50 N·m (37 lb ft), turn the bolt another 60 degrees and 15 degrees using the
J 45059
or
the
KM-470-B
.
Tighten
Tighten the valve cover bolts to 8 N·m (71 lb in).
Tighten
Tighten the spark plug cover bolts to 8 N·m (71 lb in).
Tighten
Tighten the upper and lower front timing belt cover bolts to 6 N·m (53 lb in).
Tighten
Tighten the crankshaft pulley bolts to 12 N·m (106 lb in).
Tighten
Tighten the right engine mount bracket retaining bolt and nuts to 55 N·m (41 lb ft).
Caution: Refer to Belt Dressing Caution in the Preface section.
Tighten
Tighten the air cleaner housing bolts to 10 N·m (89 lb in).
Tighten
Tighten the canister purge solenoid bracket bolt to 5 N·m (44 lb in).
