For 1990-2009 cars only
Removal Procedure
- Remove the close out panel. Refer to Instrument Panel Insulator Panel Replacement - Left Side.
- Remove the instrument panel (I/P) outer trim cover. Refer to Instrument Panel Outer Trim Cover Replacement.
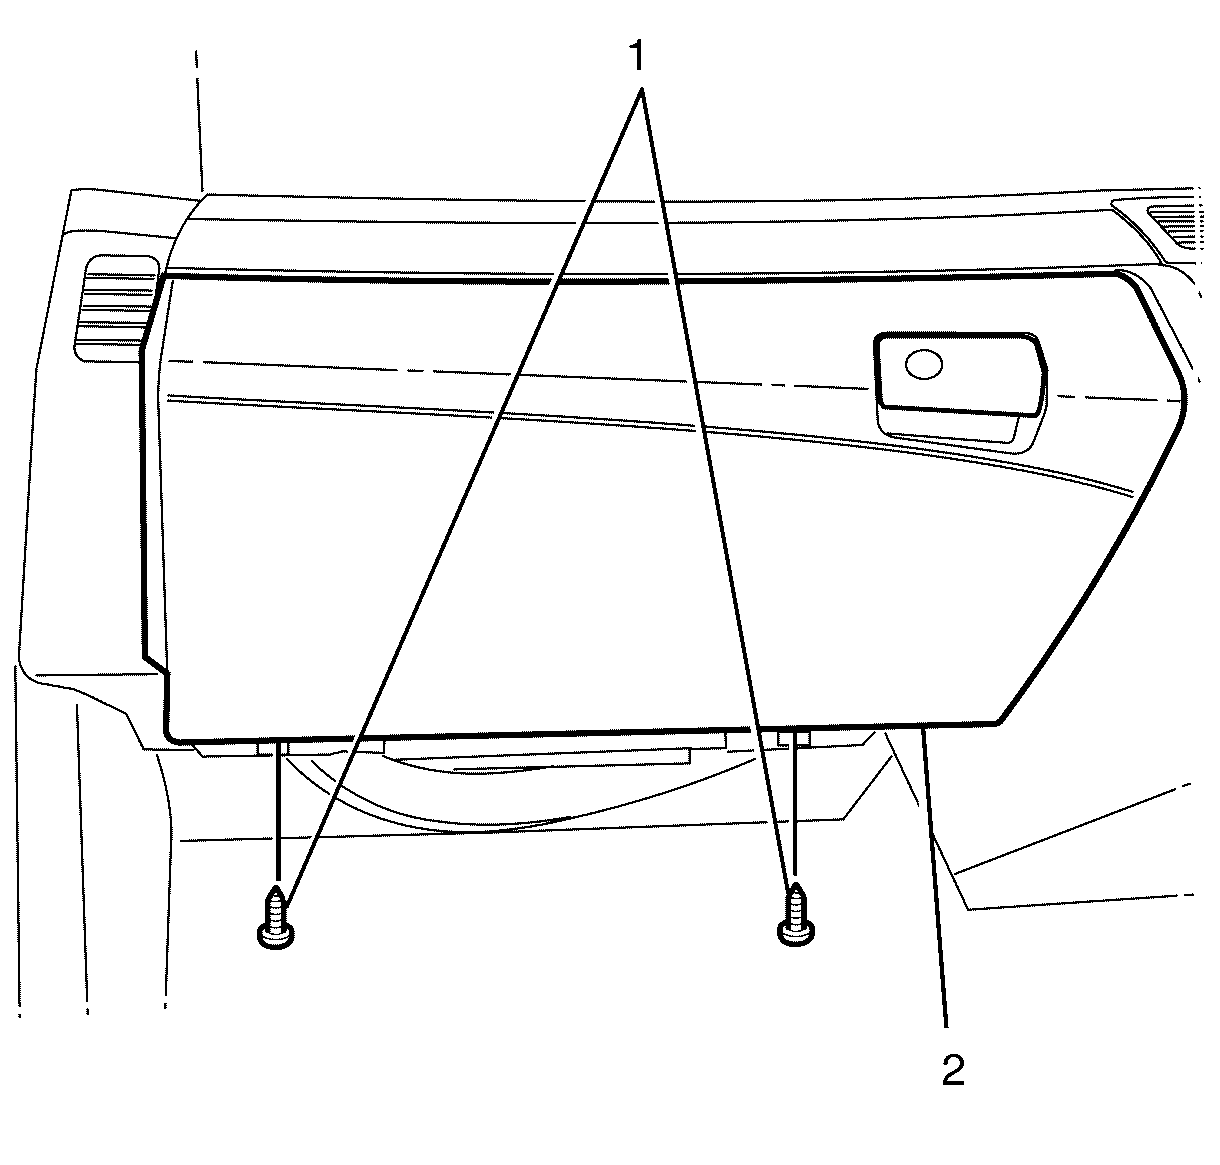
- Remove the I/P compartment assembly (2) lower retaining screws (1).
- Open the I/P compartment assembly (2) door.
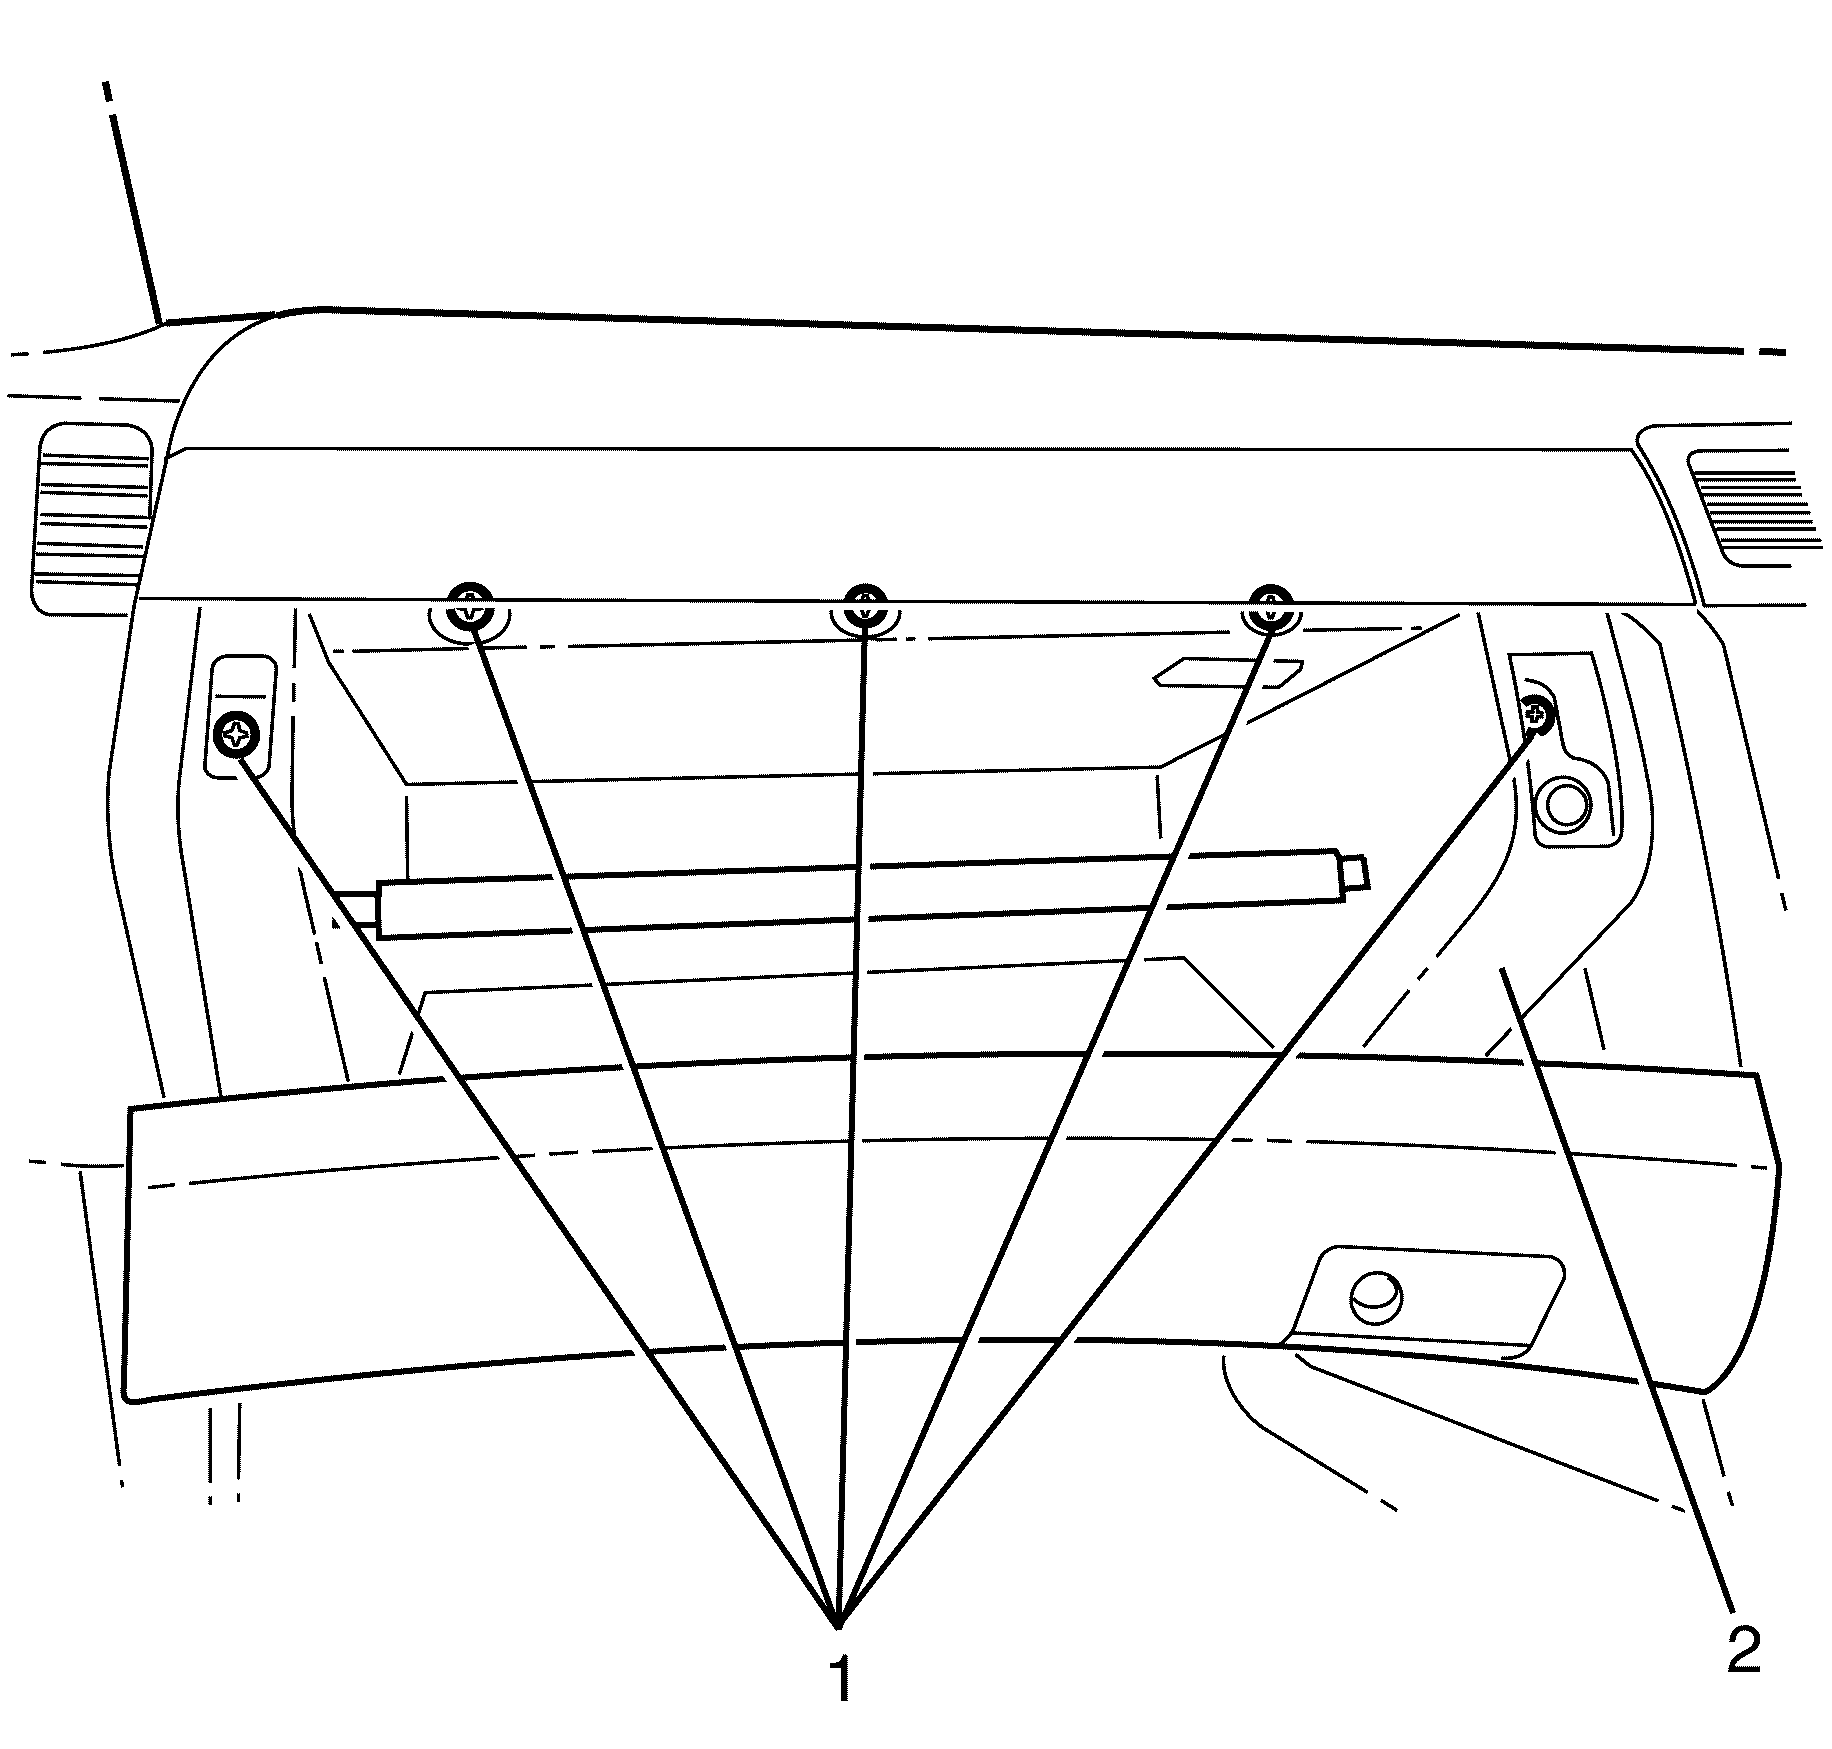
- Using a suitable tool pry the screw covers (1) from the I/P compartment (2).
- Remove the I/P compartment (2) upper retaining screws (1).
- Remove the I/P compartment (2).
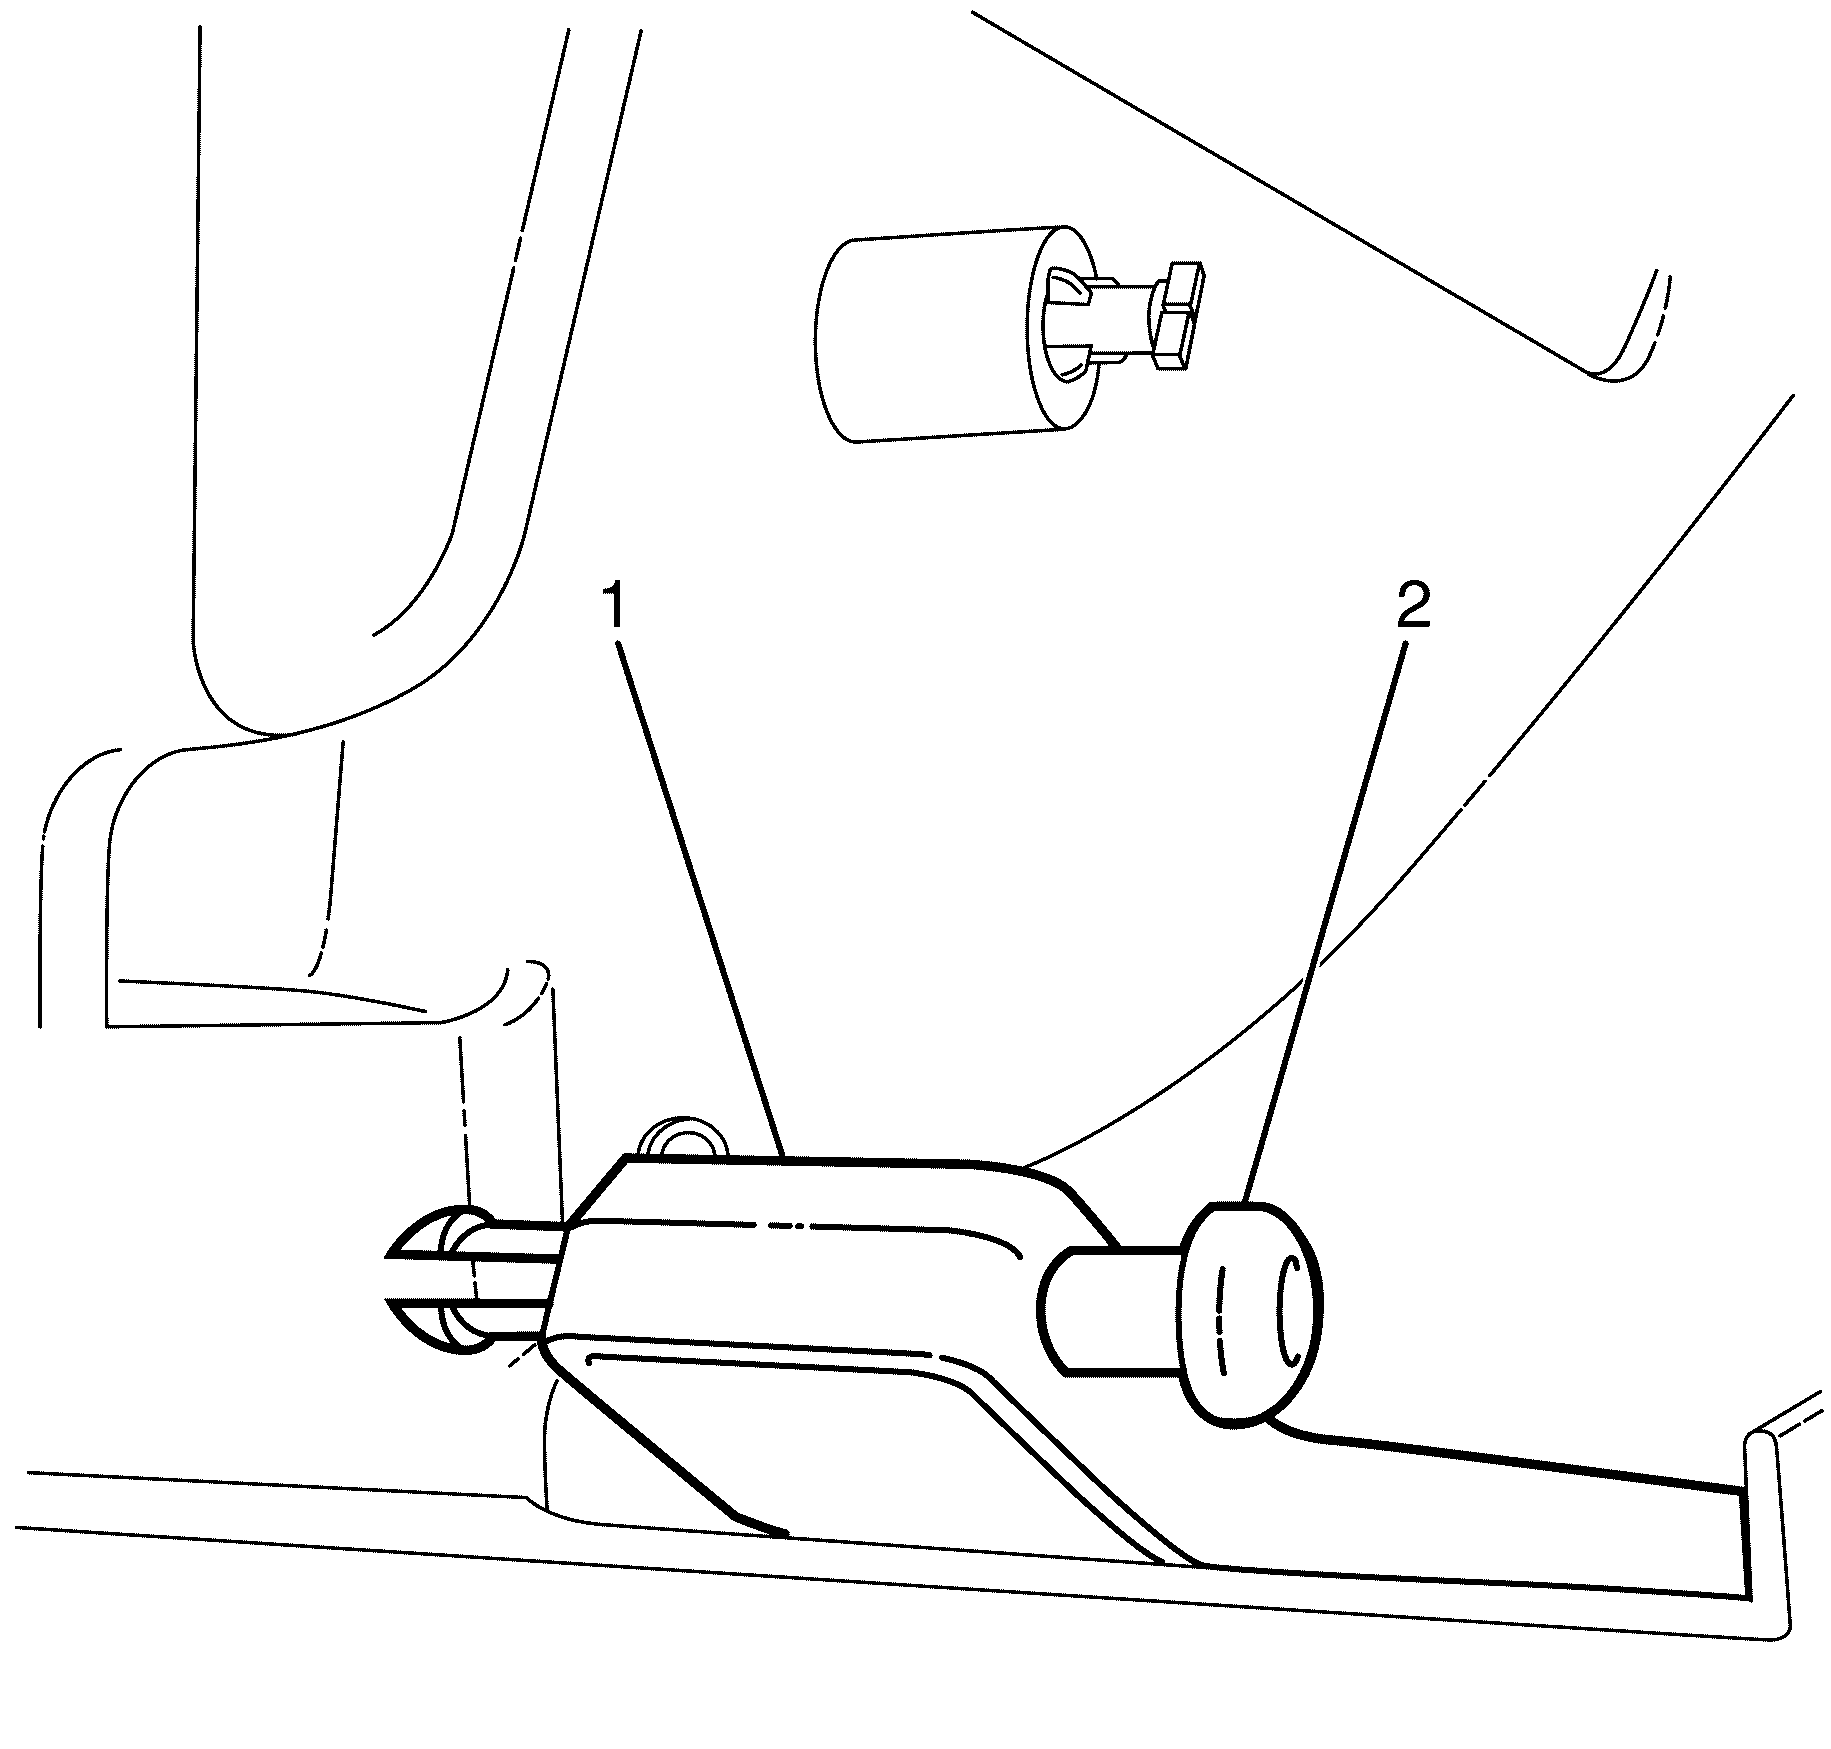
- If fitted, disconnect the I/P compartment electrical connector (1) from the main wiring harness.


Disassemble Procedure
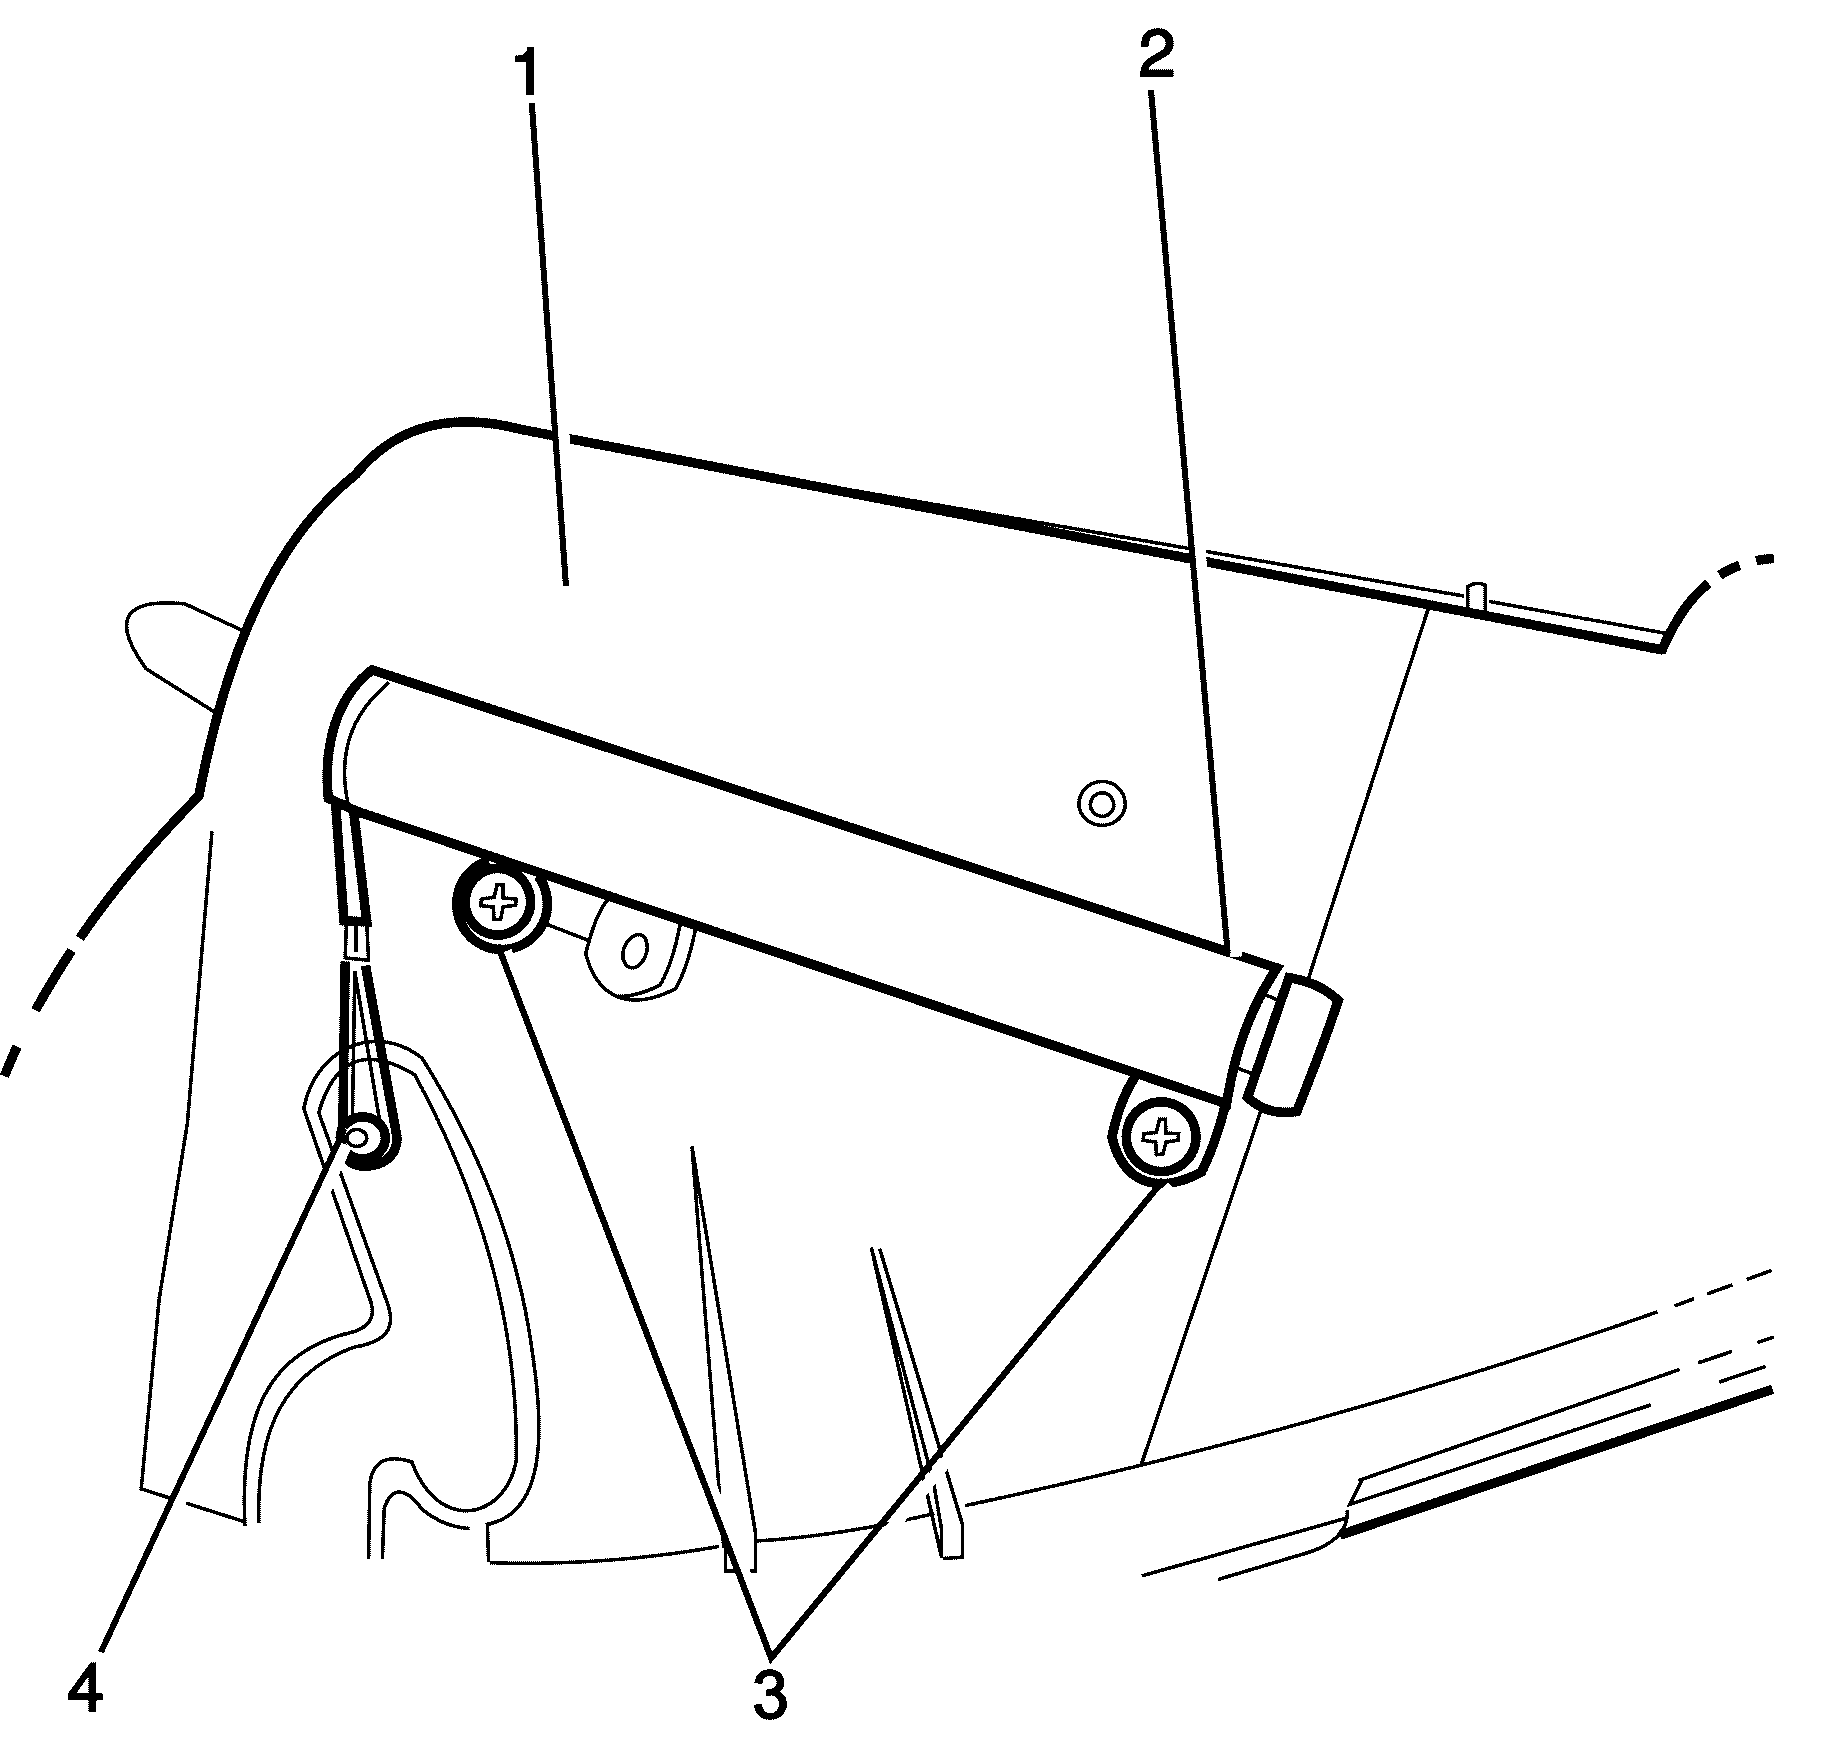
- Remove the I/P compartment damper cord by detaching the cord from the securing hook (4).
- Remove the I/P compartment damper retaining screws (3).
- Remove the I/P compartment damper (2) from the I/P compartment (1).
- Remove the I/P compartment door hinge retaining pins (2), located on either side of the I/P compartment door.
- Remove the I/P compartment door (1) from the I/P compartment.
Assemble Procedure
- Align the I/P compartment door (1) to the I/P compartment.
- Install the I/P compartment door retaining pins (2).
- Install the I/P compartment damper (2) to the I/P compartment (1).
- Install the I/P compartment damper retaining screws (3).
- Install the I/P compartment damper cord by attaching the securing hook (4).
Tighten
Tighten the screws (3) to 2 N·m (18 lb in).
Installation Procedure
- If fitted, connect the I/P compartment electrical connecter (1) to the main wiring harness.
- Align the I/P compartment into the I/P upper pad.
- Install the I/P compartment (2) upper retaining screws (1).
- Install the screw covers (1) to the instrument panel compartment (2).
- Install the I/P compartment (2) lower retaining screws (1).
- Install the instrument panel outer trim cover. Refer to Instrument Panel Outer Trim Cover Replacement.
- Install the close out panel. Refer to Instrument Panel Insulator Panel Replacement - Left Side.
- Test all electrical components for corrected operation.
Notice: Refer to Fastener Notice in the Preface section.
Tighten
Tighten the screws (1) to 2 N·m (18 lb in).
Notice: Refer to Fastener Notice in the Preface section.
Tighten
Tighten the screws (1) to 2 N·m (18 lb in).
