Driver or Passenger Seat Back Cushion Latch Release Cable Replacement Except HSV Maloo
Removal Procedure
- Disconnect the battery negative cable from the battery. Refer to Battery Negative Cable Disconnection and Connection.
- Remove the front seat. Refer to Front Seat Replacement - Bucket.
- Remove the seat back trim. Refer to Front Seat Back Trim Replacement.
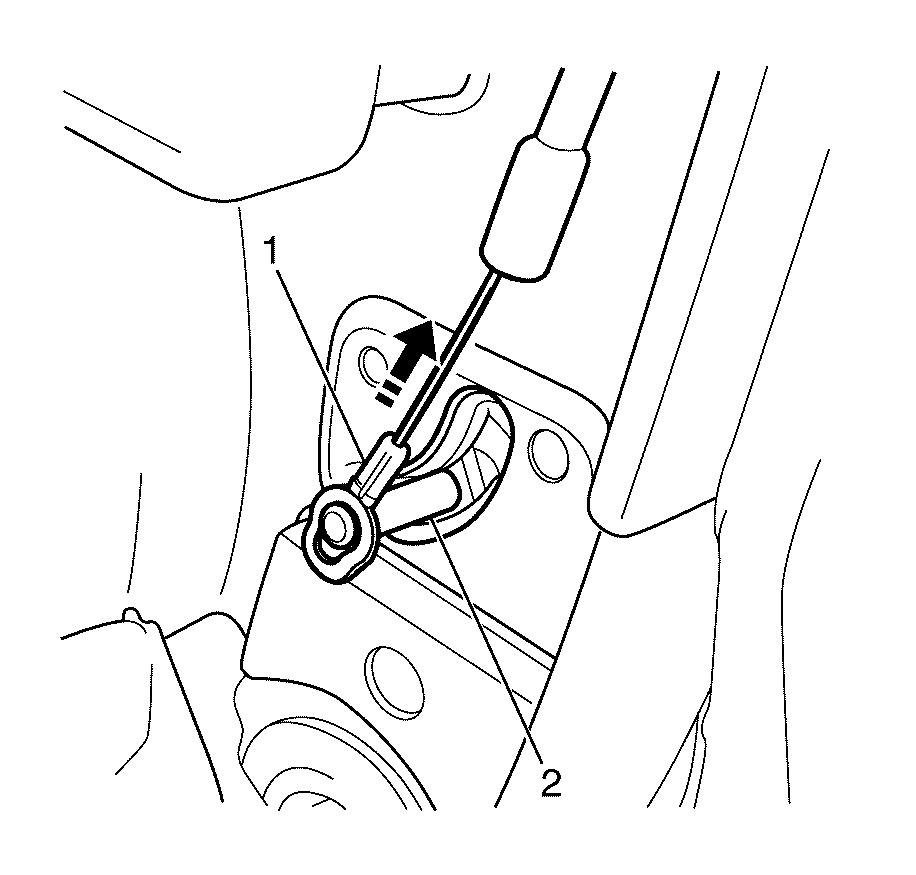
- Remove the cable eyelet (1) from the latch mechanism pin (2). Repeat for other side.
- Remove the latch mechanism cables from seat back frame (2) by releasing the retaining clips (1).
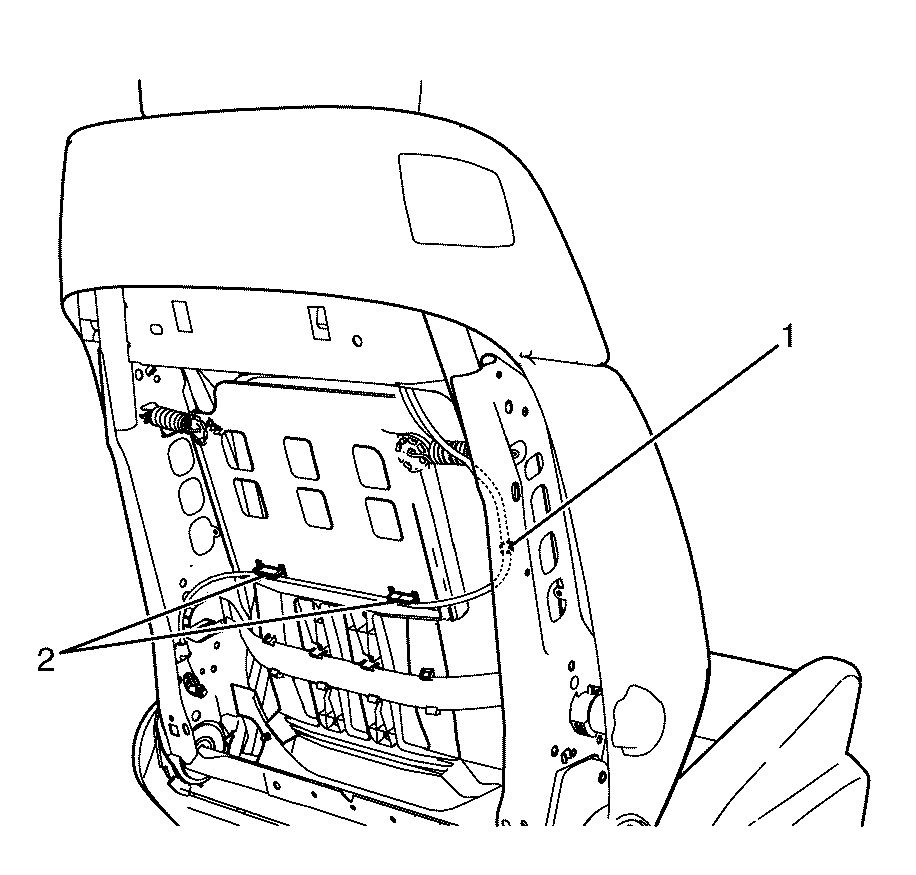
- Remove the latch mechanism cables (2) from the lumbar support frame retaining clips (1).
- Remove the handle and cable assembly (1) from the seat back (3).
Caution: Refer to Battery Disconnect Caution in the Preface section.
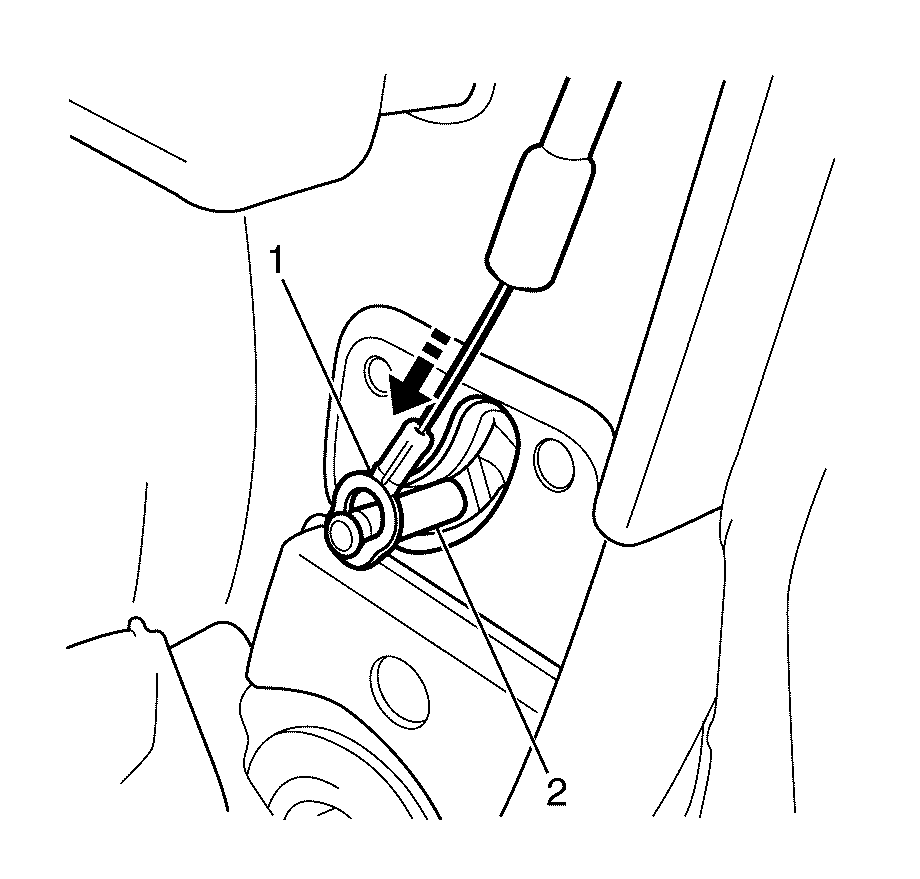
Important: Actuate the latch mechanism pin (2) to make sure the recliners are in full forward (dumped) position. Use a suitable tool to aid in the removal of the cable eyelet (1) from the latch mechanism pin (2).
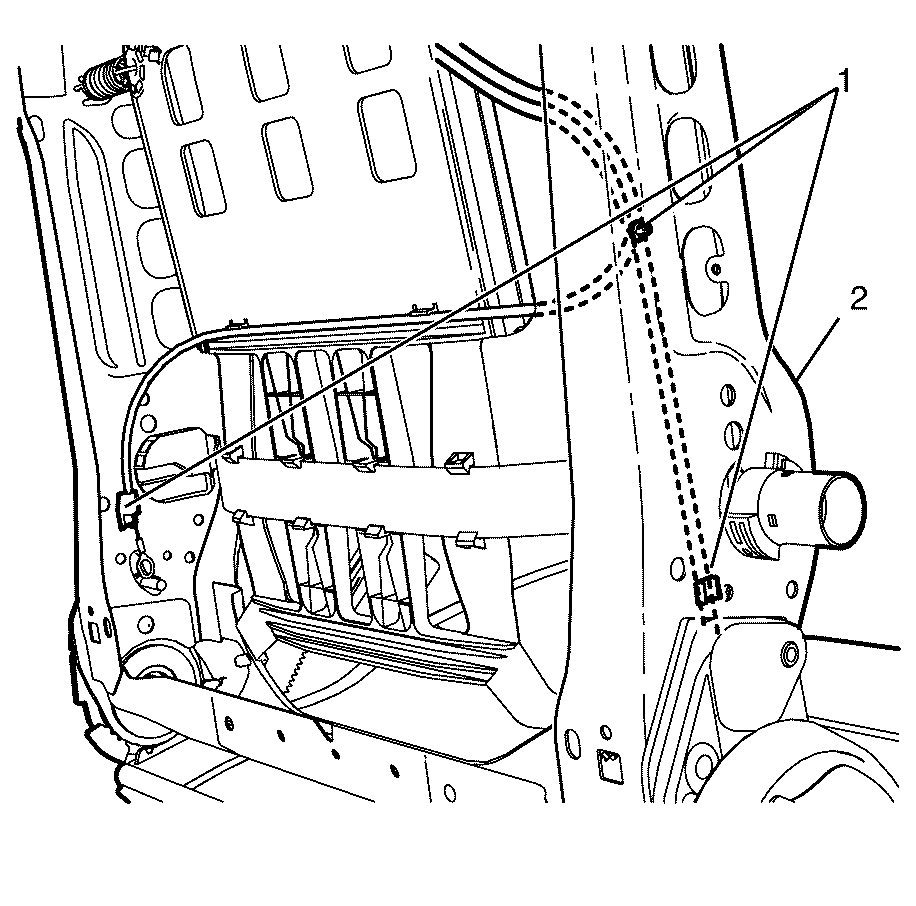
Important: Use a suitable tool to remove the cable clips (1). Bend the clip leg and pull the clip up and out of the key hole slot in the seat back frame (2).
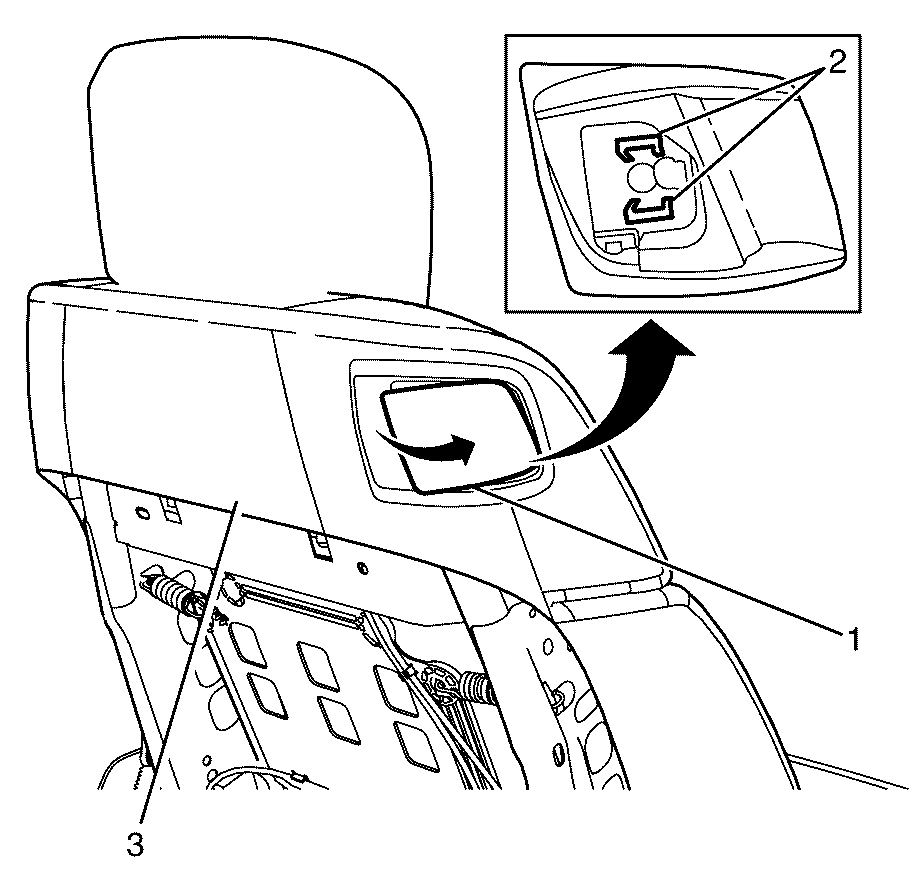
Important: Holding the handle out, use a suitable tool to compress the handle to seat back retaining clips (2) and gently pull from seat back frame.
Installation Procedure
- Install the handle and cable assembly (1) to the seat back (3).
- Install the latch mechanism cables (1) to the lumbar support frame retaining clips (2).
- Install the latch mechanism cables (1) to the seat back frame (2).
- Install the cable eyelet (1) to the latch mechanism pin (2). Repeat for other side.
- Install the seat back trim. Refer to Front Seat Back Trim Replacement.
- Install the front seat. Refer to Front Seat Replacement - Bucket.
- Connect the battery negative cable to the battery. Refer to Battery Negative Cable Disconnection and Connection.
- Test the seat for correct mechanical and electrical operation.
Important: Install the handle and cable assembly (1) until the handle to seat back retaining clips (2) lock into place, and the handle is secure.
Important: Push the cable clip (1) through the key hole slot in the seat back frame (2) until it clips into place.
Important: Use a suitable tool to aid in fitting the cable eyelet (1) to the latch mechanism pin (2).
Driver or Passenger Seat Back Cushion Latch Release Cable Replacement HSV Maloo
Removal Procedure
- Disconnect the battery ground cable from the battery. Refer to Battery Negative Cable Disconnection and Connection.
- Remove the front seat. Refer to Front Seat Replacement - Bucket.
- Remove the outer trim panel. Refer to Seat Cushion Outer Trim Panel Replacement.
- Remove the front seat-back cover. Refer to Front Seat Back Cushion Cover and Cushion Pad Replacement.
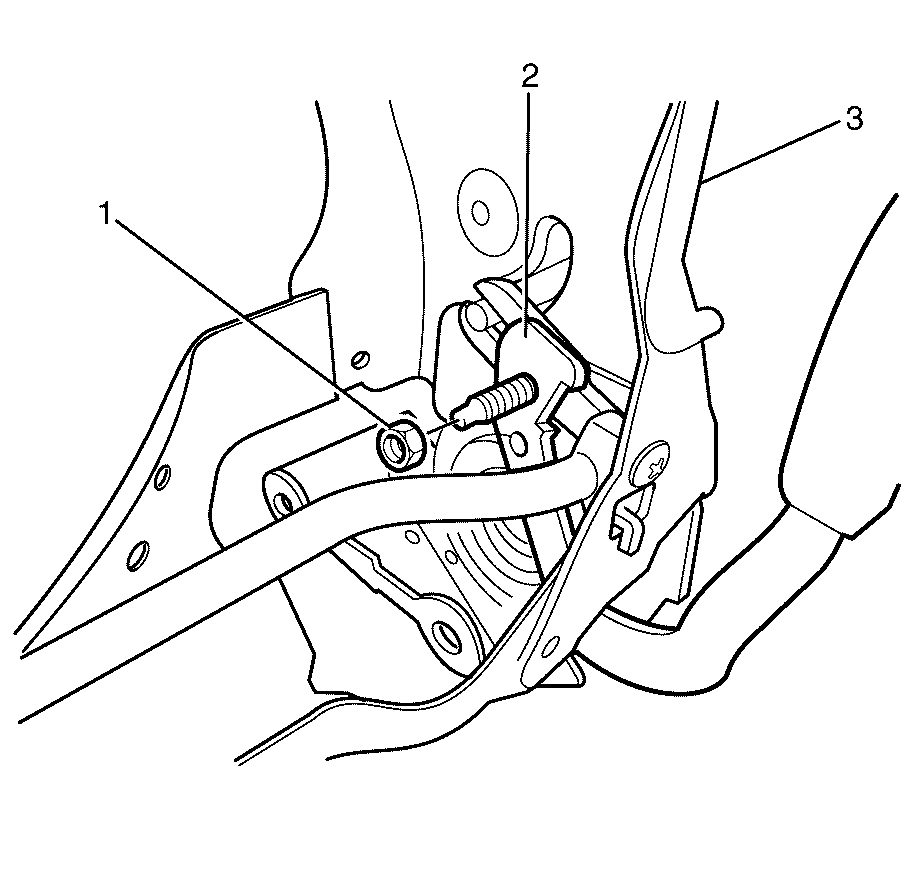
- Remove the dump latch release retaining nut (1) securing dump latch lever arm (2) to the seat back frame (3).
- Repeat for opposite side.
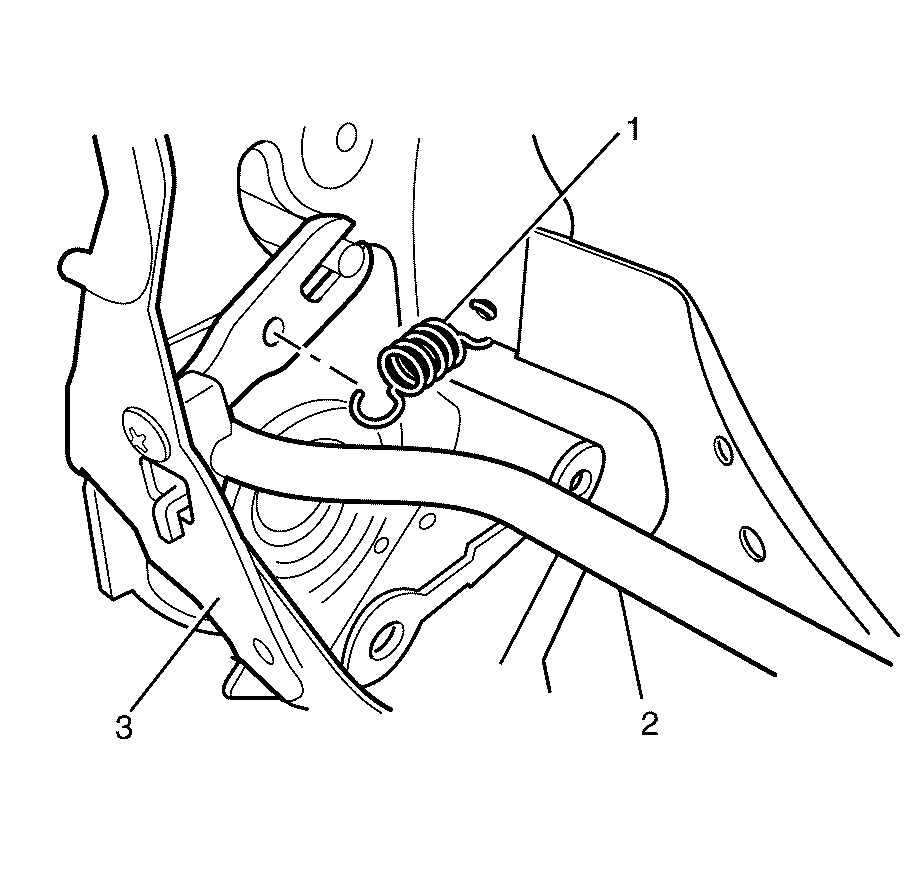
- Detach the spring (1) from the dump latch release rod (2) and seat back frame (3).
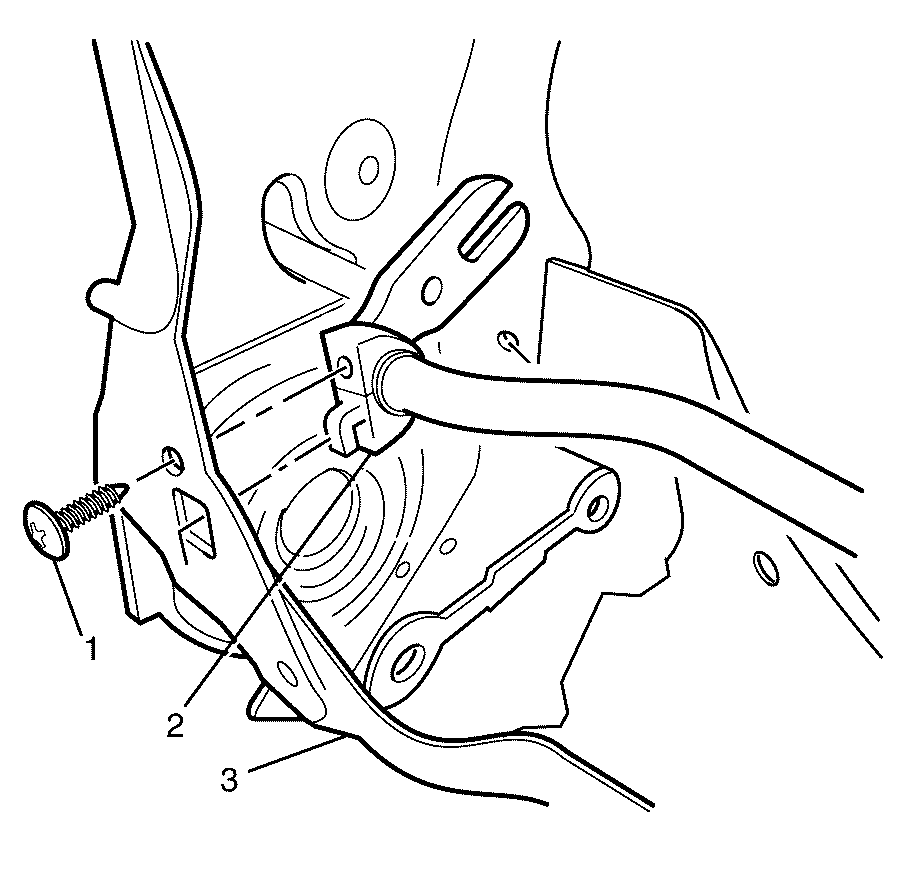
- Remove the dump latch release rod bracket fastener (1), attaching the dump-latch release rod bracket (2) to the seat back frame (3).
- From each side of the seat back frame (3), detach and remove the dump-latch release rod brackets (2).
Caution: Refer to Battery Disconnect Caution in the Preface section.
Important: This procedure is relevant for both the driver and passenger seat. The passenger seat dump latch assembly includes an additional dump latch lever adjacent to the centre console, to aid the driver in folding the passenger seat forward from the driver's side of the vehicle.
Repeat for opposite side.
Installation Procedure
- Install the dump-latch release rod bracket (2) to both sides of the seat back frame (3).
- Install the dump latch release rod bracket fastener (1) securing the dump-latch release rod bracket (2) to the seat back frame (3).
- Install the spring (1), linking it between the dump latch release rod (2) and seat back frame (3).
- Install the dump latch release retaining nut (1) securing the dump latch lever arm (2) to the seat back frame (3).
- Repeat for opposite side.
- Install the front seat-back cover. Refer to Front Seat Back Cushion Cover and Cushion Pad Replacement.
- Install the outer trim panel. Refer to Seat Cushion Outer Trim Panel Replacement.
- Install the front seat. Refer to Front Seat Replacement - Bucket.
- Connect the battery ground cable to the battery. Refer to Battery Negative Cable Disconnection and Connection.
- Check the system for correct operation.
Notice: Refer to Fastener Notice in the Preface section.
Important: This procedure is relevant for both the driver and passenger seat. The passenger seat will have an additional dump latch lever adjacent to the centre console, to aid the driver in folding the passenger seat forward from the driver's side of the vehicle.
Repeat for opposite side.
Tighten
Tighten the dump latch release rod bracket fastener
to 3.0 N·m (26 lb in).
Important: The dump latch tension spring must be securely located for correct seat operation.
Repeat for opposite side.
Tighten
Tighten the dump latch release retaining nut to
5.0 N·m (44 lb in).
