For 1990-2009 cars only
Cleaning Procedure
- Clean the camshaft covers in solvent.
- Dry the camshaft covers with compressed air.
Caution: Refer to Safety Glasses Caution in the Preface section.
Inspection Procedure
- Inspect each camshaft cover for the dents or damage to the exterior. A dented or damaged camshaft cover may:
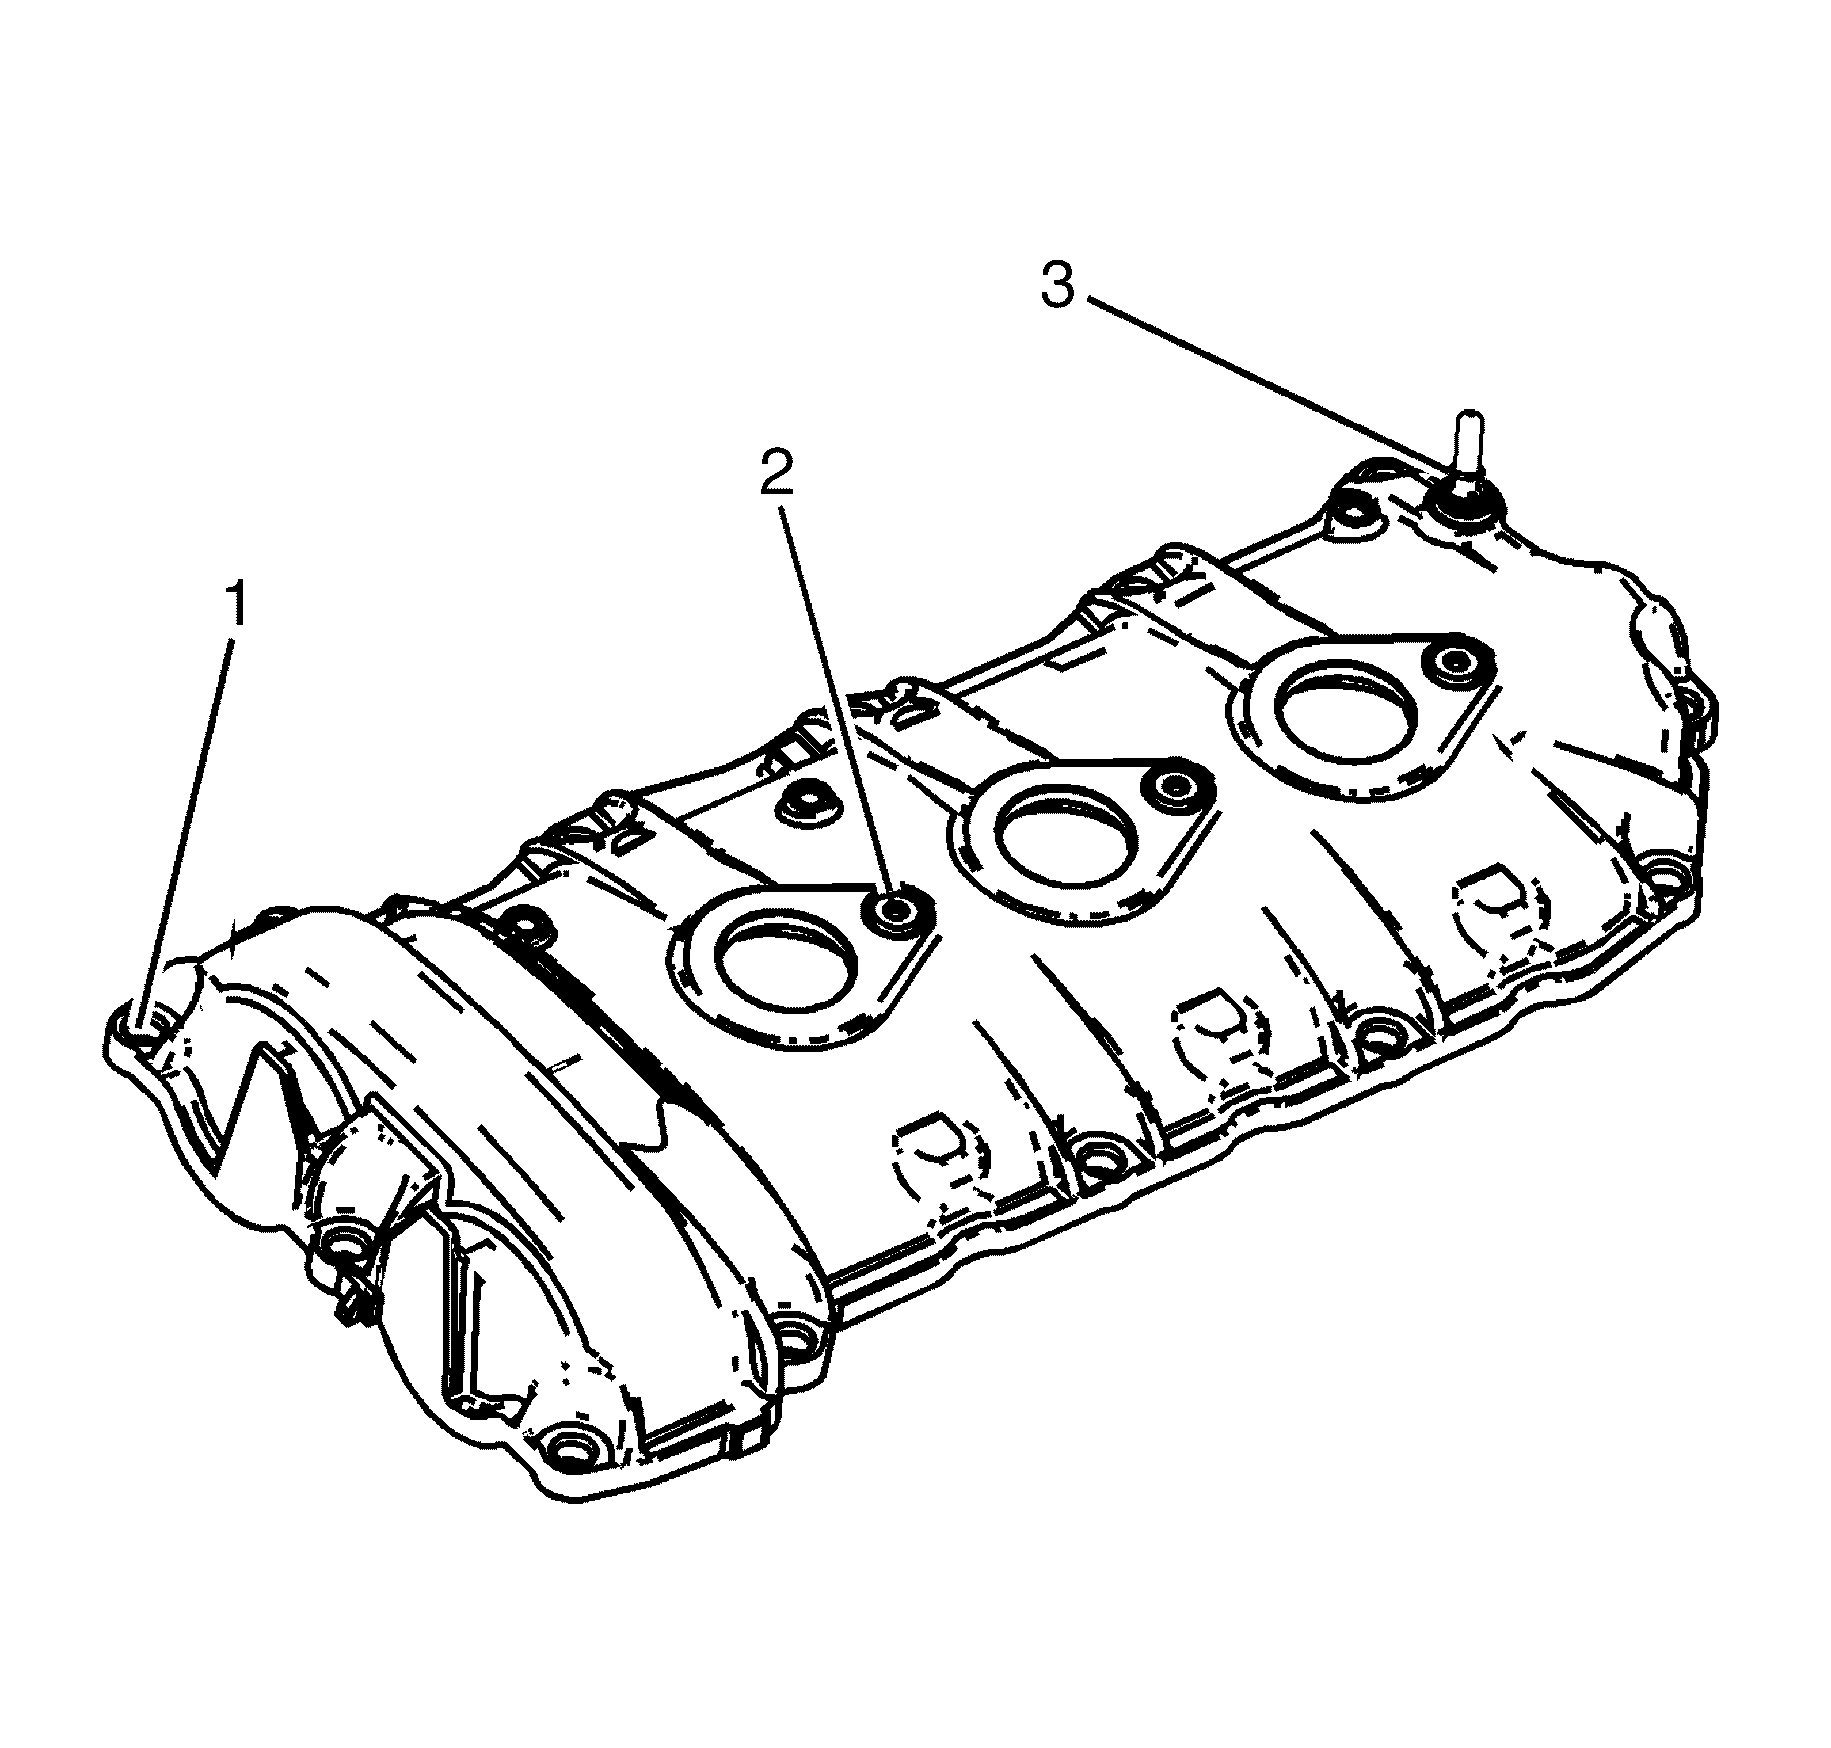
- Inspect the exterior of the left camshaft cover for the following conditions:
- Inspect the interior of the left camshaft cover for the following conditions:
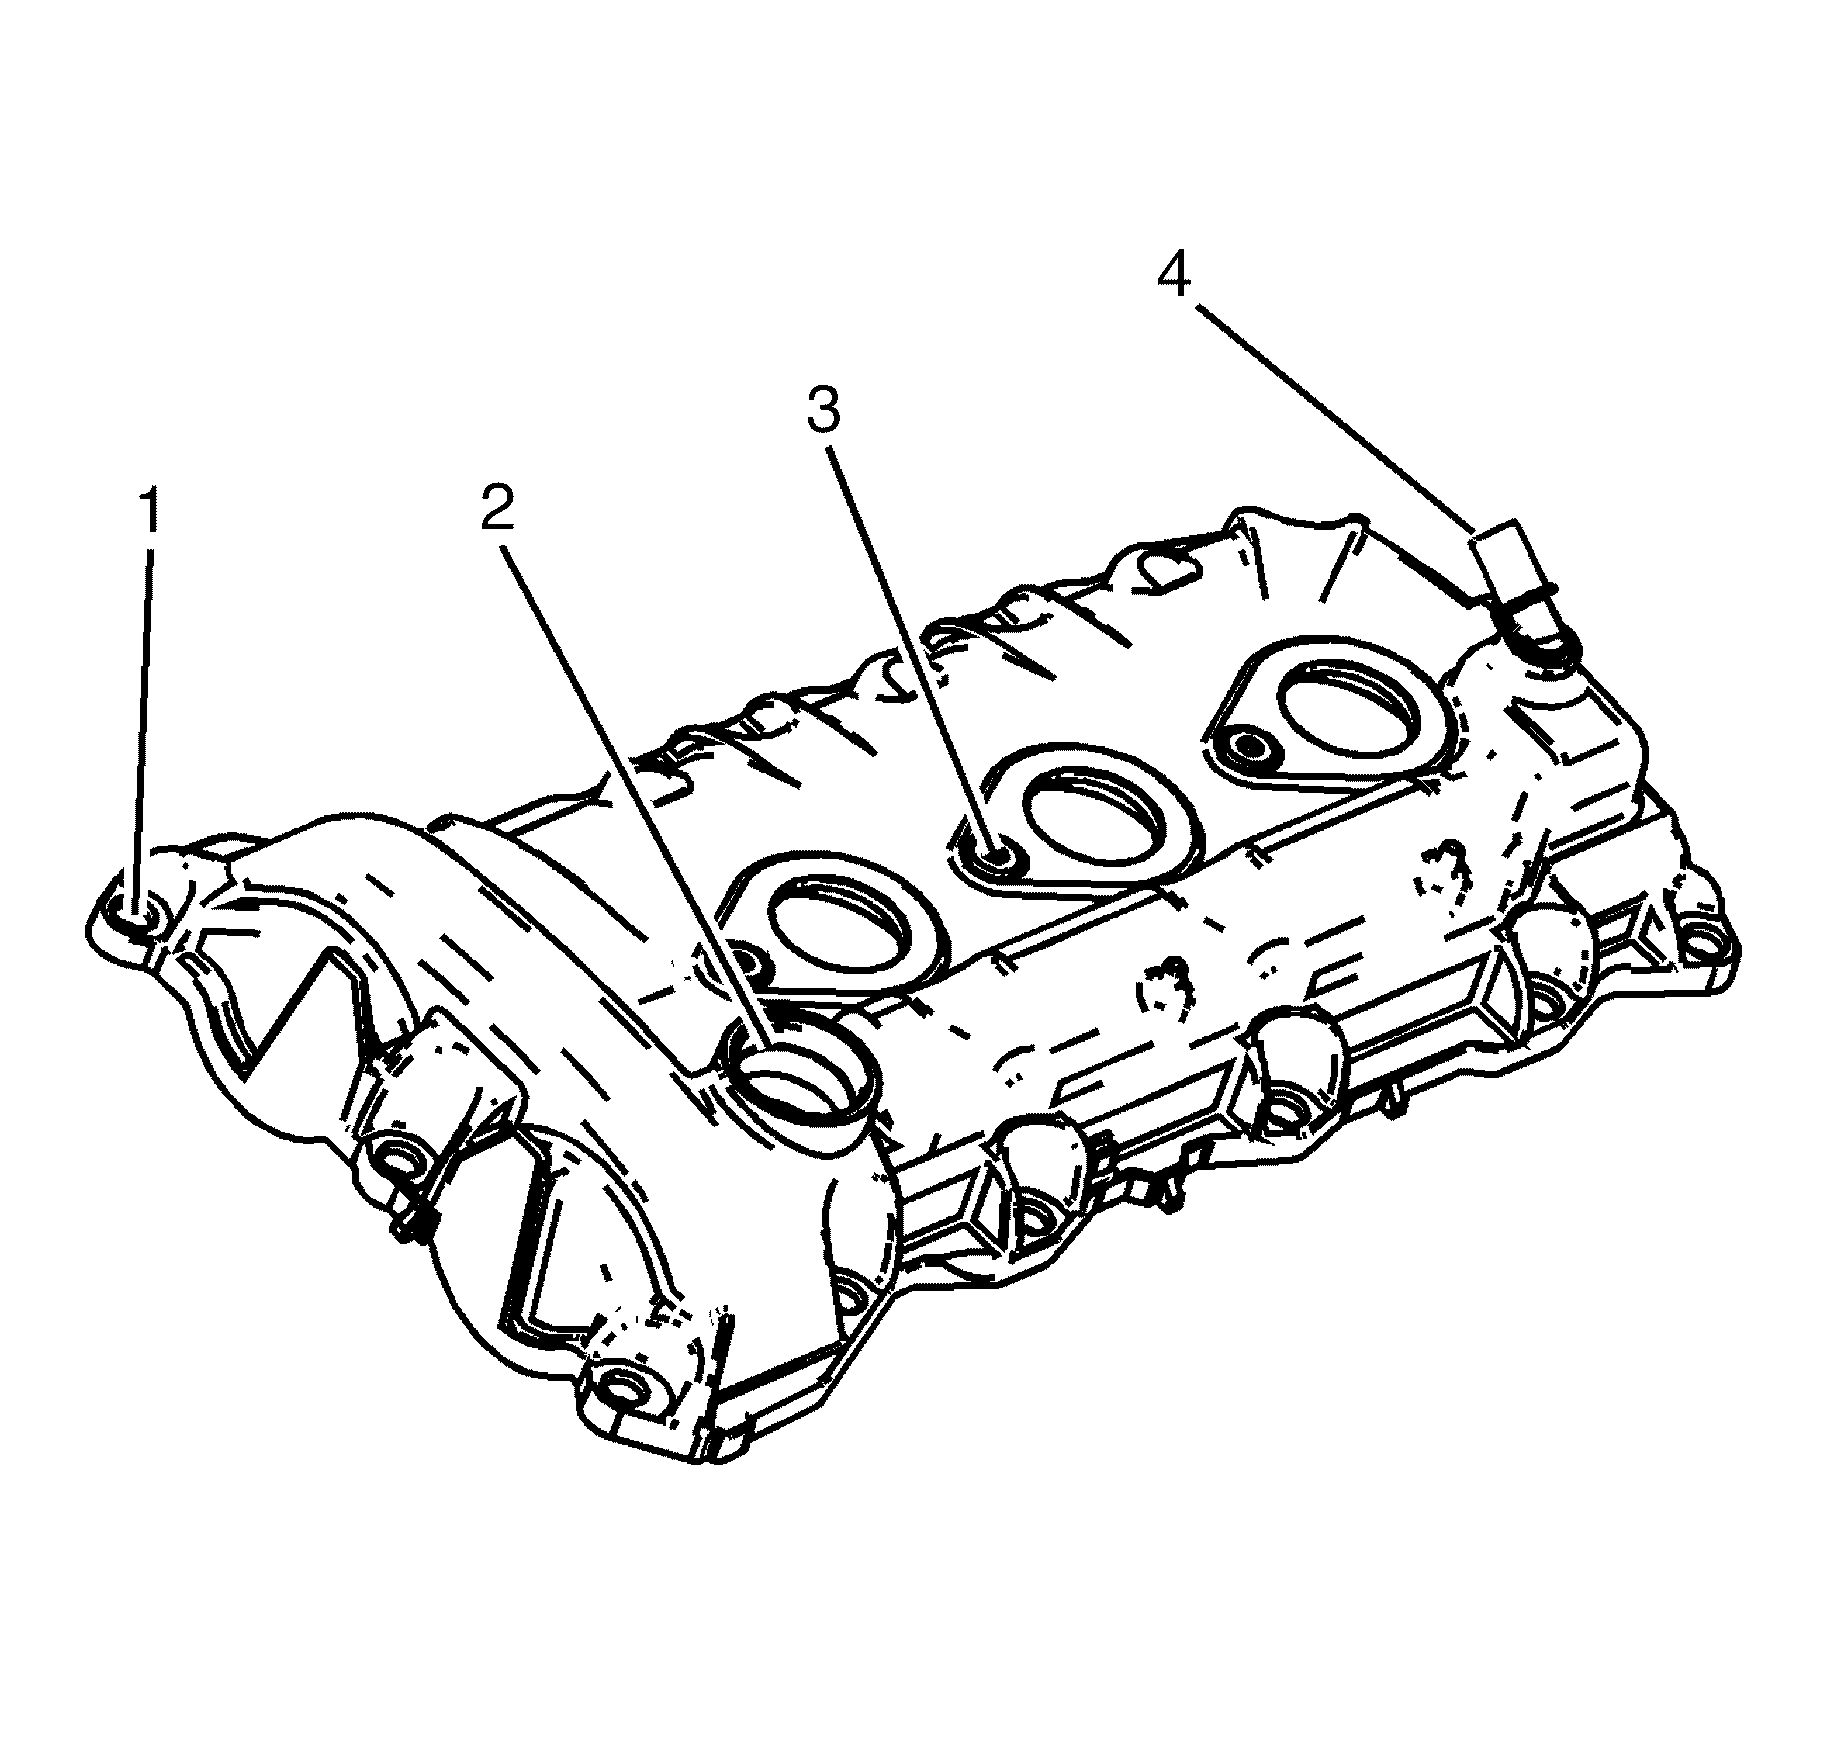
- Inspect the exterior of the right camshaft cover for the following conditions:
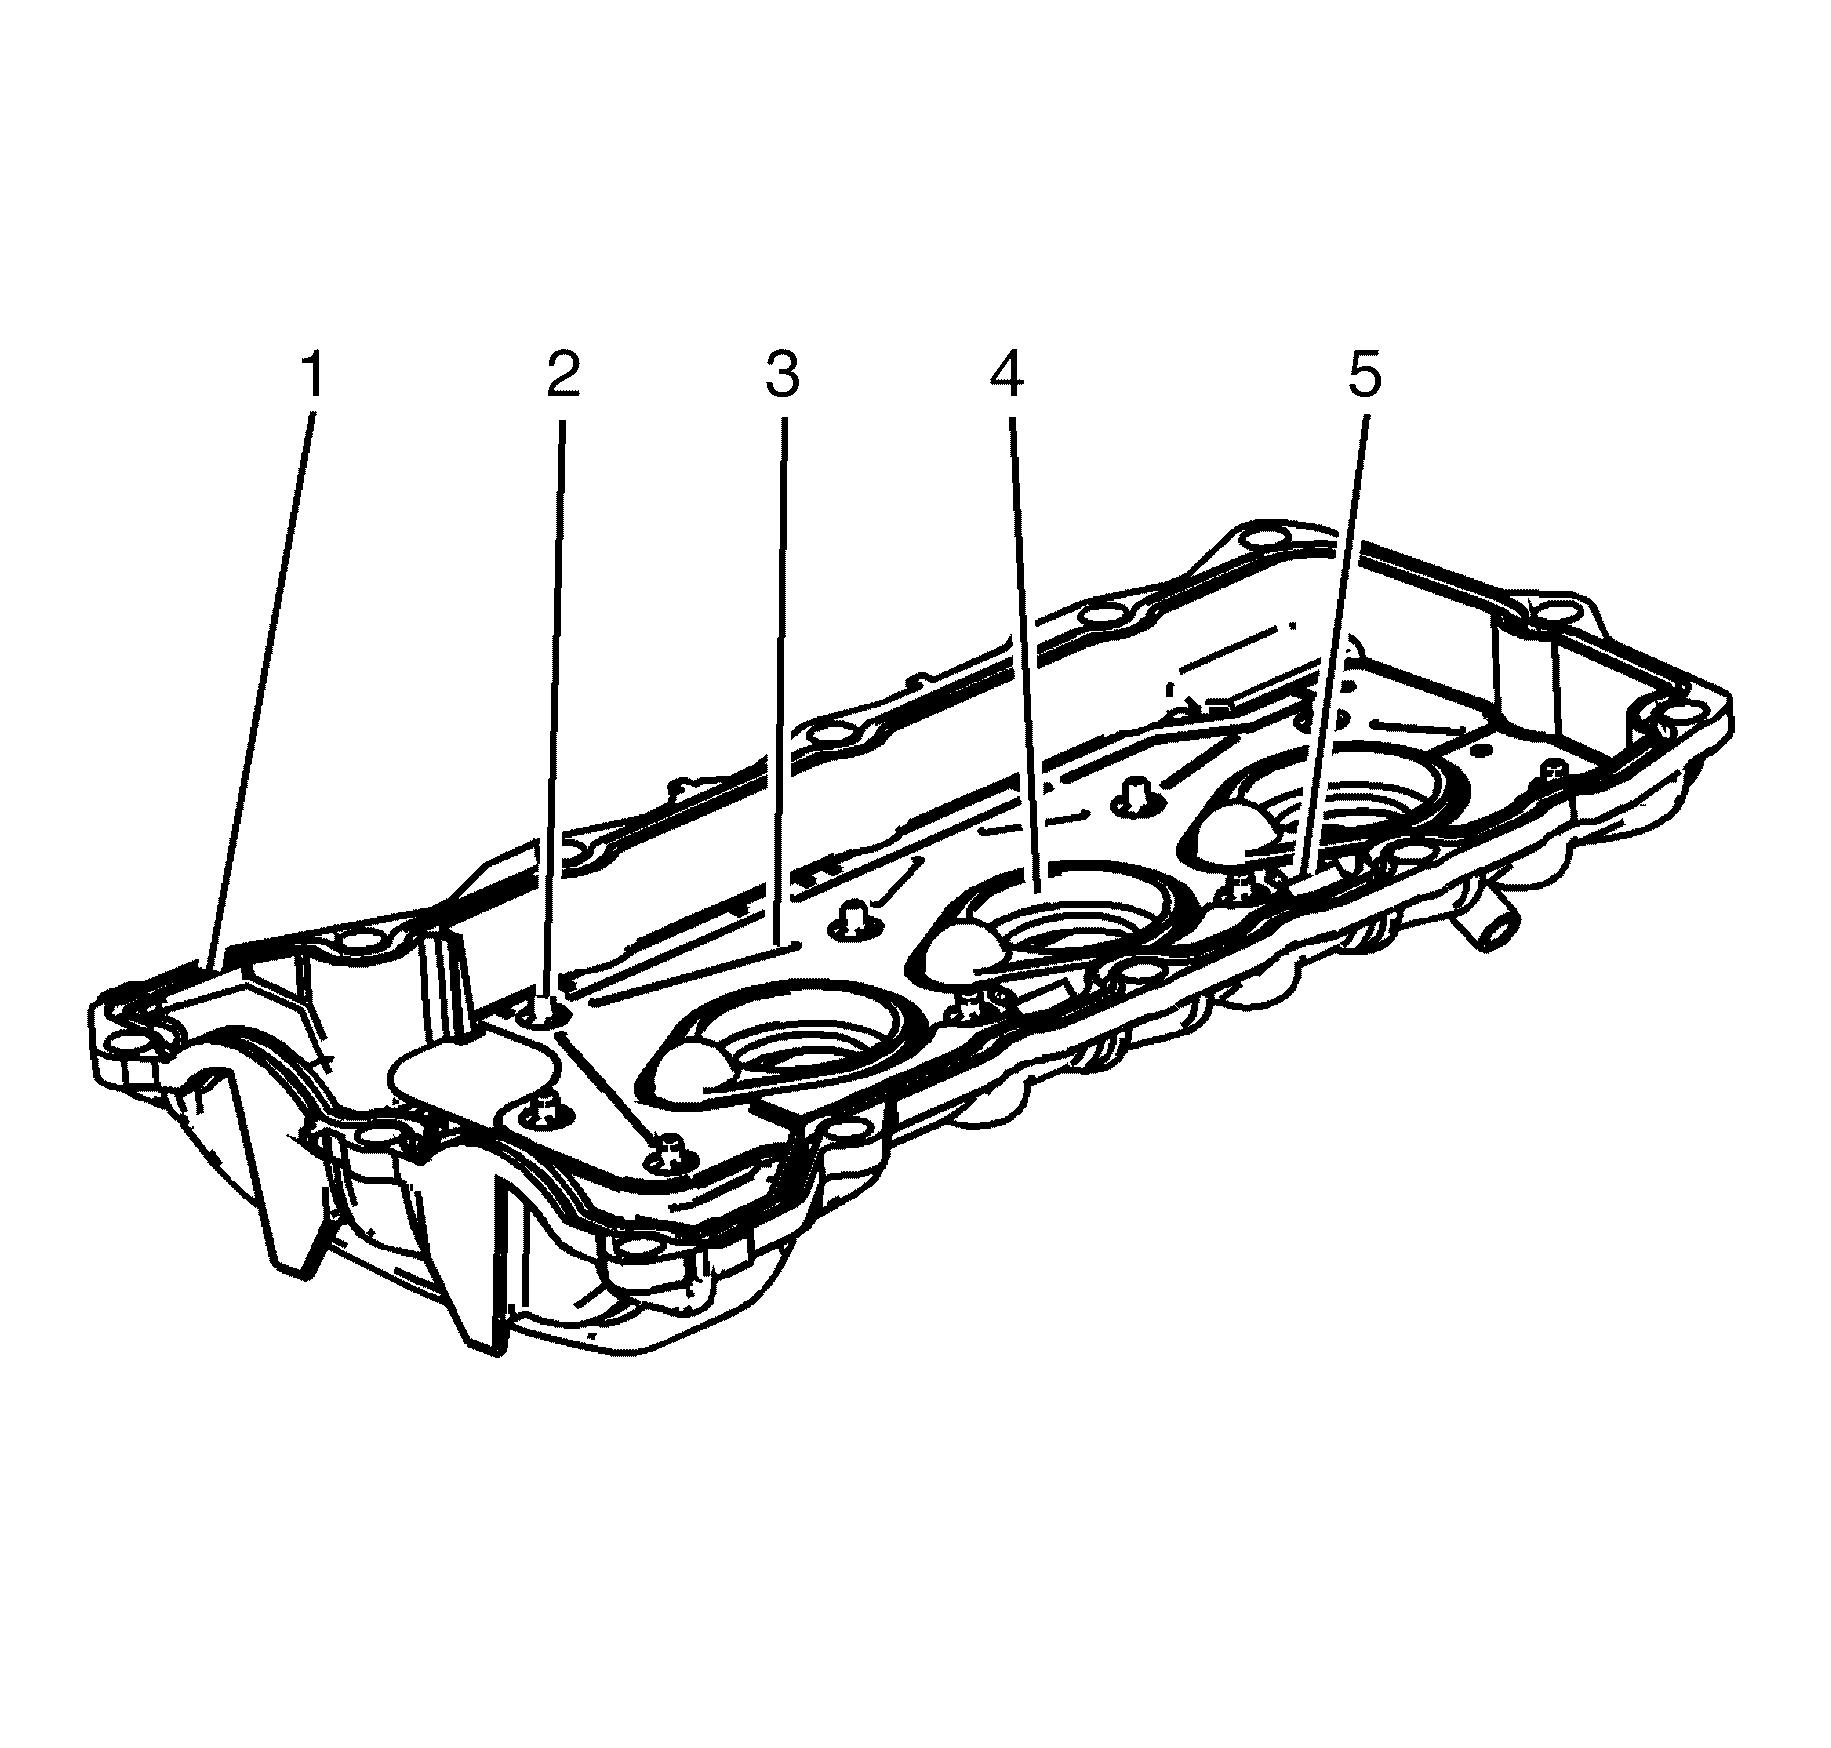
- Inspect the interior of the right camshaft cover for the following conditions:
- Repair or replace the camshaft cover or covers as necessary.
| • | Leak engine oil. |
| • | Effect crankcase ventilation. |
| • | Interfere with the camshafts. |
| • | Interfere with the ignition coil sealing. |
| • | Allow water or condensation to enter the engine. |
| • | Damage to the camshaft cover bolt holes (1). |
| • | Damage to the oil fill hole (2). |
| • | Damage to the mounting holes (3) for the ignition coil assembly. |
| • | Damage to the Positive Crankcase Ventilation (PCV) hose connector (4) -- A damaged PCV hose connector is replaceable. |
| • | Gouges or damage to the camshaft cover sealing groove (1). |
| • | Damaged, loose or missing baffle fasteners (2). |
| • | Damaged, loose or missing baffle (3). |
| • | Gouges or damage to the ignition coil seal bore (4). |
| • | Restrictions to the ventilation system (5). |
| • | Damage to the camshaft cover bolt holes (1). |
| • | Damage to the mounting holes (2) for the ignition coil assembly. |
| • | Damage to the PCV orifice (3) -- A damaged PCV orifice can be replaced. Refer to PCV Orifice Replacement. |

| • | Gouges or damage to the camshaft cover sealing groove (1). |
| • | Gouges or damage to the ignition coil seal bore (2). |
| • | Restrictions to the ventilation system (3). |
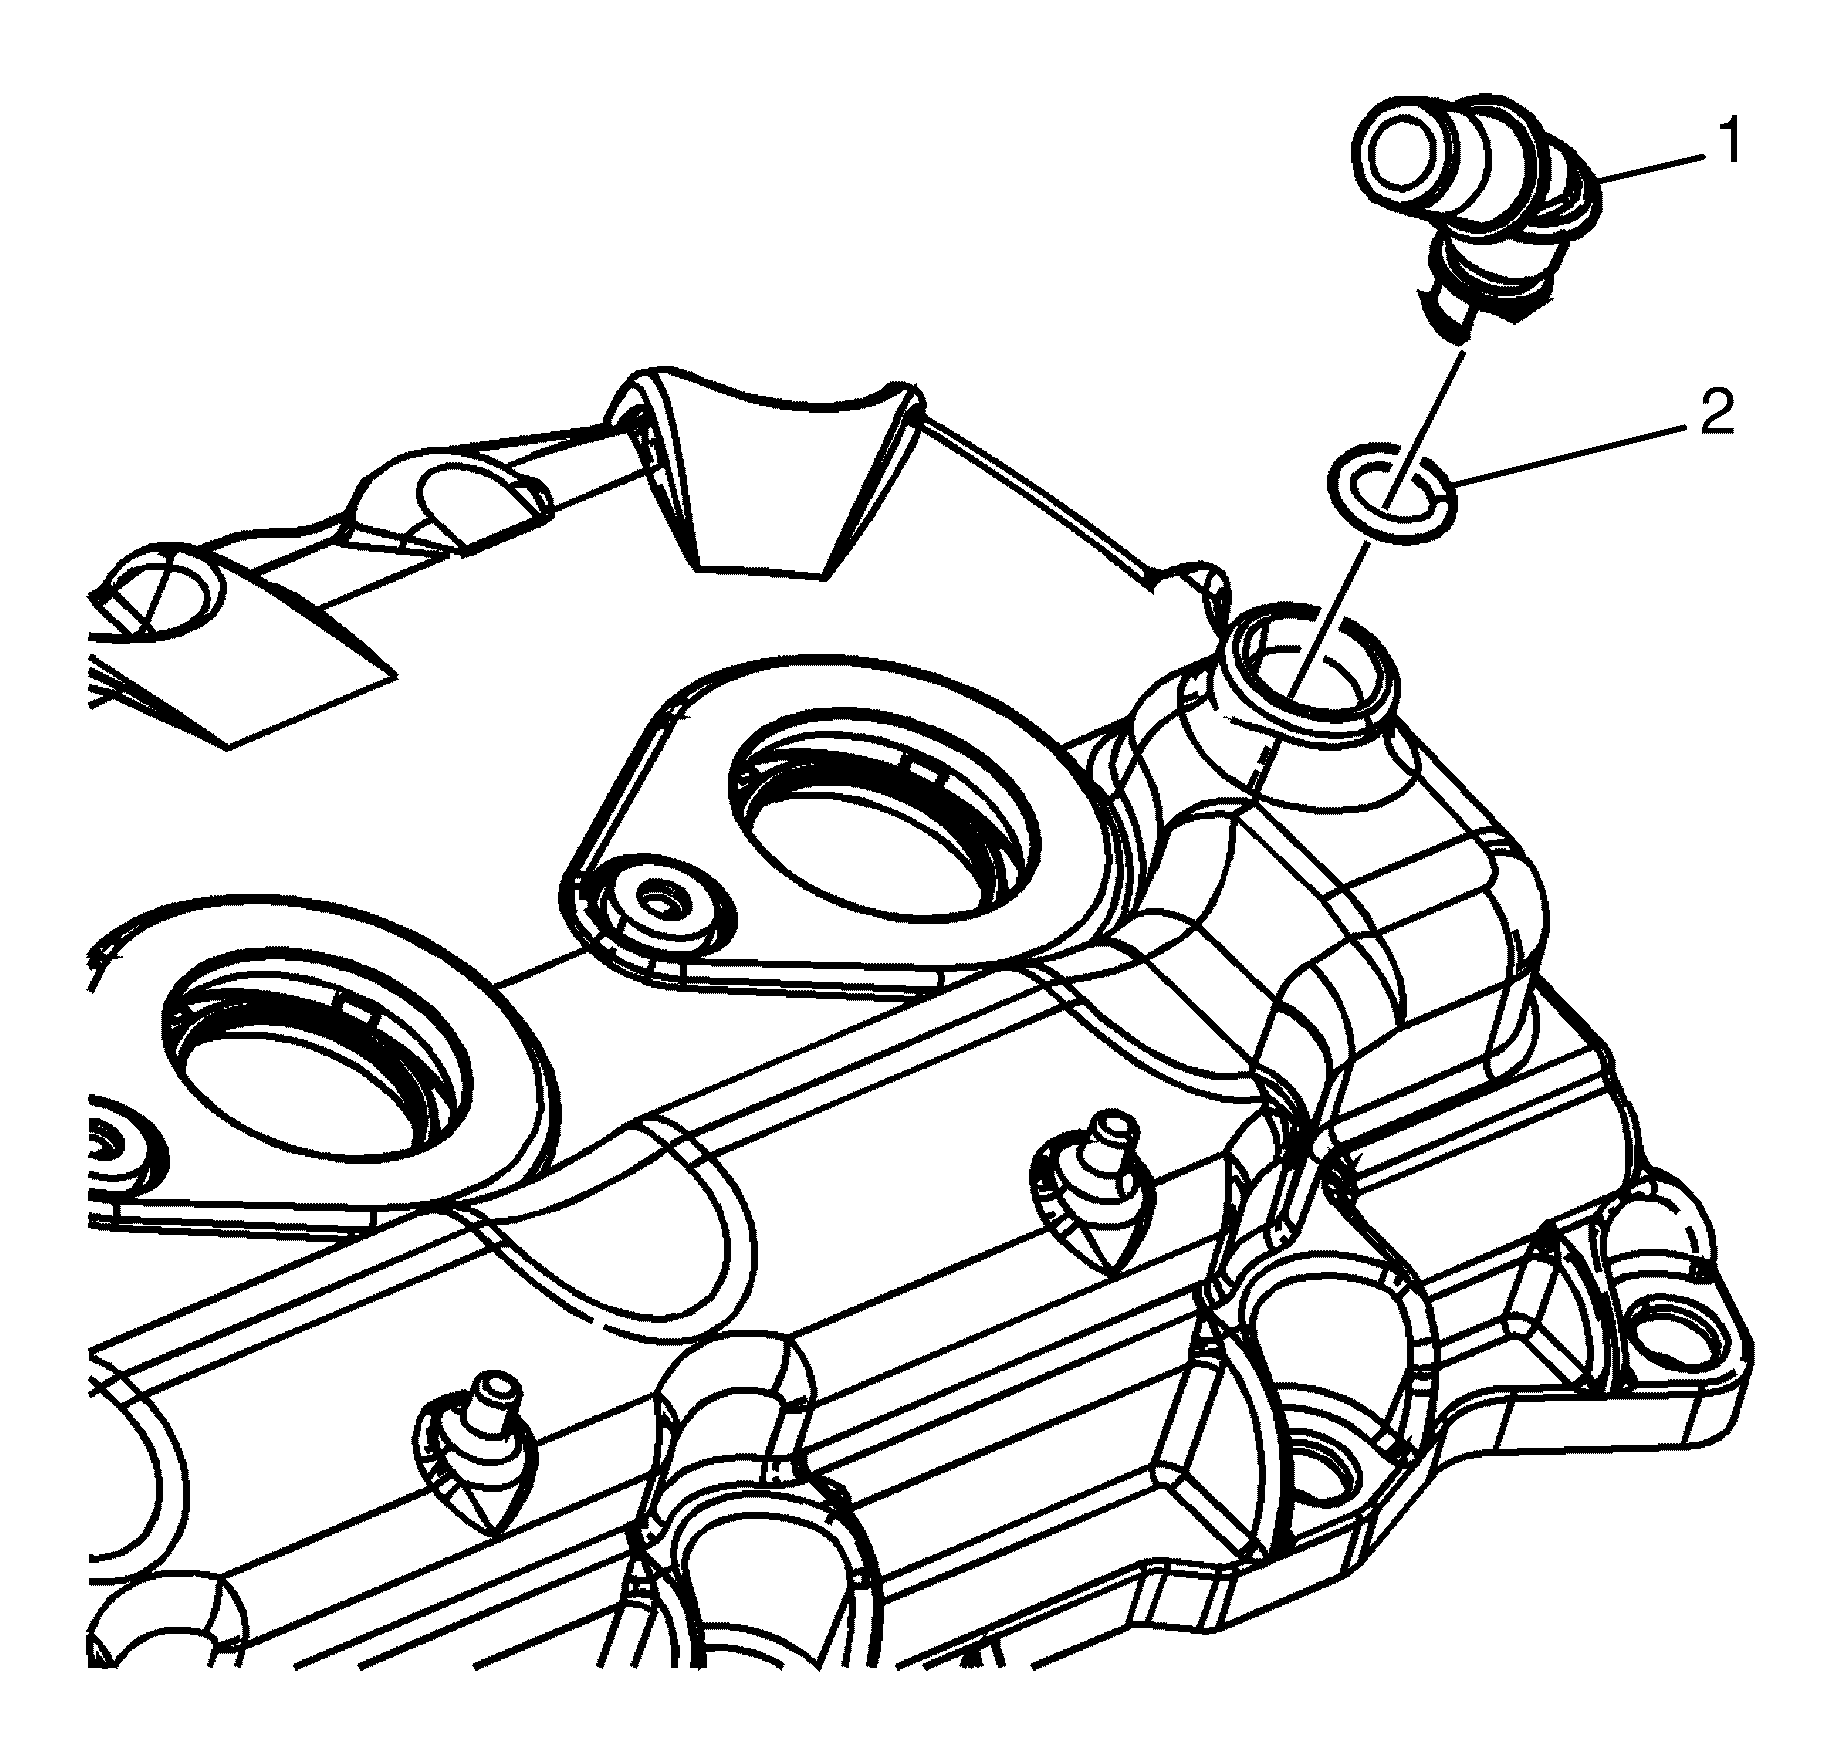
PCV Orifice Replacement
- Remove the PCV orifice (1) from the right camshaft cover (2).
- Apply a Holden approved sealant to the NEW PCV orifice (1).
- Install the NEW PCV orifice (2) into the right camshaft cover (1). After insertion, twist the PCV orifice (2) in order to address any vertical leak paths in the sealant.
Important: If the PCV orifice is damaged or plugged and cannot be cleaned out, the PCV orifice can be replaced.
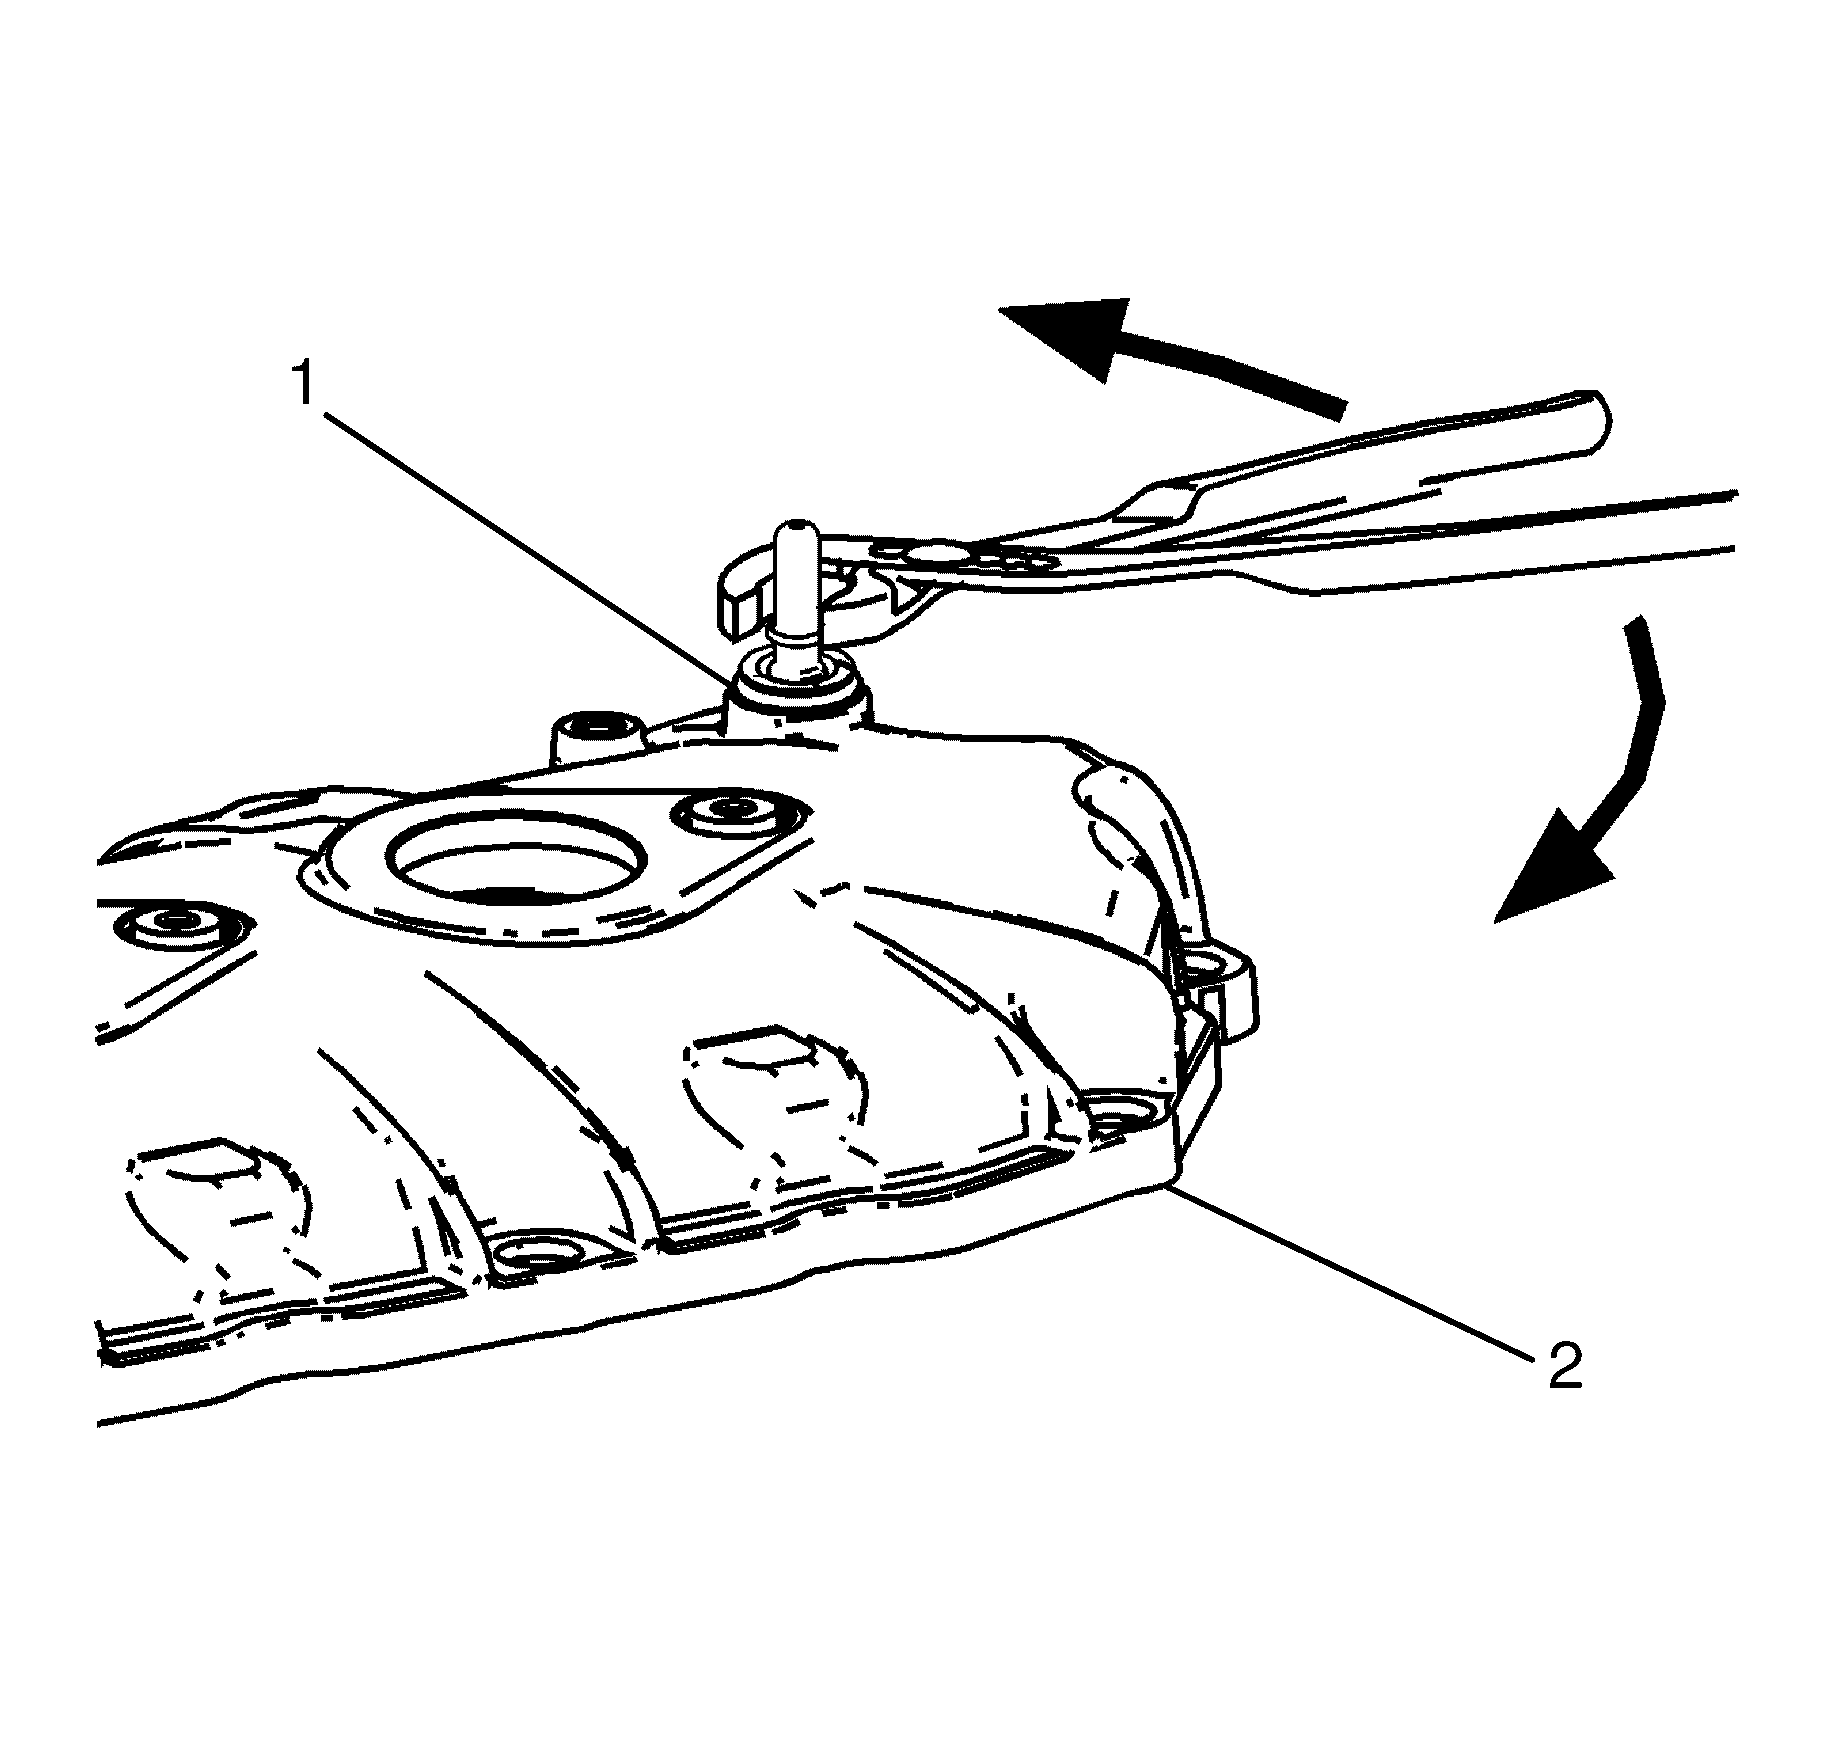
Important: Remove the PCV orifice (1) by griping the neck of the PCV orifice (1) with pliers and twisting and pulling out of the right camshaft cover (2).
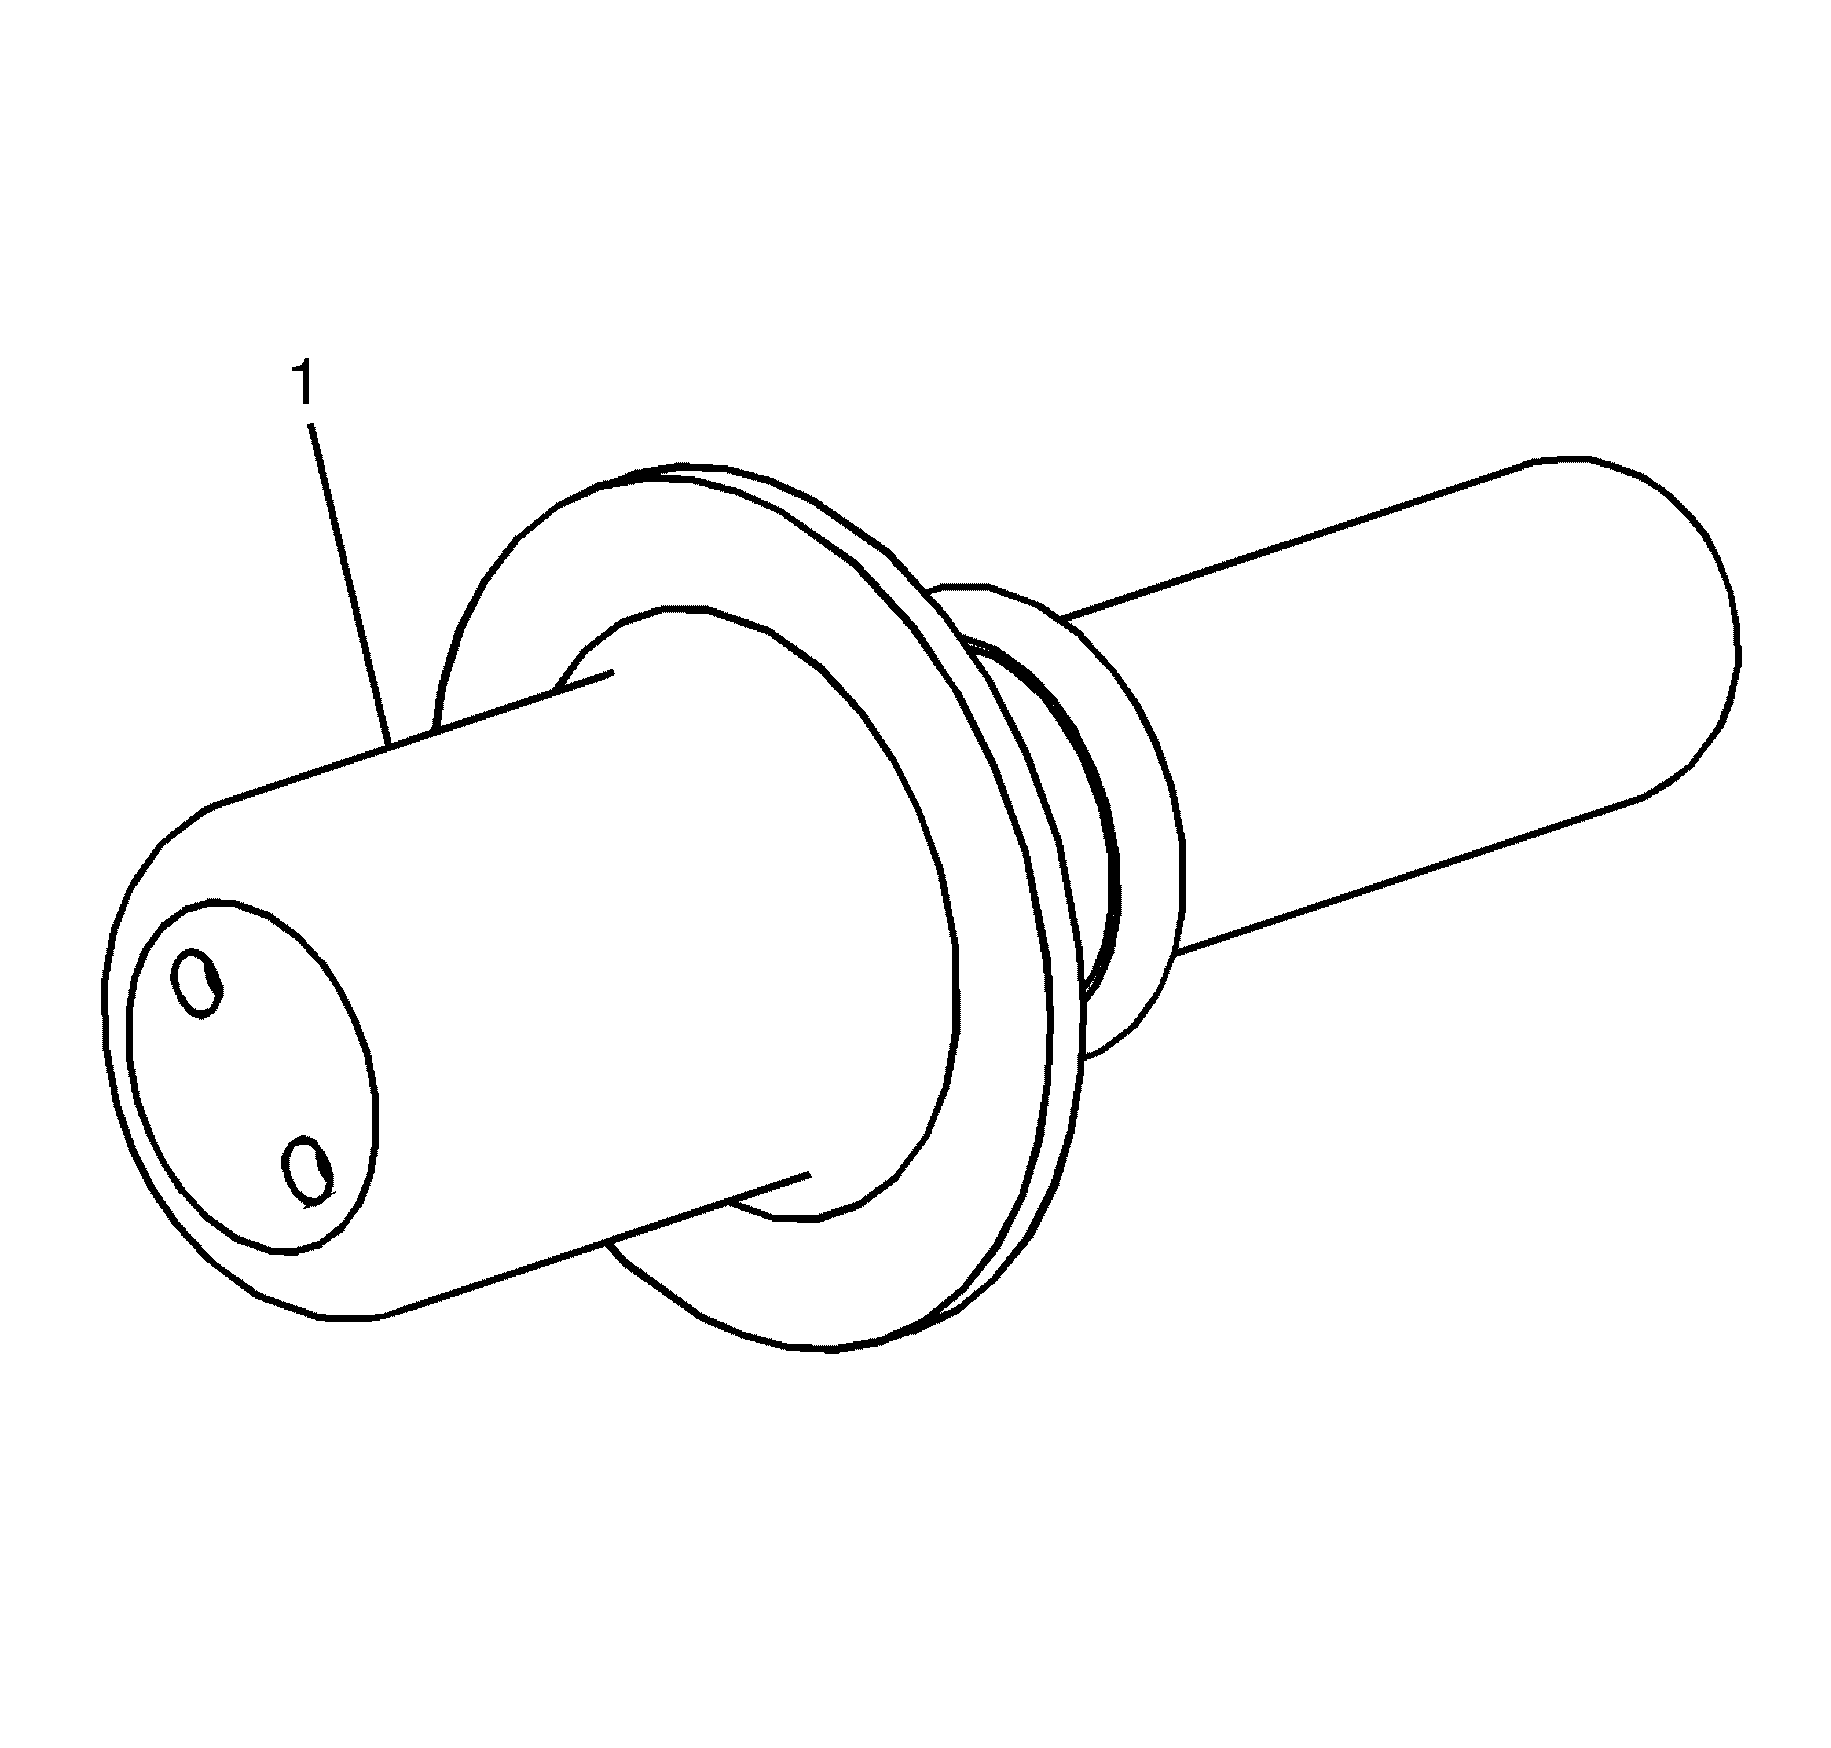

PCV Fitting Replacement
- Remove the PCV fitting (1).
- Install the NEW PCV fitting (1) with a NEW PCV fitting O-ring (2).
Important: If the PCV fitting (1) is damaged or plugged and cannot be cleaned out, the PCV fitting (1) can be replaced.
Important: The PCV fitting O-ring (2) is a single use component and must be discarded whenever the PCV fitting (1) is removed.
Discard the PCV fitting O-ring (2).
