Tire and Wheel Assembly Balancing - Off Vehicle SWBHSV VXR8
Wheel Weight Usage - Type B
Important: Clip-on wheel balance weights are not suitable for the following wheels sizes. Stick-on adhesive weights must be used.
Model | Engine | Wheel | Tyre Designation |
|---|---|---|---|
CR8 / Senator | V8 | 8.0J x 19 alloy | 245/40 ZR19 98Y |
GTS | V8 | 8.0J x 20 alloy | 245/35 ZR20 95Y |
CR8 / Senator | V8 | 9.5J x 19 alloy | 275/35 ZR19 96Y |
GTS | V8 | 9.5J x 20 alloy | 275/30 ZR20 97Y |
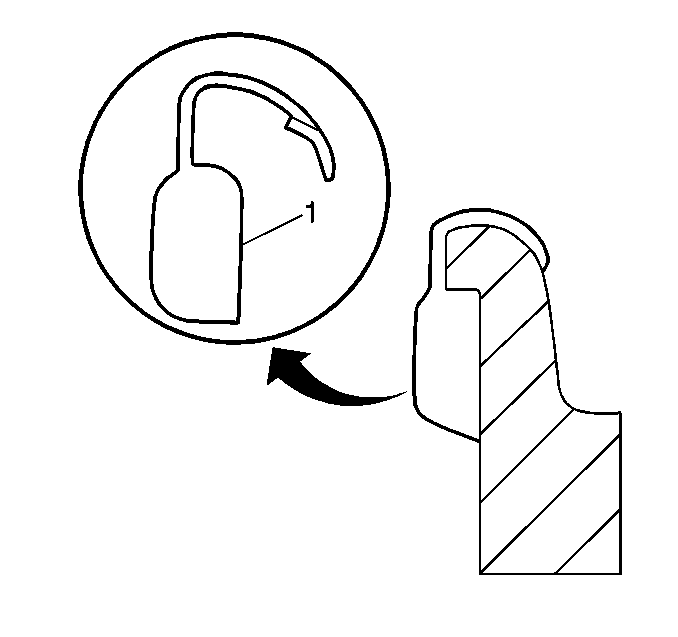
Wheel Weight Placement - Adhesive Weights
Important: When installing adhesive balance weights on flangeless wheels, do not install the weight on the outboard surface of the rim.
Adhesive wheel balance weights may be used on factory aluminium wheels. Perform the following procedure to install adhesive wheel balance weights.
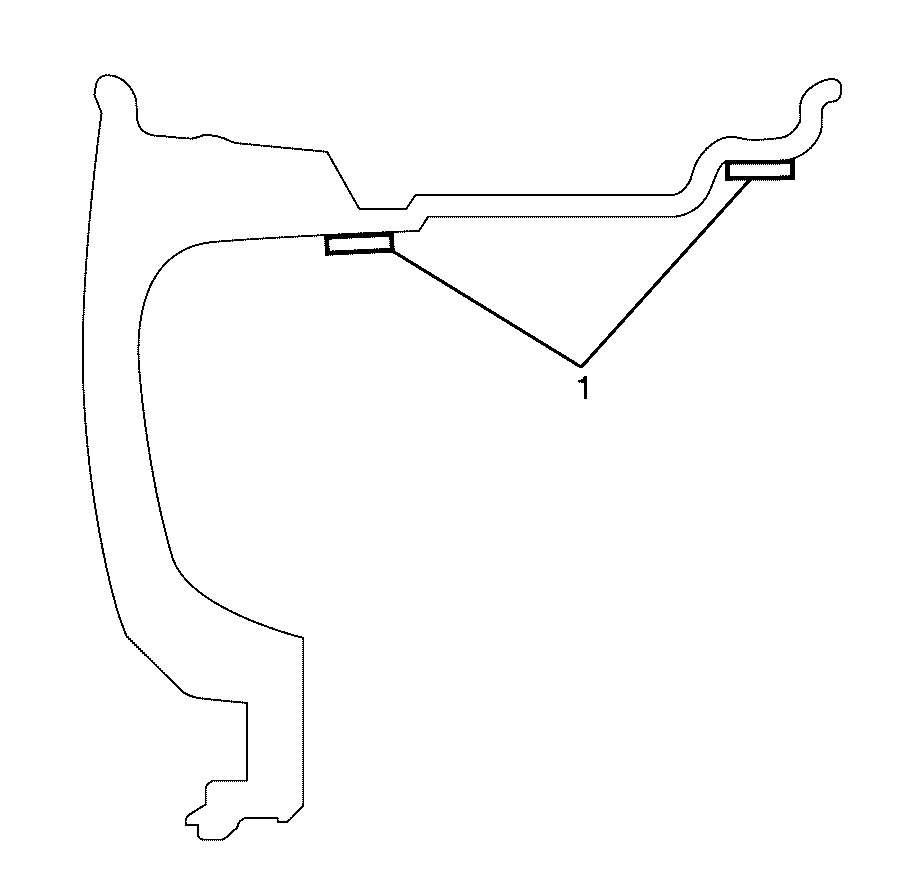
- Determine the correct areas for placement of the wheel weights on the wheel (1).
- Make sure that there is sufficient clearance between the wheel weights and brake system components.
- Clean the designated balance weight attachment areas.
- Dry the attachment areas with hot air until the wheel surface is warm to the touch.
- Warm the adhesive backing on the wheel balance weights to room temperature.
- Remove the protective covering from the adhesive backing on the back of the balance weights.
- Install the wheel balance weights to the wheel.
Important: On Type B wheels, any outer balance weights should align with the spokes of the wheel.
Important: To ensure proper adhesion on Type B wheels, locate stick-on balance weights on flat surfaces only.
When balancing, separate adhesive weight planes as much as possible, minimising the weight required to balance the wheel and tyre assembly.
Important: Do not use abrasives to clean any surface of the wheel. The balance weight attachment areas must be free from corrosion, dirt, oil or any other foreign material.
Important: Do not touch the adhesive surface.
Important: Press the wheel balance weights into place with firm hand pressure.
Tire and Wheel Assembly Balancing - Off Vehicle LWBHSV
Wheel Weight Usage
Important: Clip-on wheel balance weights are not suitable for the following wheels sizes. Stick-on adhesive weights must be used.
Model | Engine | Wheel | Tyre Designation |
|---|---|---|---|
Grange | V8 | 8.0J x 19 alloy | 245/40 ZR19 98Y |
Grange | V8 | 9.5J x 19 alloy | 275/35 ZR19 96Y |
Wheel Weight Placement - Adhesive Weights
- Determine the correct areas for placement of the wheel weights on the wheel (1).
- Make sure that there is sufficient clearance between the wheel weights and brake system components.
- Clean the designated balance weight attachment areas.
- Dry the attachment areas with hot air until the wheel surface is warm to the touch.
- Warm the adhesive backing on the wheel balance weights to room temperature.
- Remove the protective covering from the adhesive backing on the back of the balance weights.
- Install the wheel balance weights to the wheel.
Important: When installing adhesive balance weights on flangeless wheels, do not install the weight on the outboard surface of the rim.
Important: Adhesive wheel balance weights may be used on factory aluminium wheels. Perform the following procedure to install adhesive wheel balance weights.
Important: On Type B wheels, any outer balance weights should align with the spokes of the wheel.
Important: To ensure proper adhesion on Type B wheels, locate stick-on balance weights on flat surfaces only.
Important: When balancing, separate adhesive weight planes as much as possible, minimising the weight required to balance the wheel and tyre assembly.
Important: Do not use abrasives to clean any surface of the wheel. The balance weight attachment areas must be free from corrosion, dirt, oil or any other foreign material.
Important: Do not touch the adhesive surface.
Important: Press the wheel balance weights into place with firm hand pressure.
Tire and Wheel Assembly Balancing - Off Vehicle LWB SWB
Caution: Failure to adhere to the following precautions before tire balancing
can result in personal injury or damage to components:
• Clean away any dirt or deposits from the inside of the wheels. • Remove any stones from the tread. • Wear eye protection. • Use coated weights on aluminum wheels.
Tyre and Wheel Assembly Balancer Calibration
- Tyre and wheel balancers can drift out of calibration over time, or can become inaccurate as a result of heavy use. It is likely there will not be any visual evidence that a calibration problem exists. If a balancer is not calibrated within specifications, and a tyre and wheel assembly is balanced on that machine, the assembly may actually be unbalanced.
- Tyre and wheel assembly balancer calibration should be checked and serviced in accordance with manufacturer's specifications and recommendations.
Tyre and Wheel Assembly Balancing Guidelines
- If the runout of the tyre and wheel assemblies has not yet been measured, refer to Tire and Wheel Assembly Runout Measurement - On-Vehicle , before proceeding.
- There are 2 types of tyre and wheel balance:
Important: Tyre and wheel assemblies which exhibit excessive runout can produce vibrations even if the assemblies are balanced.
It is strongly recommended that the tyre and wheel assembly runout be measured and corrected if necessary before the assemblies are balanced.Static Balance
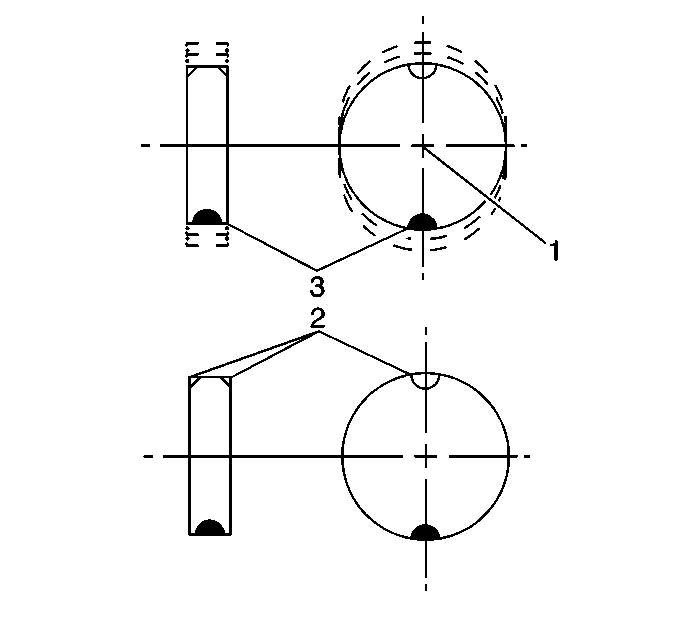
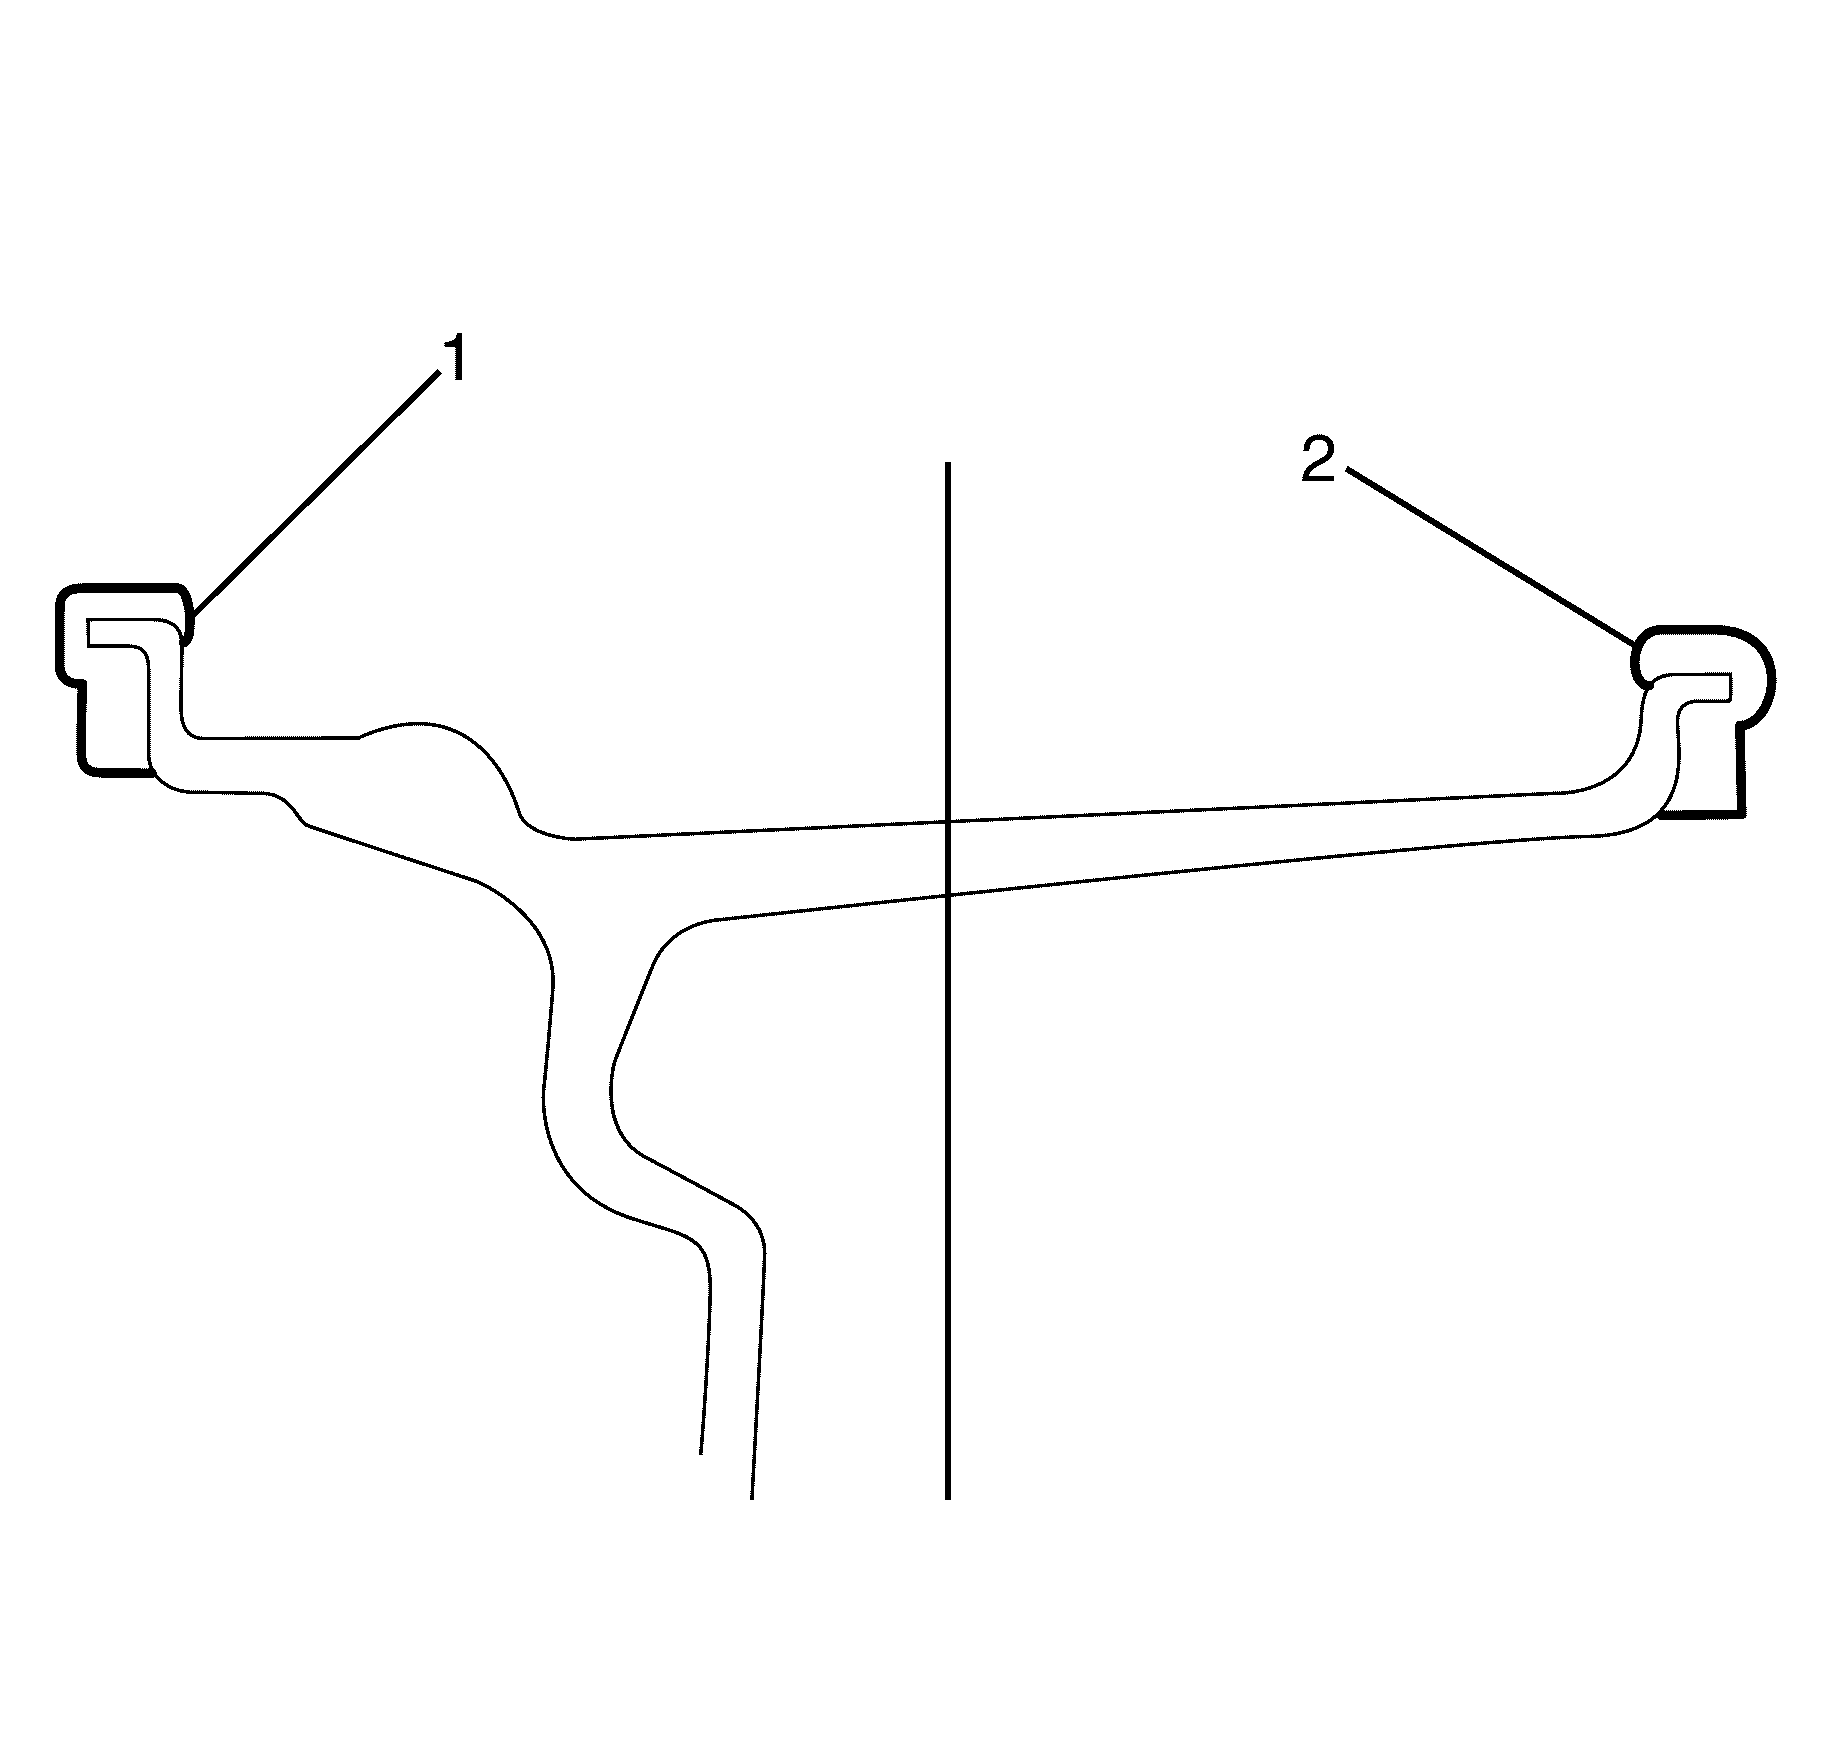
- Static balance is the equal distribution of weight around the wheel circumference. The wheel balance weights (2) are positioned on the wheel in order to offset the effects of a heavy spot (3).
- Wheels that have static imbalance can produce a bouncing action around the wheel centre (1) called tramp.
Dynamic Balance
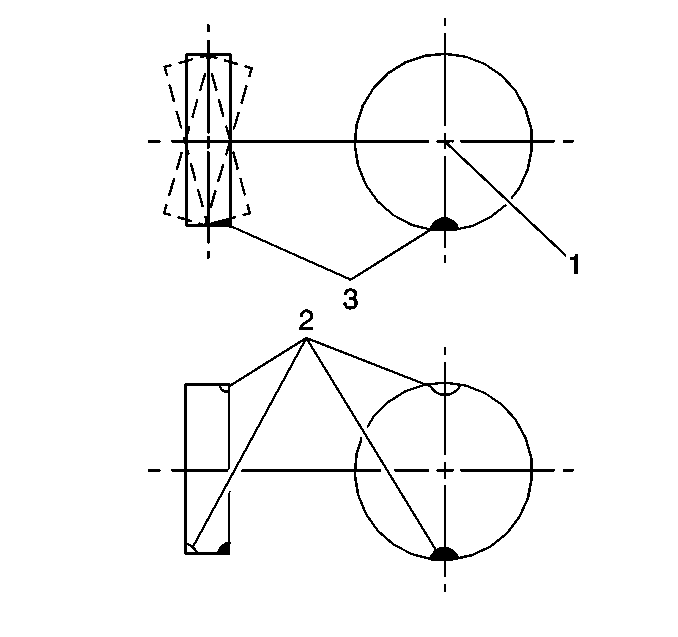
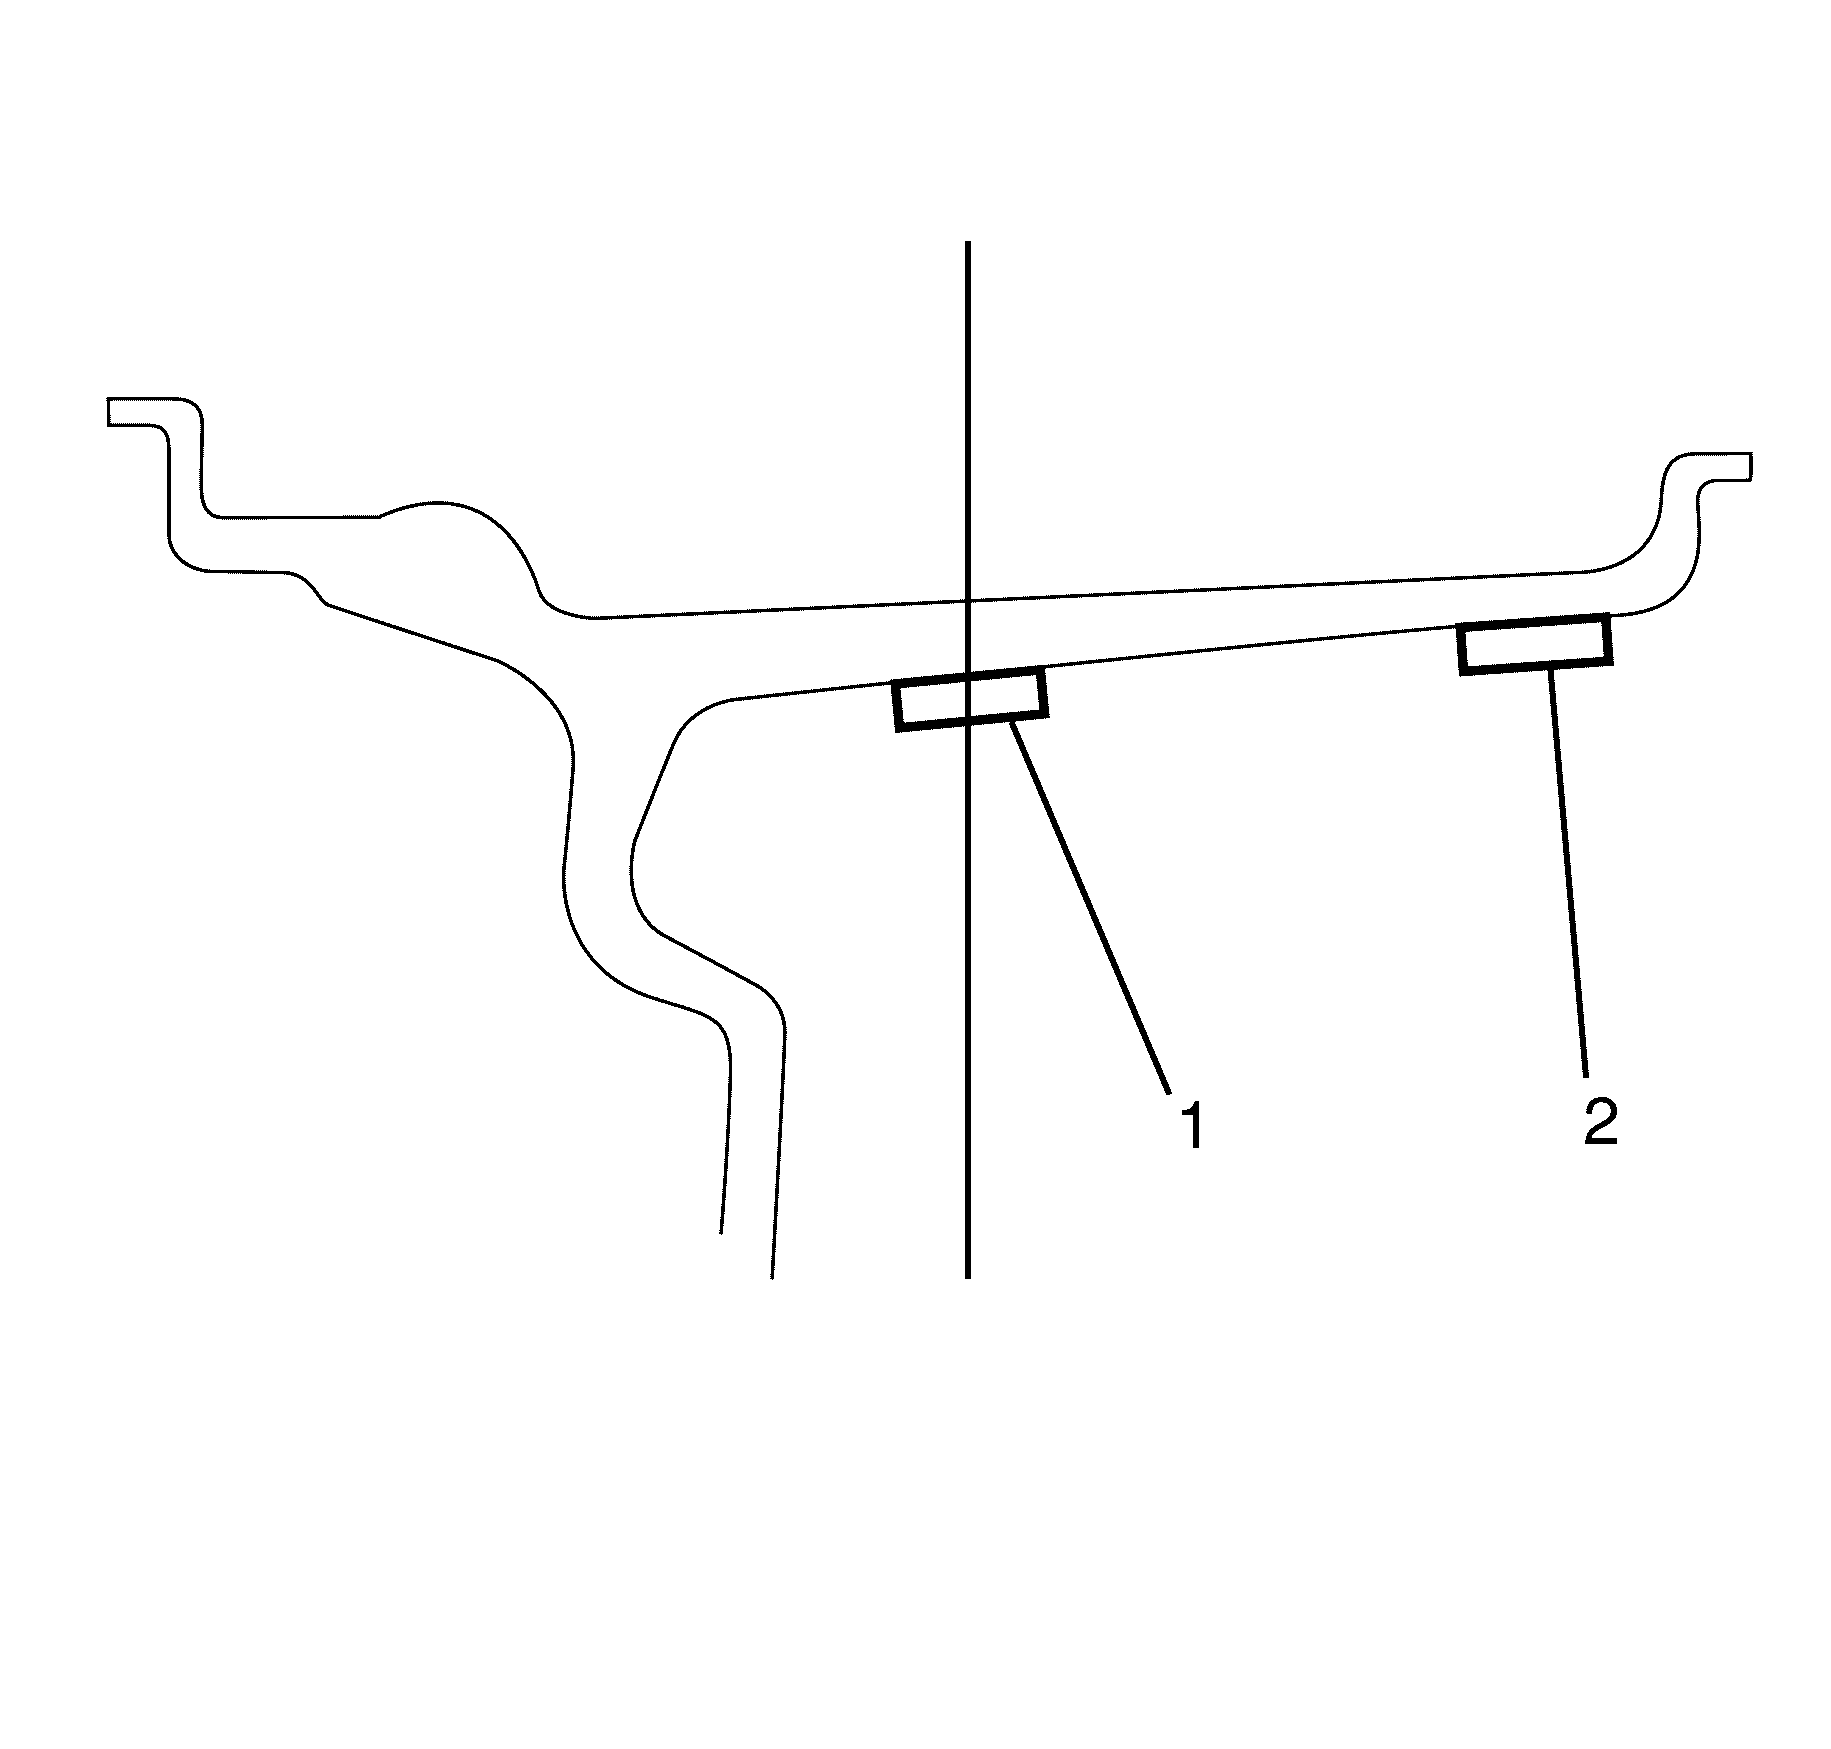
- Dynamic balance is the equal distribution of weight on each side of the tyre and wheel assembly centre-line. The wheel balance weights (2) are positioned on the wheel in order to offset the effects of a heavy spot (3). Wheels that have dynamic imbalance have a tendency to move from side to side around the wheel centre (1) called shimmy.
- Most off-vehicle balancers are capable of checking both types of balance simultaneously.
- As a general rule, most vehicles are more sensitive to static imbalance than to dynamic imbalance; however, vehicles equipped with low profile, wide tread path, high performance tyres and wheels are susceptible to small amounts of dynamic imbalance.
Balancing Procedure
- Raise and support the vehicle. Refer to Lifting and Jacking the Vehicle.
- Remove the tyre and wheel assemblies. Refer to Tire and Wheel Removal and Installation.
- Mount a tyre and wheel assembly on a spin-type wheel balancer.
- Cycle the wheel balancer to determine if a tyre and wheel assembly imbalance exists.
- Balance all of the tyre and wheel assemblies.
- Install the tyre and wheel assemblies. Refer to Tire and Wheel Removal and Installation.
- Remove the safety stands.
- Lower the vehicle.
Caution: Refer to Safety Glasses Caution in the Preface section.
Caution: Refer to Vehicle Lifting Caution in the Preface section.
Important: When balancing tyre and wheel assemblies, use a calibrated and well maintained, off-vehicle, two-plane dynamic balancer set to the finest balance mode available.
Important: Note the location of each tyre and wheel assembly in relation to the original position on the vehicle.
Important: The wheel must be mounted on the spin-type wheel balancer in accordance with manufacturers instructions.
| • | If an imbalance is found remove and discard all wheel weights from the tyre and wheel assembly and continue the procedure. |
| • | If an imbalance is not found. Refer to Strategy Based Diagnosis. |
Important: The correct type of wheel balance weights for the type of wheel rim being balanced must be used. The correct type of coated wheel balance weights for aluminium wheels must be used. Refer to Wheel Weight Usage within this procedure.
Important: The tyre and wheel assembly must be balanced in accordance with the wheel balancer manufacturers instructions.
Important: The tyre and wheel assemblies must be installed in the correct location in relation to the original position on the vehicle.
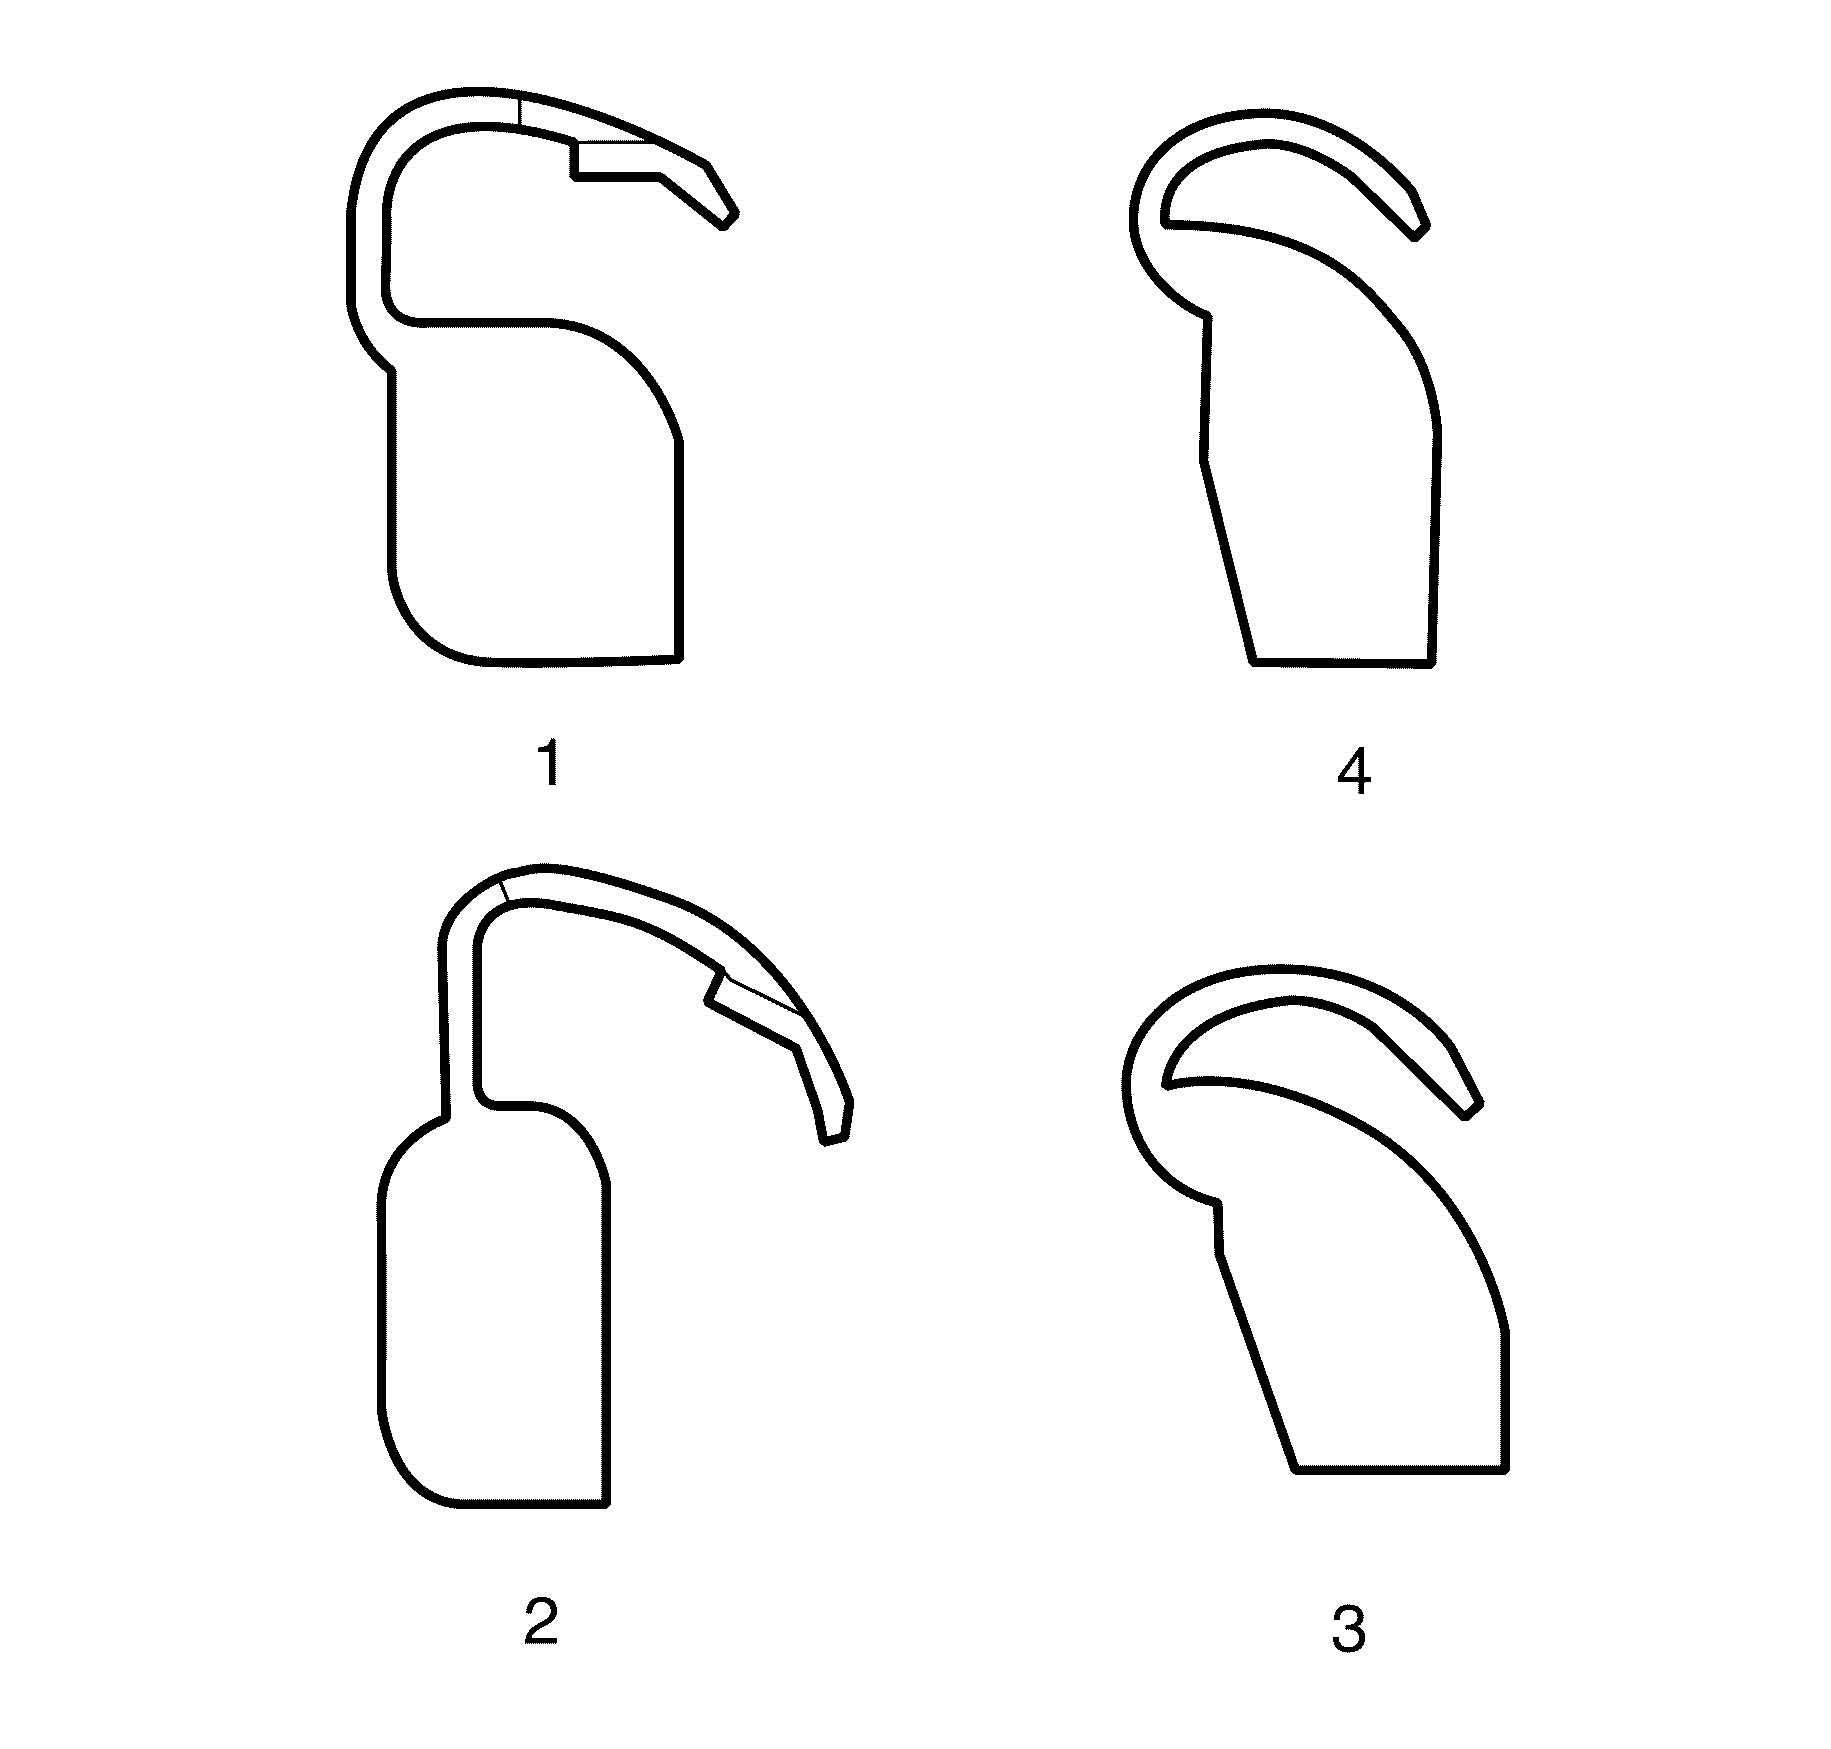
Wheel Weight Usage
- MC (1) and AW (2) series weights are approved for use on aluminium wheels.
- P (3) series weights are approved for use on steel wheels only.
- T (4) series coated weights are approved for use on both steel and aluminium wheels.
Important: When balancing factory aluminium wheels with clip-on wheel balance weights, be sure to use special polyester-coated weights. These coated weights reduce the potential for corrosion and damage to aluminium wheels.
- The contour and style of the wheel rim flange will determine which type of clip-on wheel weight (1) should be used.
- The weight should follow the contour of the rim flange. The weight clip should firmly grip the rim flange.
Important: A nylon or plastic-tipped hammer must be used when installing coated clip-on wheel balance weights to minimize the possibility of damage to the polyester coating and wheel surface.
Wheel Weight Placement - Clip-on Weights
When balancing, install the wheel balance weights on the inboard (2) and outboard (1) rim flanges at the positions specified by the wheel balancer.
Wheel Weight Placement - Adhesive Weights
- Adhesive wheel balance weights may be used on factory aluminium wheels. Perform the following procedure to install adhesive wheel balance weights.
- Determine the correct areas for placement of the wheel weights on the wheel.
- Make sure that there is sufficient clearance between the wheel weights and brake system components.
- Clean the designated balance weight attachment areas.
- Dry the attachment areas with hot air until the wheel surface is warm to the touch.
- Warm the adhesive backing on the wheel balance weights to room temperature.
- Remove the protective covering from the adhesive backing on the back of the balance weights.
- Install the wheel balance weights to the wheel.
Important: When installing adhesive balance weights on flangeless wheels, do not install the weight on the outboard surface of the rim.
When balancing, locate the wheel balance weights along the wheel centre-line (1) and the inboard edge (2) of the inner wheel surface at the positions specified by the wheel balancer.
Important: Do not use abrasives to clean any surface of the wheel. The balance weight attachment areas must be free from corrosion, dirt, oil or any other foreign material.
Important: Do not touch the adhesive surface.
Important: Press the wheel balance weights into place with firm hand pressure.
