Tire Dismounting and Mounting LWB SWB
- Raise and support the vehicle. Refer to Lifting and Jacking the Vehicle .
- Remove the tyre and wheel assemblies from the vehicle. Refer to Tire and Wheel Removal and Installation .
- Deflate the tyre completely.
- Remove the tyre from the wheel, using a tyre changing machine.
- Remove any rubber, light rust or corrosion from the wheel bead seats.
- Apply an approved Lubricant to the tyre bead and the wheel rim.
- Install the tyre to the wheel using a tyre changer.
- Inflate the tyre to the specified pressure. Refer to Tire Inflation Pressure Specifications .
- Make sure that the locating rings are visible on both sides of the tyre in order to verify that the tyre bead is fully seated on the wheel.
- Balance the tyre and wheel. Refer to Tire and Wheel Balancing off vehicle.
- Install the tyre and wheel. Refer to Tire and Wheel Removal and Installation .
- Remove the safety stands.
- Lower the vehicle.
Caution: Refer to Safety Glasses Caution in the Preface section.
Caution: Refer to Vehicle Lifting Caution in the Preface section.
Notice: Damage to either the tire bead or the wheel mounting holes can result from the use of improper wheel attachment or tire mounting procedures. It takes up to 70 seconds for all of the air to completely exhaust from a large tire. Failure to follow the proper procedures could cause the tire changer to put enough force on the tire to bend the wheel at the mounting surface. Such damage may result in vibration and/or shimmy, and under severe usage lead to wheel cracking.
Notice: Use a tire changing machine in order to dismount tires. Do not use hand tools or tire irons alone in order to remove the tire from the wheel. Damage to the tire beads or the wheel rim could result.
Notice: Do not scratch or damage the clear coating on aluminum wheels with the tire changing equipment. Scratching the clear coating could cause the aluminum wheel to corrode and the clear coating to peel from the wheel.
Important: If the tyre is to be refitted note and record the relationship and orientation of the tyre to the wheel.
Notice: When mounting the tires, use an approved tire mounting lubricant. DO NOT use silicon or corrosive base compounds to lubricate the tire bead and the wheel rim. A silicon base compound can cause the tire to slip on the rim. A corrosive type compound can cause tire or rim deterioration.
Important: Rim-clamp tyre changes are recommended.
Important: If fitting the original tyre maintain the original relationship and orientation of the tyre to the wheel.
Important: If fitting an Australian manufactured tyre align the RED dot on tyre to the mark on outer flange of wheel, or if there is no mark on the wheel, align RED dot to low point of wheel as measured with dial indicator.
Important: If fitting an European manufactured tyre align the WHITE dot on the tyre 180 degrees from the mark on outer flange of wheel, or if there is no mark on the wheel, align WHITE dot 180 degrees from the low point of the wheel as measured with the dial indicator.
Important: If fitting a Japanese manufactured tyre and there is a YELLOW dot but not a RED dot use the rule for Australian tyres. If there is a YELLOW and a RED dot, ignore the YELLOW dot and use the RED dot as per the rule for Australian tyres.
Caution: To avoid serious personal injury, do not stand over tire when inflating. The bead may break when the bead snaps over the safety hump. Do not exceed 275 kPa (40 psi) pressure when inflating any tire if beads are not seated. If 275 kPa (40 psi) pressure will not seat the beads, deflate, relubricate the beads and reinflate. Overinflation may cause the bead to break and cause serious personal injury.
Tire Dismounting and Mounting LWB
Removal Procedure
- Raise and support the vehicle. Refer to Lifting and Jacking the VehicleLifting and Jacking the Vehicle.
- Remove the tyre and wheel assemblies from the vehicle. Refer to Tire and Wheel Removal and InstallationTire and Wheel Removal and Installation.
- Remove the valve cap.
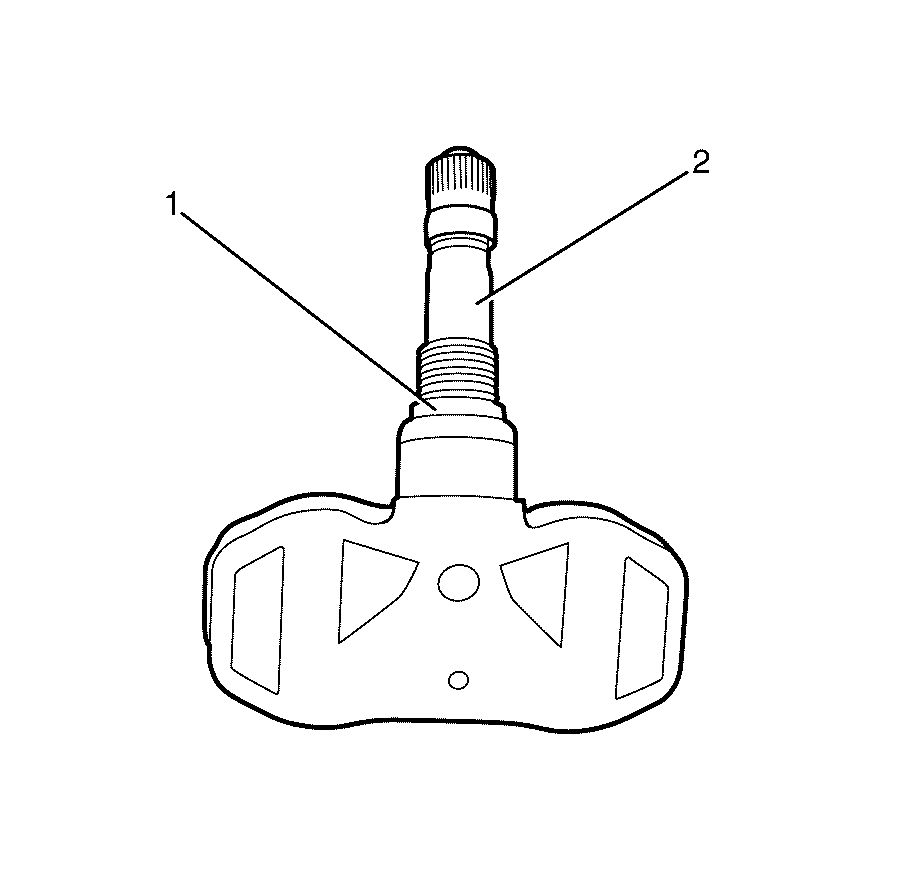
- Using a suitable tool remove the valve core (1) from the valve stem (2).
- Deflate the tyre completely.
- Remove the tyre from the wheel, using a tyre changing machine.
- Remove any rubber, light rust or corrosion from the wheel bead seats.
Caution: Refer to Safety Glasses Caution in the Preface section.
Caution: Refer to Vehicle Lifting Caution in the Preface section.
Notice: Refer to General Repair Instructions in the Preface section.
Important: The valve core (1) is a single use part. It must be discarded after removal.
Important: If the tyre is to be refitted note and record the relationship and orientation of the tyre to the wheel.
Discard the valve core.
Disassembly Procedure
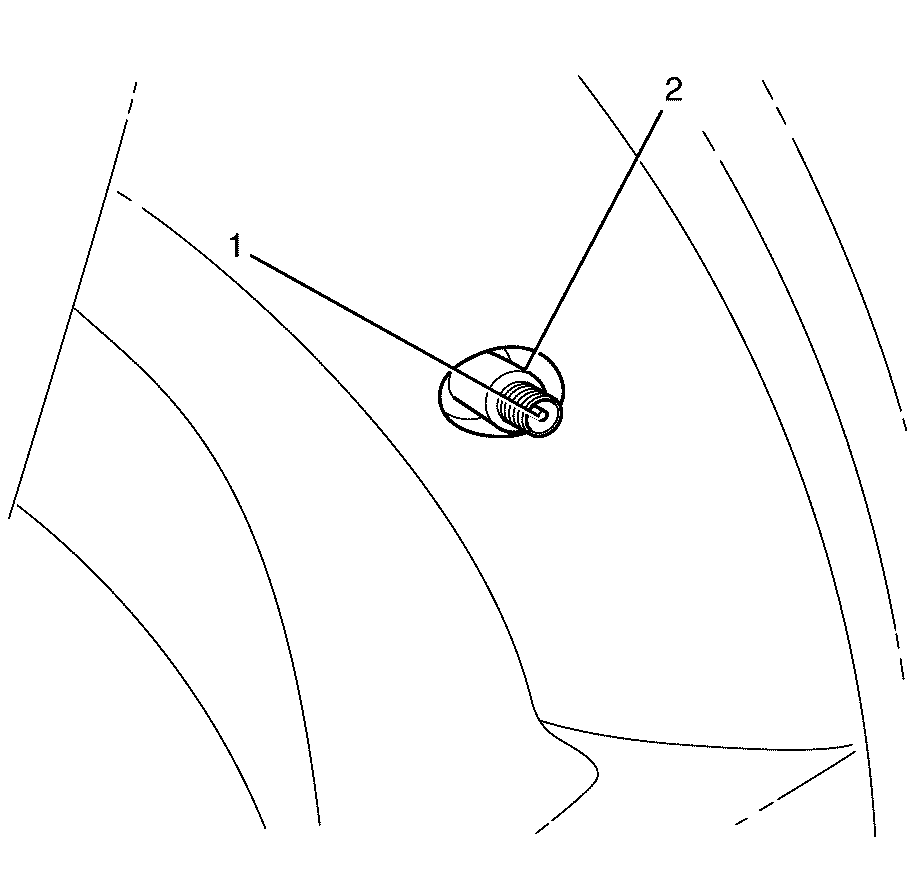
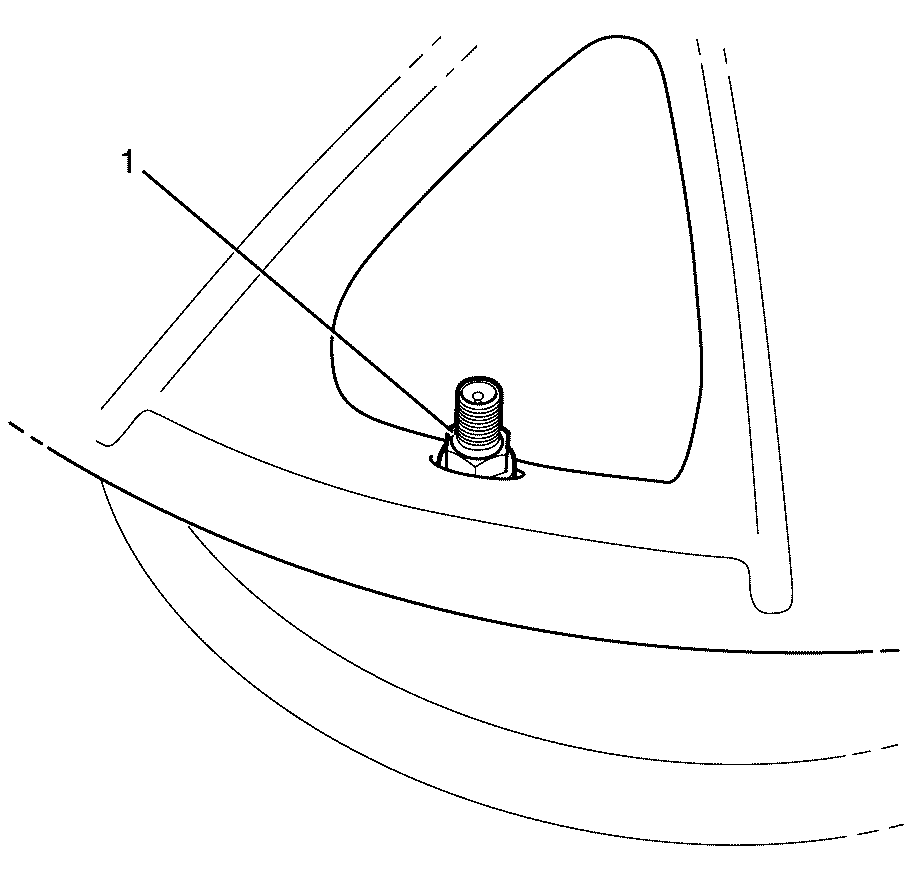
- Remove the tyre pressure transmitter to wheel retaining nut (1).
- Remove the tyre pressure transmitter from the wheel.
- Remove the tyre pressure transmitter (1) from the wheel (2).
- Remove the tyre pressure transmitter seal (1) from the tyre pressure transmitter (2).
Important: The tyre pressure transmitter to wheel retaining nut (1) is a single use part. It must be discarded after removal.
Discard the nut.

Important: The tyre pressure transmitter seal (1) is a single use part. It must be discarded after removal.
Discard the seal.
Assembly Procedure
- Install a NEW tyre pressure transmitter seal (1) to the tyre pressure transmitter (2).
- Position tyre pressure transmitter (1) to the wheel (2).
- Install a NEW tyre pressure transmitter to wheel retaining nut (1).
Notice: Refer to Fastener Notice in the Preface section.
Important: Secure the tyre pressure transmitter in the valve hole while tightening.
Tighten
Tighten the nut to 2 N·m (18 lb in).
Installation Procedure
- Apply an approved lubricant to the tyre bead and the wheel rim.
- Install the tyre using a tyre changing machine.
- Install a NEW valve core (1) to the valve stem (2).
- Inflate the tyre until the bead snaps over the safety hump then inflate to the specified pressure. Refer to Tire Inflation Pressure SpecificationsTire Inflation Pressure Specifications.
- Install a valve cap to the valve stem.
- Make sure that the locating rings are visible on both sides of the tyre in order to verify that the tyre bead is fully seated on the wheel.
- Balance the tyre and wheel assemblies. Refer to Tire and Wheel BalancingTire and Wheel Balancing (Off Vehicle).
- Install the tyre and wheel assemblies. Refer to Tire and Wheel Removal and InstallationTire and Wheel Removal and Installation.
- Lower the vehicle.
Notice: Refer to General Repair Instructions in the Preface section.
Important: Rim-clamp tyre changers are recommended.
Important: If fitting the original tyre maintain the original relationship and orientation of the tyre to the wheel.
Important: If fitting an Australian manufactured tyre align the RED dot on tyre to the mark on outer flange of wheel, or if there is no mark on the wheel, align RED dot to low point of wheel as measured with dial indicator.
Important: If fitting an European manufactured tyre align the WHITE dot on the tyre 180 degrees from the mark on outer flange of wheel, or if there is no mark on the wheel, align WHITE dot 180 degrees from the low point of the wheel as measured with the dial indicator.
Important: If fitting a Japanese manufactured tyre and there is a YELLOW dot but not a RED dot use the rule for Australian tyres. If there is a YELLOW and a RED dot, ignore the YELLOW dot and use the RED dot as per the rule for Australian tyres.
Caution: Refer to General Repair Instructions in the Preface section.
