Removal Procedure
- Raise and support the vehicle. Refer to Lifting and Jacking the Vehicle.
- Remove the rear wheel. Refer to Tire and Wheel Removal and Installation.
- Support the lower control arm using a suitable jack.
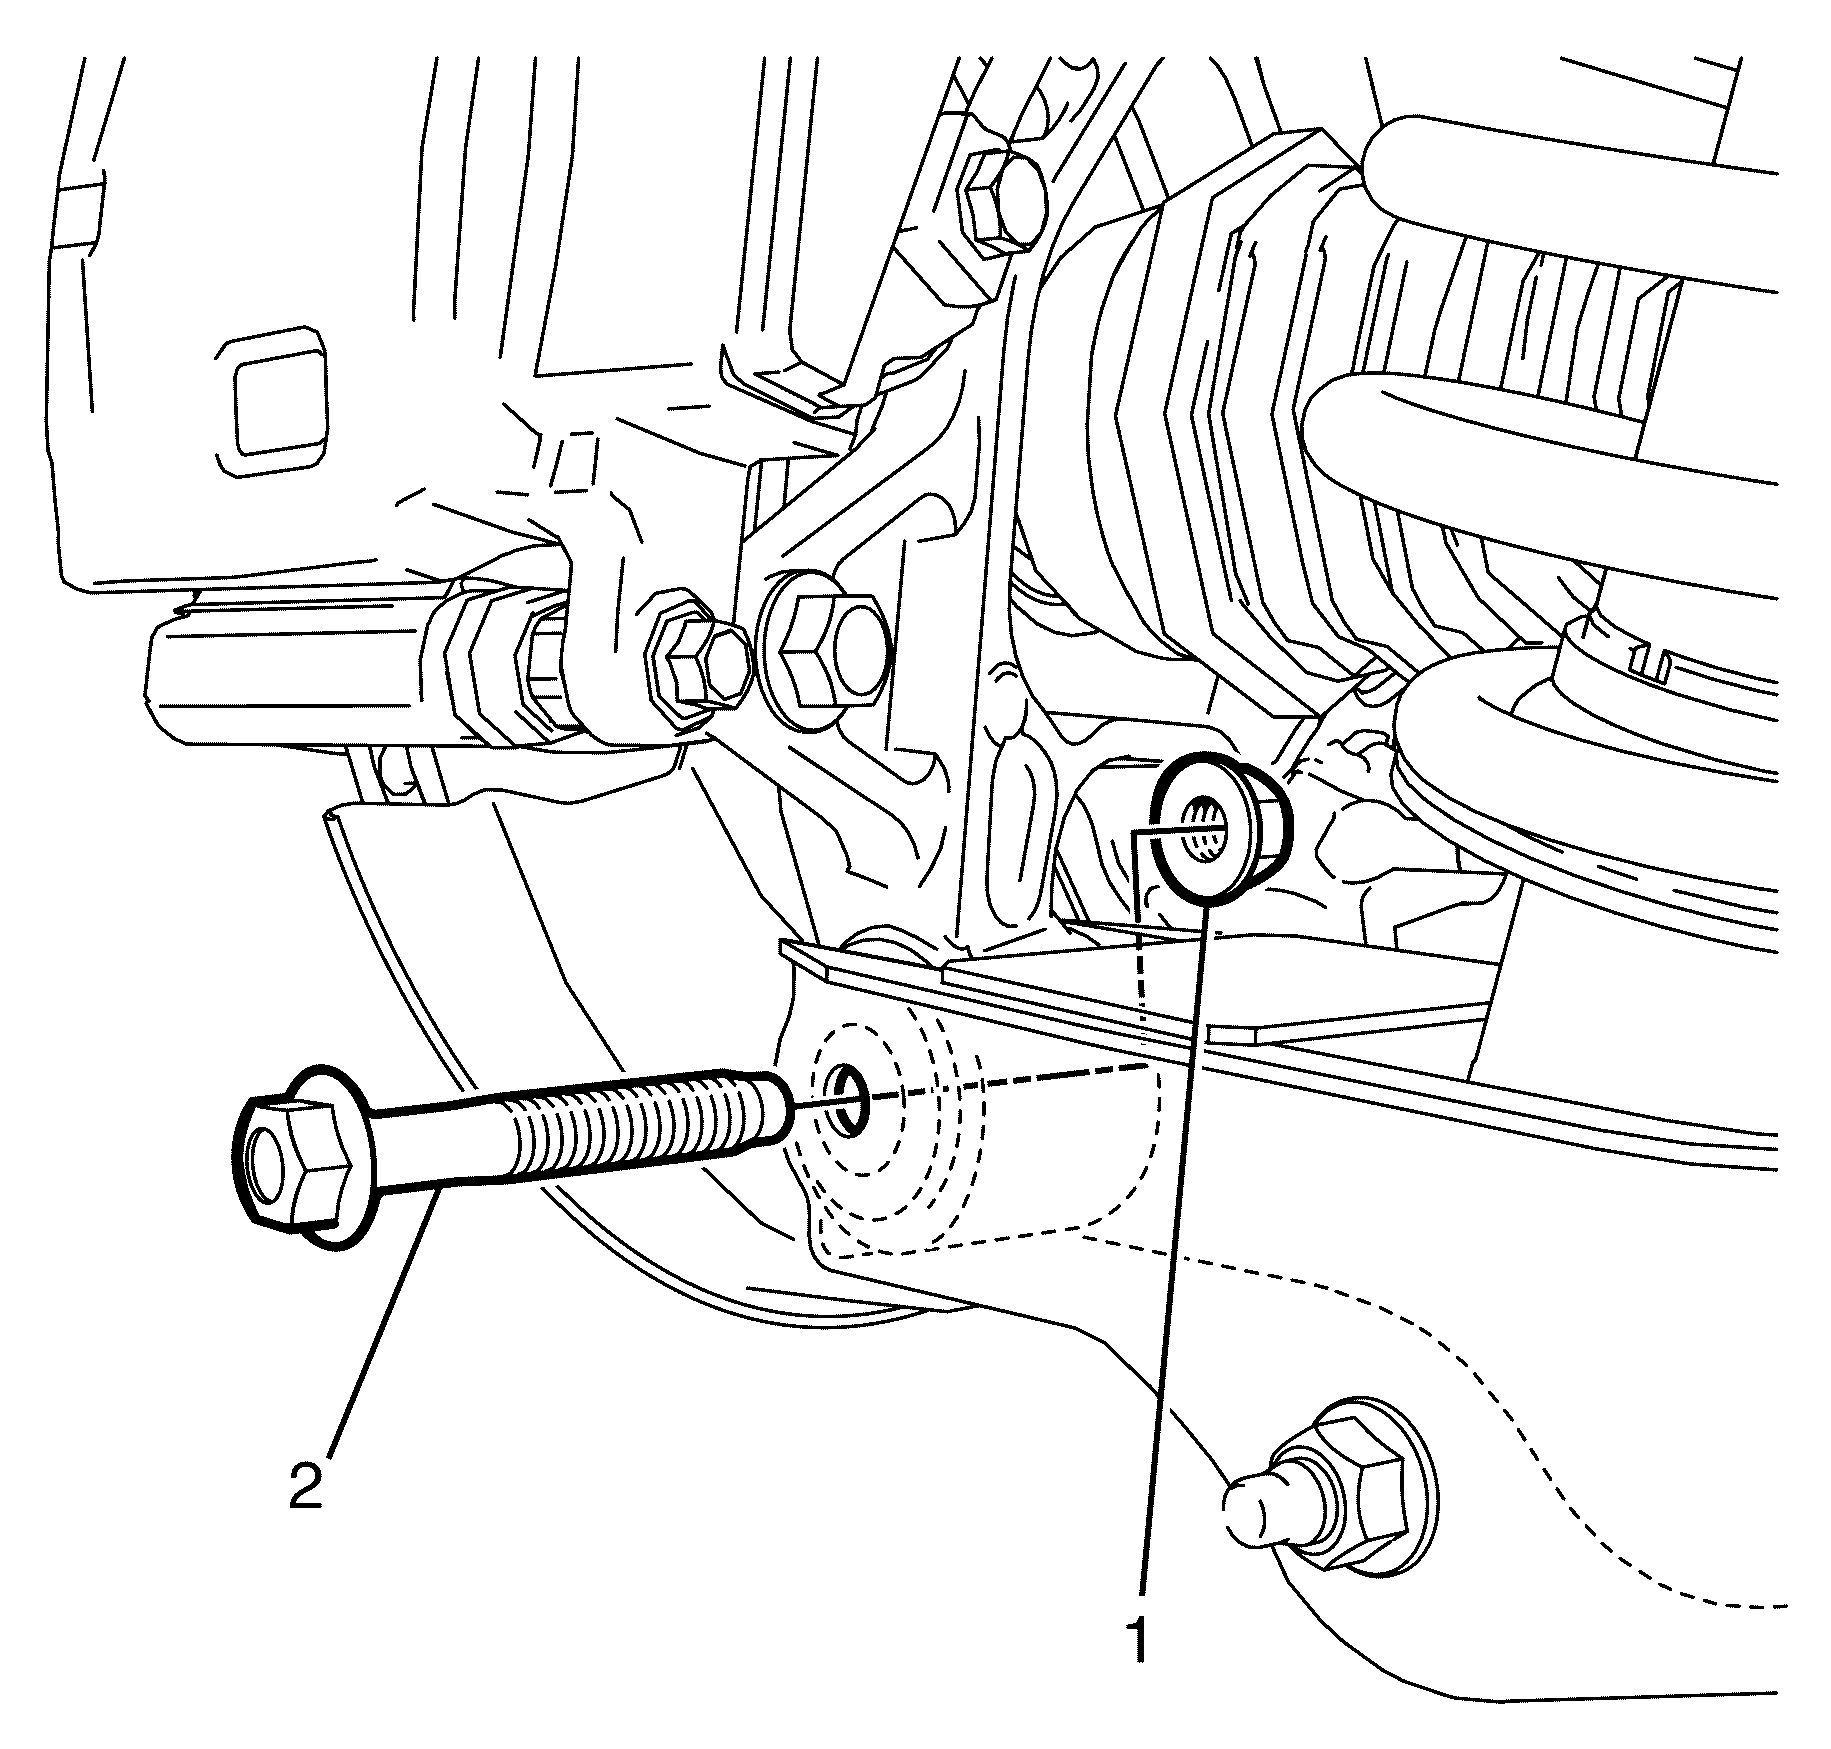
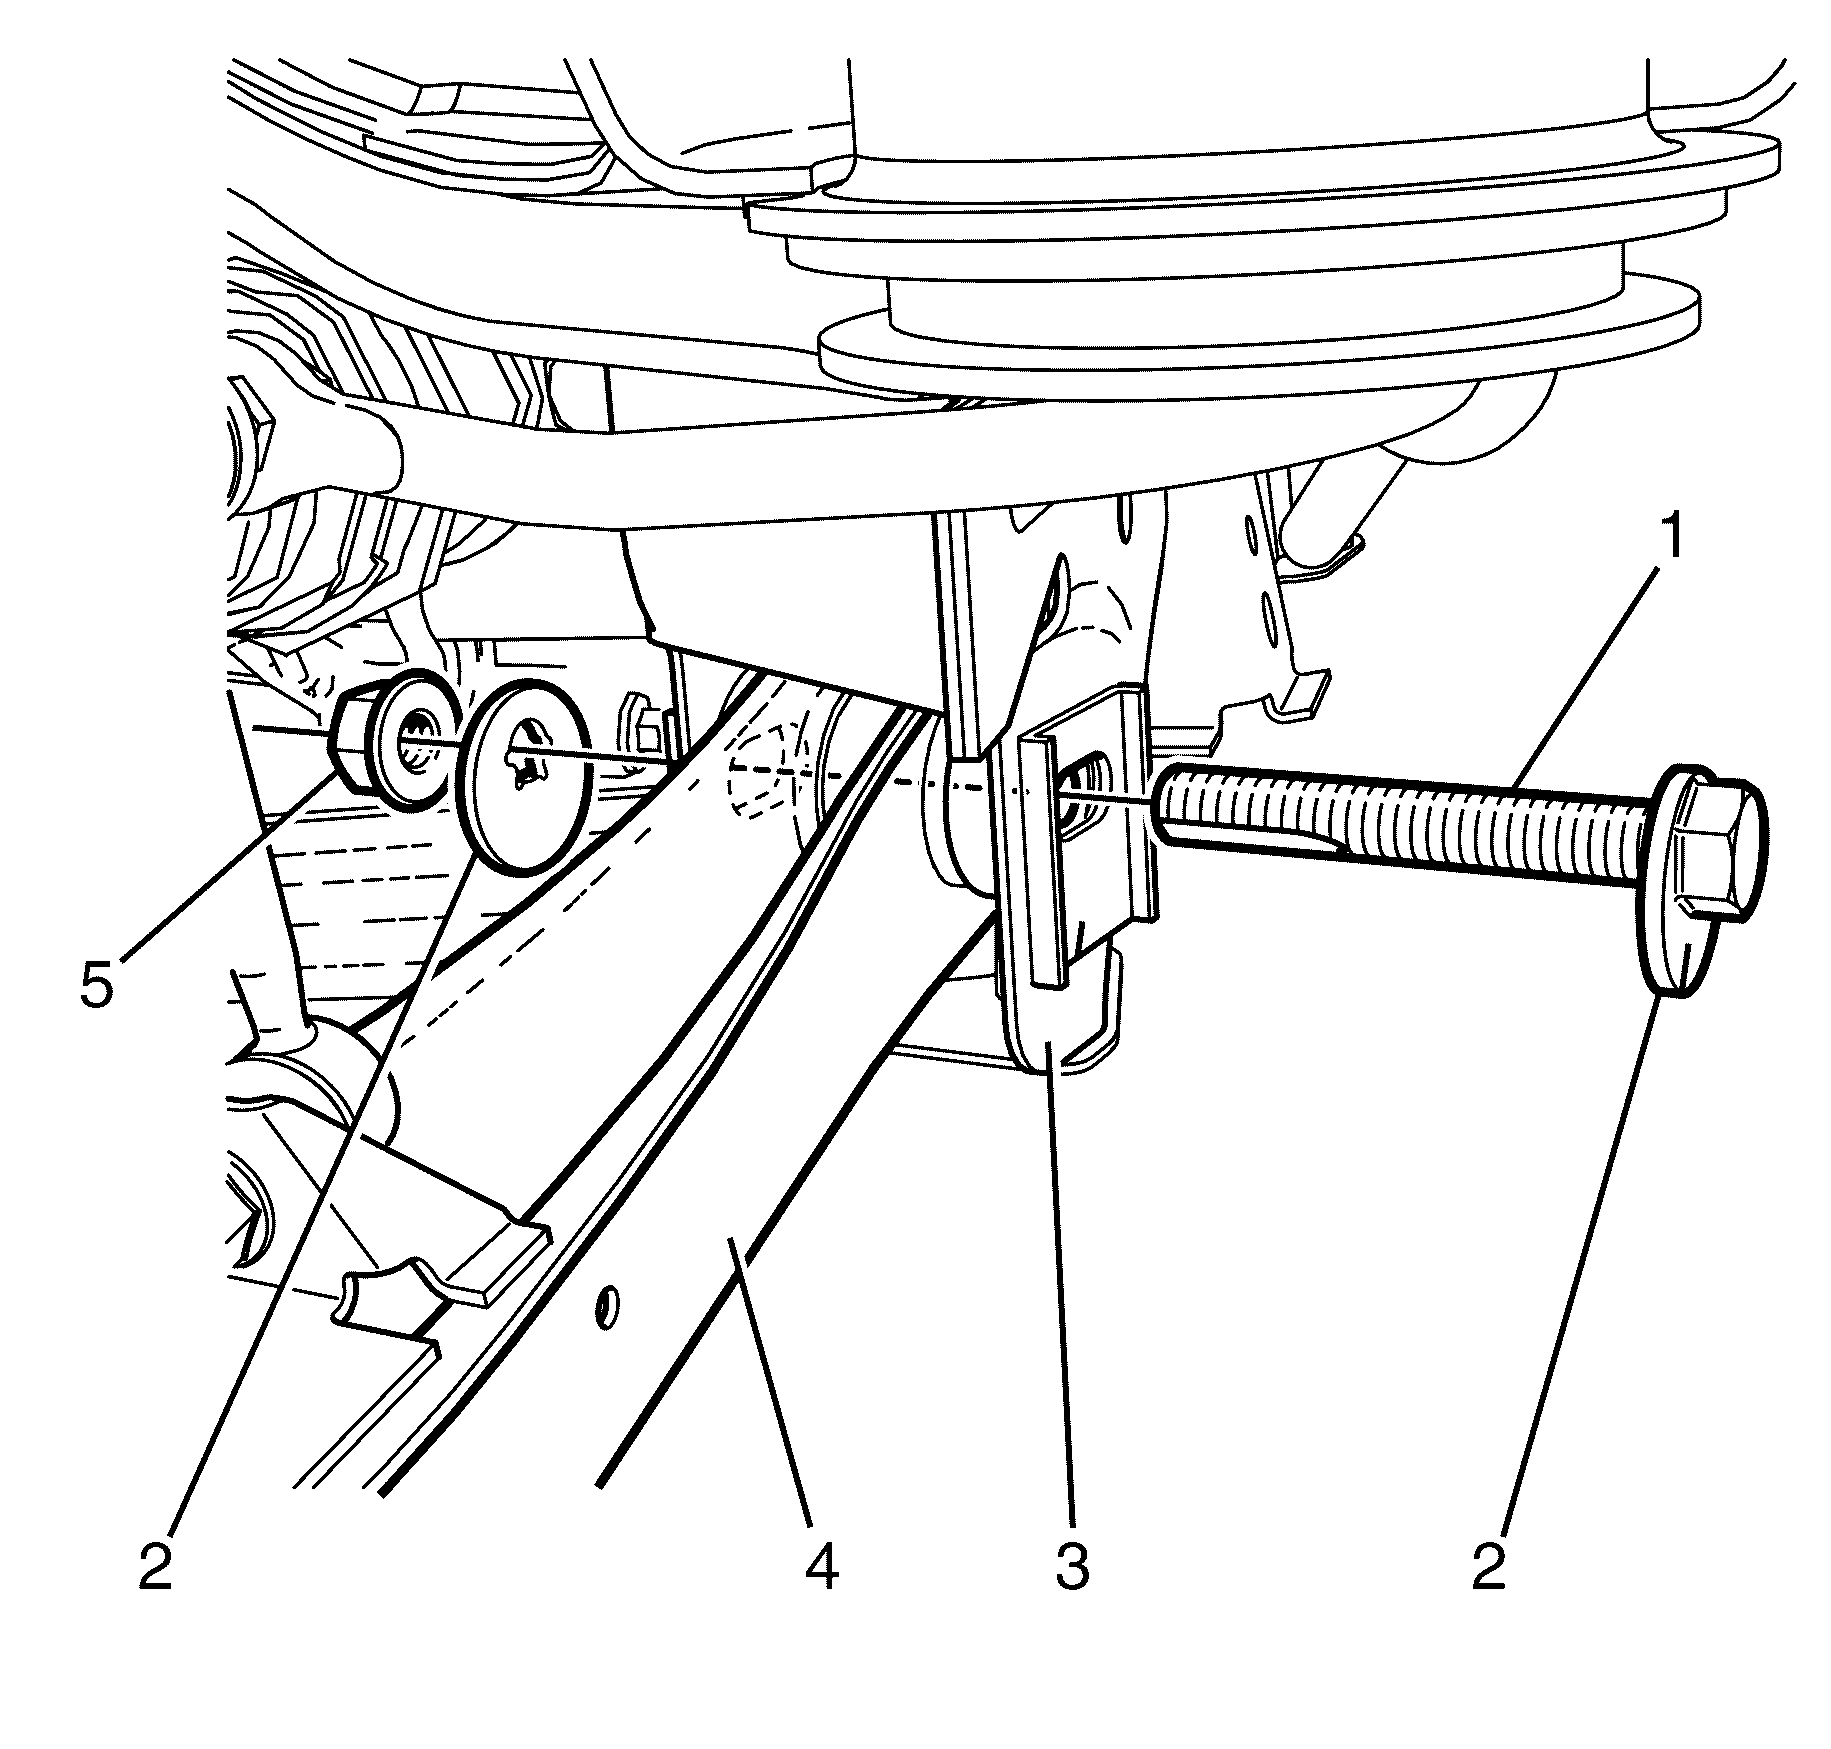
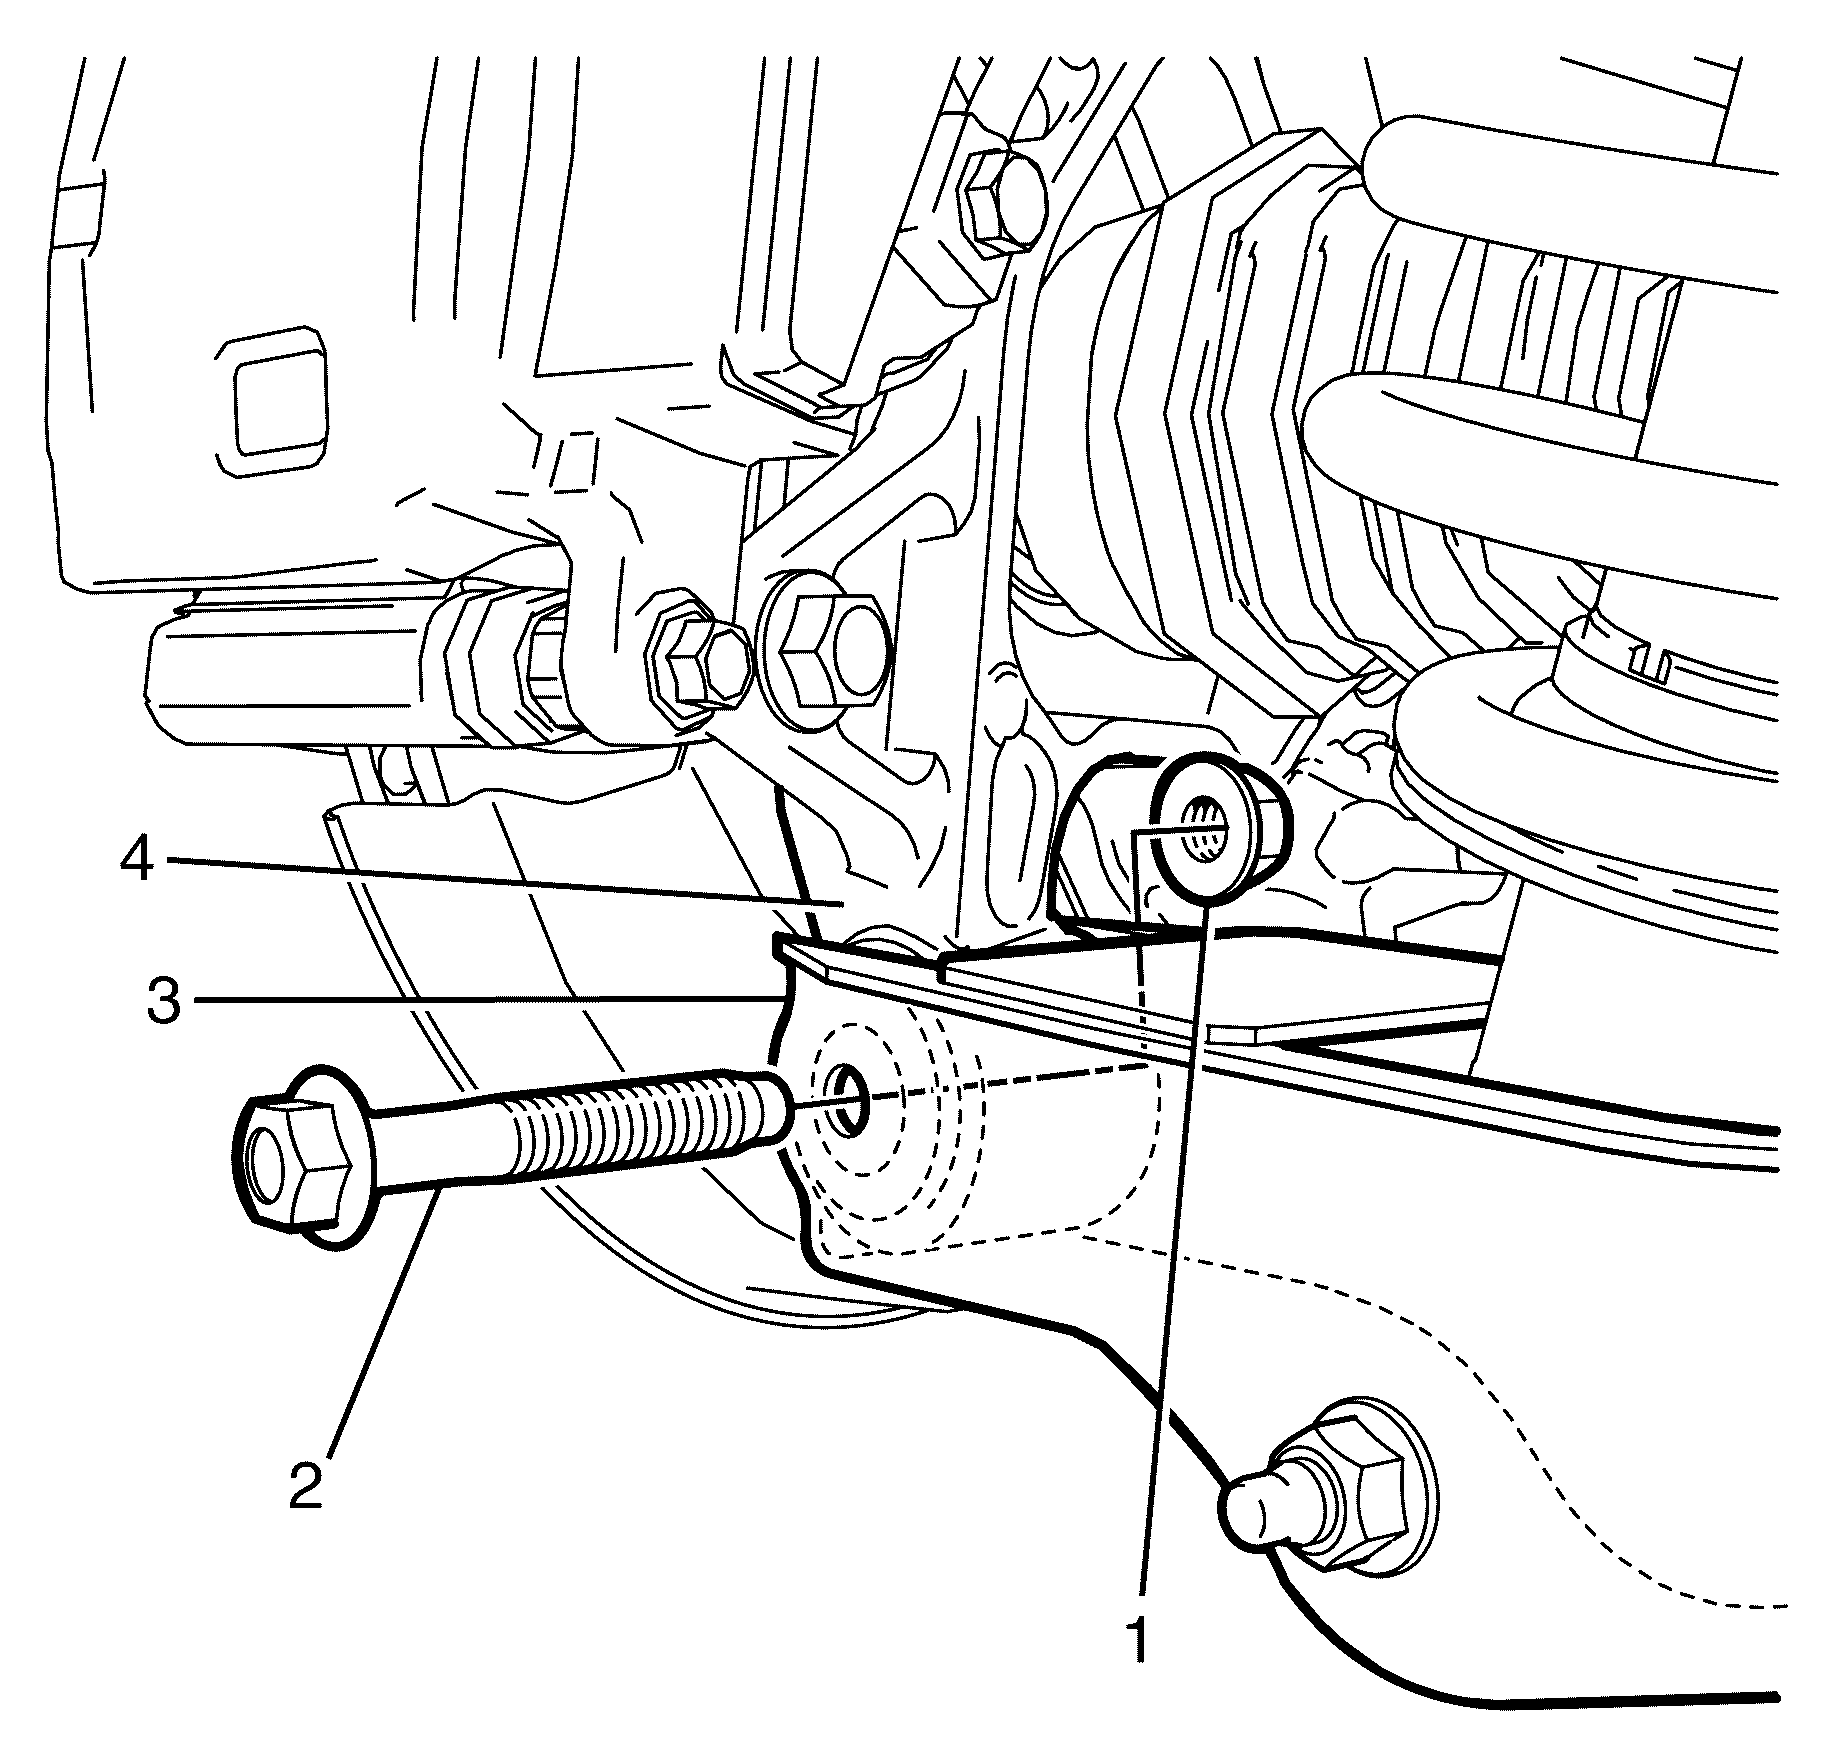
- Remove the stabiliser bar link to lower control arm retaining nut (3).
- Disconnect the stabiliser bar link (1) from the lower control arm (2).
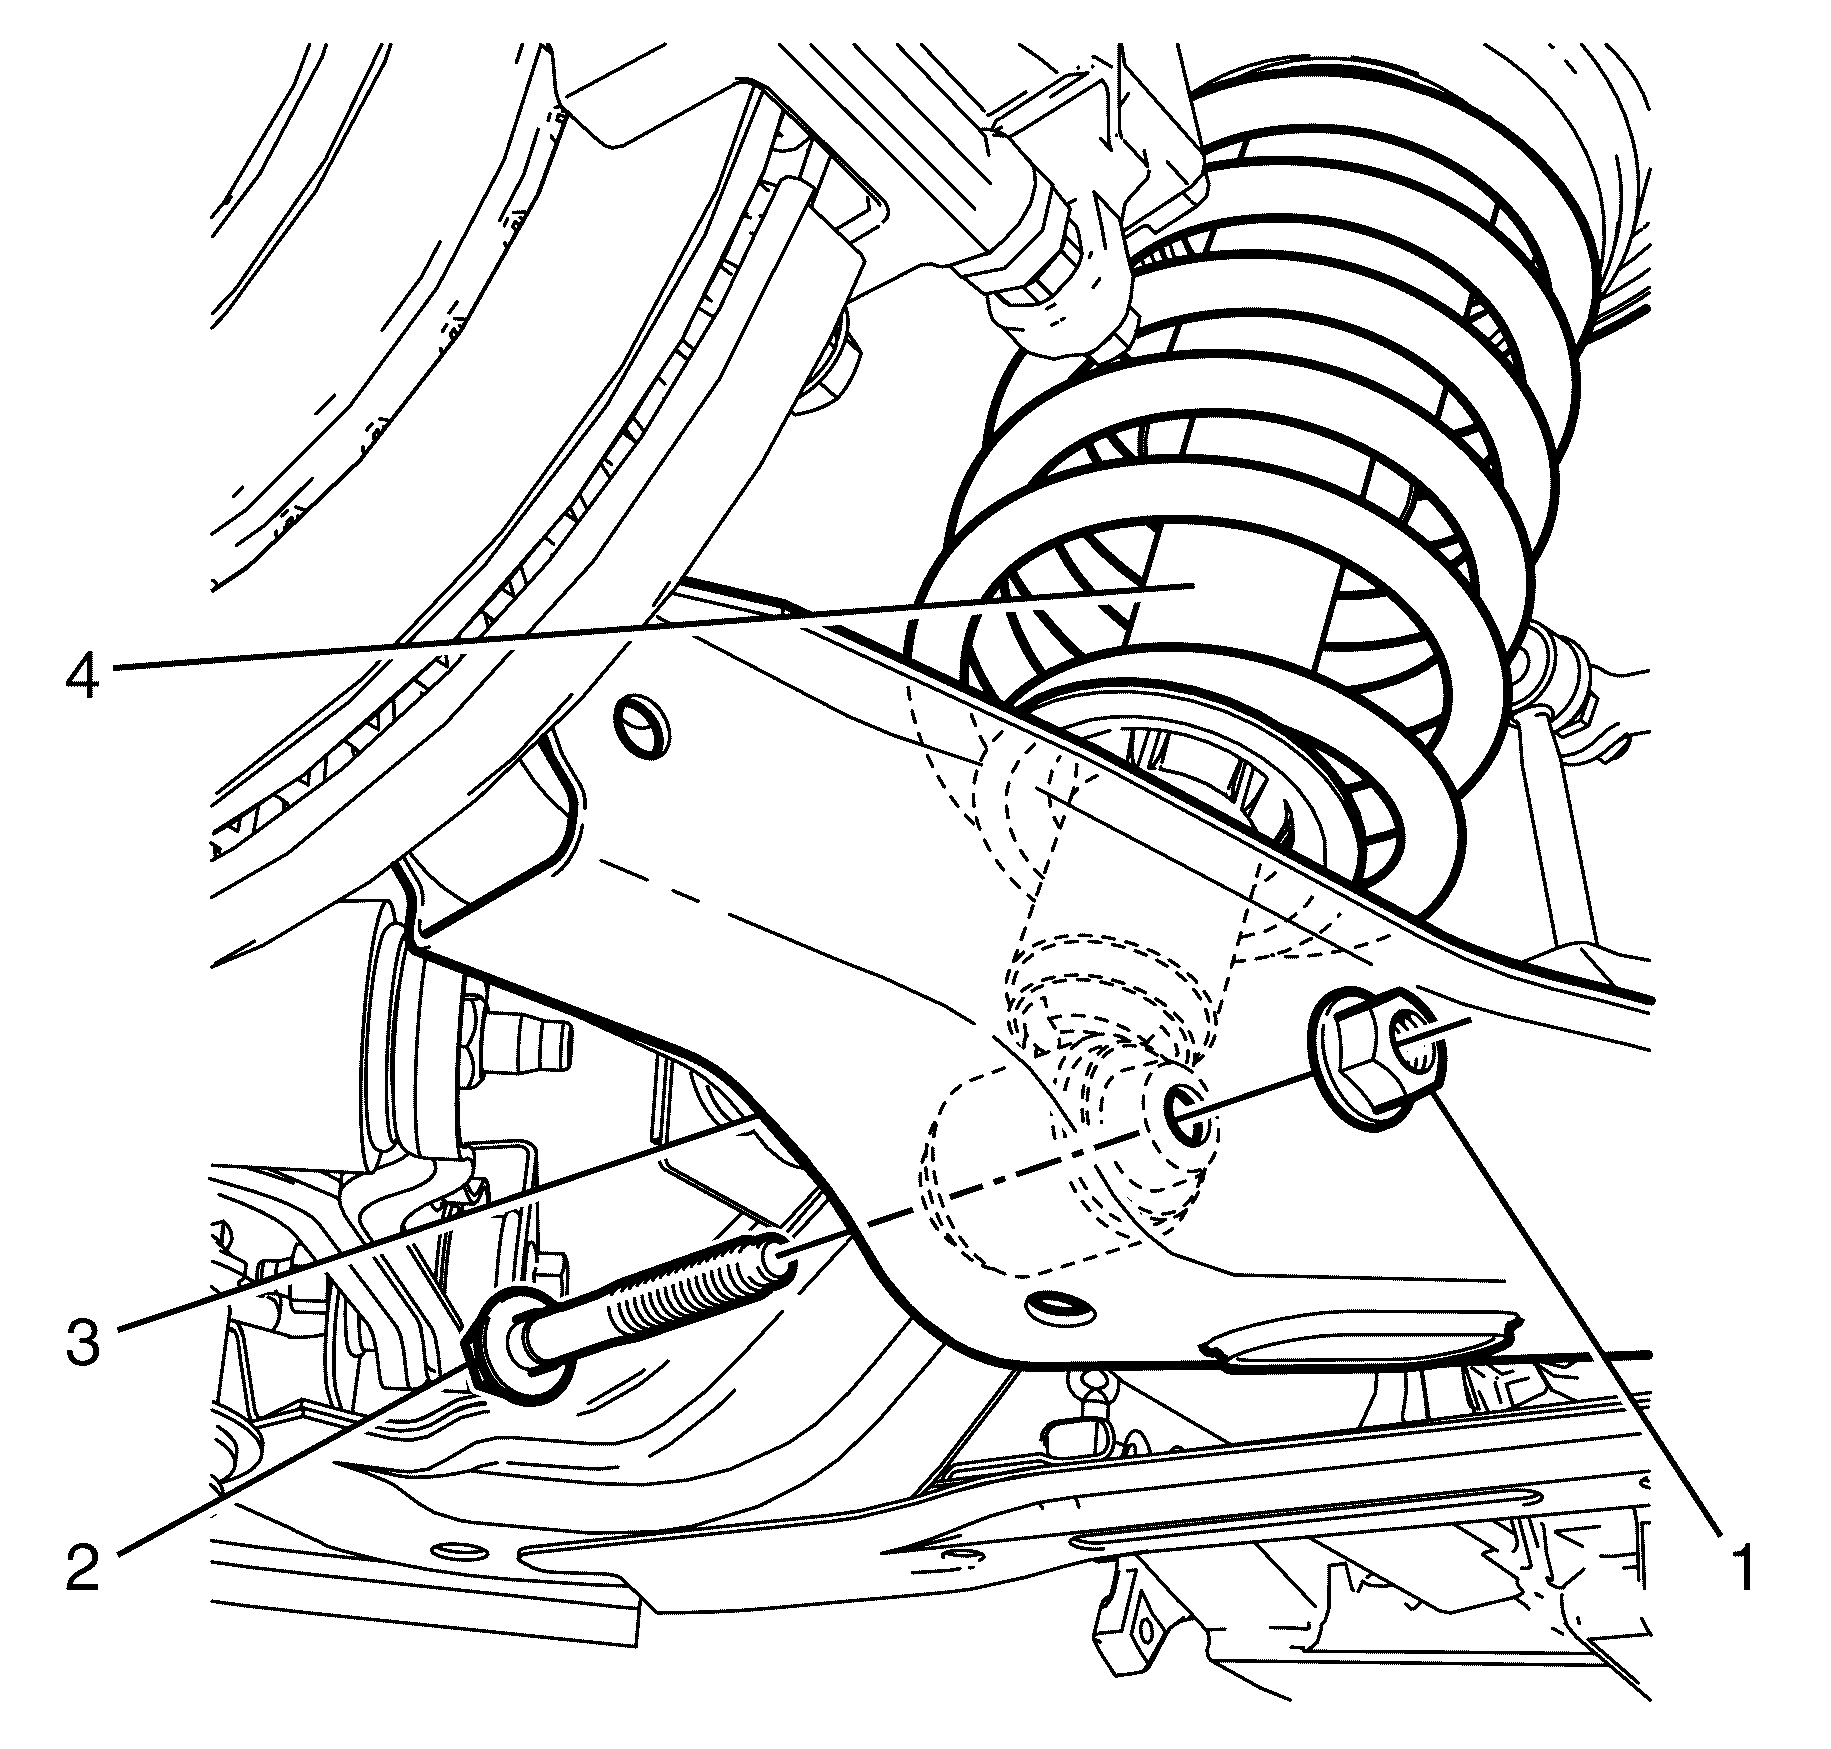
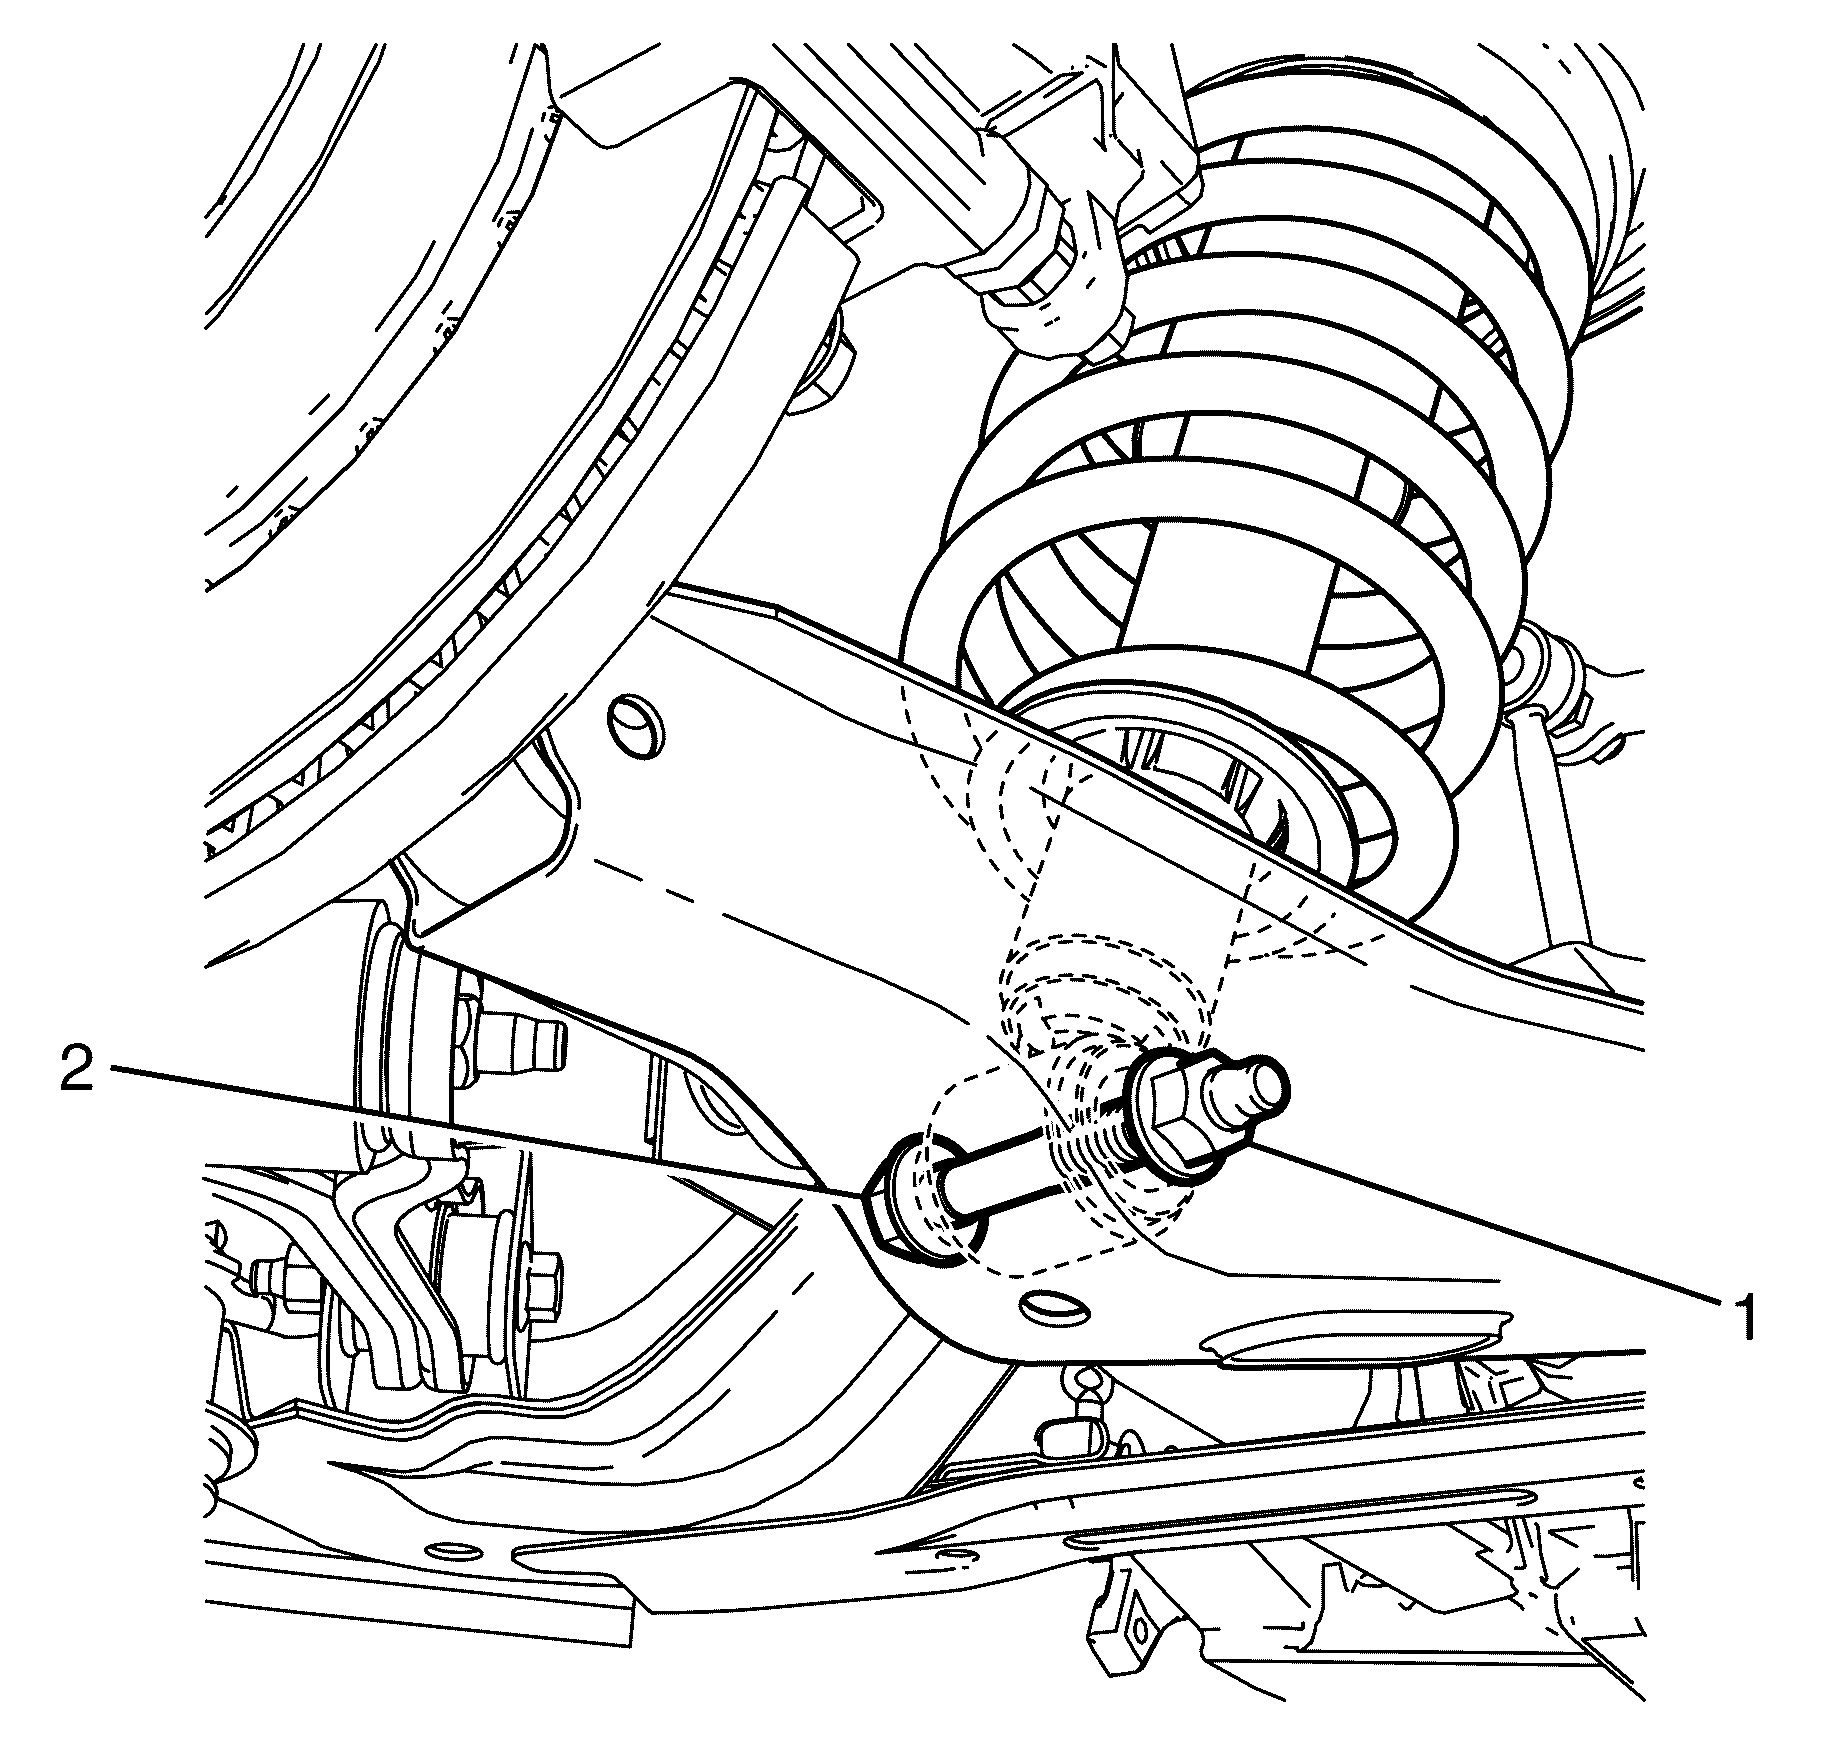
- Remove the lower control arm to knuckle retaining bolt (2) and nut (1).
- Remove the lower control arm to strut assembly retaining bolt (2) and nut (1).
- Detach the lower control arm (1) using a suitable pry bar.
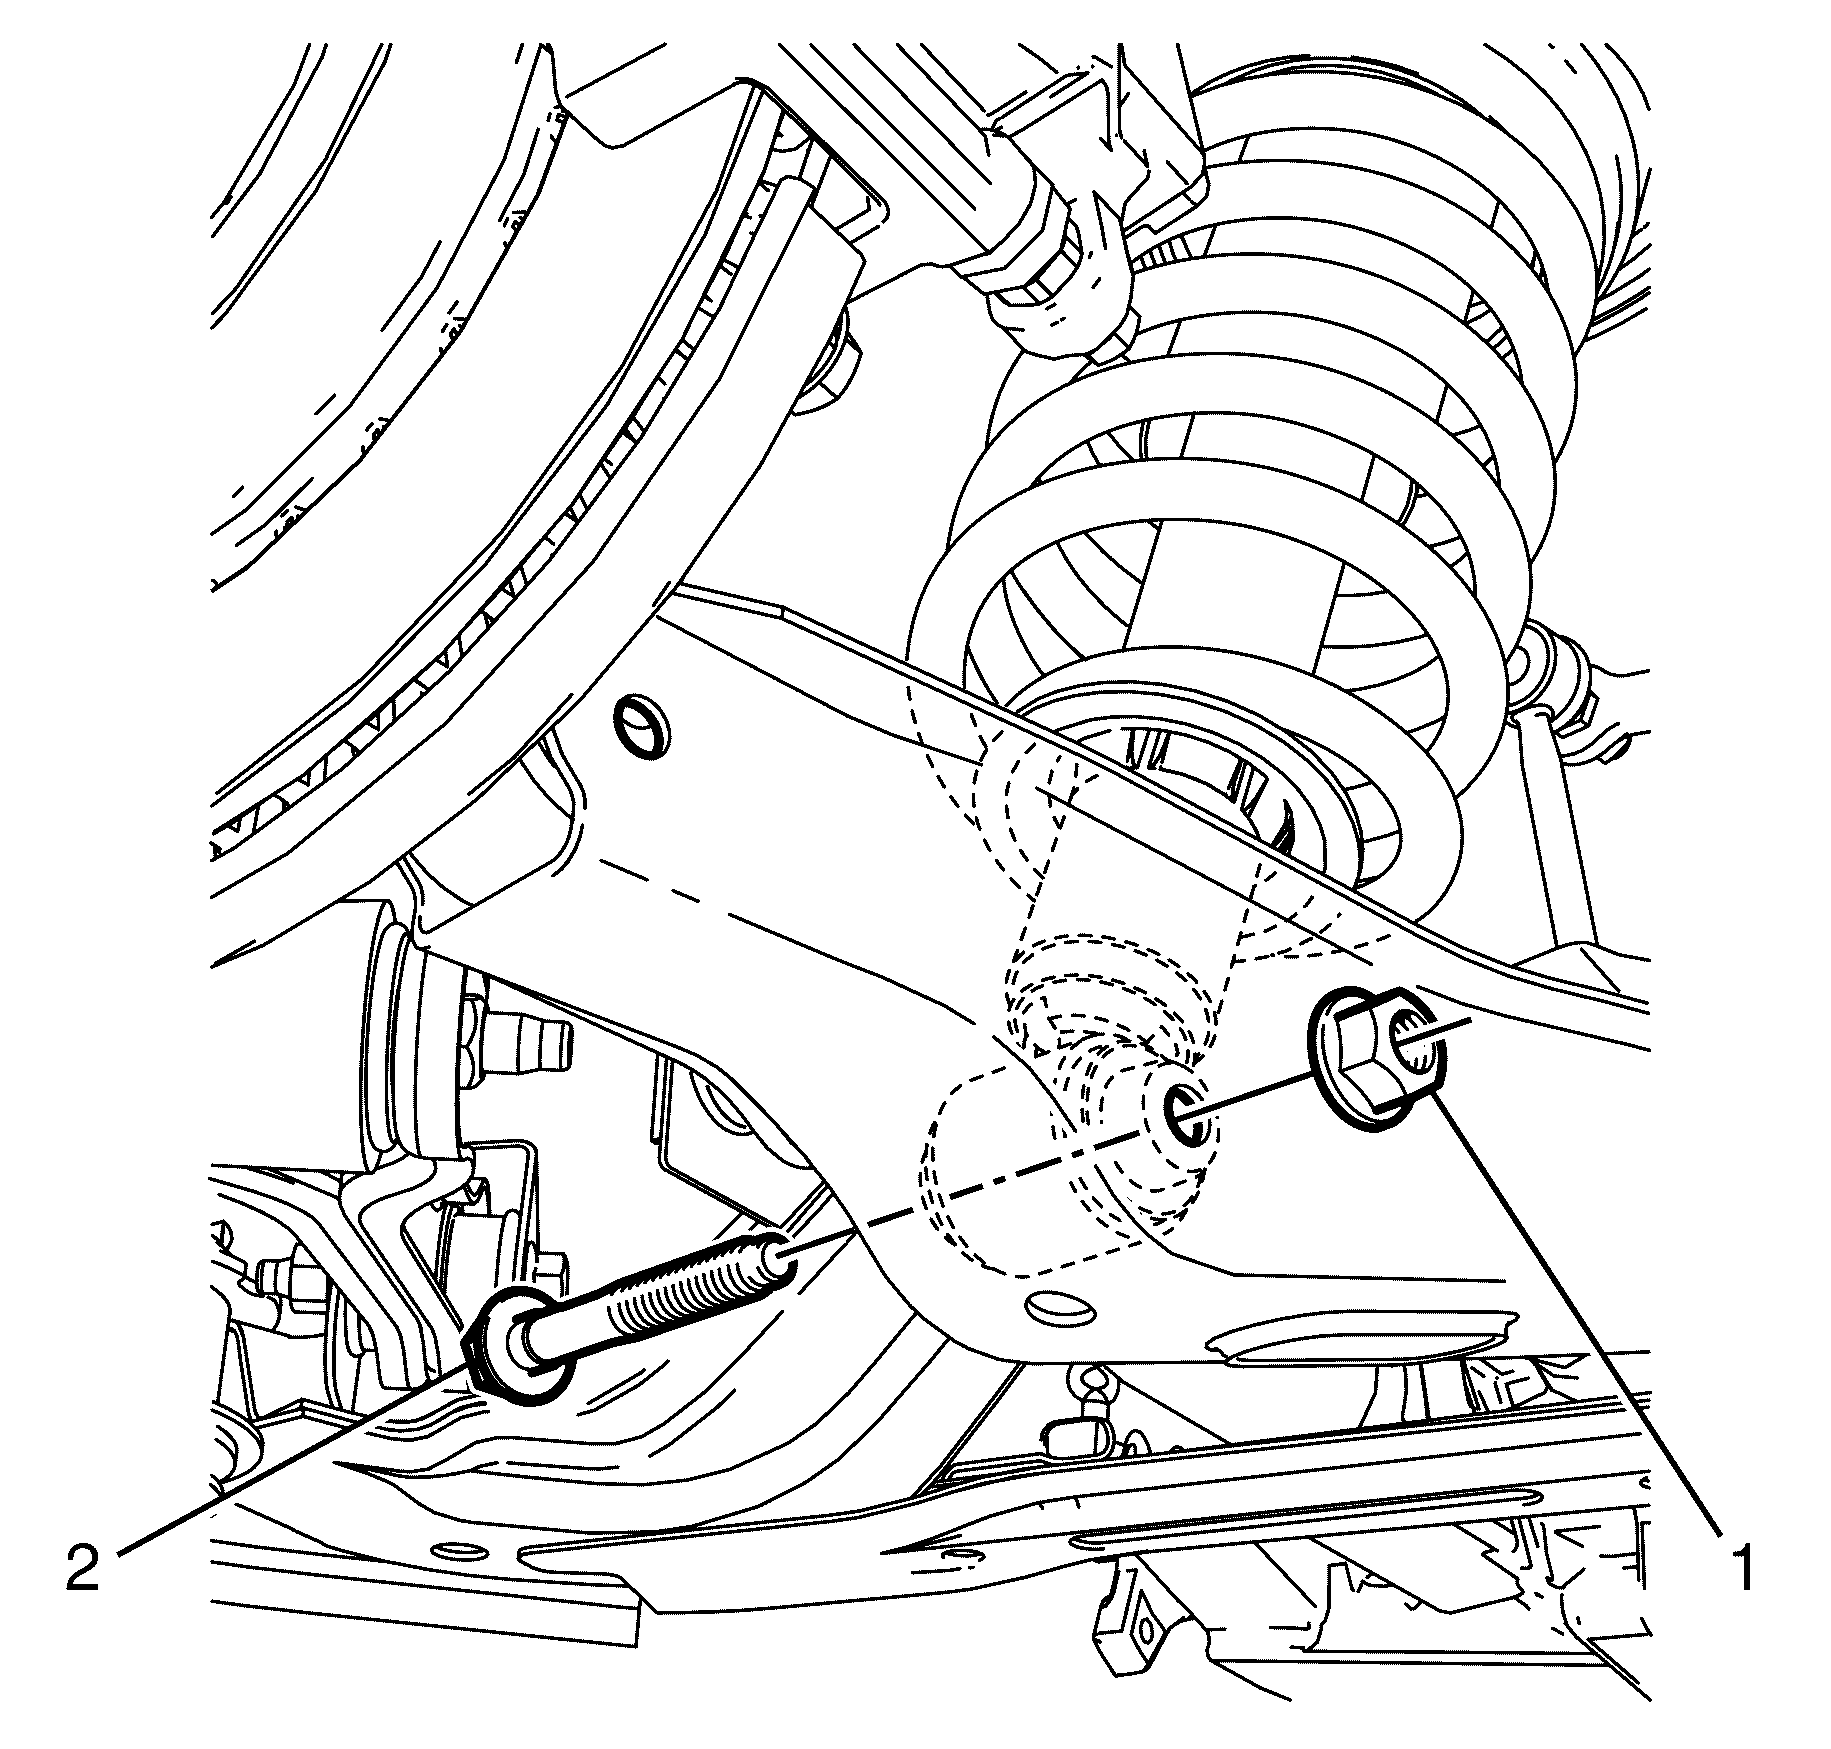
- Scribe the eccentric washers (3) with reference to their seating position relative to the subframe.
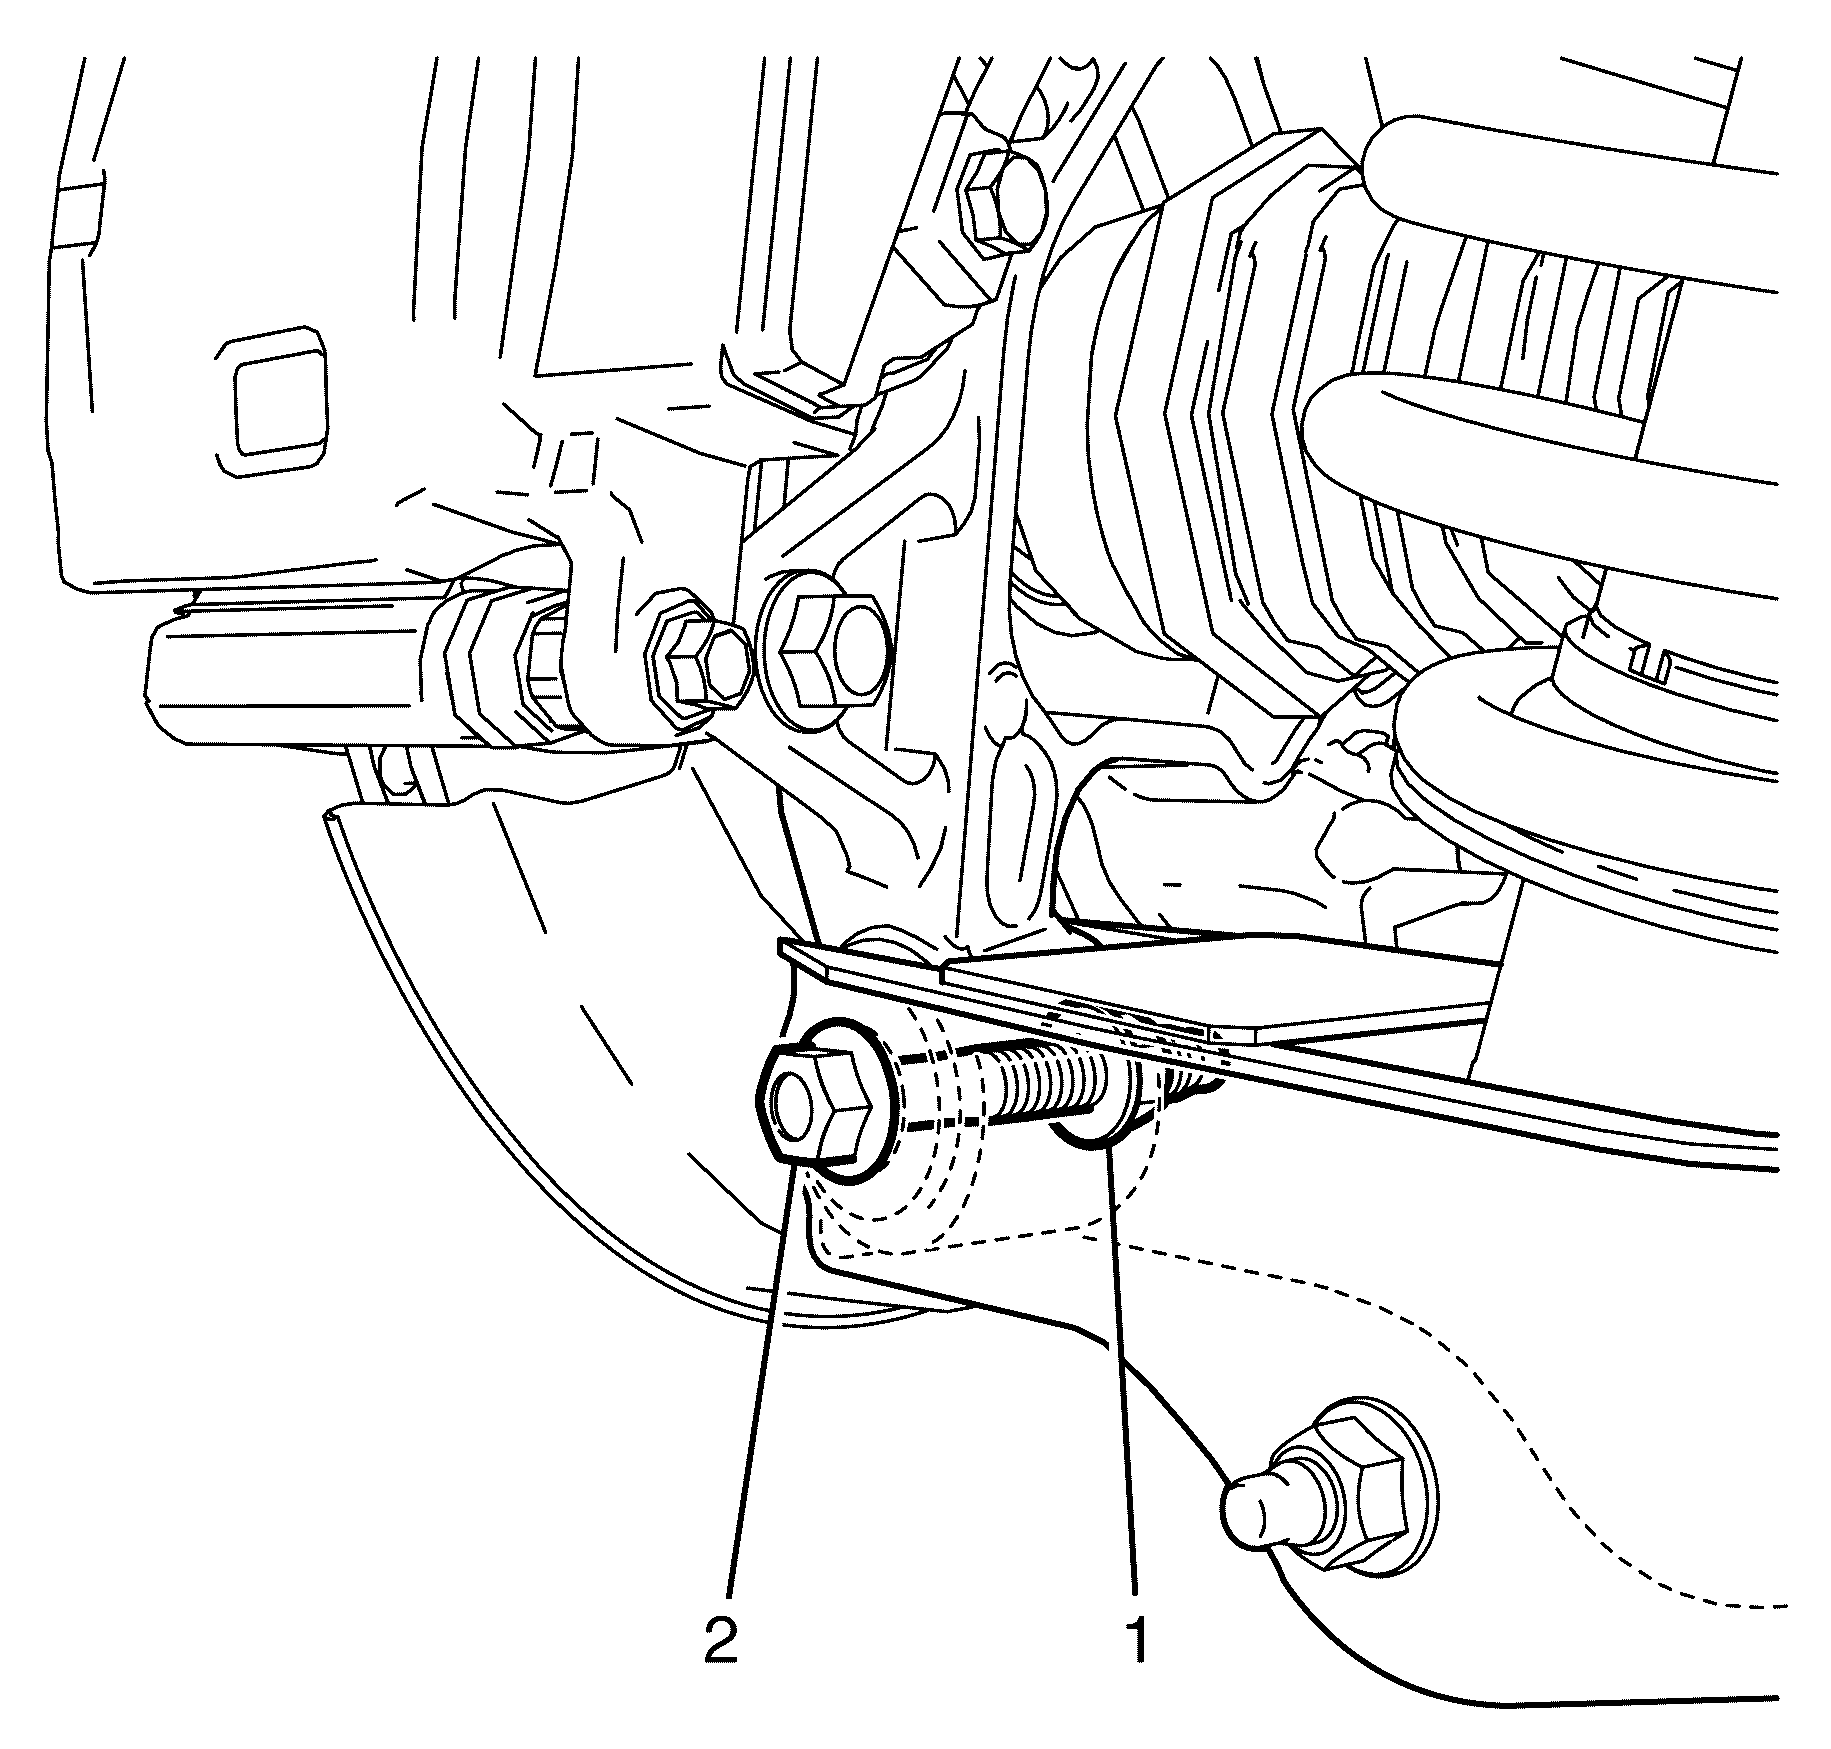
- Remove the lower control arm to subframe retaining bolt (1) and nut (5).
- Remove the lower control arm (4) from the subframe (3).
Caution: Refer to Safety Glasses Caution in the Preface section.
Caution: Refer to Vehicle Lifting Caution in the Preface section.

Important: Prevailing torque nuts must be discarded after removal.
Discard the nut.
Discard the nut.
Discard the nut.
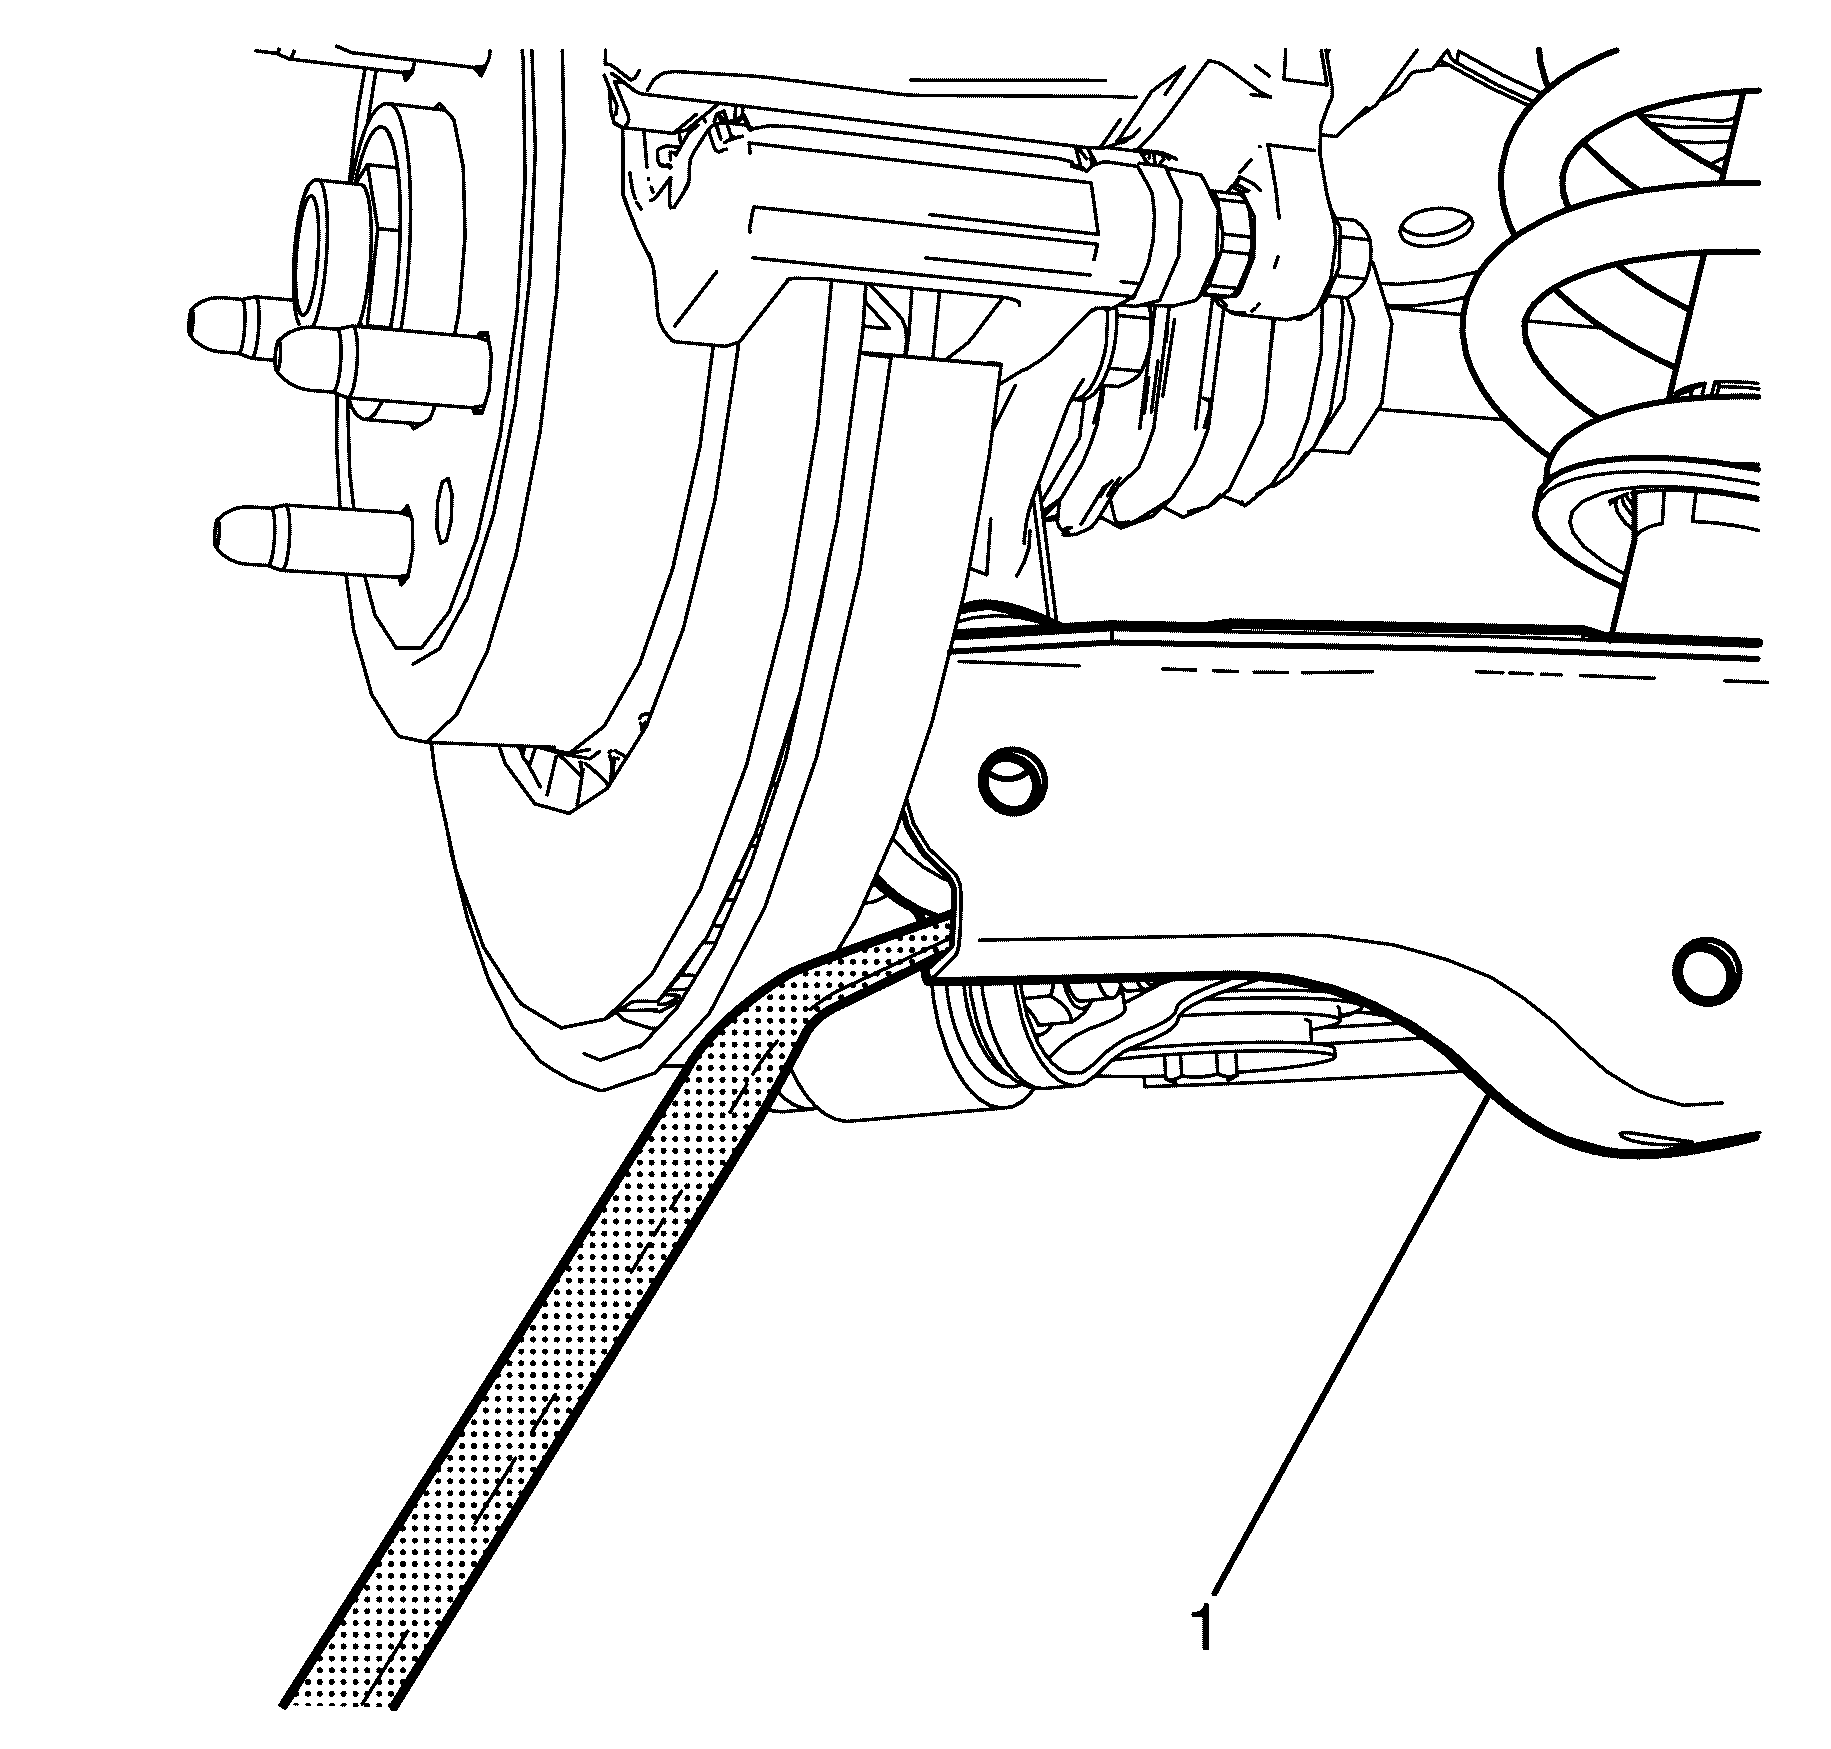
Important: Do not apply pressure to the rear brake disc backing plate while levering.
Reposition the jack as necessary.
Important: The lower control arm to subframe retaining bolt (1) and nut (2) eccentric washers (3) are used to adjust the rear suspension camber. One eccentric washer (3) is mounted directly to the head of the lower control arm to subframe retaining bolt (1).
Discard the nut.
Installation Procedure
- Install the lower control arm (4) into the subframe (3).
- Install the lower control arm to subframe retaining bolt (1).
- Install the eccentric washer (2) and the NEW nut (5).
- Connect the rear strut assembly (4) to the lower control arm (3).
- Install the lower control arm to strut assembly retaining bolt (2) and NEW nut (1).
- Connect the lower control arm (3) to the knuckle (4) using a suitable jack.
- Install the lower control arm to the knuckle retaining bolt (2) and NEW nut (1).
- Connect the stabiliser bar link (1) to the lower control arm (2).
- Install the stabiliser bar link to lower control arm retaining NEW nut (3).
- Install the rear wheel. Refer to Tire and Wheel Removal and Installation.
- Remove the safety stands.
- Lower the vehicle to the ground.
- Bounce the vehicle several times to settle the suspension.
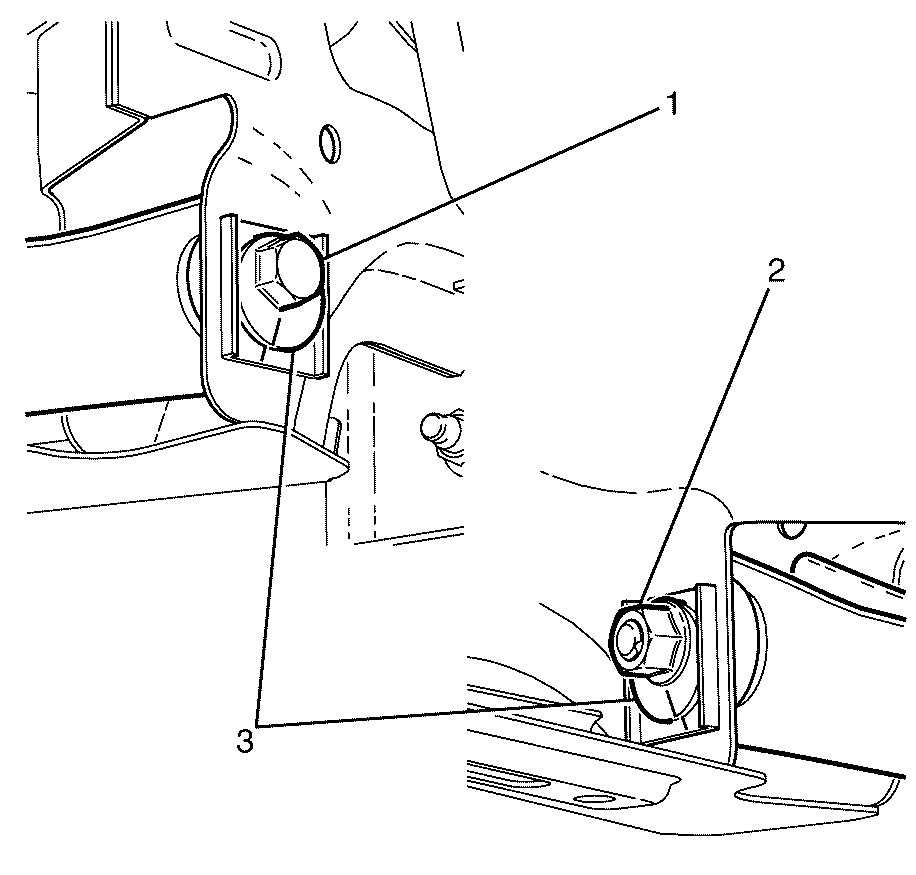
- Align the marks on the eccentric washers (3) with the marks on the subframe.
- Tighten the lower control arm to subframe retaining bolt (1) and nut (2).
- Tighten the lower control arm to strut assembly retaining bolt (2) and nut (1).
- Tighten the lower control arm to knuckle retaining bolt (2) and nut (1).
- Check the wheel alignment of the vehicle. Refer to Wheel Alignment Measurement.
- Correct the wheel alignment of the vehicle, if necessary. Refer to Rear Camber Adjustment and Rear Toe Adjustment.
Important: The eccentric washers (2) must be fitted correctly in terms of their orientation and alignment marks.
Important: Do not fully tighten the lower control arm to subframe retaining bolt (1) and nut (5) at this stage.
Do not fully tighten at this stage.
Important: Do not fully tighten the lower control arm to strut assembly retaining bolt (2) and nut (1) at this stage.
Do not fully tighten at this stage.
Important: Do not fully tighten the lower control arm to knuckle retaining bolt (2) and nut (1) at this stage.
Do not fully tighten at this stage.
Notice: Refer to Fastener Notice in the Preface section.
Tighten
Tighten the nut to 50 N·m (37 lb ft).
Important: The lower control arm to the subframe retaining bolt (1) and nut (2) eccentric washers (3) are used to adjust rear suspension camber.
Important: The weight of the vehicle must be on a level surface and on all four wheels before fully tightening the nuts and bolts.
Tighten
Tighten the bolt and nut to 175 N·m
(129 lb ft).
Tighten
Tighten the bolt and nut a first pass to 40 N·m
(30 lb ft).
Tighten the bolt and nut a final pass 120 Degrees.
Tighten
Tighten the bolt and nut a first pass to 40 N·m
(30 lb ft).
Tighten the bolt and nut a final pass 120 Degrees.
