Removal Procedure
- Raise the window to the full up position.
- Remove the door trim panel. Refer to Front Side Door Trim Panel Replacement.
- Pull the rear half of the water deflector away from the door panel in order to access the door handle and door lock.
- Remove the lock actuating rod (1) from the door lock cylinder (2) (if fitted).
- Disconnect the outside door handle rod (2) from the door handle rod retaining clip (1).
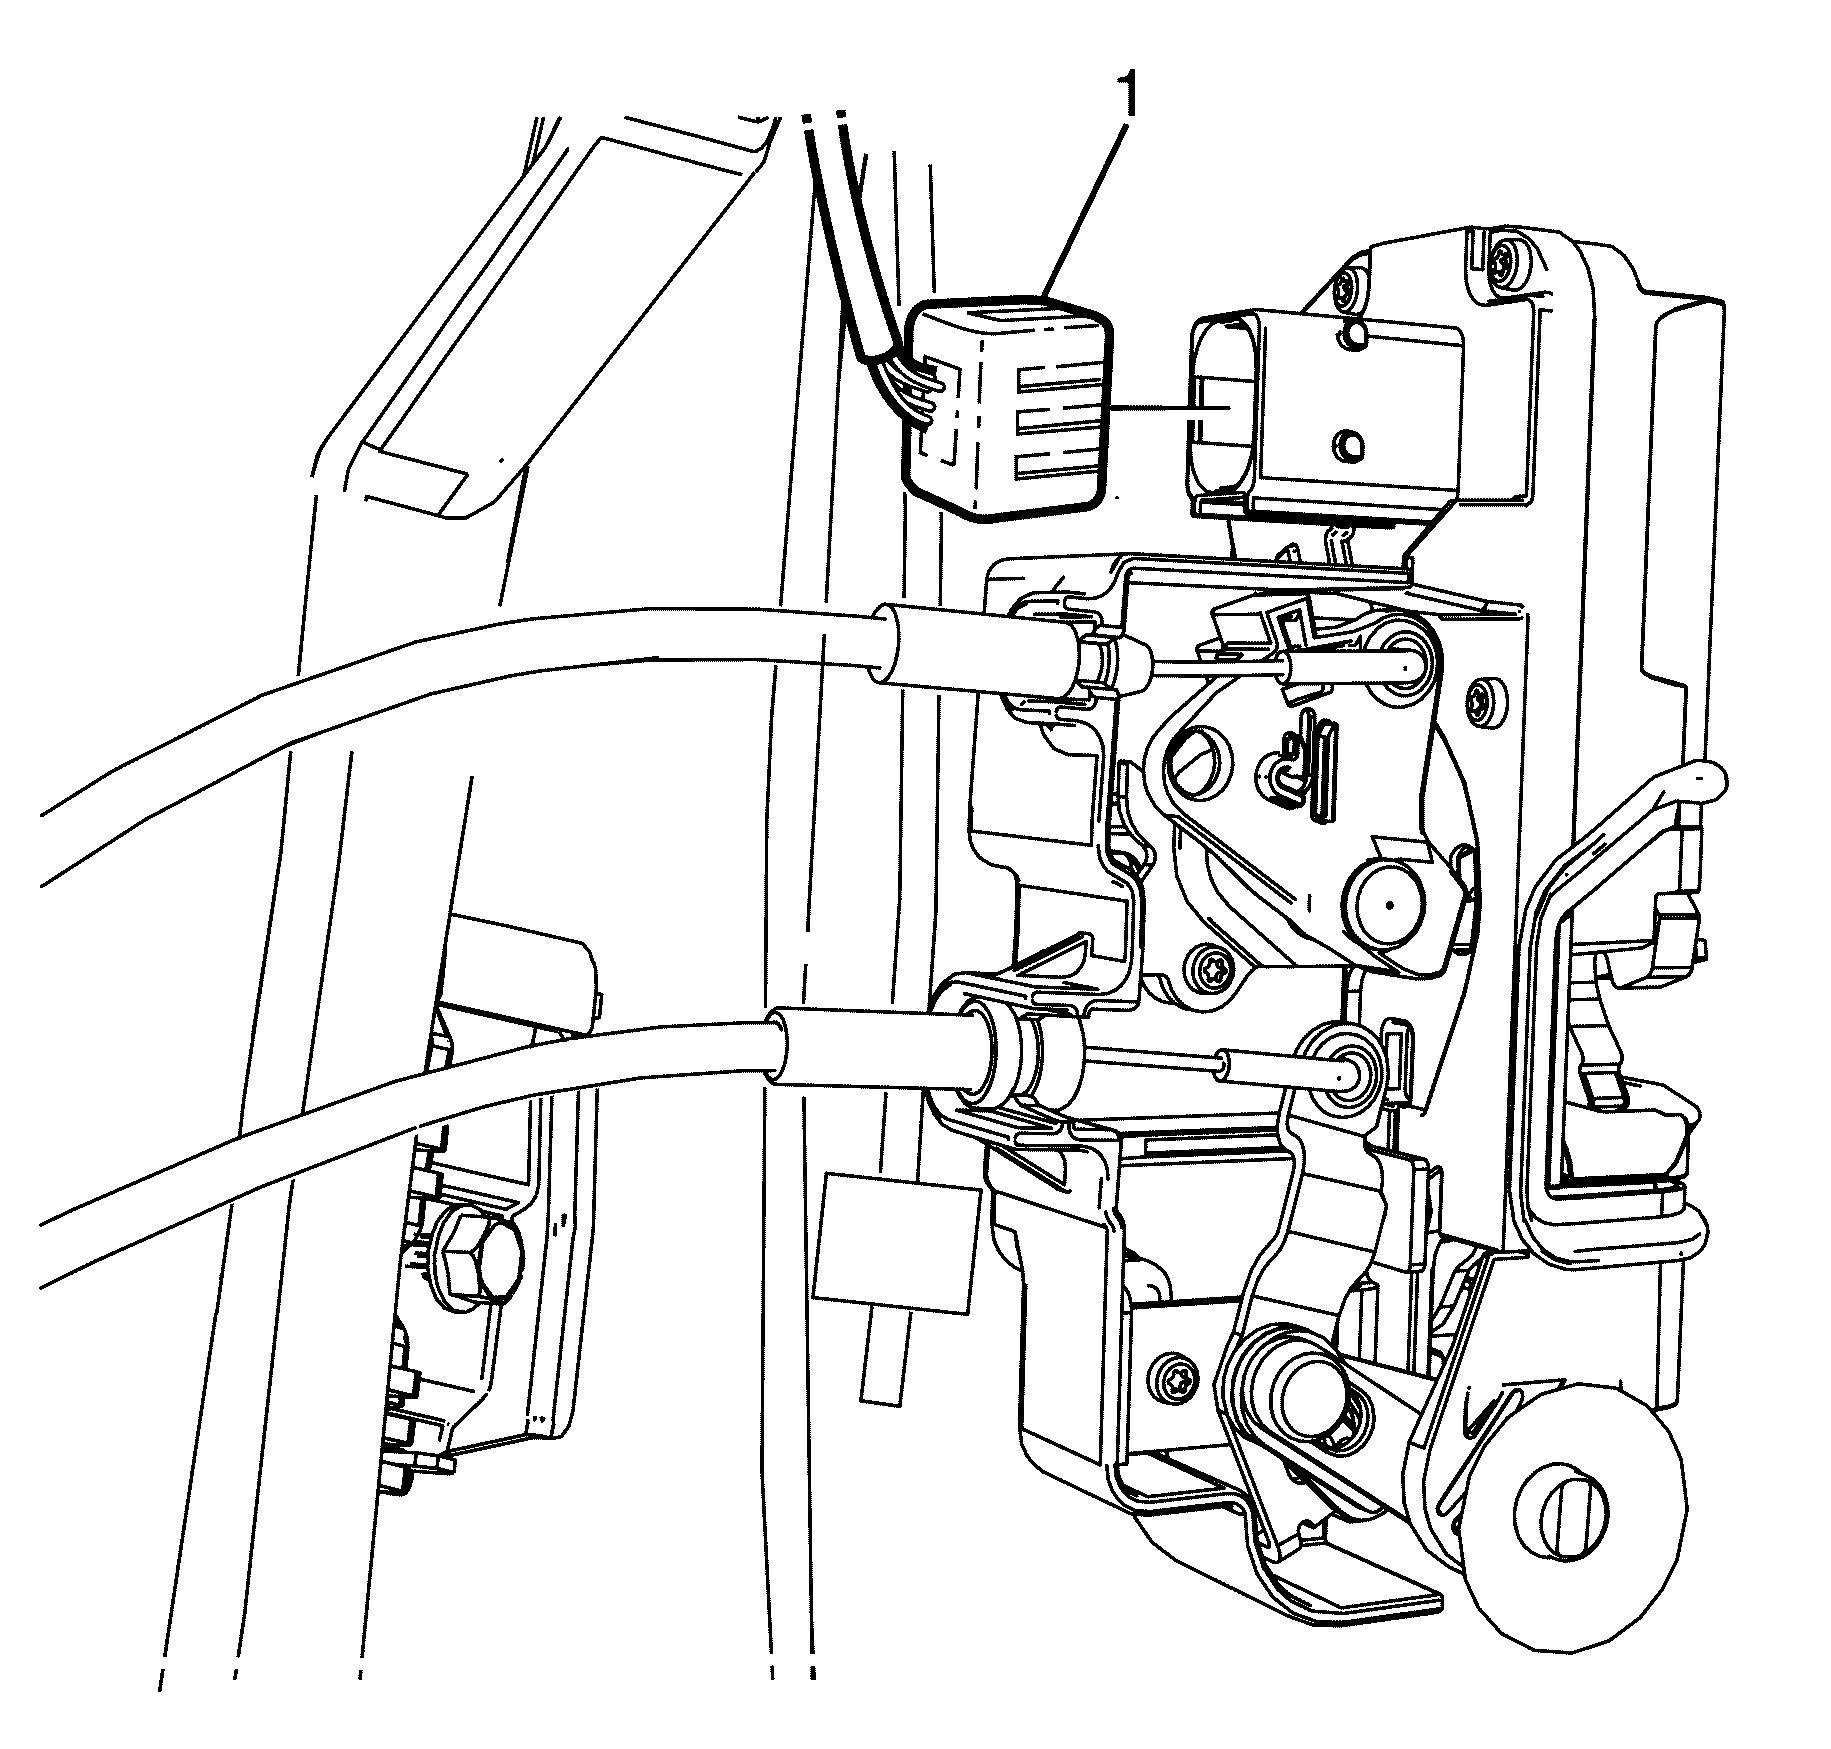
- Disconnect the door latch electrical connector (1).
- Remove the door latch to door retaining screws (1).
- Remove the door latch from the door with the inside door handle cable, inside door lock cable and lock actuator rod (if fitted) attached.
- Disconnect the inside door handle cable and inside door lock cable from the door latch. Refer to Front Side Door Inside Handle Cable Replacement.
- Disconnect the lock rod (if fitted) from the door latch.
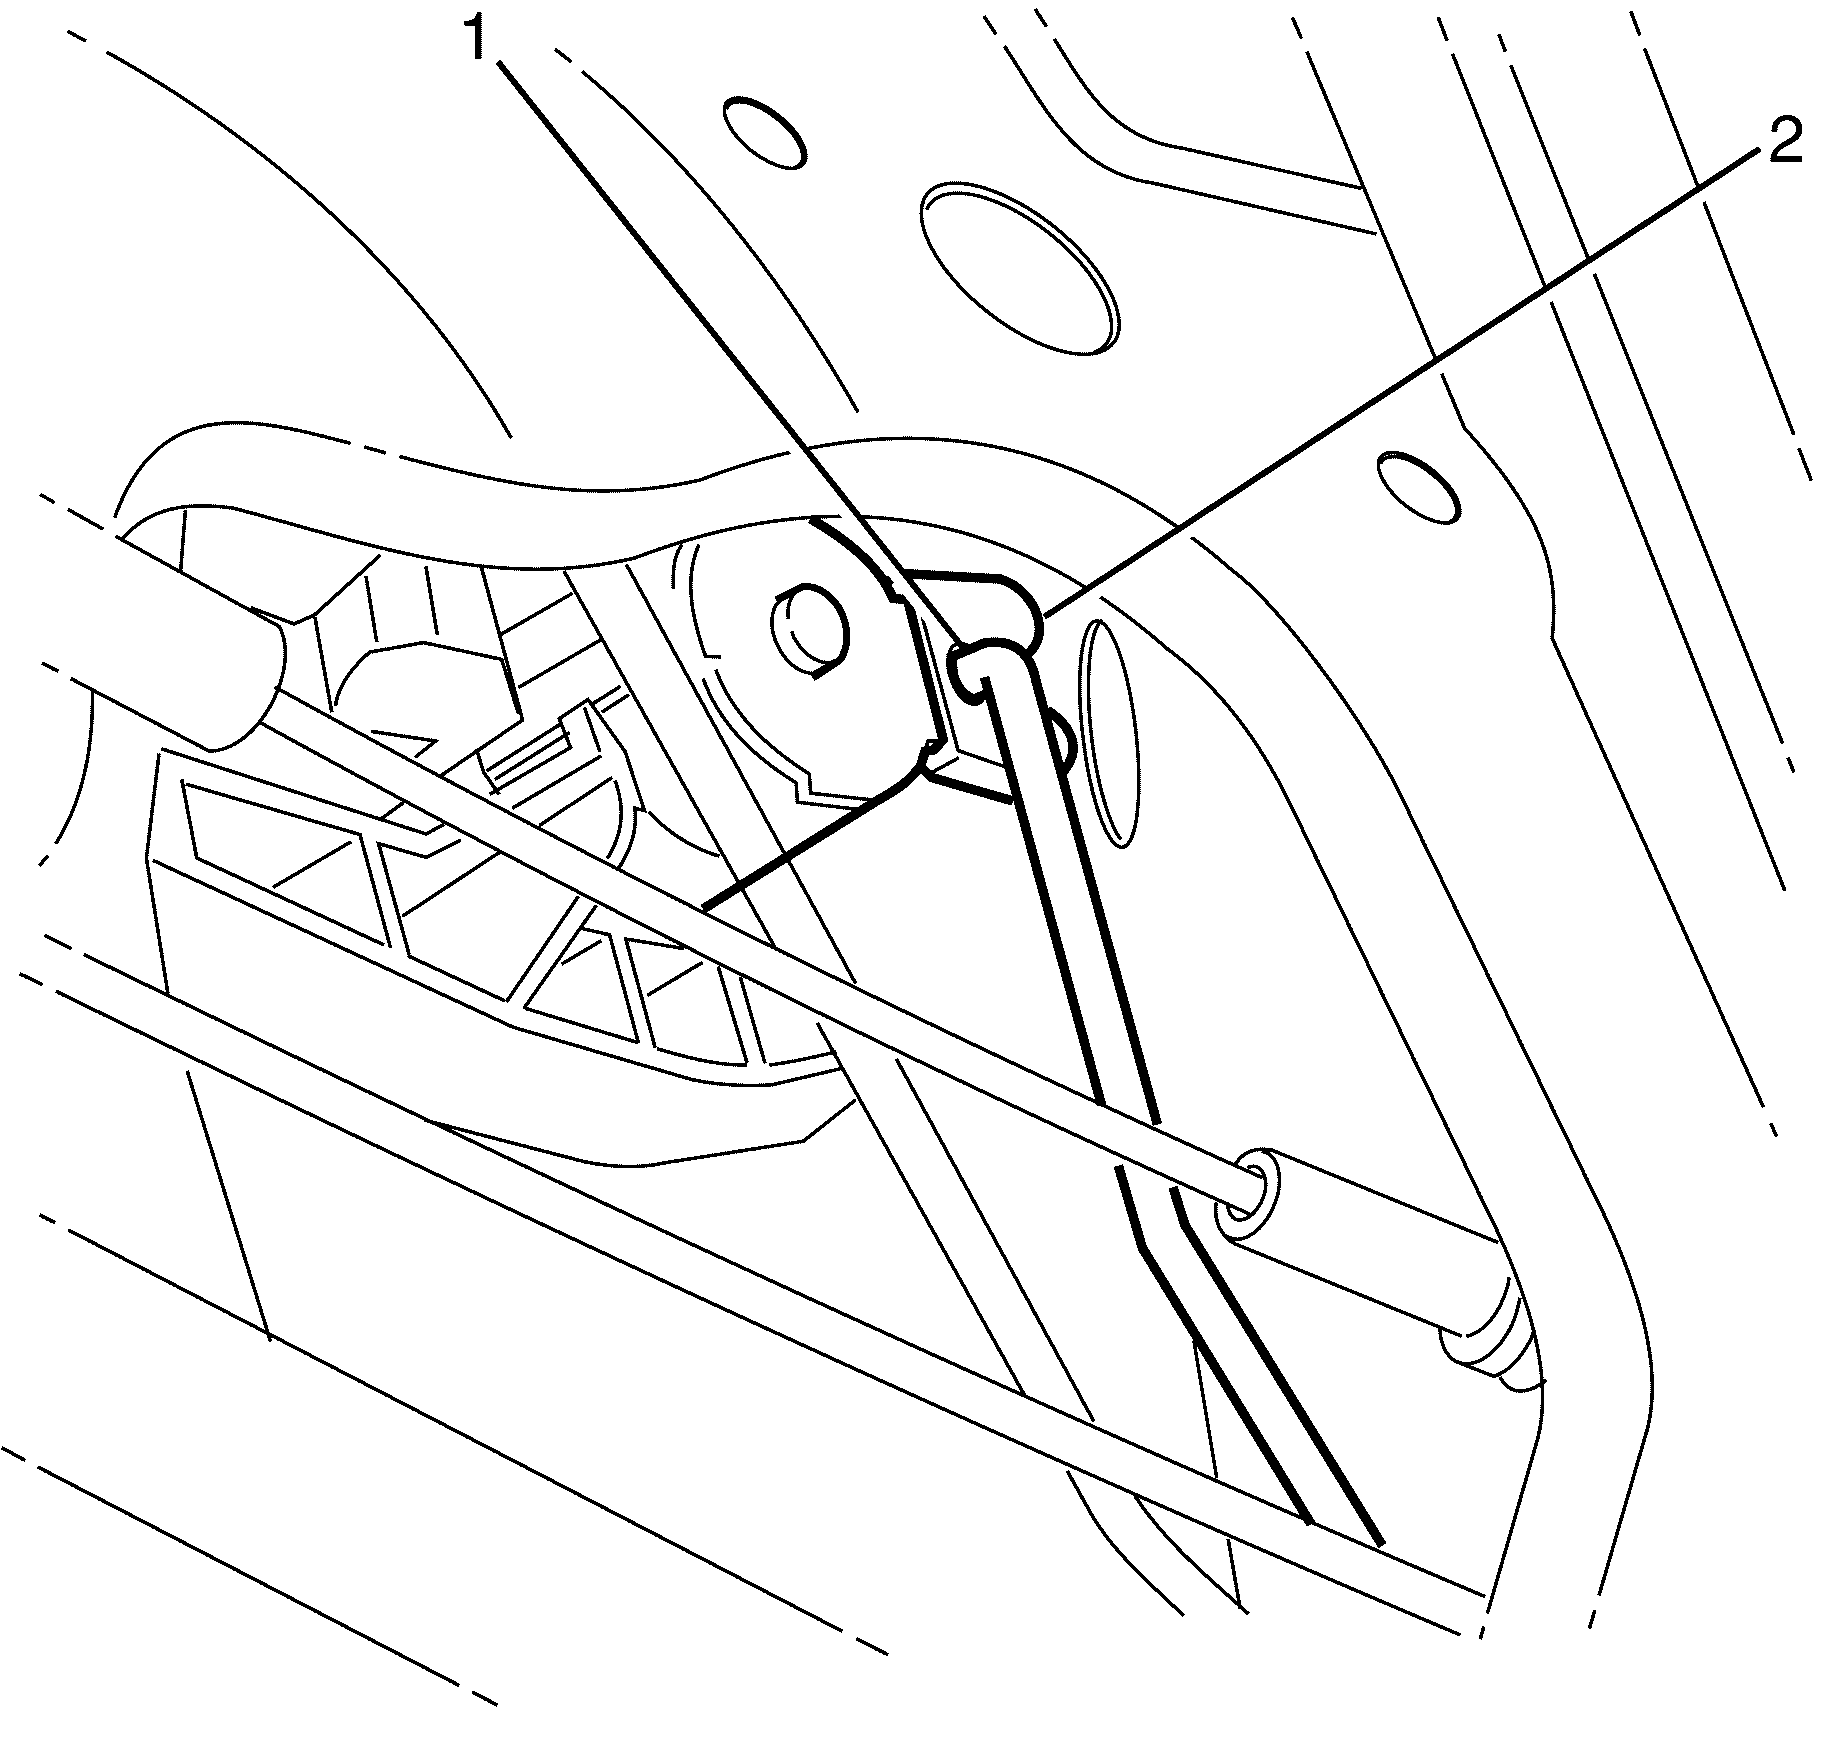
Important: The lock actuating rod (1) is only fitted to the drivers door handle.
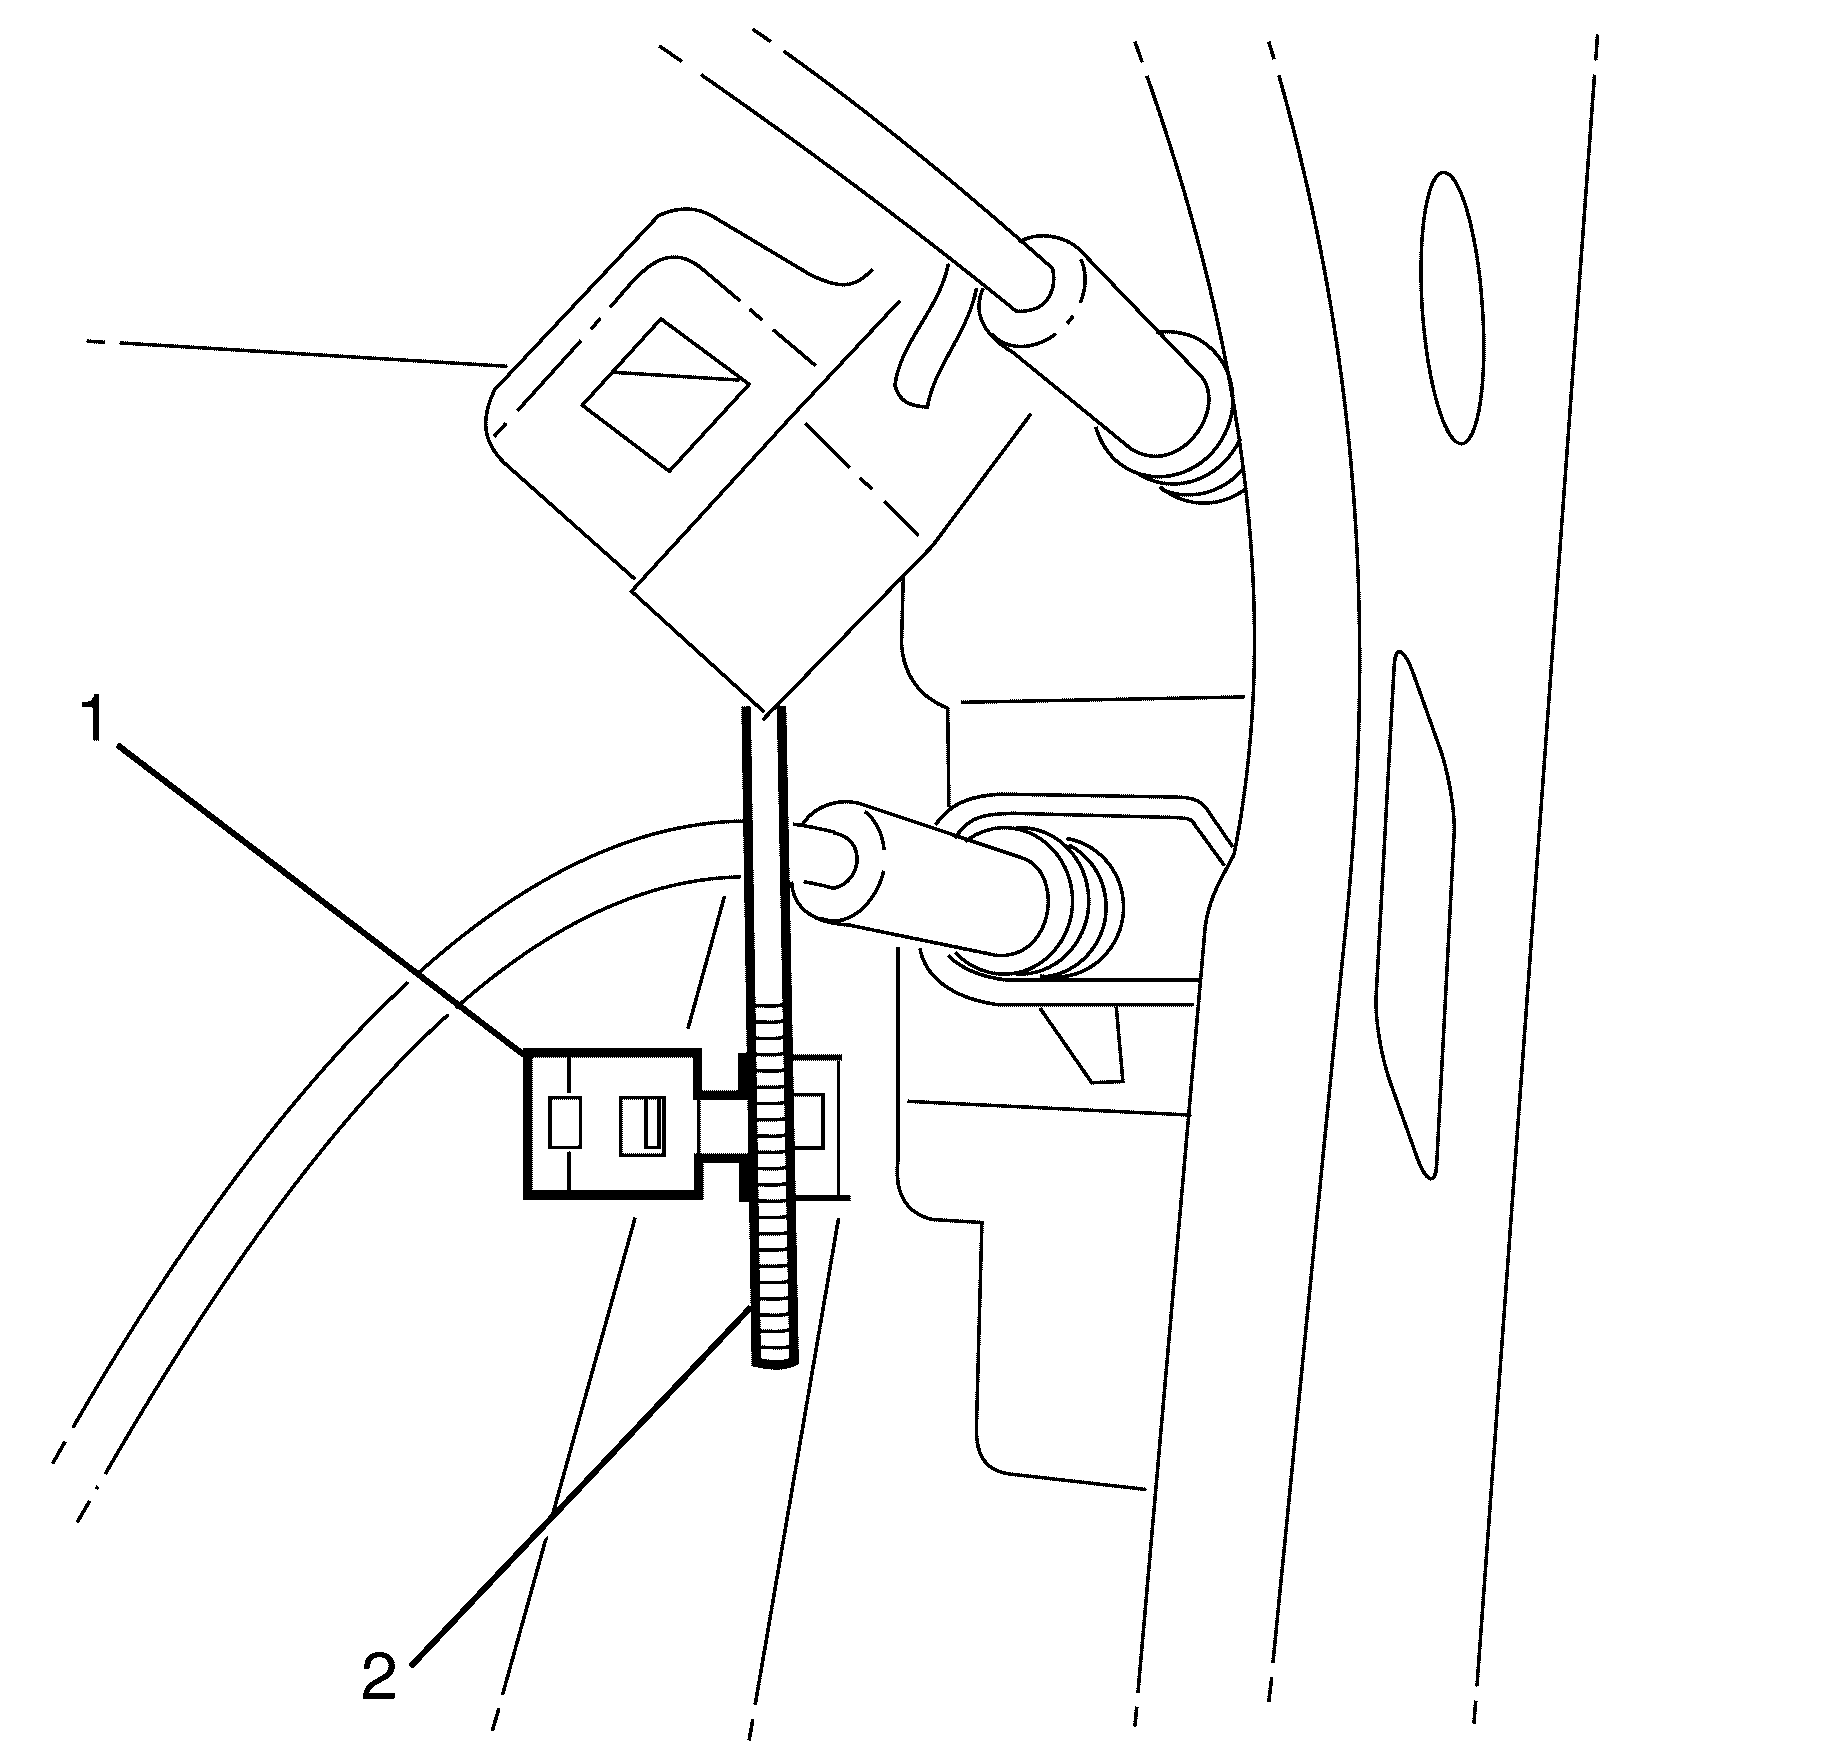
Important: Pry the outside door handle rod retaining clip (1) using a suitable tool.
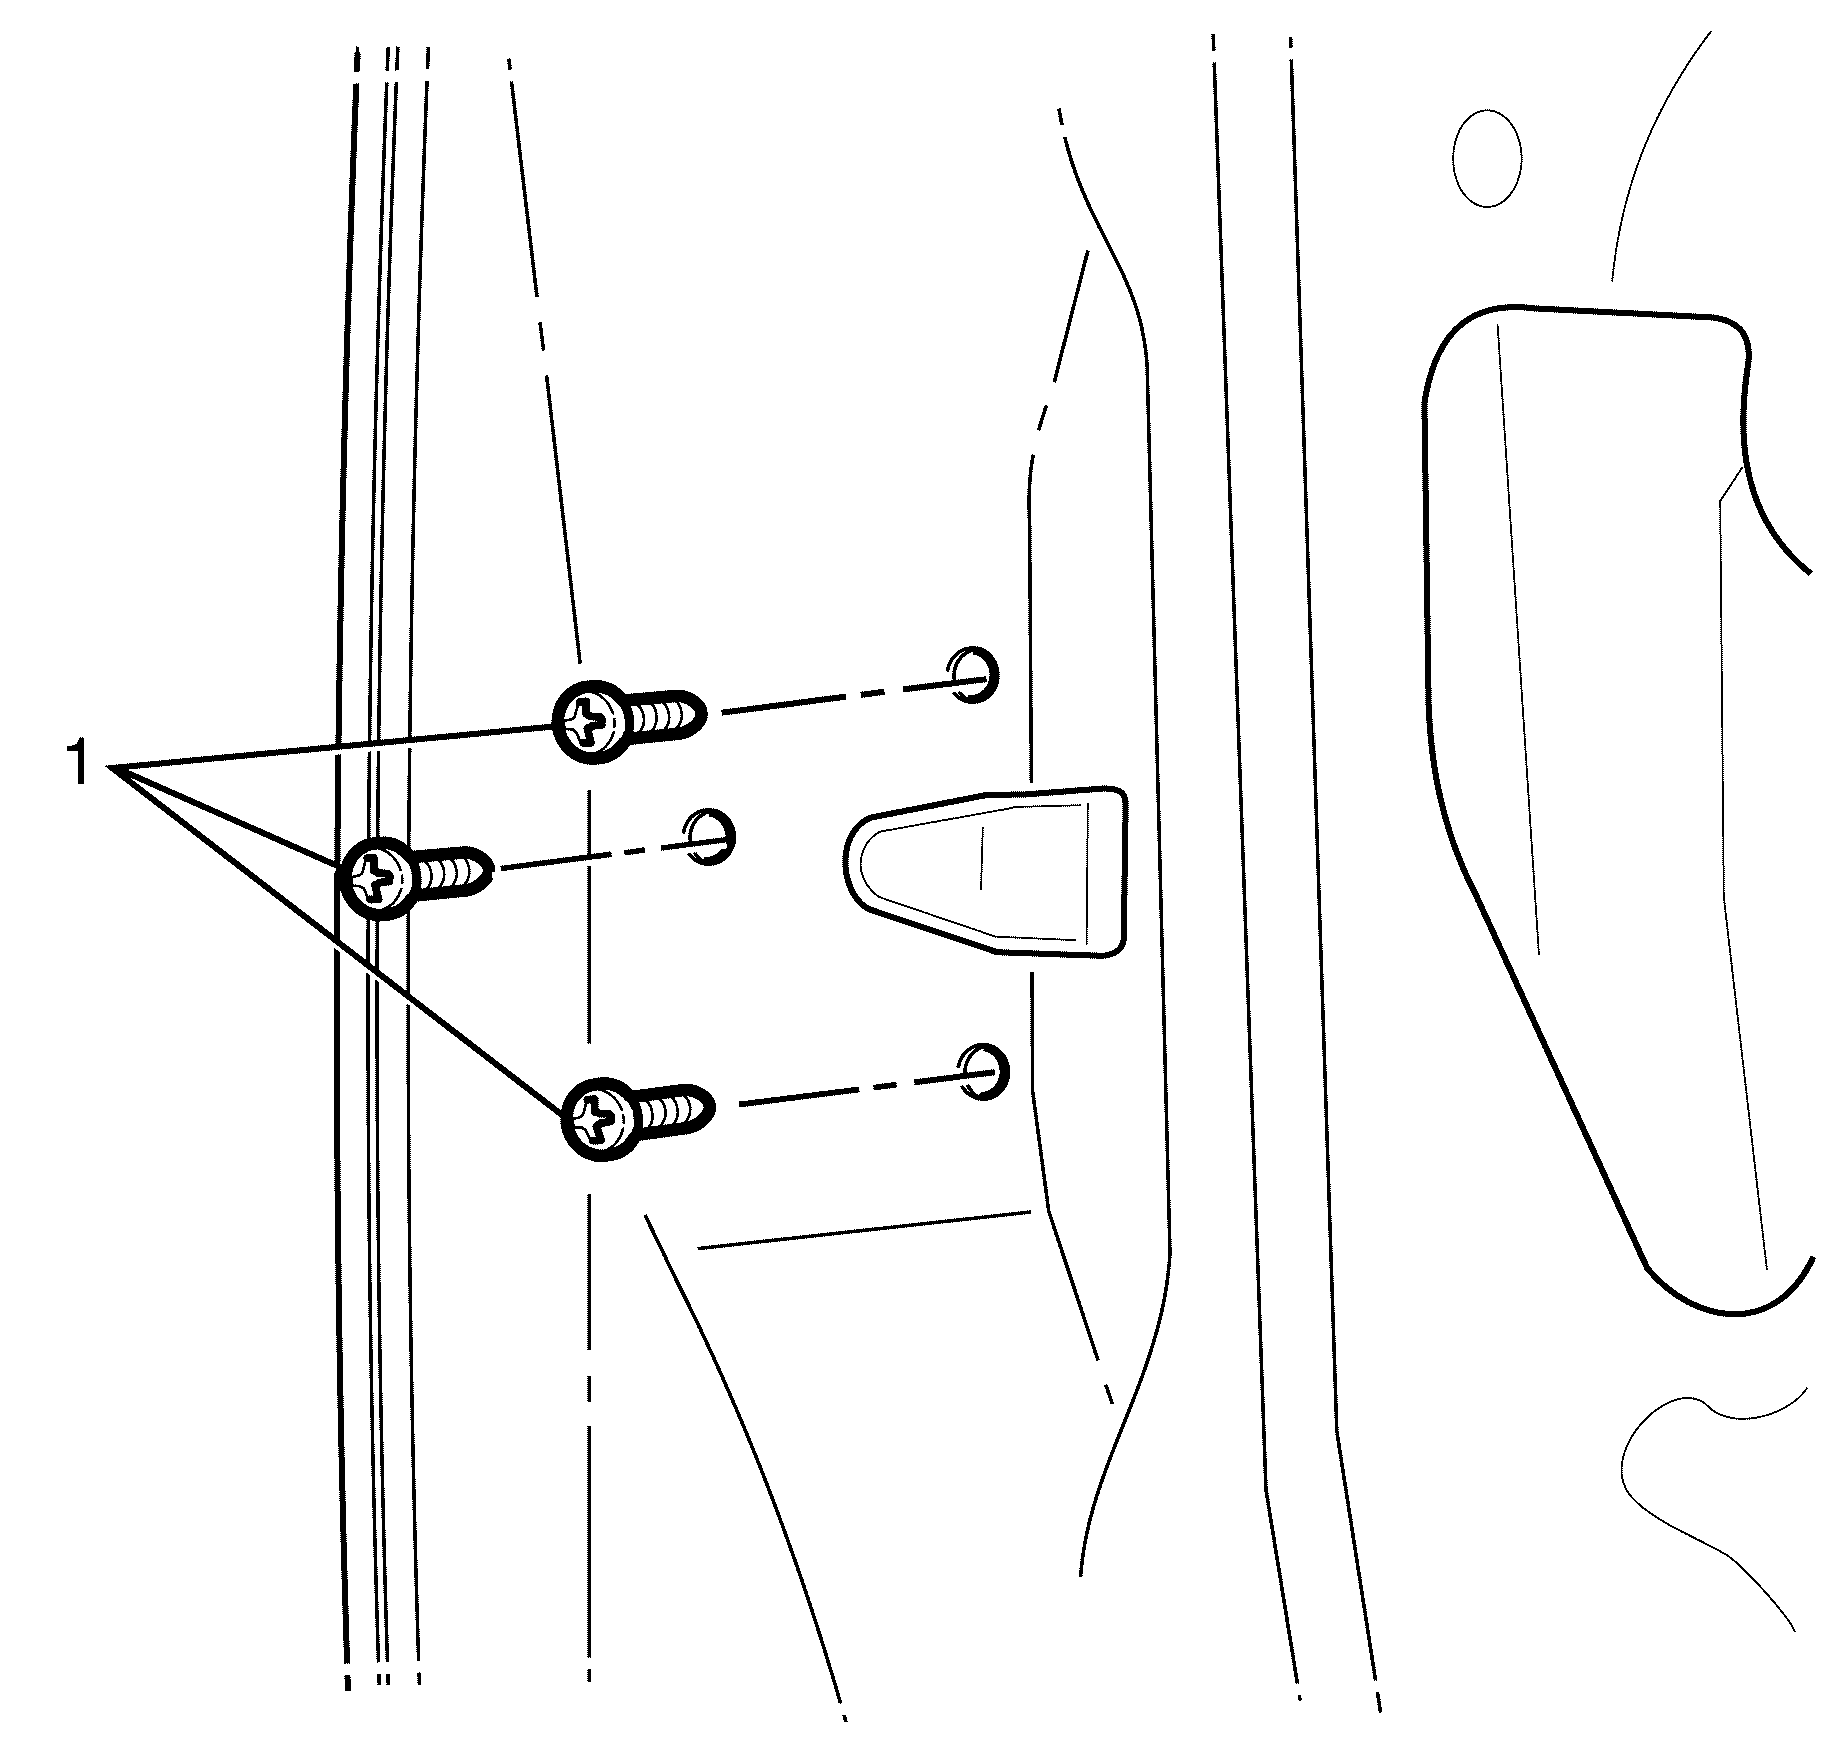
Important: The door latch to door retaining screws (2) are single use parts and must be discarded after use.
Important: Support door latch when removing the door latch to door retaining screws (1).
Discard the screws.
Installation Procedure
- Connect the lock rod (if fitted) to the door latch.
- Connect the inside door handle cable and inside door lock cable to the door latch. Refer to Front Side Door Inside Handle Cable Replacement.
- Position the door latch into the door.
- Install the door latch to door NEW retaining screws (1).
- Connect the door latch electrical connector (1).
- Connect the outside door handle rod (2) to the door handle rod retaining clip (1).
- Install the lock actuating rod (1) to the lock cylinder retaining clip (2) (if fitted).
- Inspect for the correct operation of the door handle, lock cylinder (if fitted), and door latch.
- Install the rear half of the water deflector to the door panel.
- Install the door trim panel. Refer to Front Side Door Trim Panel Replacement.
Important: Position the door latch through the door cavity and support.
Notice: Refer to Fastener Notice in the Preface section.
Tighten
Tighten the screws to 13 N-m (115 lb in).
Important: Attach the door handle rod retaining clip (1) by pressing clip together over door handle rod until an audible click is heard.
Important: The lock actuating rod (2) pushes into the lock cylinder retaining clip (1).
Important: Firmly press the water deflector where adhesive is applied to make sure water tight bond.
