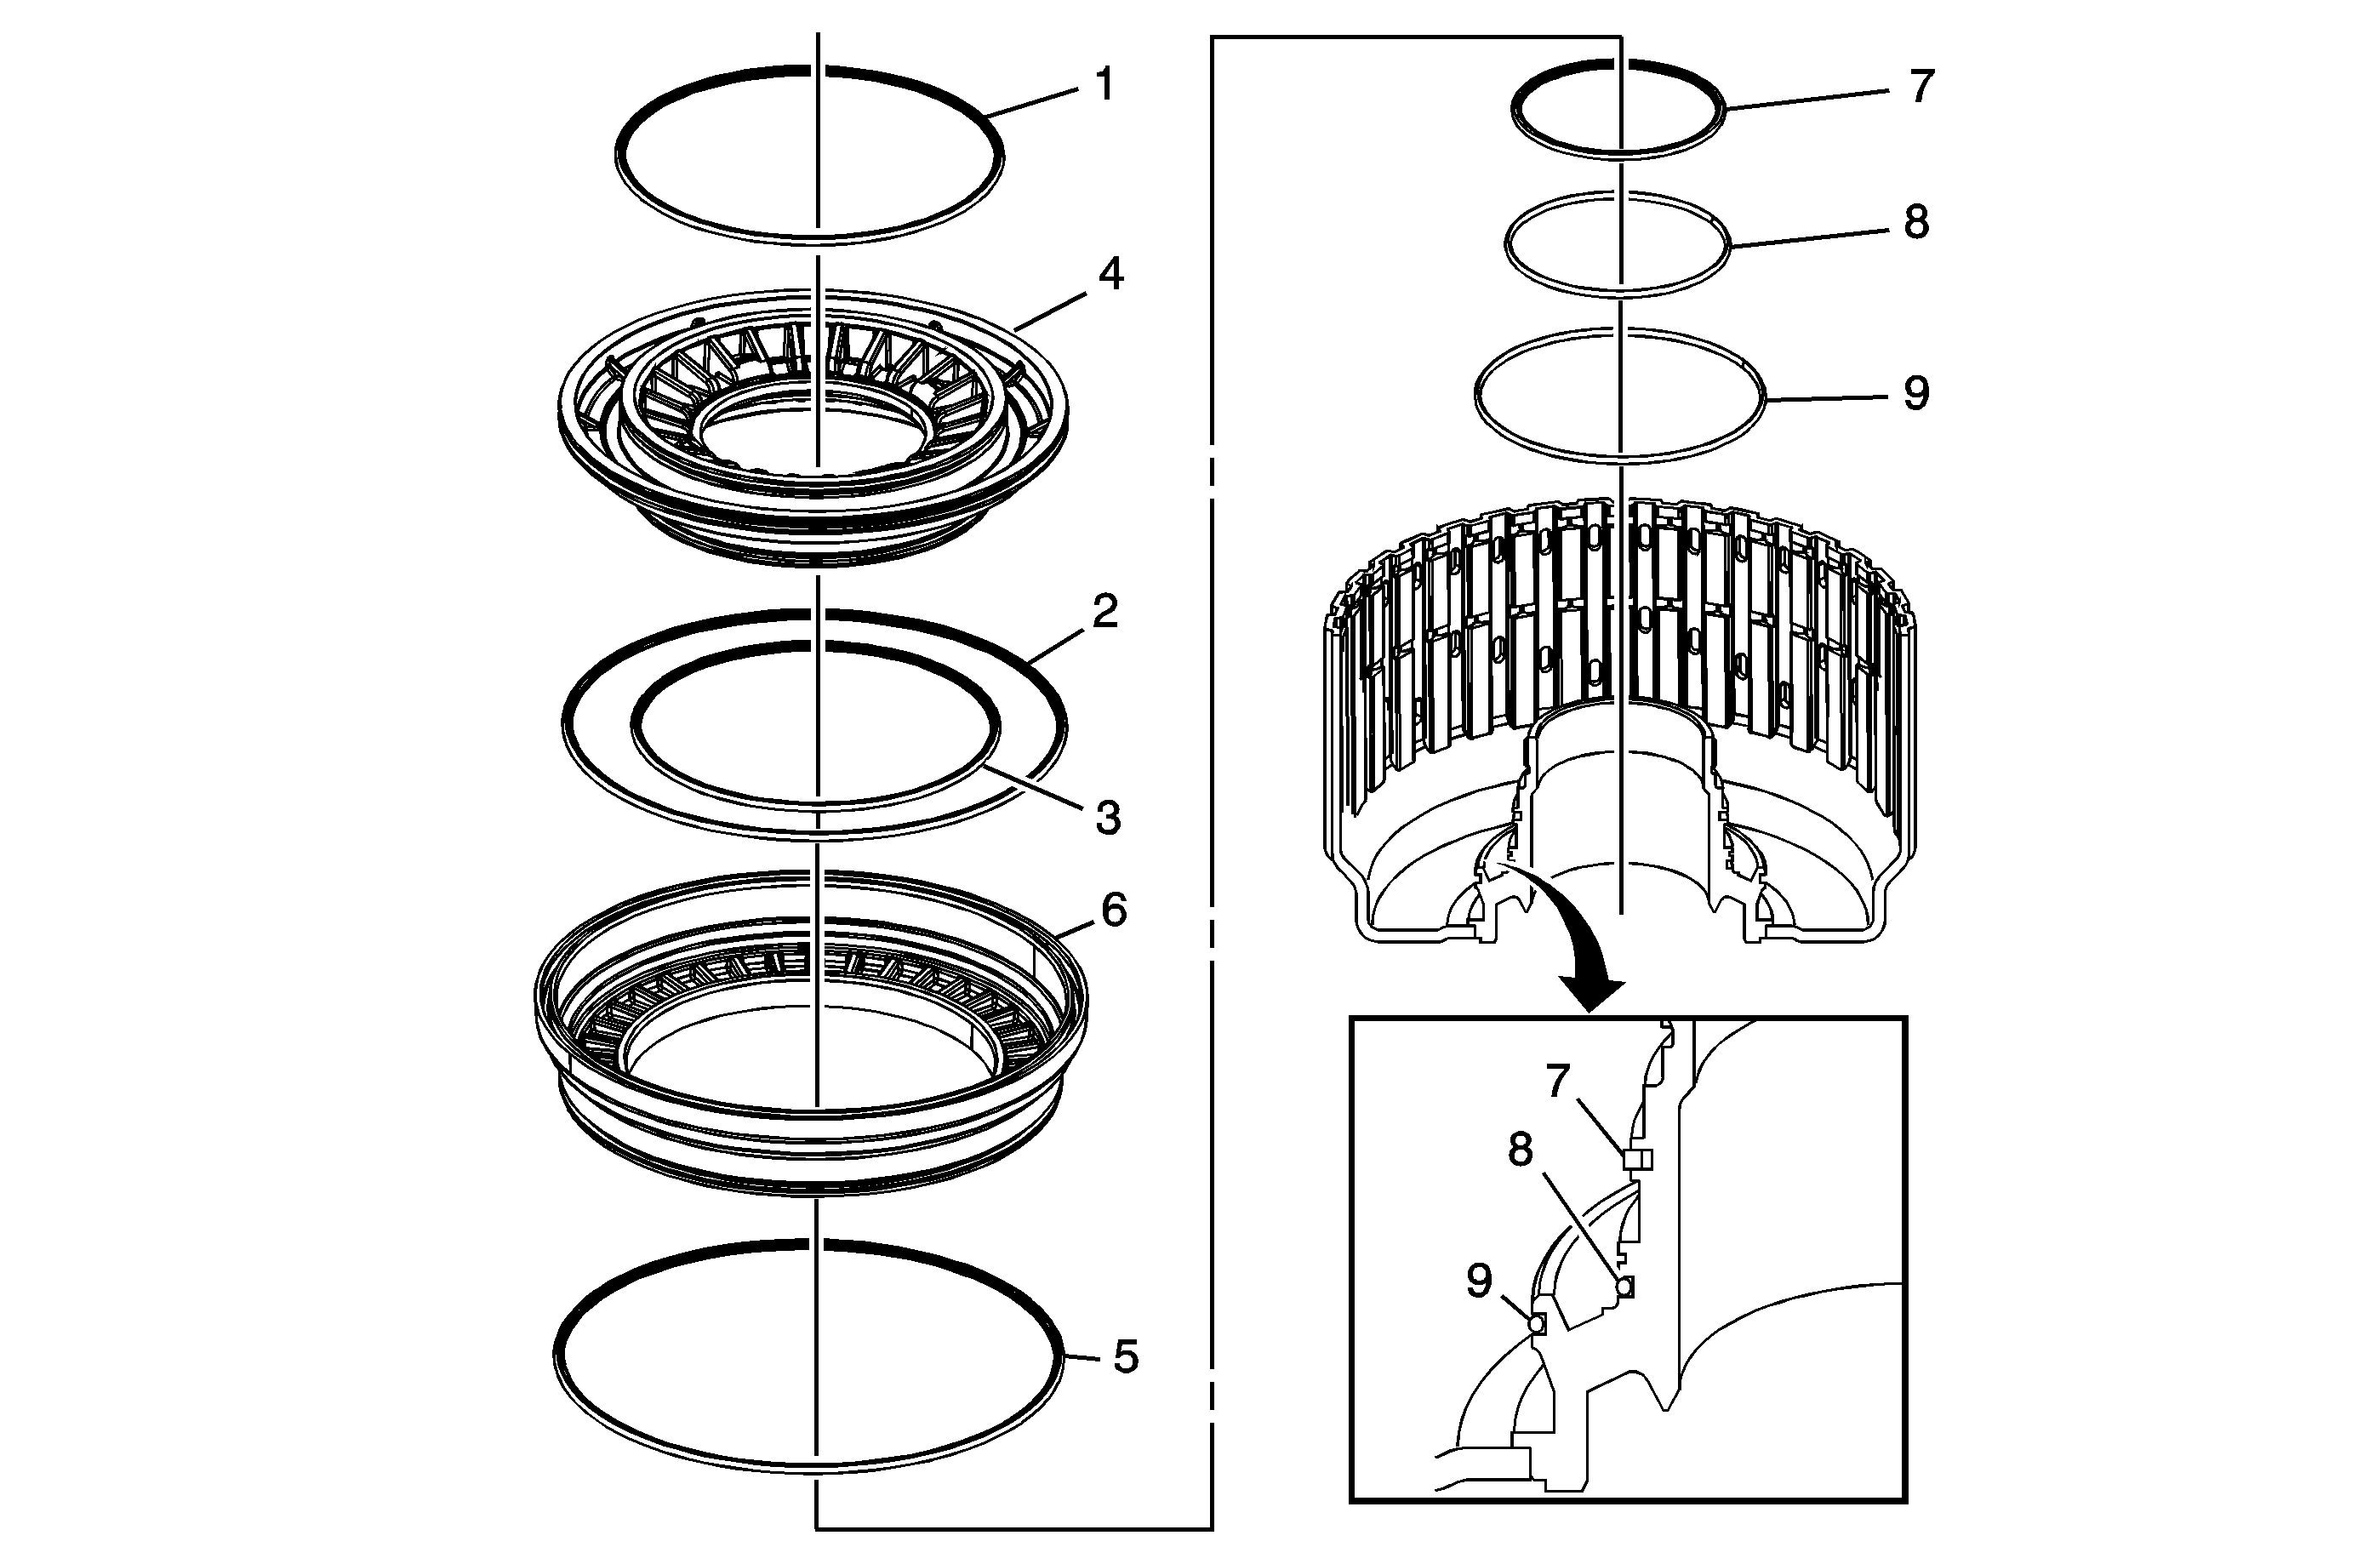
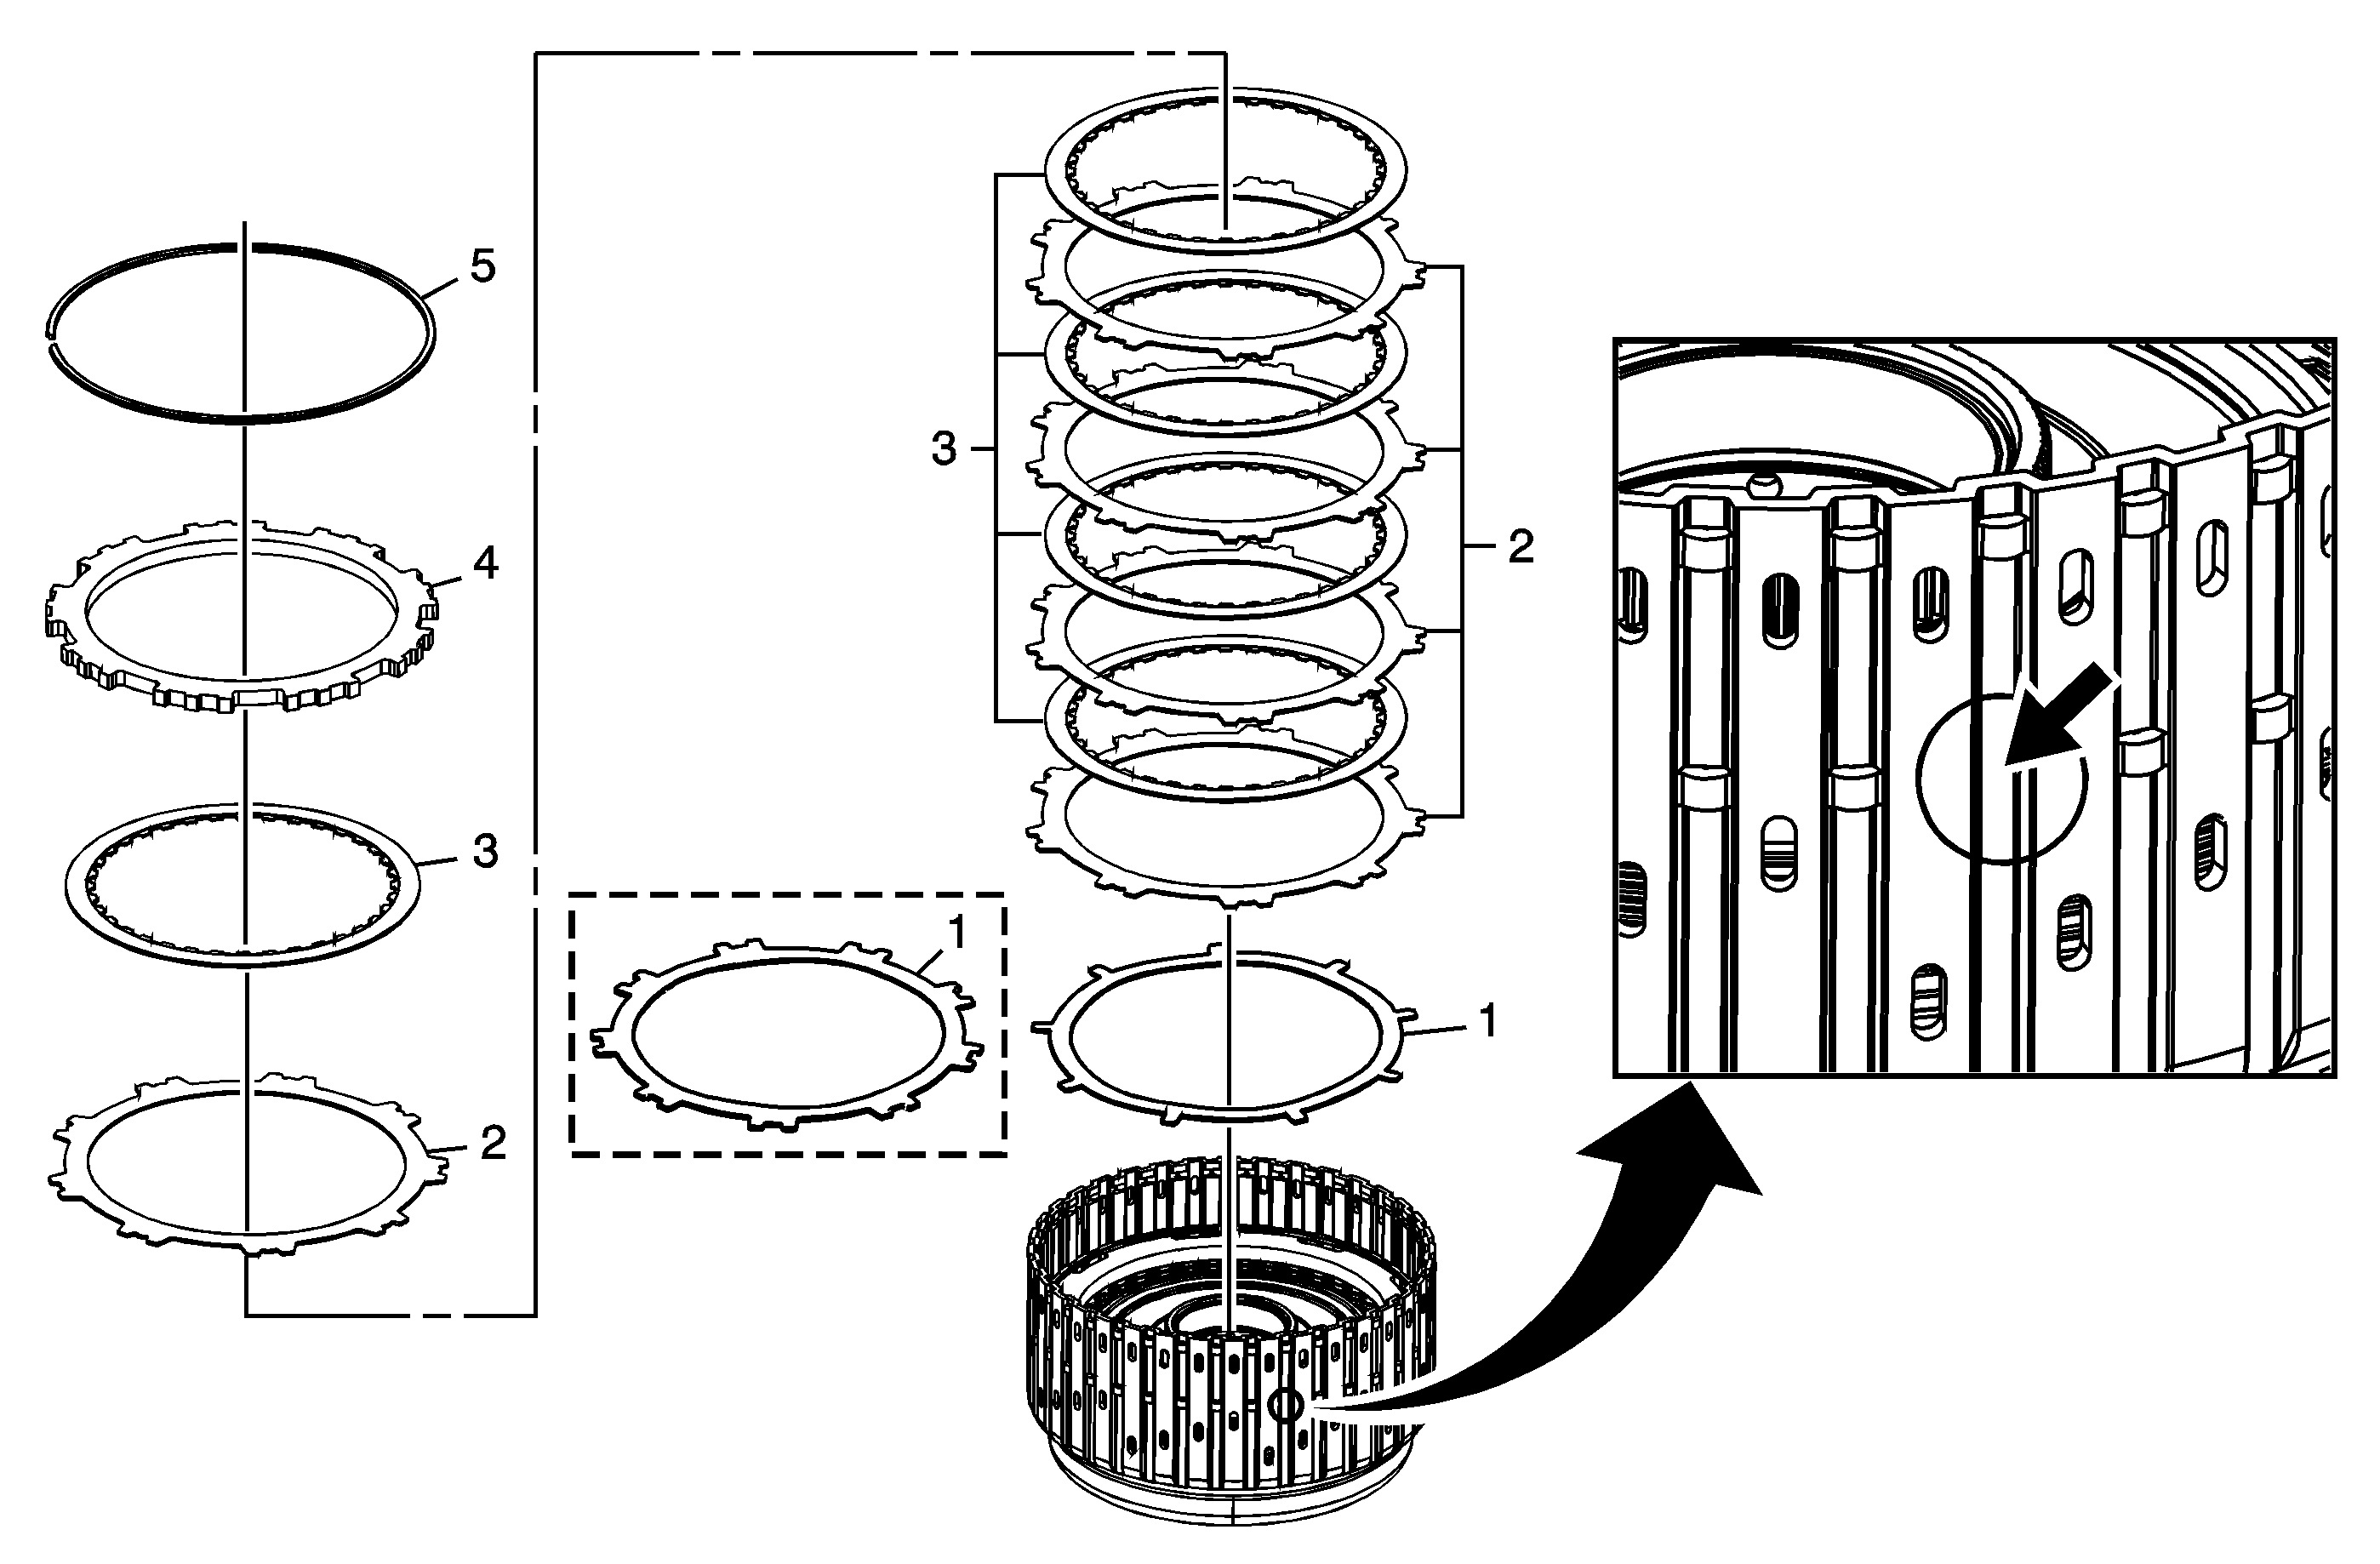
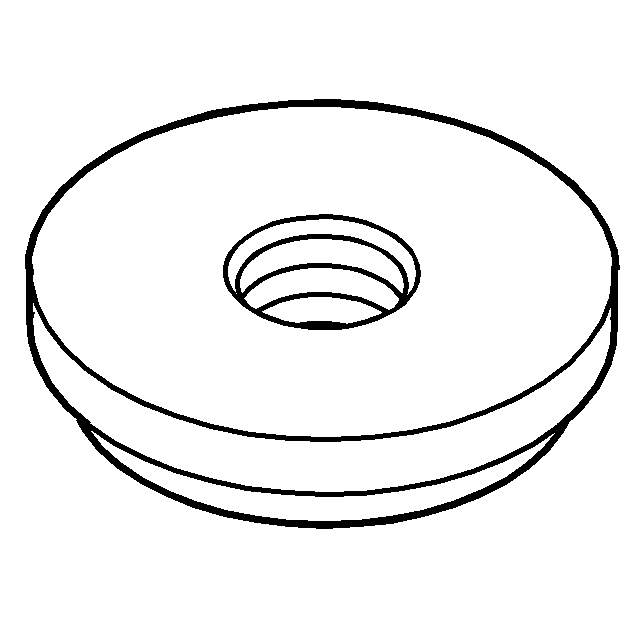
1-2-3-4 and 3-5 Reverse Clutch Plates Removal
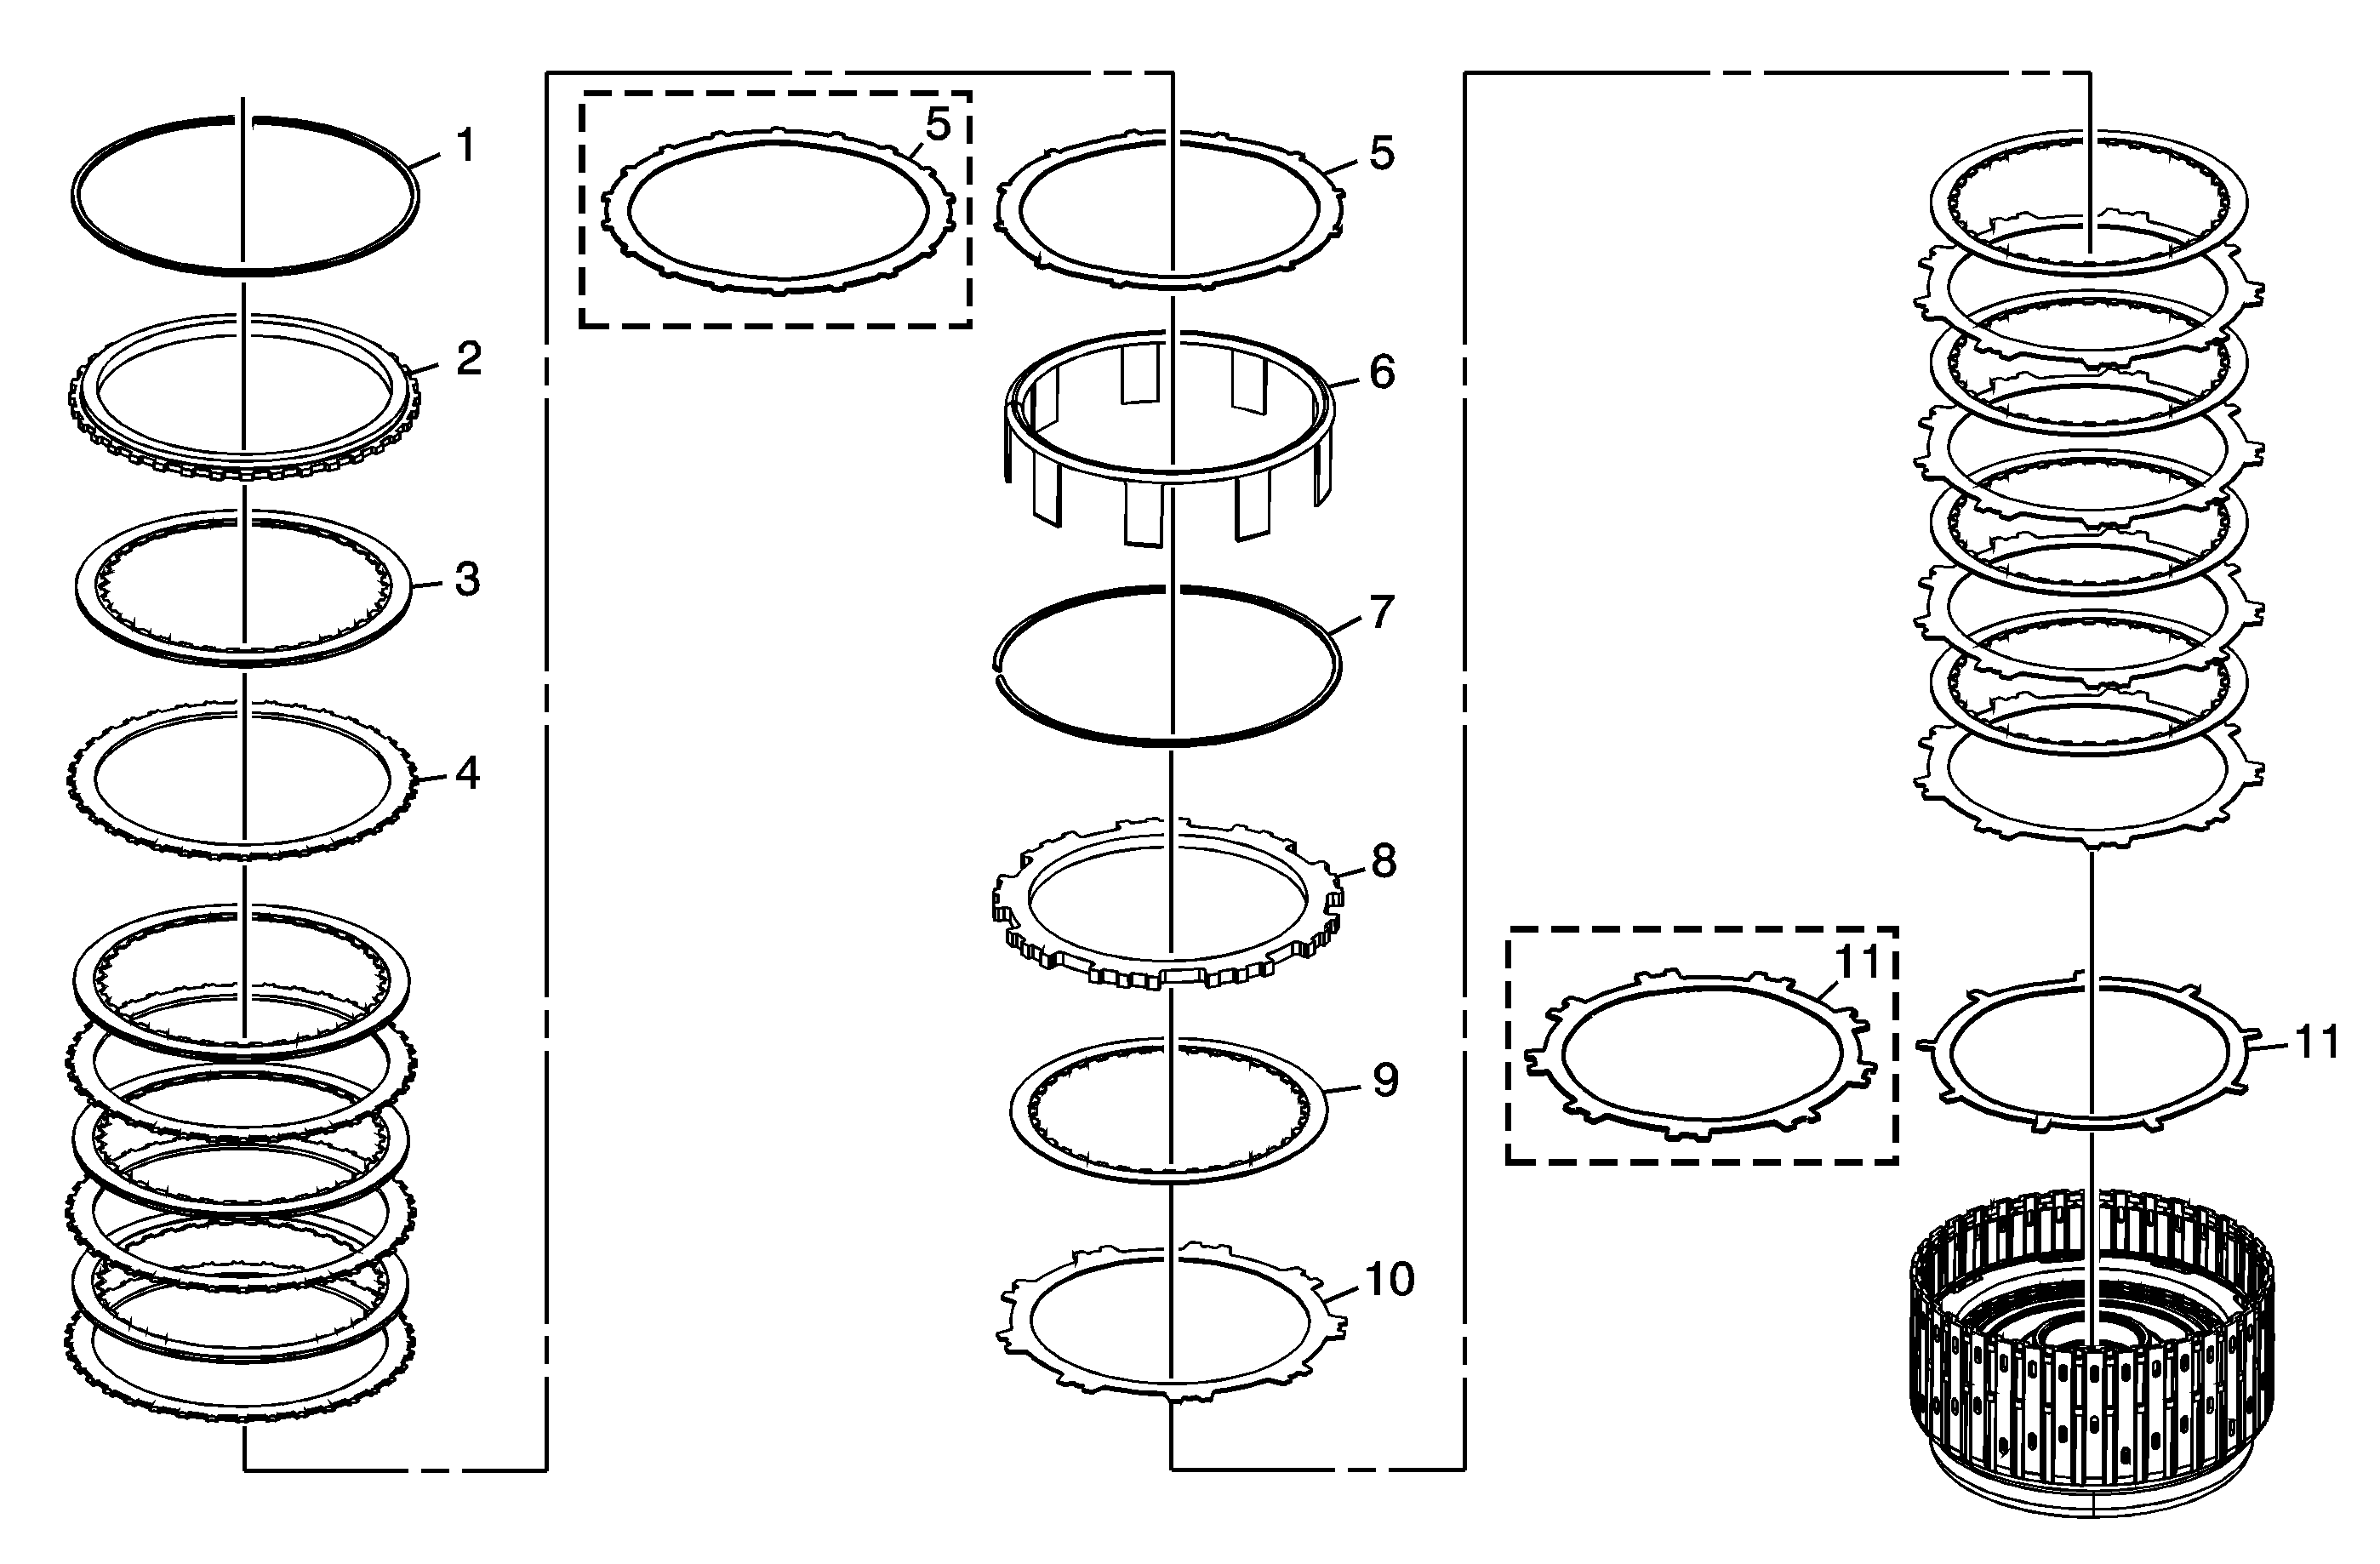
Callout | Component Name |
|---|---|
1 | 3-5 Reverse Clutch Backing Plate Retaining Ring |
2 | 3-5 Reverse Clutch Backing Plate |
3 | 3-5 Reverse Clutch Plate Assembly (Quantity: 4) |
4 | 3-5 Reverse Clutch Plate (Quantity: 4) |
5 | 3-5 Reverse Clutch (Waved) Plate |
6 | 3-5 Reverse Clutch Apply Ring |
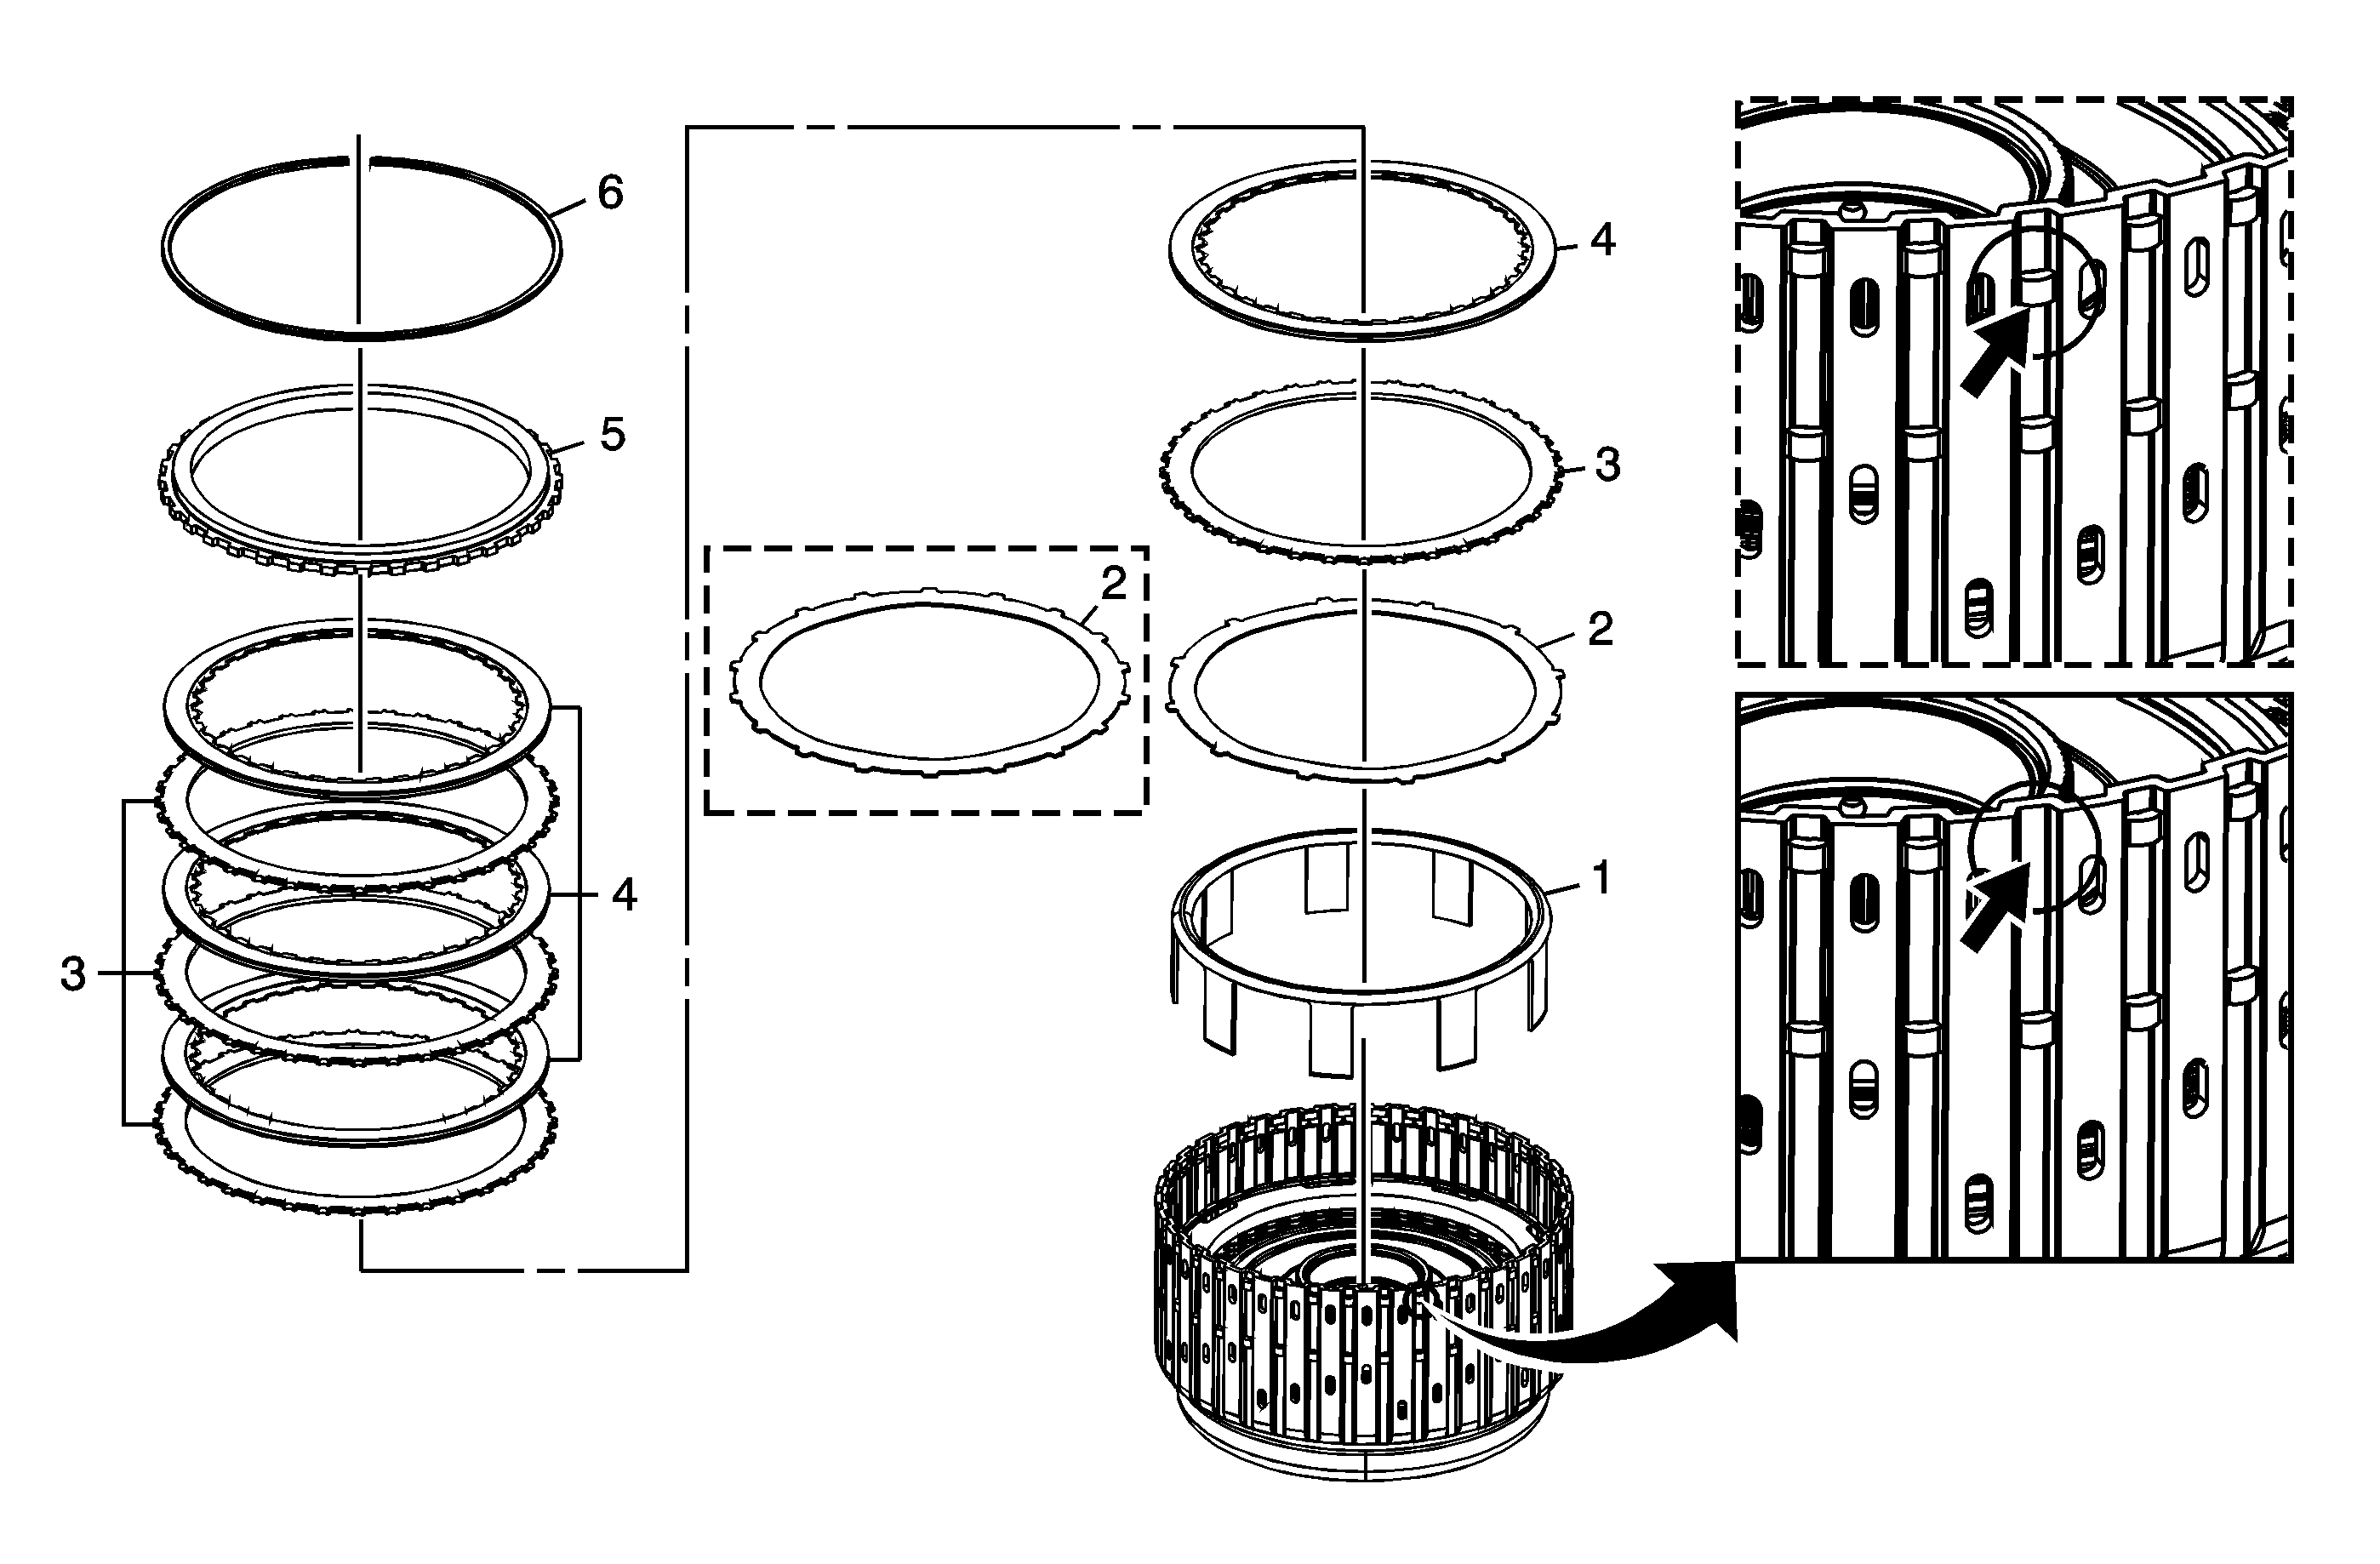
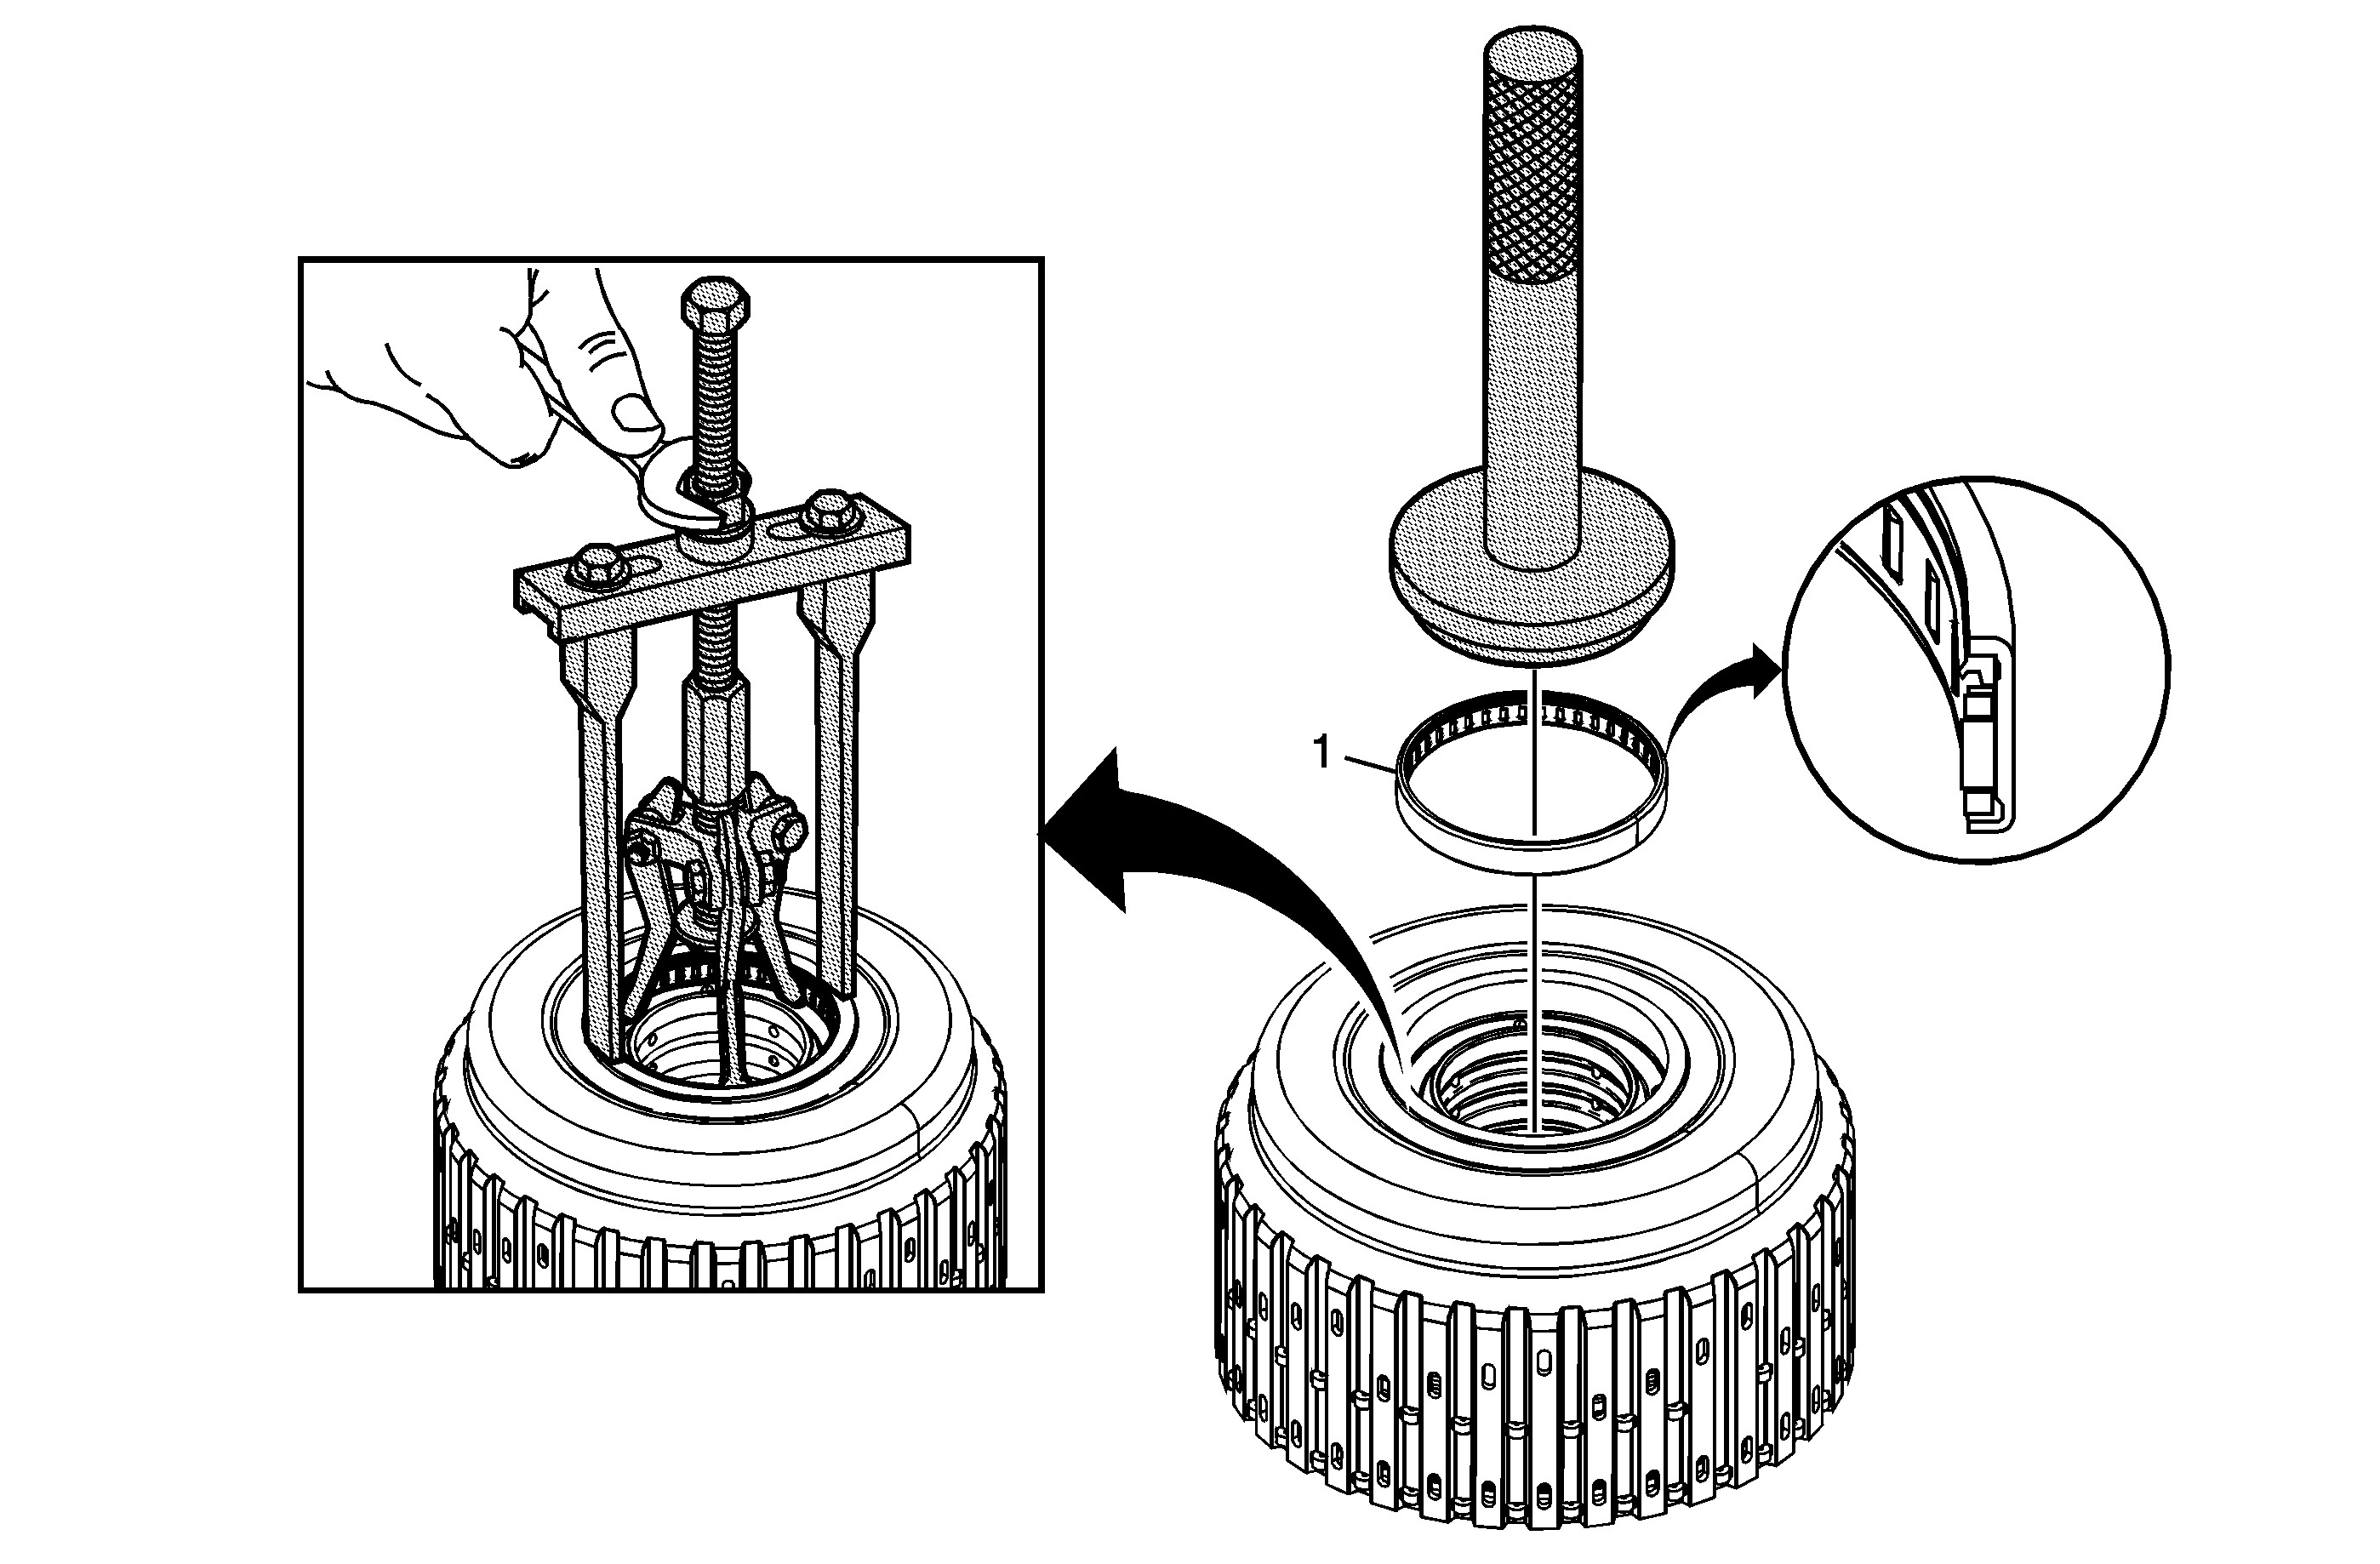
7 | 1-2-3-4 Clutch Backing Plate Retaining Ring |
8 | 1-2-3-4 Clutch Backing Plate |
9 | 1-2-3-4 Clutch Plate Assembly (Quantity: 5) |
10 | 1-2-3-4 Clutch Plate (Quantity: 5) |
11 | 1-2-3-4 Clutch (Waved) Plate |
1-2-3-4 Clutch Piston Removal
Callout | Component Name |
|---|---|
1 | 1-2-3-4 Clutch Piston Dam Retaining Ring. Notice: Refer to General Repair Instructions in the Preface section. Notice: Do not reuse the retaining ring. Install a NEW retaining ring. Reusing the old retaining ring may cause damage to the clutch assembly. Special ToolJ 38734 Intermediate Spring Compressor Adapter |
2 | 1-2-3-4 Clutch Piston Dam Assembly. |
3 | 1-2-3-4 Clutch Spring |
4 | 1-2-3-4 Clutch Piston Tip Tip |
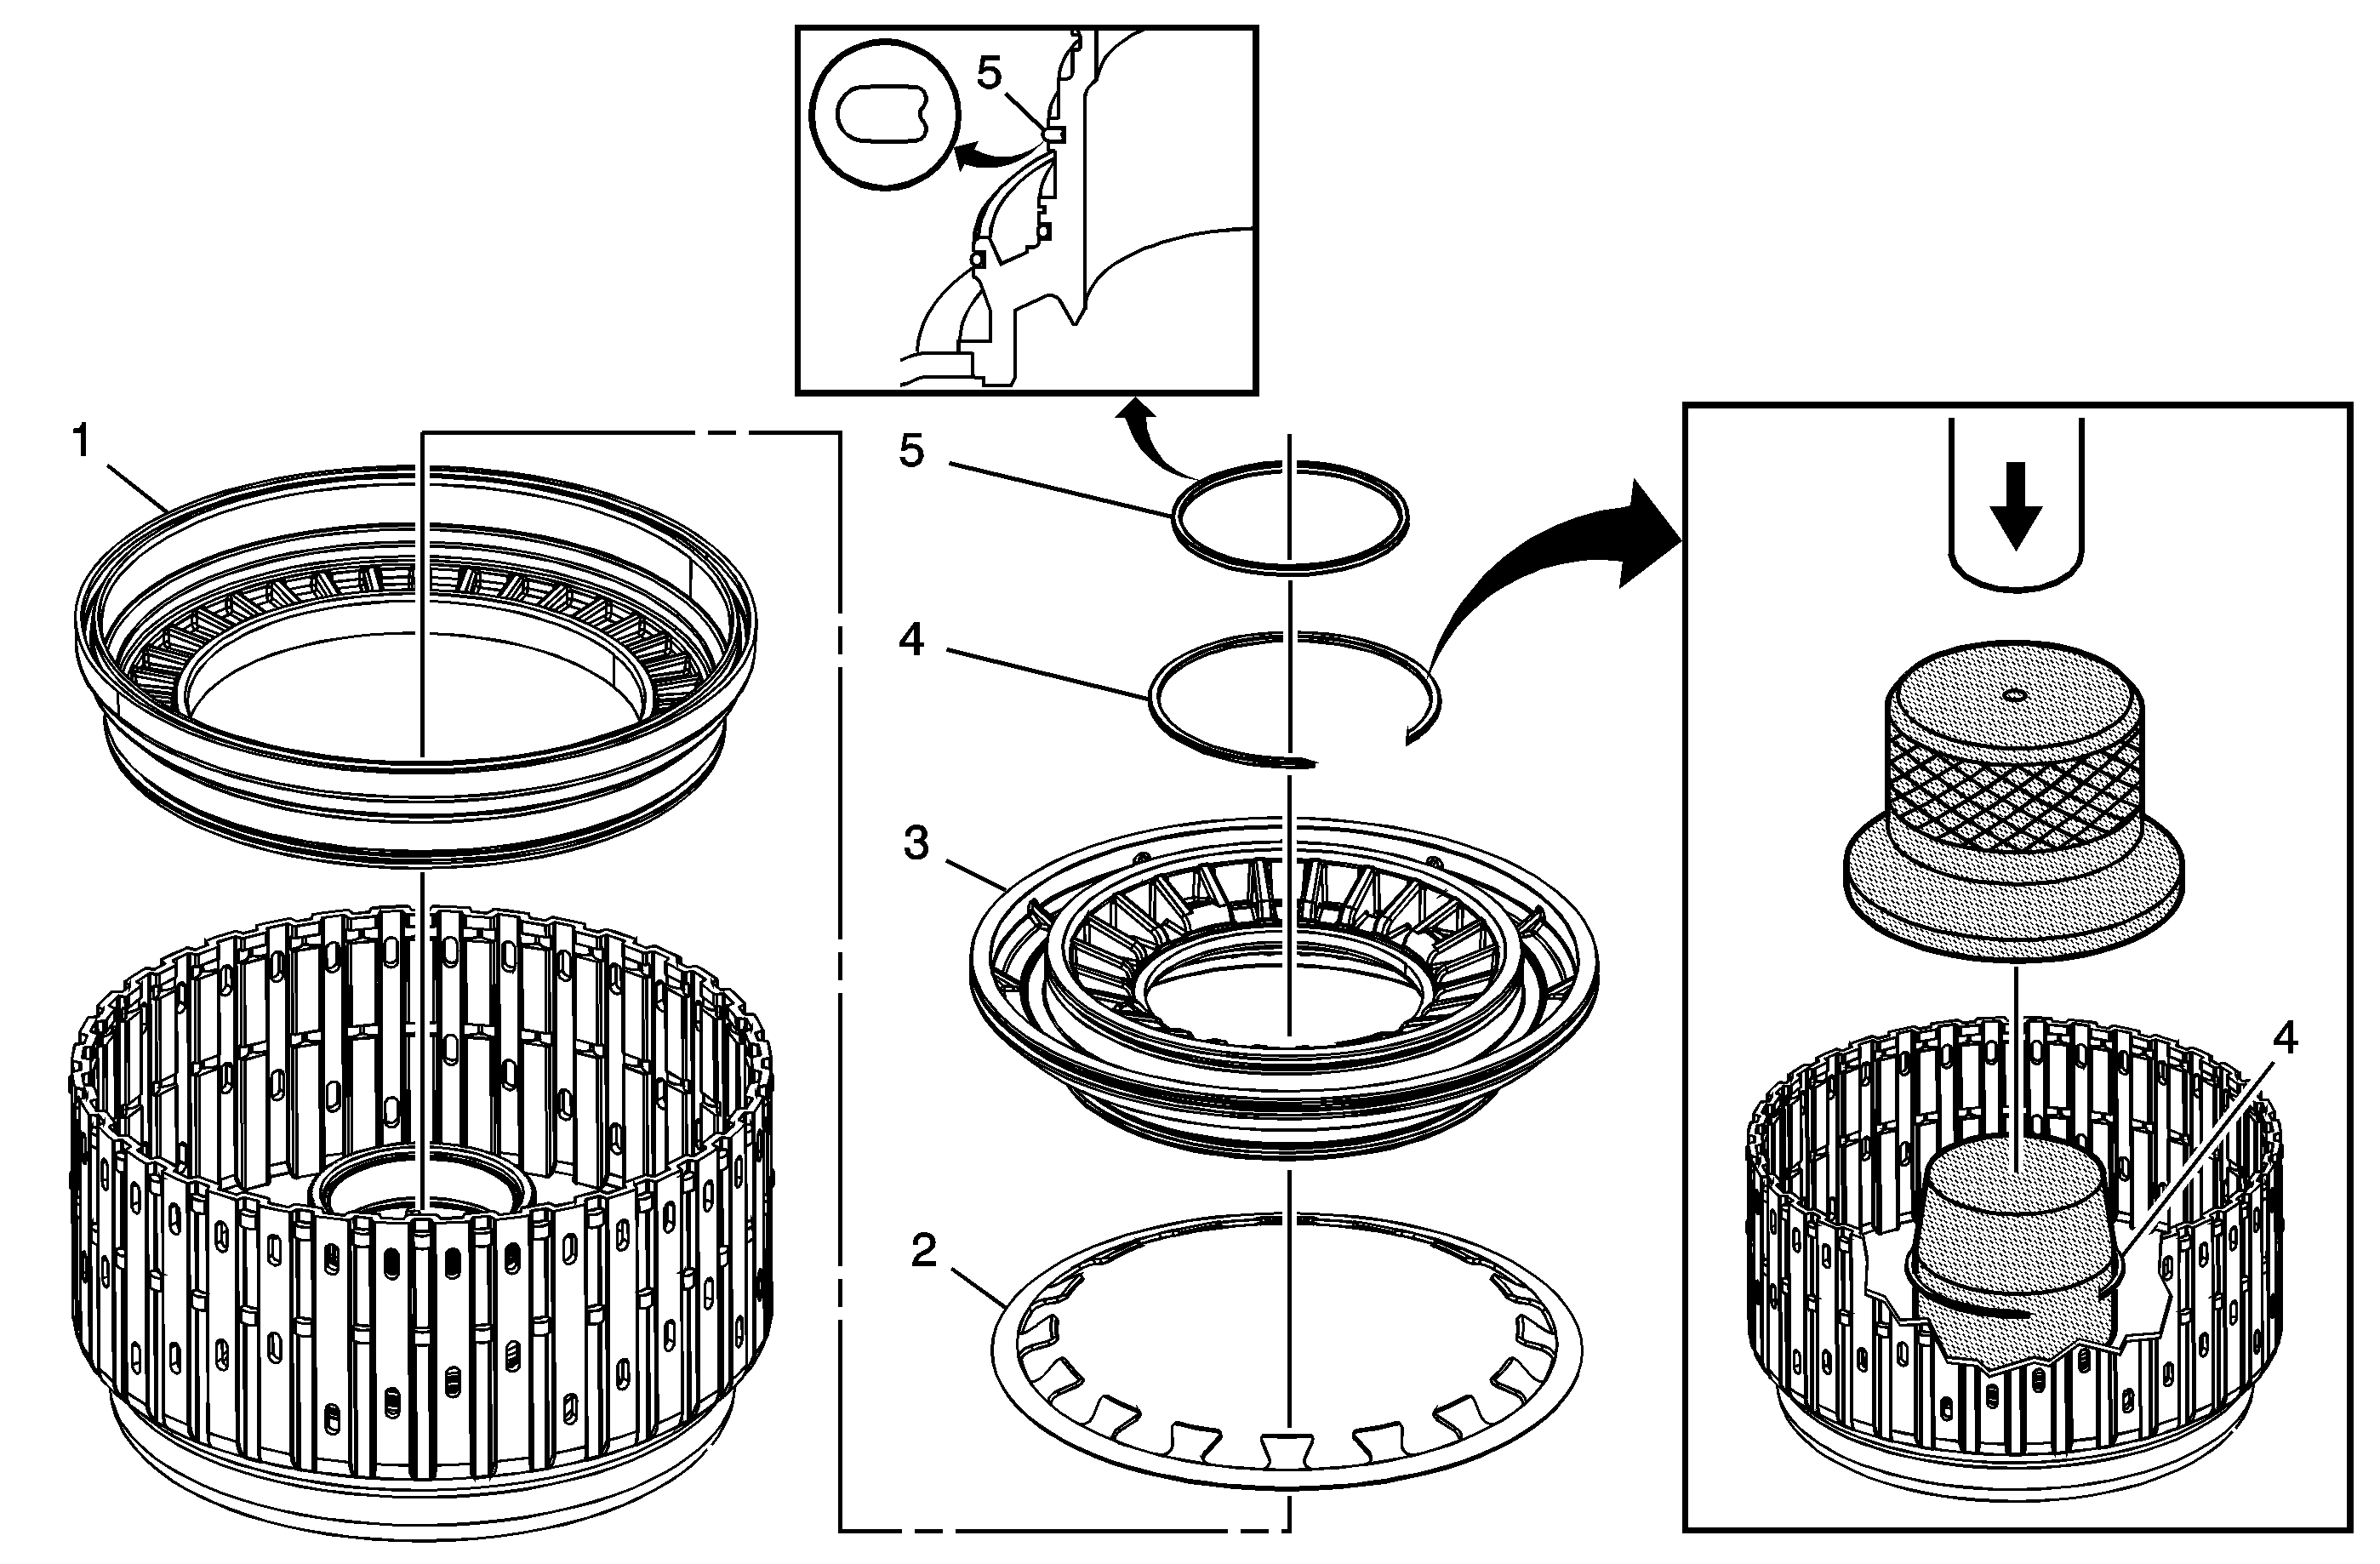
3-5 Reverse Clutch Piston Removal
Callout | Component Name |
|---|---|
1 | 1-2-3-4 Clutch Piston Housing Retaining Ring Notice: Do not reuse the retaining ring. Install a NEW retaining ring. Reusing the old retaining ring may cause damage to the clutch assembly. Special ToolDT 47867 Adjustable Clutch Spring Compressor |
Preliminary Procedures
| |
2 | 1-2-3-4 Clutch Piston Housing |
3 | 3-5 Reverse Clutch Spring |
4 | 3-5 Reverse Clutch Piston Tip |
1-2-3-4 and 3-5 Reverse Clutch Piston Seals Replacement
Callout | Component Name |
|---|---|
|
Notice: Do not reuse the seals. Replace with NEW seals. Reusing old seals may cause transmission damage. Tip | |
1 | 1-2-3-4 Clutch Piston Seal |
2 | 3-5 Reverse Clutch Piston Dam (O-Ring) Seal |
3 | 3-5 Reverse Clutch Piston Inner Seal |
4 | 1-2-3-4 Clutch Piston Housing |
5 | 3-5 Reverse Clutch Piston Outer Seal |
6 | 3-5 Reverse Clutch Piston |
7 | 1-2-3-4 Clutch Piston Inner Seal Notice: Refer to General Repair Instructions in the Preface section. |
8 | 1-2-3-4 Clutch Piston Housing Seal |
9 | 1-2-3-4 Clutch Piston Housing Seal |
3-5 Reverse Clutch Piston Installation
Callout | Component Name | ||||
|---|---|---|---|---|---|
1 | 3-5 Reverse Clutch Piston | ||||
2 | 3-5 Reverse Clutch Spring Notice: Refer to General Repair Instructions in the Preface section. | ||||
3 | 1-2-3-4 Clutch Piston Housing | ||||
4 | 1-2-3-4 Clutch Piston Housing Retaining Ring Notice: Refer to General Repair Instructions in the Preface section. Notice: Do not reuse the retaining ring. Install a NEW retaining ring. Reusing the old retaining ring may cause damage to the clutch assembly. Notice: Refer to General Repair Instructions in the Preface section. Special Tools
| ||||
5 | 1-2-3-4 Clutch Piston Inner Seal Notice: Refer to General Repair Instructions in the Preface section. |
1-2-3-4 Clutch Piston Installation
Callout | Component Name |
|---|---|
1 | 1-2-3-4 Clutch Piston |
2 | 1-2-3-4 Clutch Spring Notice: Refer to General Repair Instructions in the Preface section. |
3 | 1-2-3-4 Clutch Piston Dam Assembly Tip |
4 | 1-2-3-4 Clutch Piston Dam Retaining Ring Notice: Refer to General Repair Instructions in the Preface section. Notice: Do not reuse the retaining ring. Install a NEW retaining ring. Reusing the old retaining ring may cause damage to the clutch assembly. Special ToolJ 38734 Intermediate Spring Compressor Adapter |
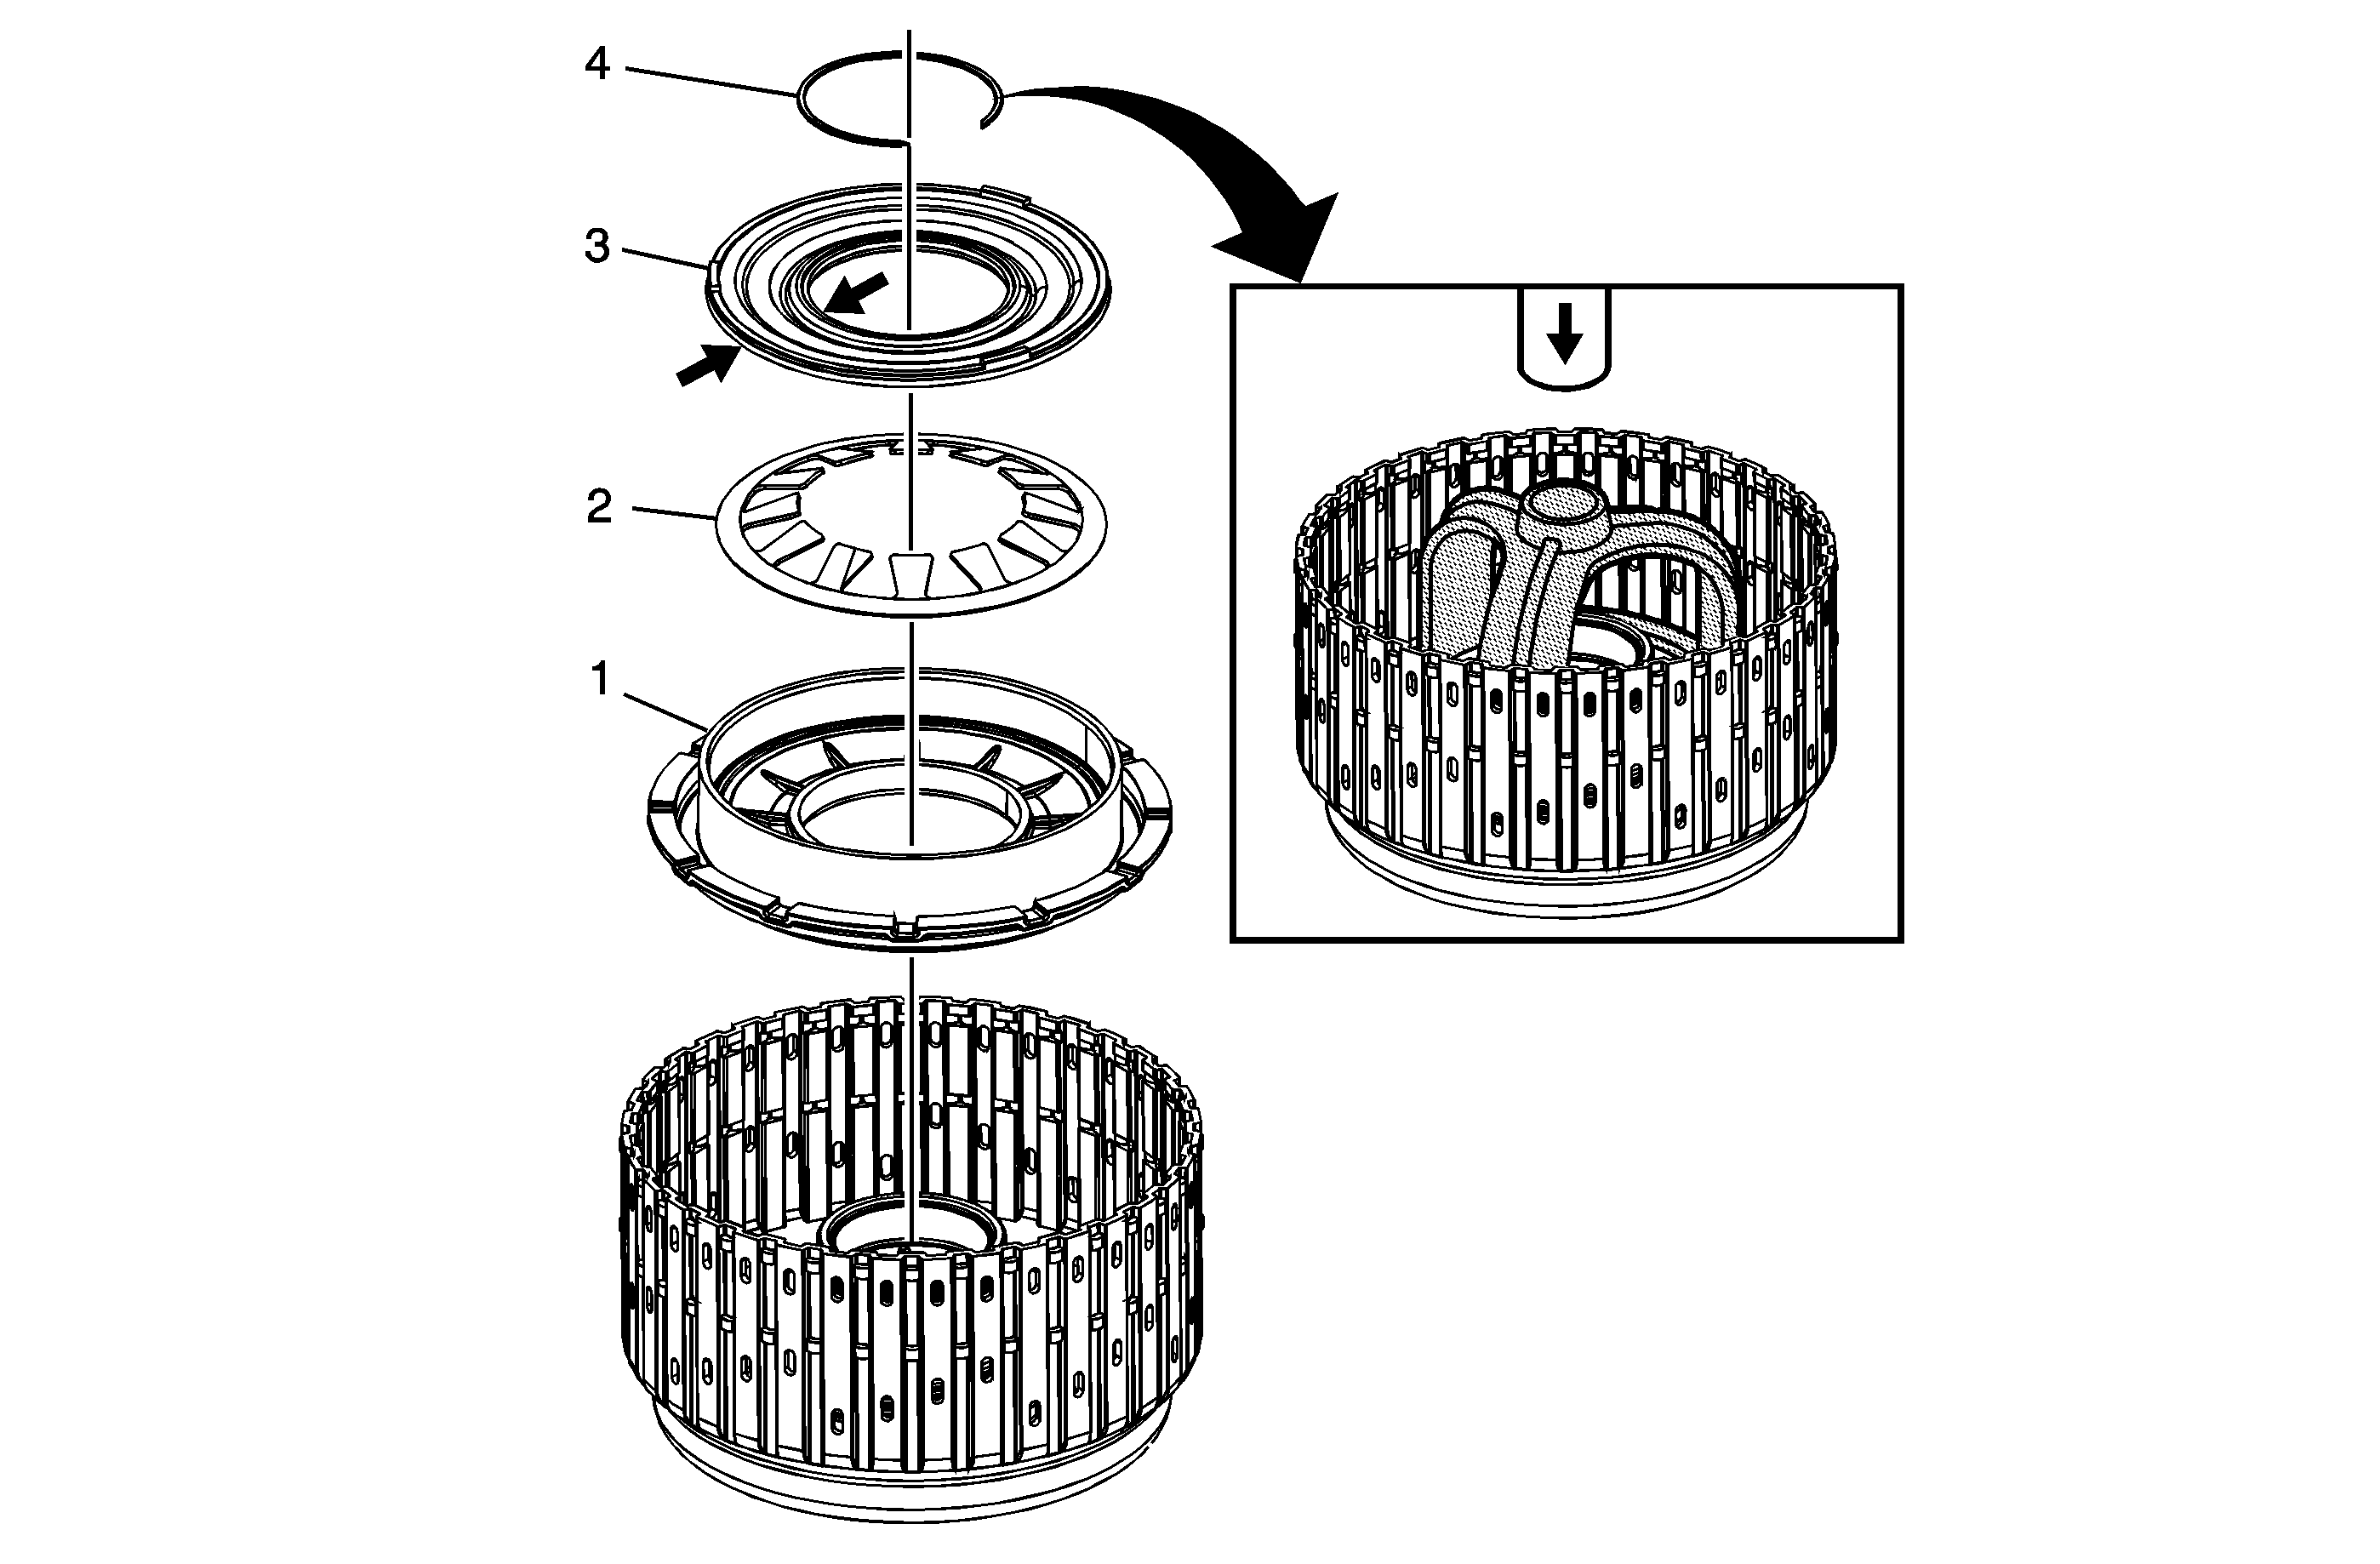
1-2-3-4 Clutch Plate Installation
Callout | Component Name |
|---|---|
1 | 1-2-3-4 Clutch (Waved) Plate Notice: Refer to General Repair Instructions in the Preface section. |
2 | 1-2-3-4 Clutch Plate (Quantity: 5) Notice: Refer to General Repair Instructions in the Preface section. |
3 | 1-2-3-4 Clutch Plate Assembly (Quantity: 5) |
4 | 1-2-3-4 Clutch Backing Plate Notice: Refer to General Repair Instructions in the Preface section. |
5 | 1-2-3-4 Clutch Backing Plate Retaining Ring Notice: Refer to General Repair Instructions in the Preface section. Tip |
3-5 and Reverse Clutch Plate Installation
Callout | Component Name |
|---|---|
1 | 3-5 Reverse Clutch Apply Ring Notice: Refer to General Repair Instructions in the Preface section. |
2 | 3-5 Reverse Clutch (Waved) Plate |
3 | 3-5 Reverse Clutch Plate (Quantity: 4) |
4 | 3-5 Reverse Clutch Plate Assembly (Quantity: 4) |
5 | 3-5 Reverse Clutch Backing Plate |
6 | 3-5 Reverse Clutch Backing Plate Retaining Ring Notice: Refer to General Repair Instructions in the Preface section. Tip |
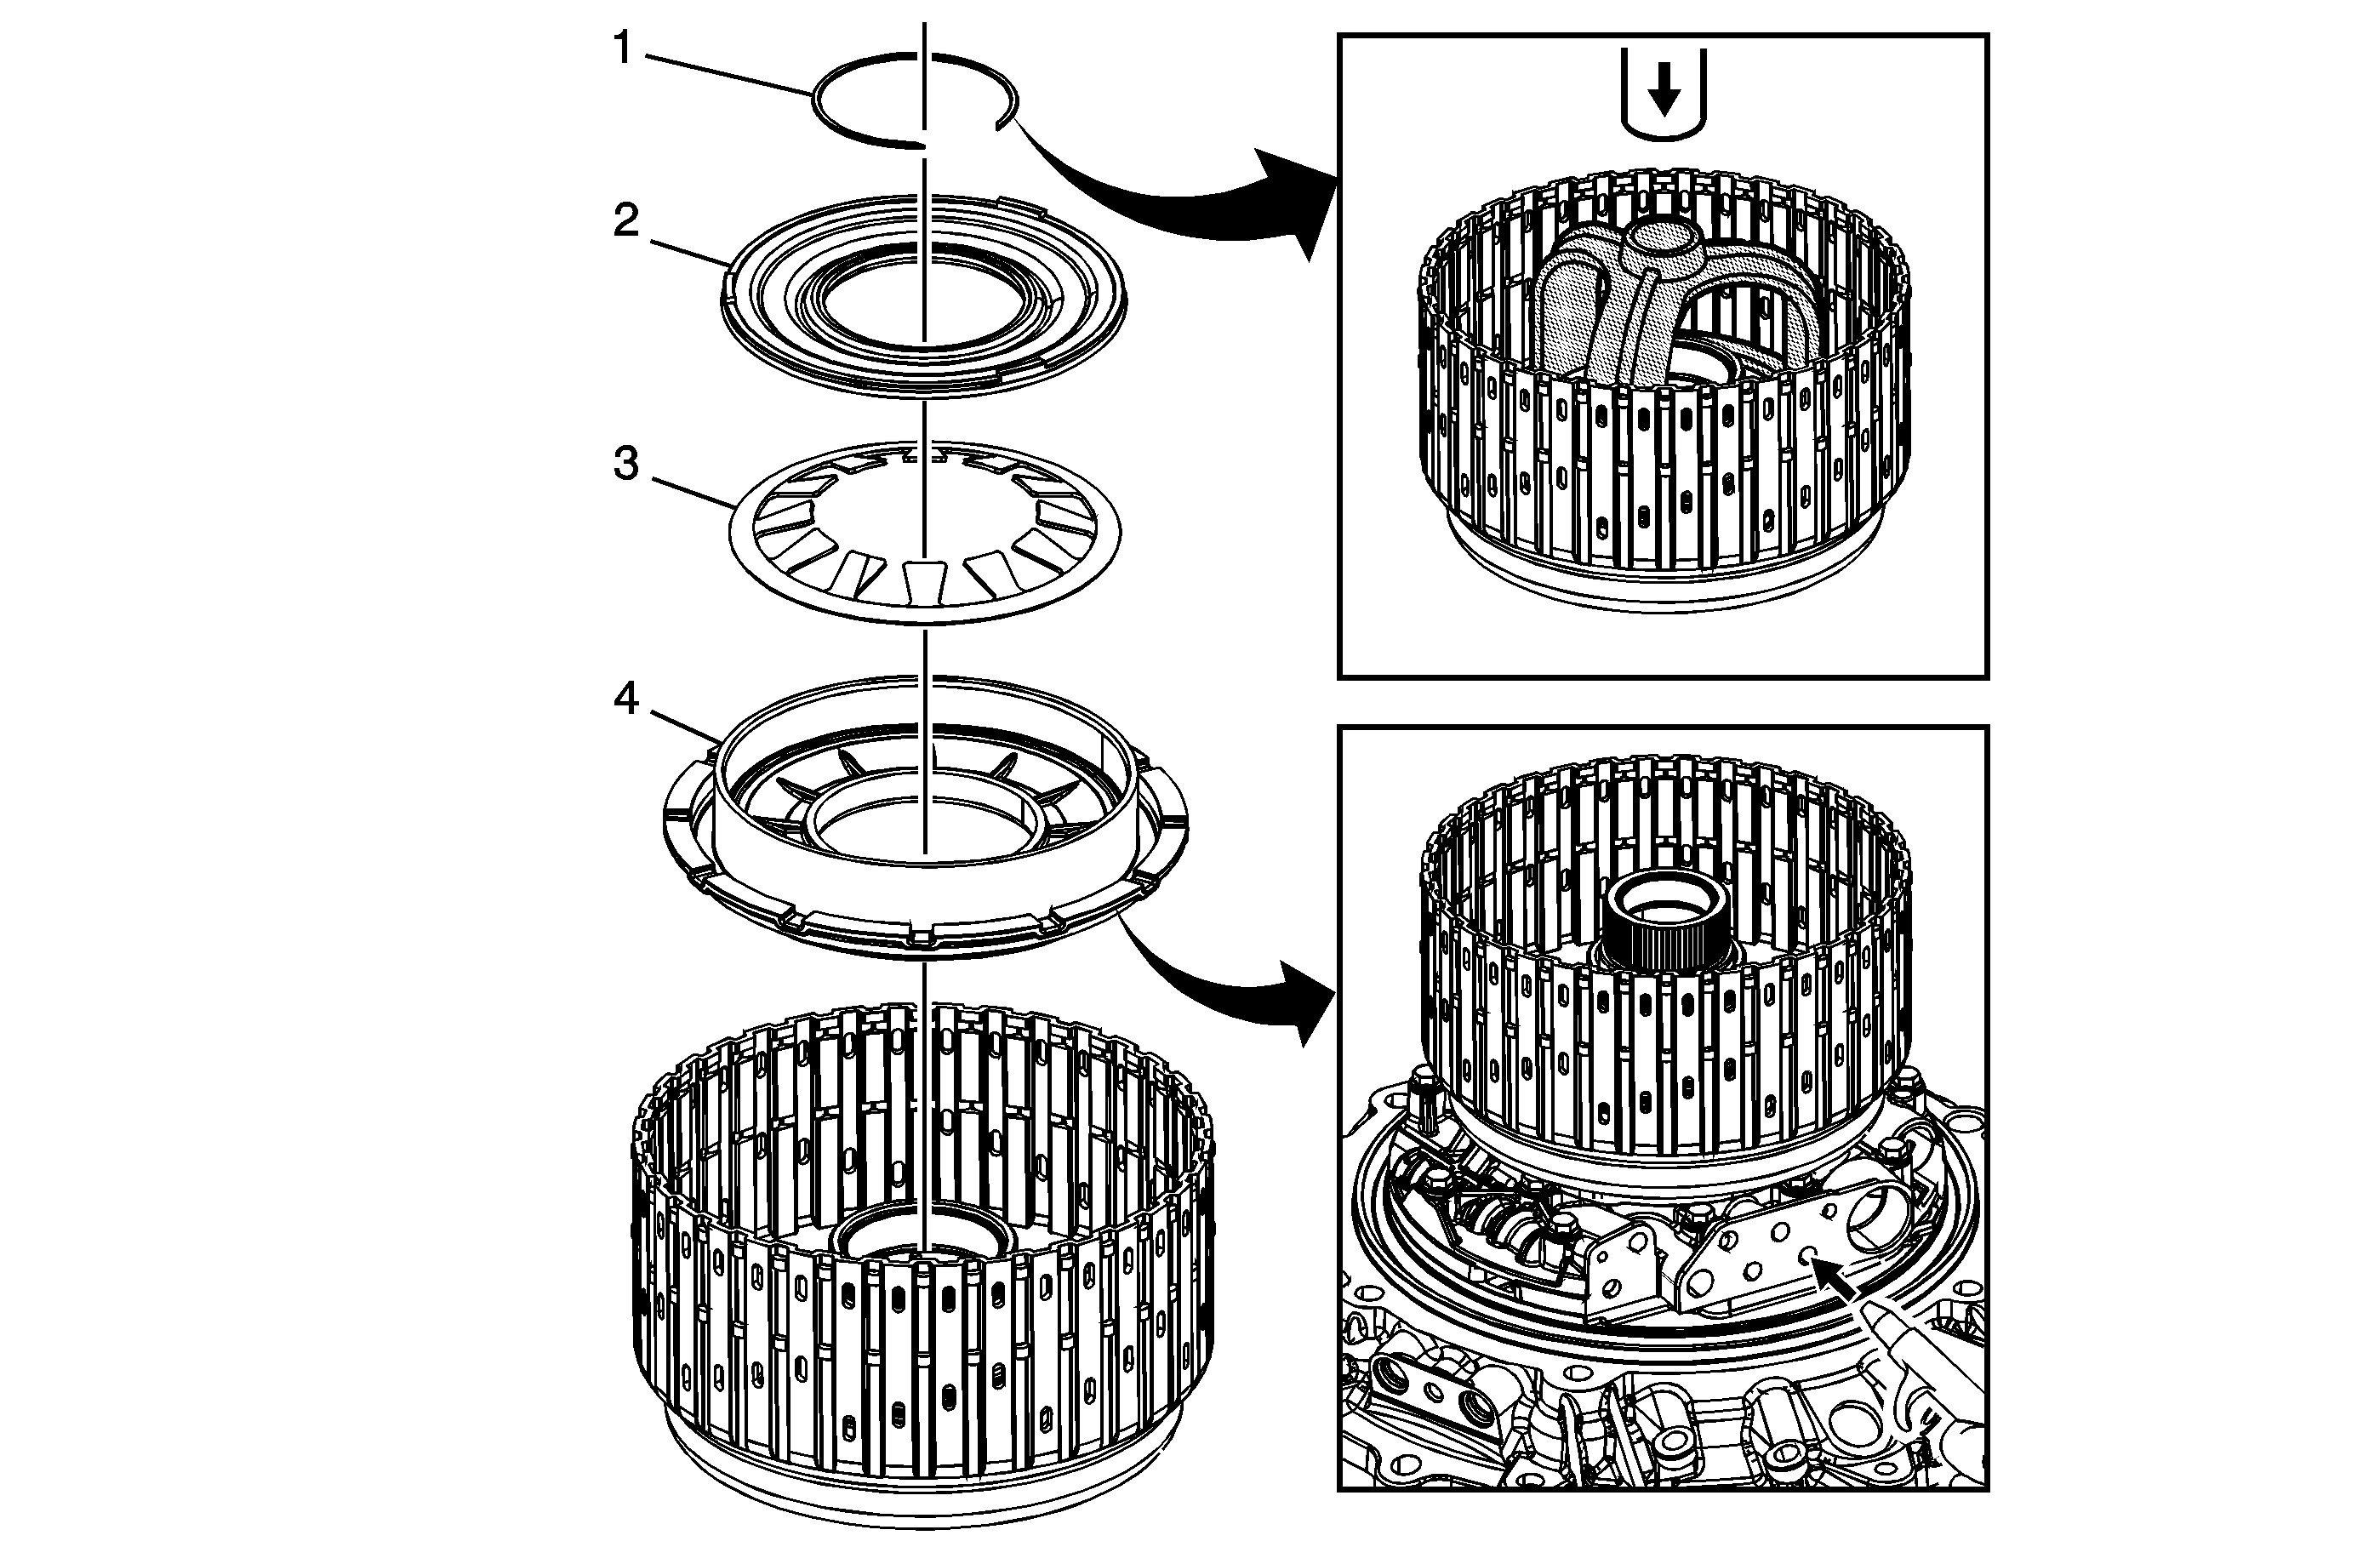
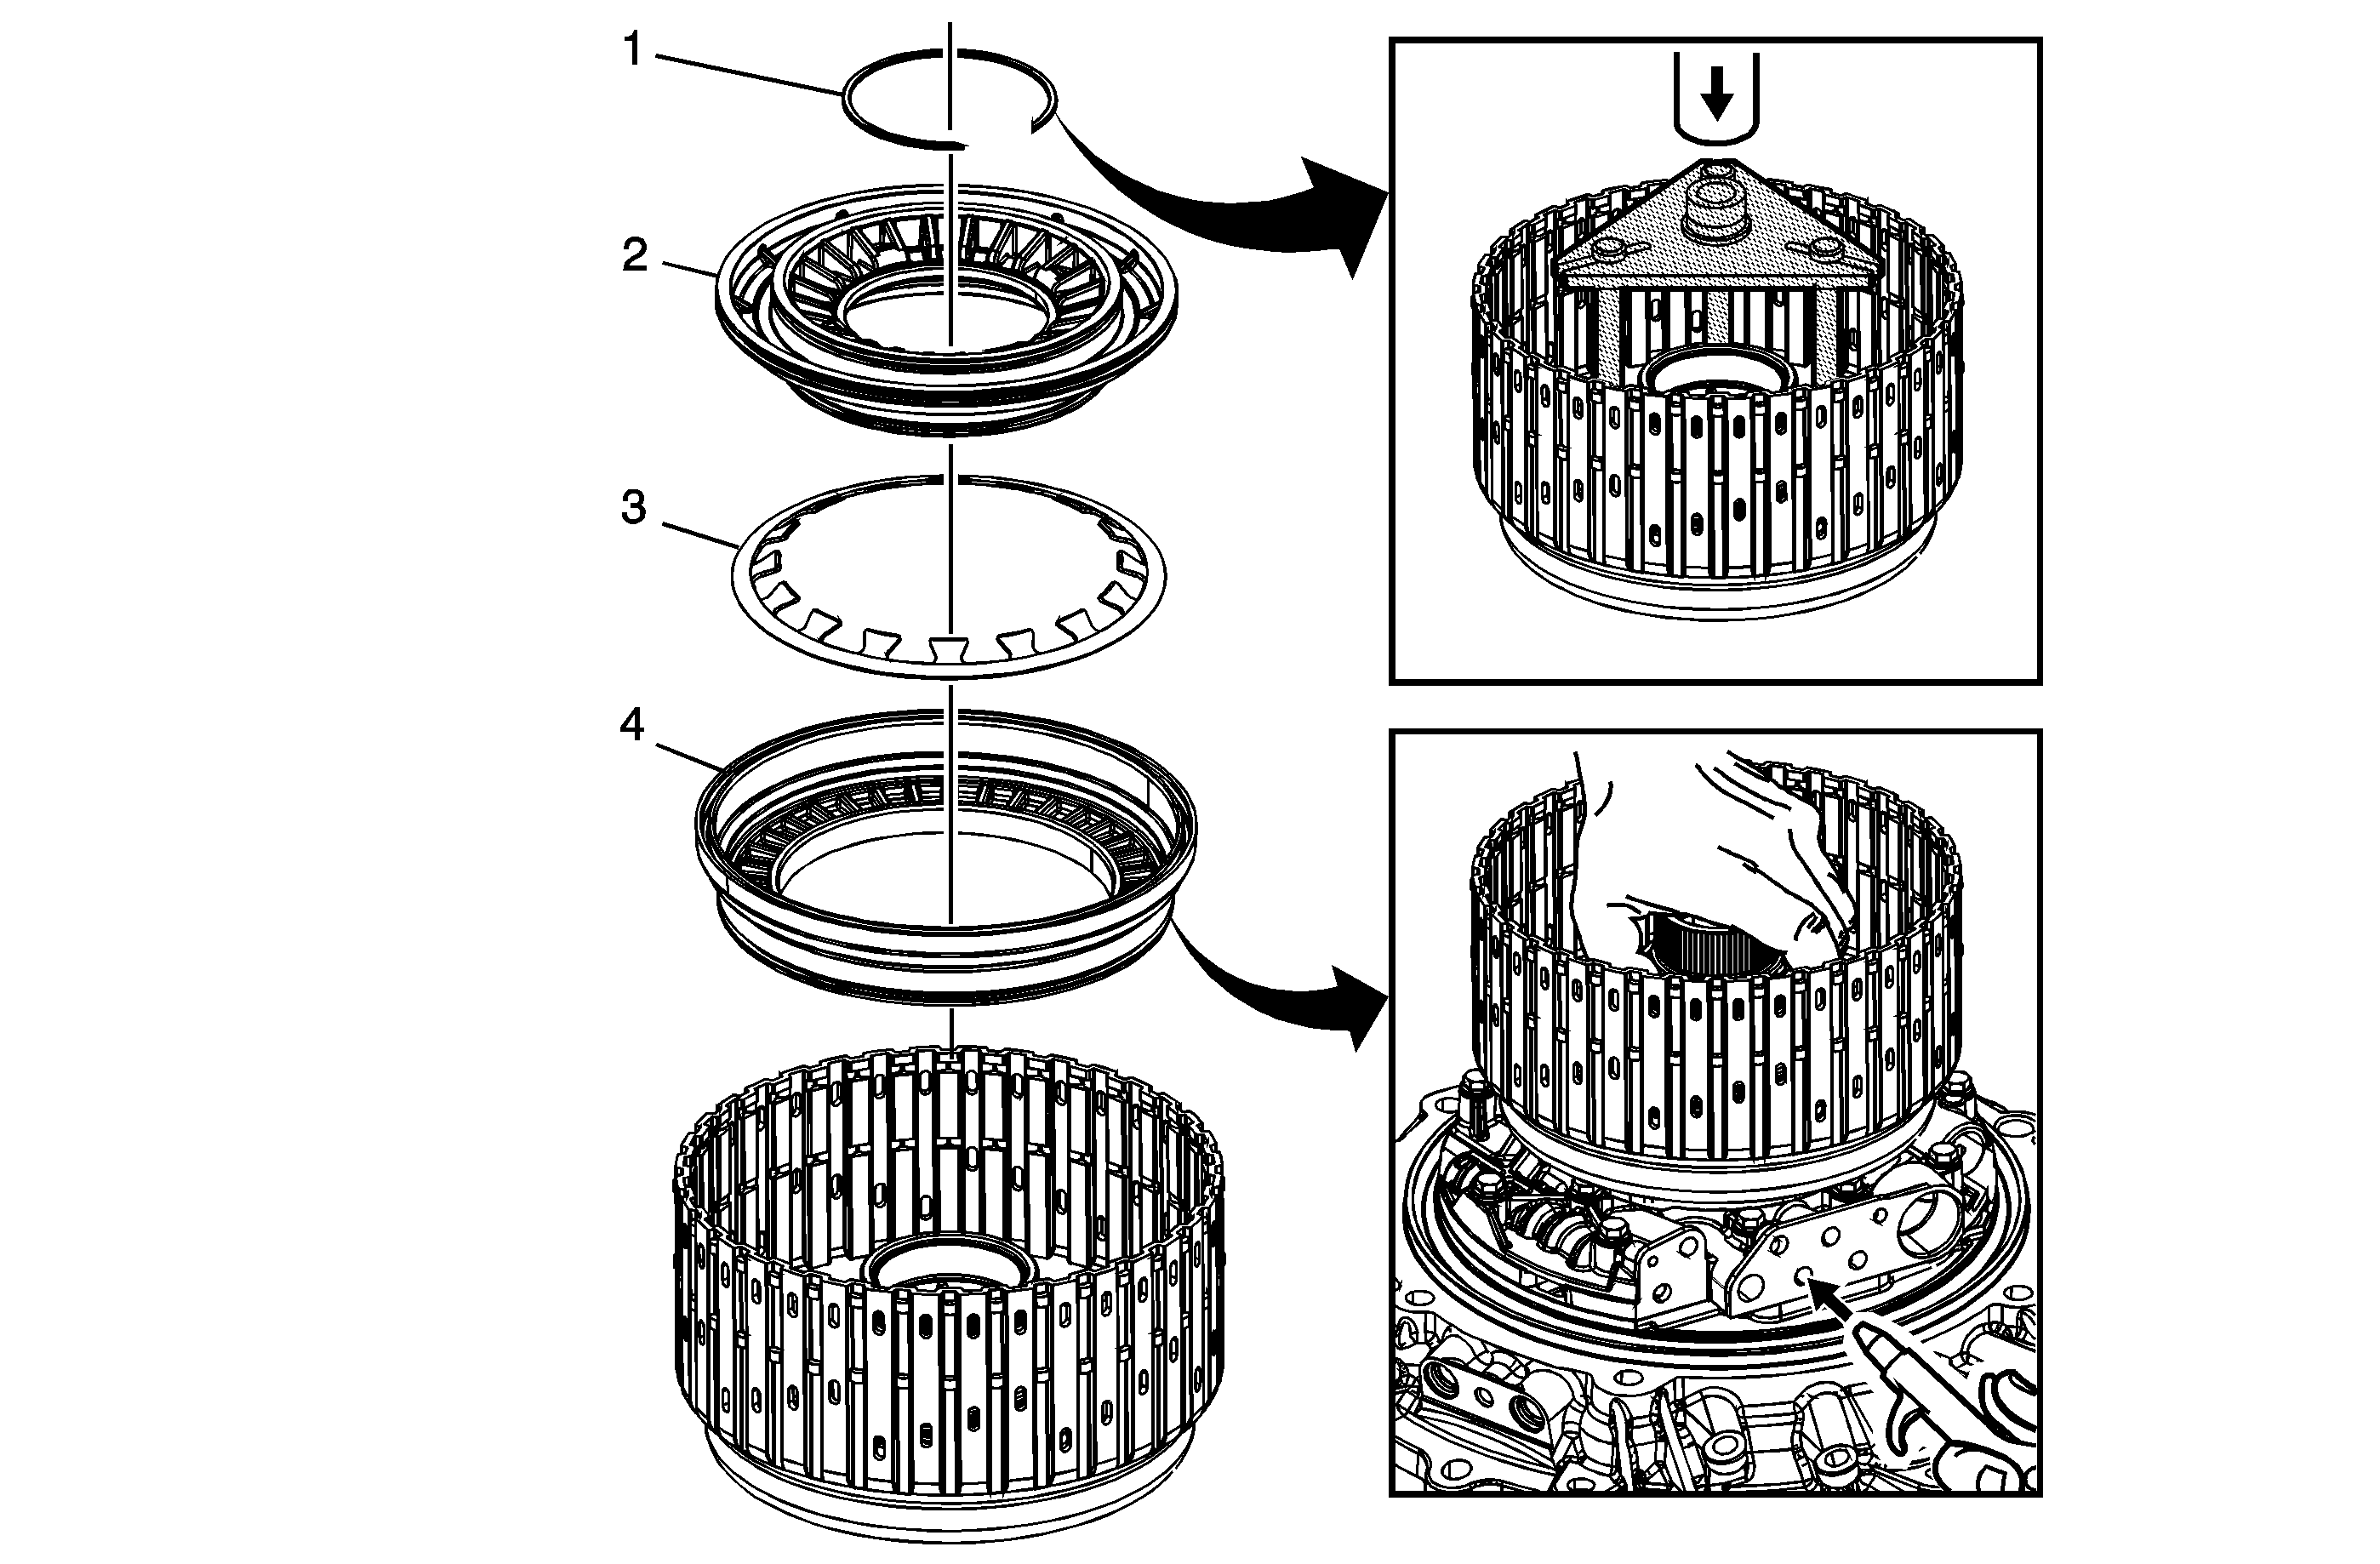
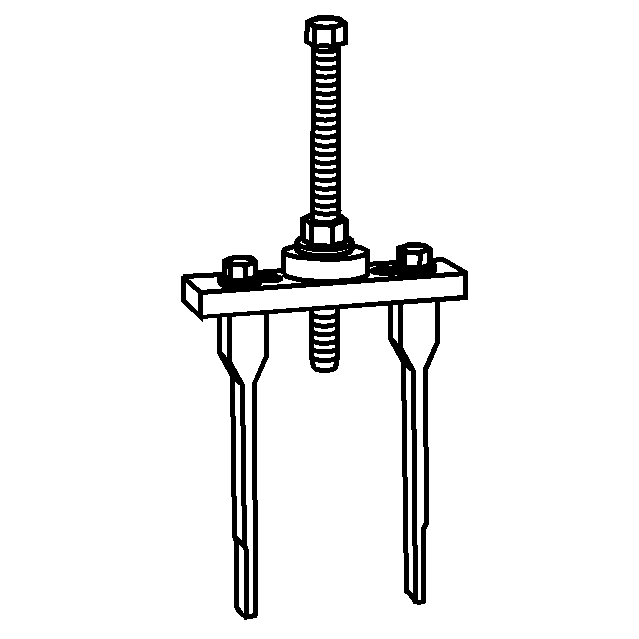
1-2-3-4 and 3-5 Reverse Clutch Bearing Assembly Replacement
Callout | Component Name | ||||||||
|---|---|---|---|---|---|---|---|---|---|
1 | 3-5 Reverse Clutch Bearing Notice: Refer to General Repair Instructions in the Preface section. Notice: Refer to General Repair Instructions in the Preface section. Specification Special Tools
|
