For 1990-2009 cars only
Tools Required
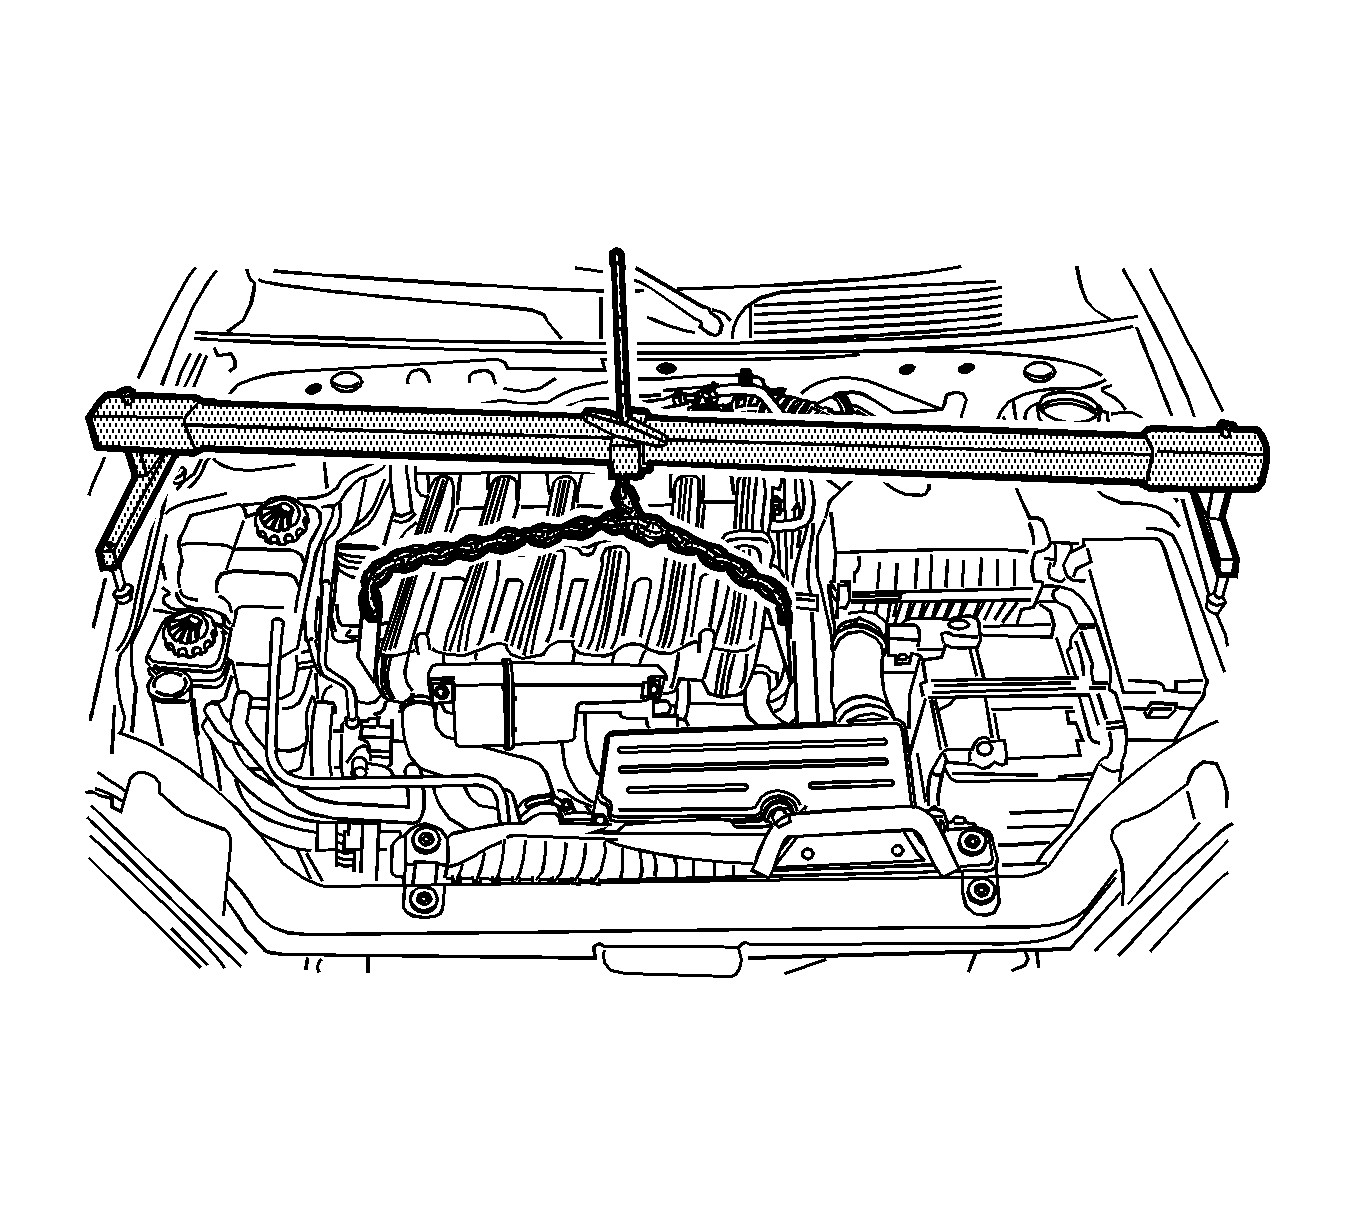
DW-110-060 Engine Support Fixture
Removal Procedure
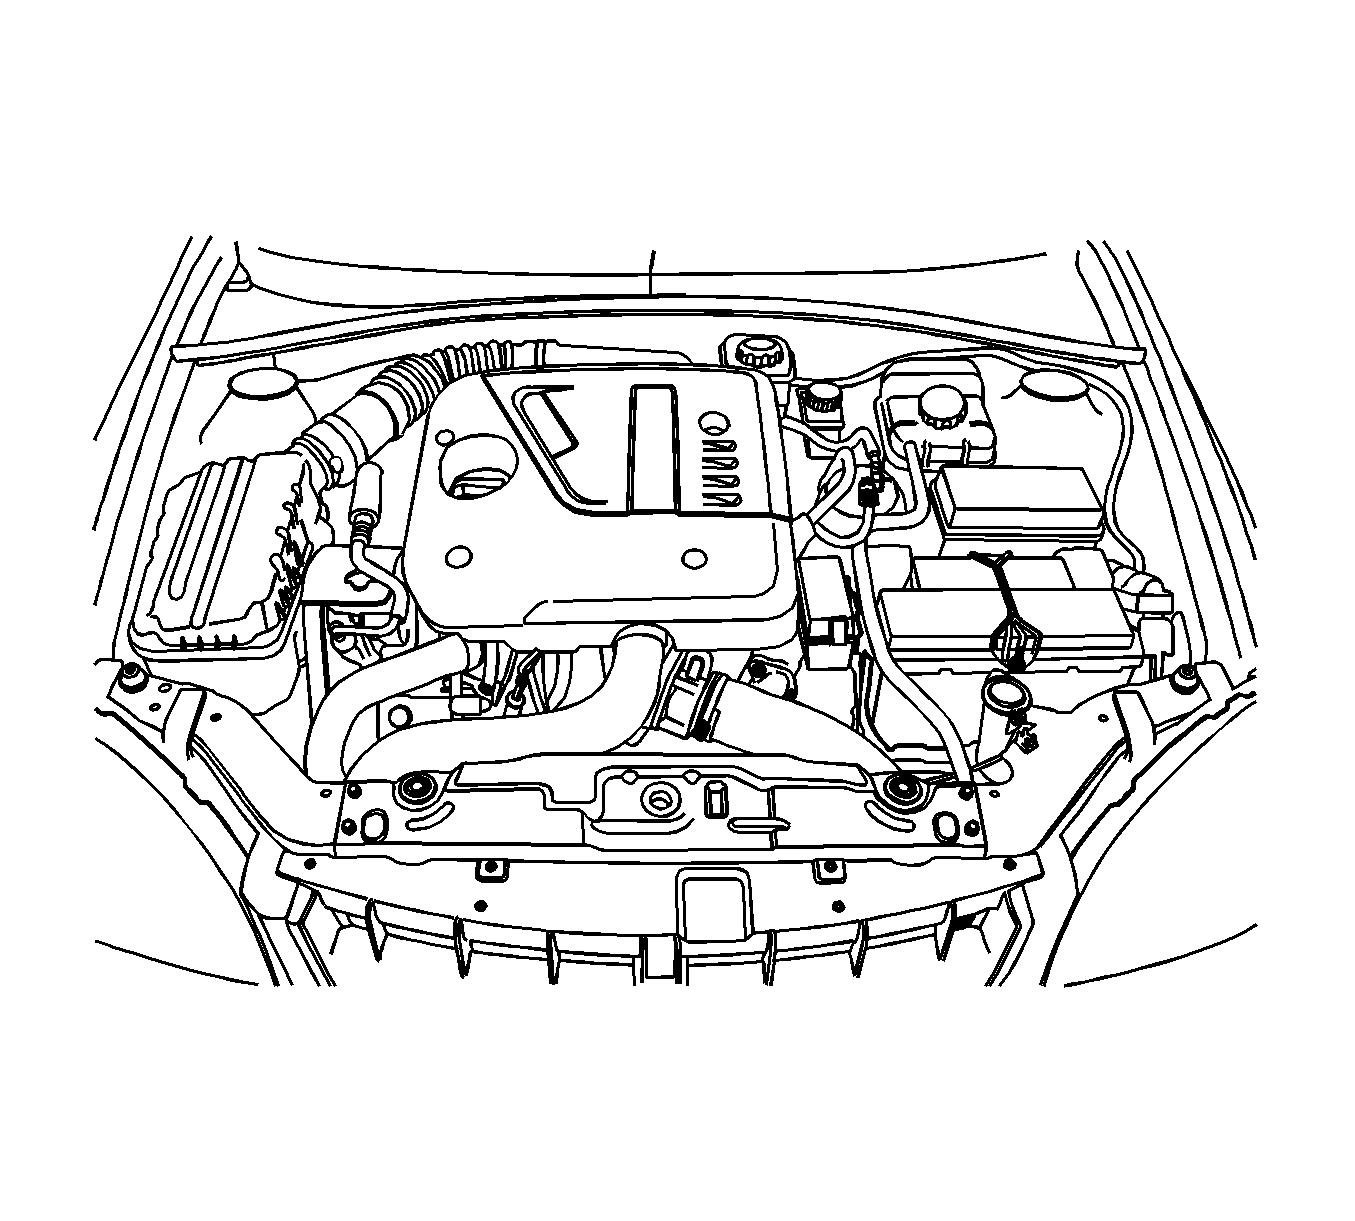
- Remove the engine cover and the air filter housing.
- Remove the battery and the battery tray.
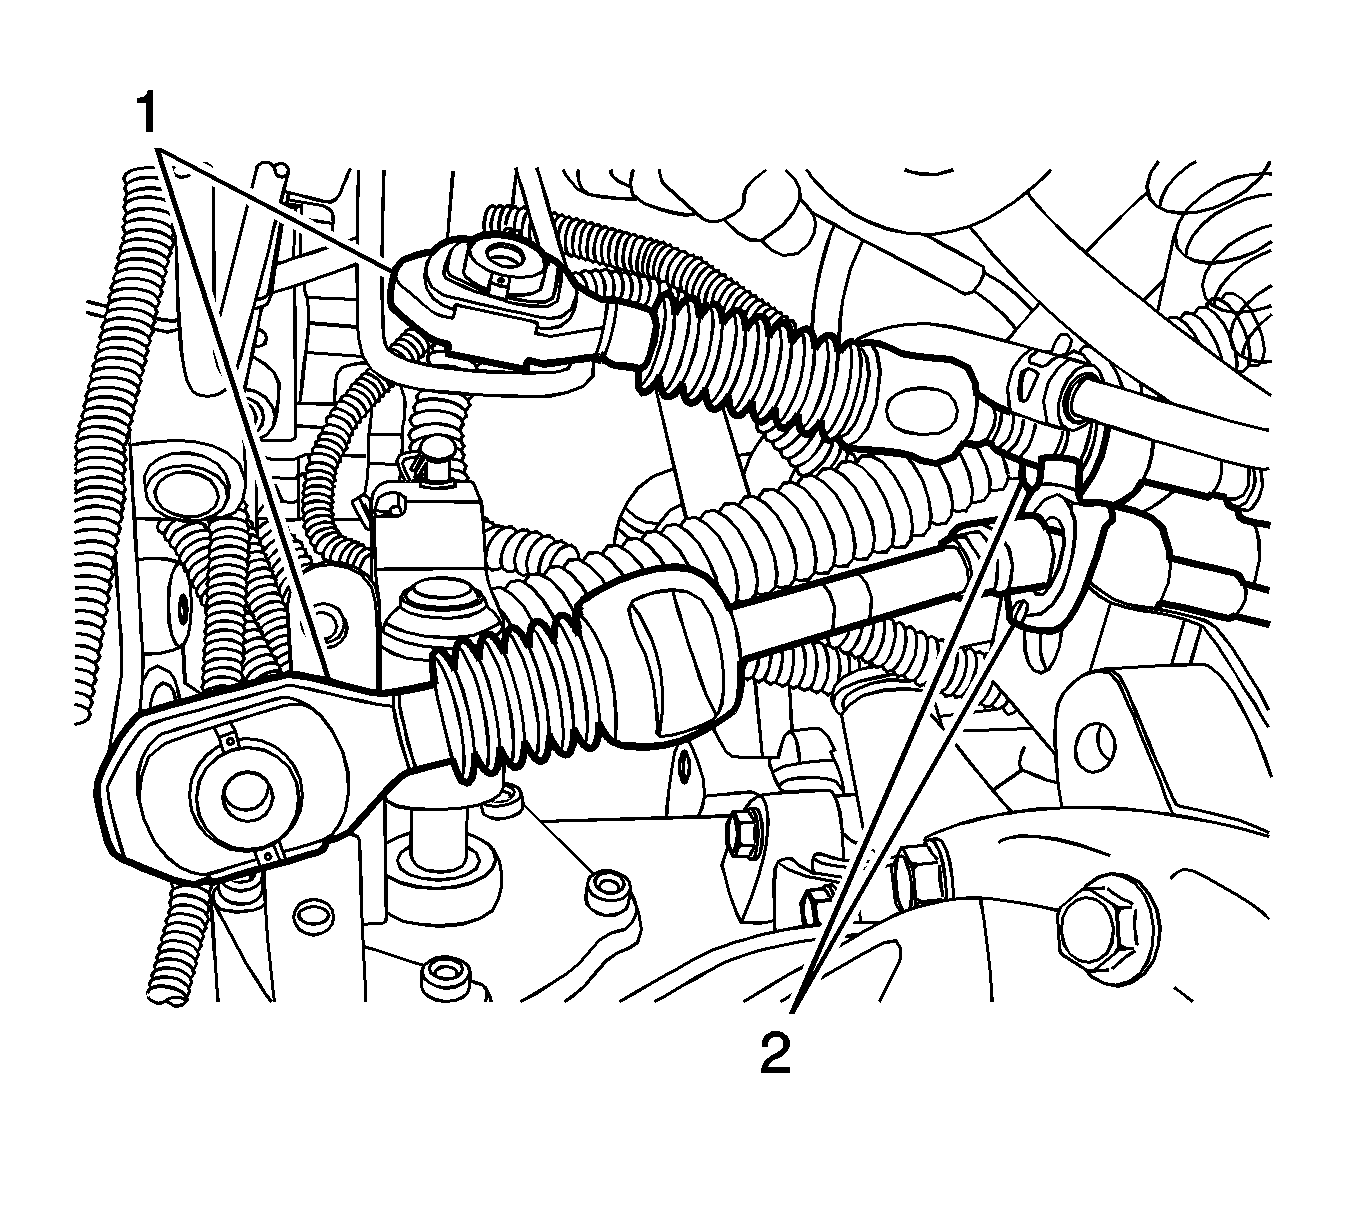
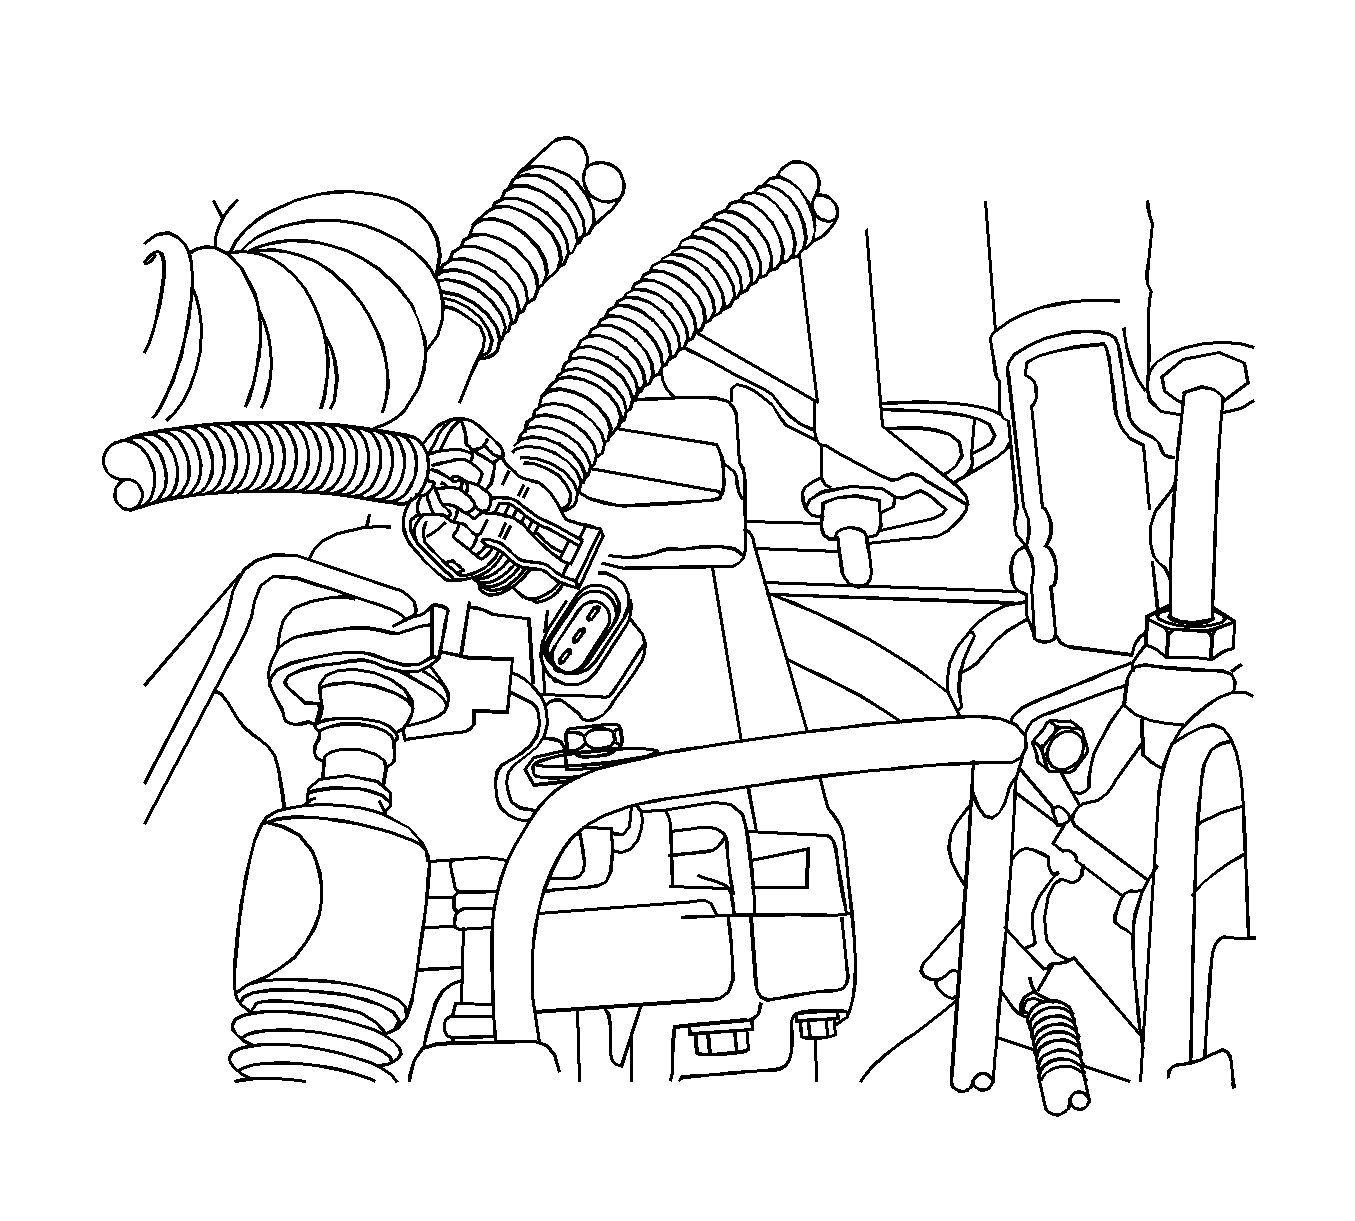
- Remove the shift control cables (1) from the transaxle using a suitable tool.
- Remove the cables (2) from the shift control cable bracket.
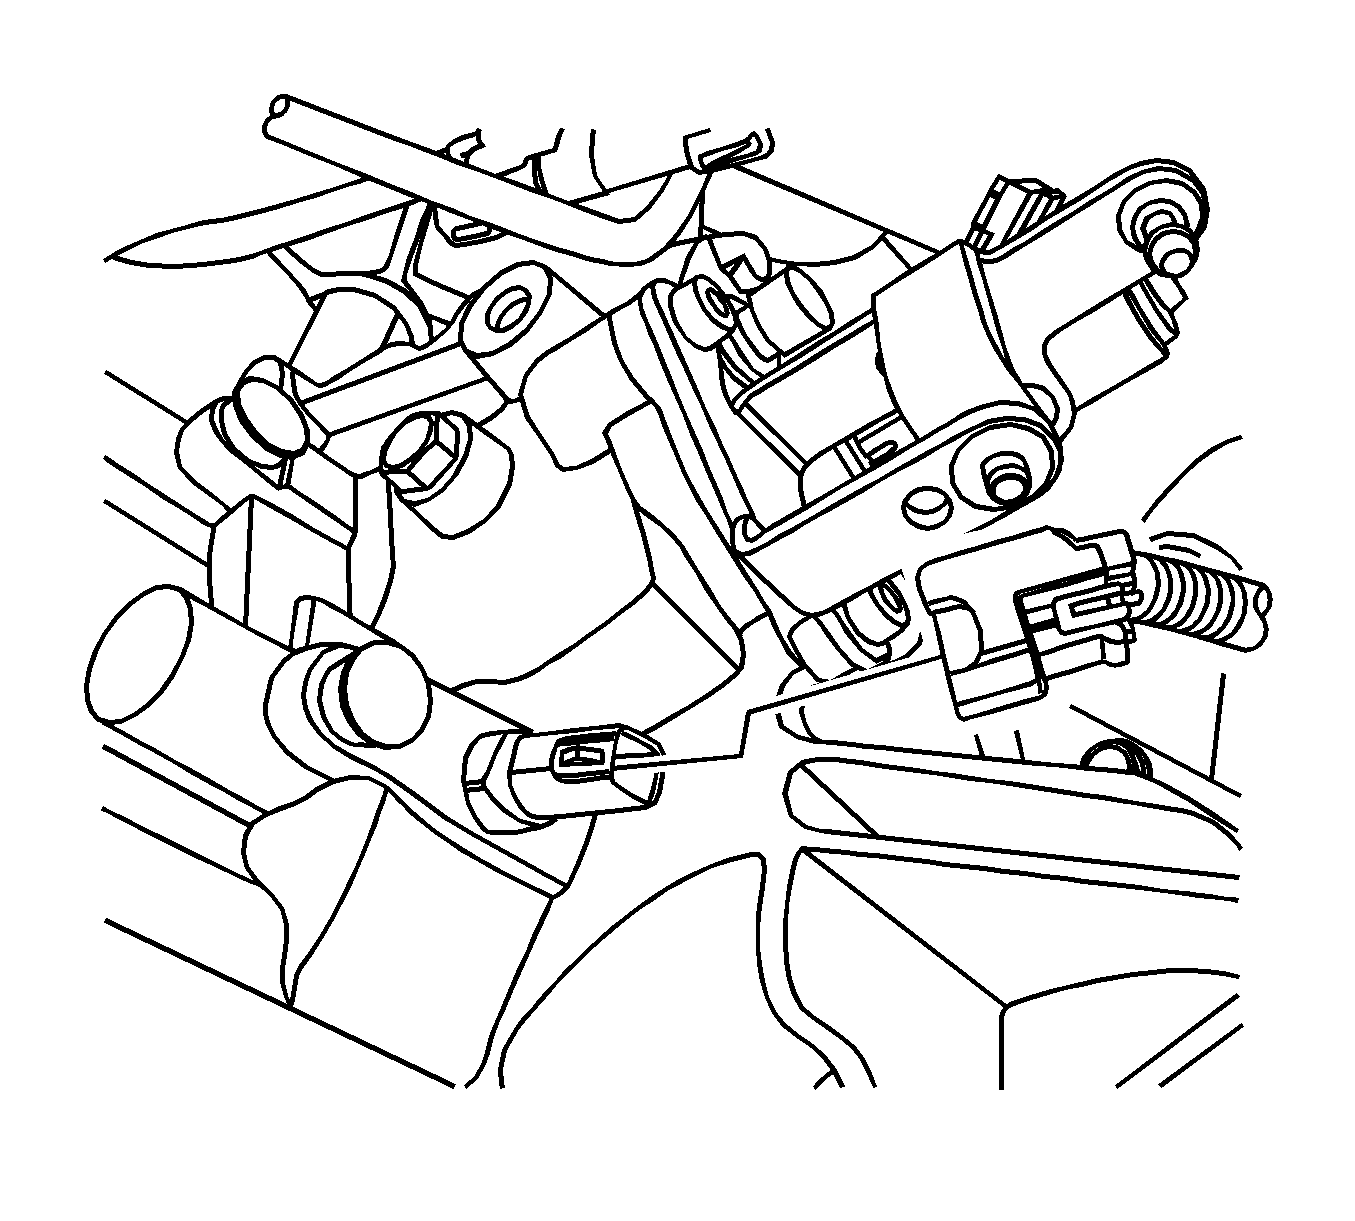
- Remove the clip and disconnect the clutch actuator cylinder pipe from the concentric slave cylinder pipe.
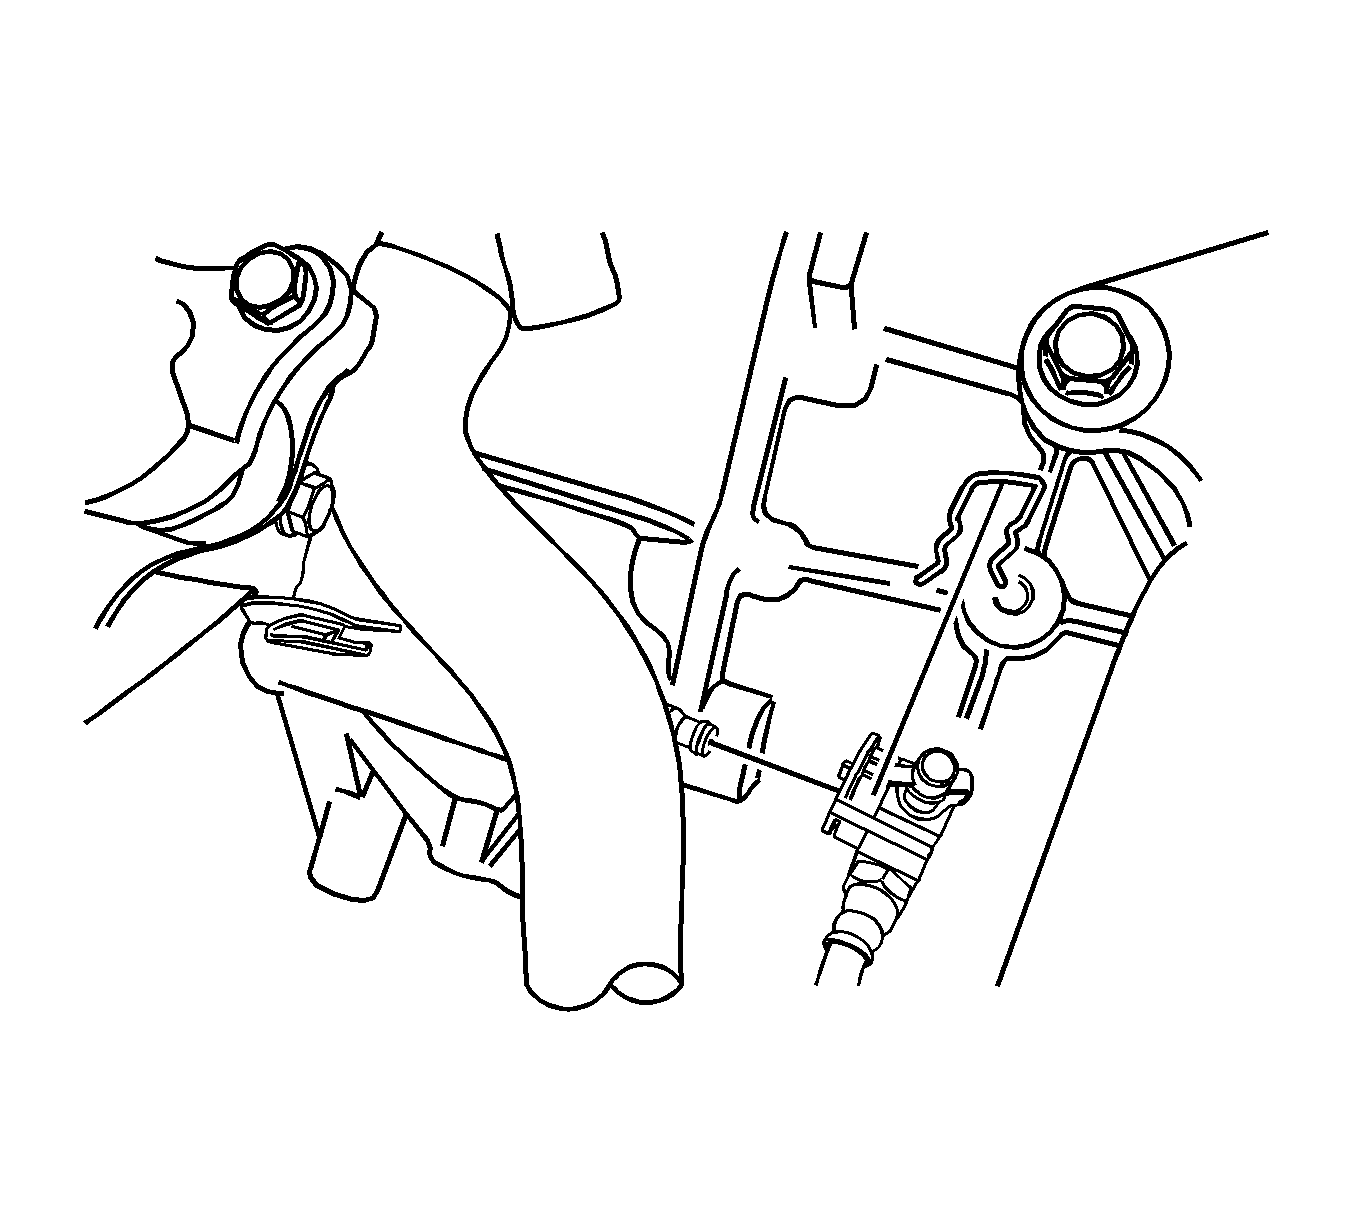
- Disconnect the speedometer driven gear electrical wiring connector.
- Disconnect the backup lamp switch electrical wiring connector.
- Remove the upper transaxle-to-engine bolts.
- Install the DW-110-060 .
- Raise and suitably support the vehicle.
- Remove the engine under covers.
- Remove the front exhaust pipe. Refer to Front Pipe Replacement .
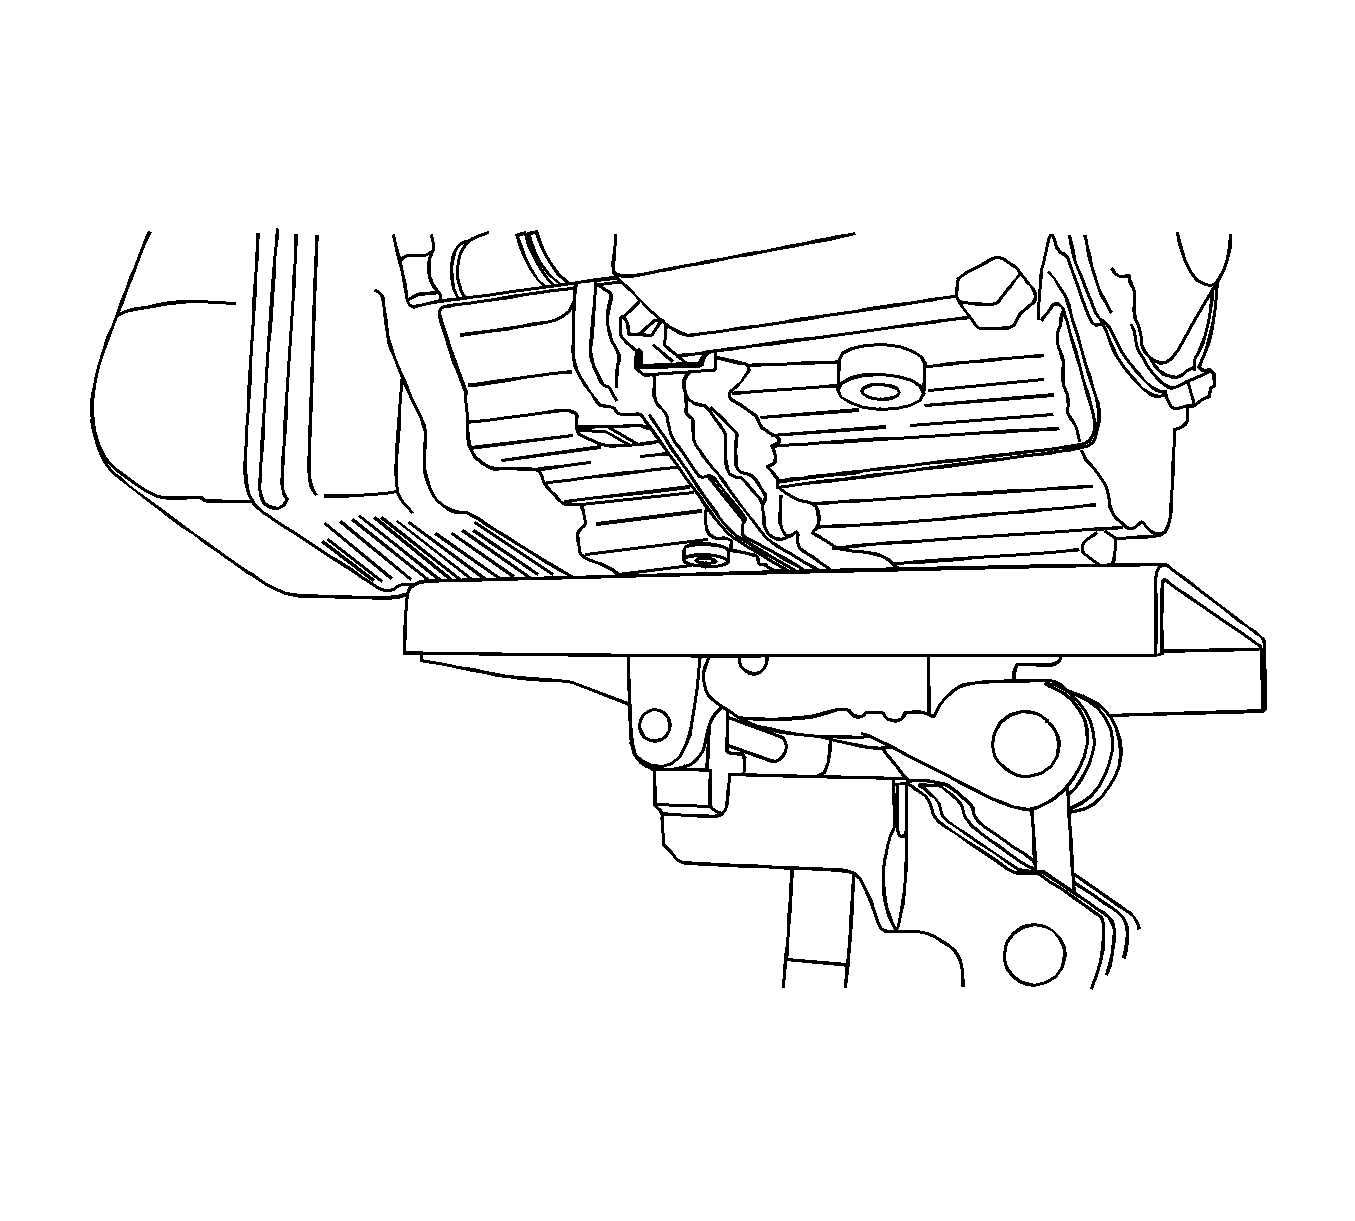
- Remove the centermember. Refer to Front Suspension Support Brace Replacement .
- Remove the impact bar. Refer to I-Beam Suspension Replacement .
- Remove the drive axle shafts. Refer to Wheel Drive Shaft Replacement .
- Remove the front damper bush mounting bolts and the front damper bush.
- Remove the transaxle ground wiring harness and the transaxle ground bolt.
- Remove the starter. Refer to Starter Motor Replacement .
- Remove the rear transaxle mounting bracket bolts and the rear transaxle mounting bracket.
- Support the transaxle assembly using the supporting jack.
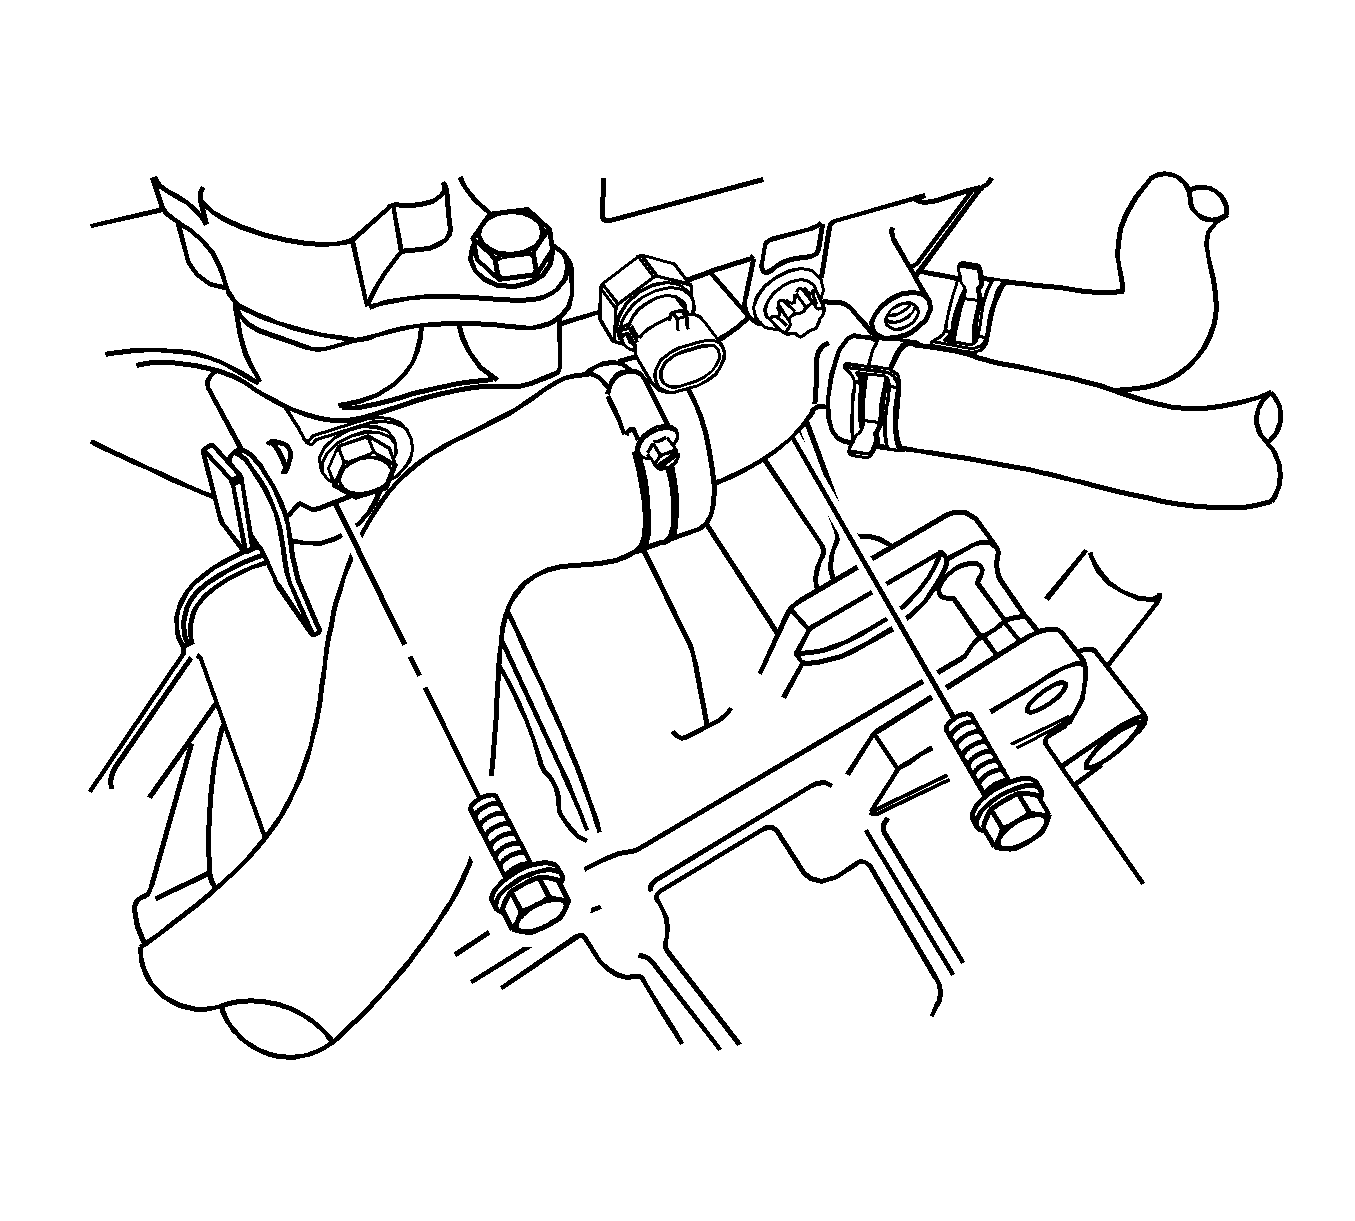
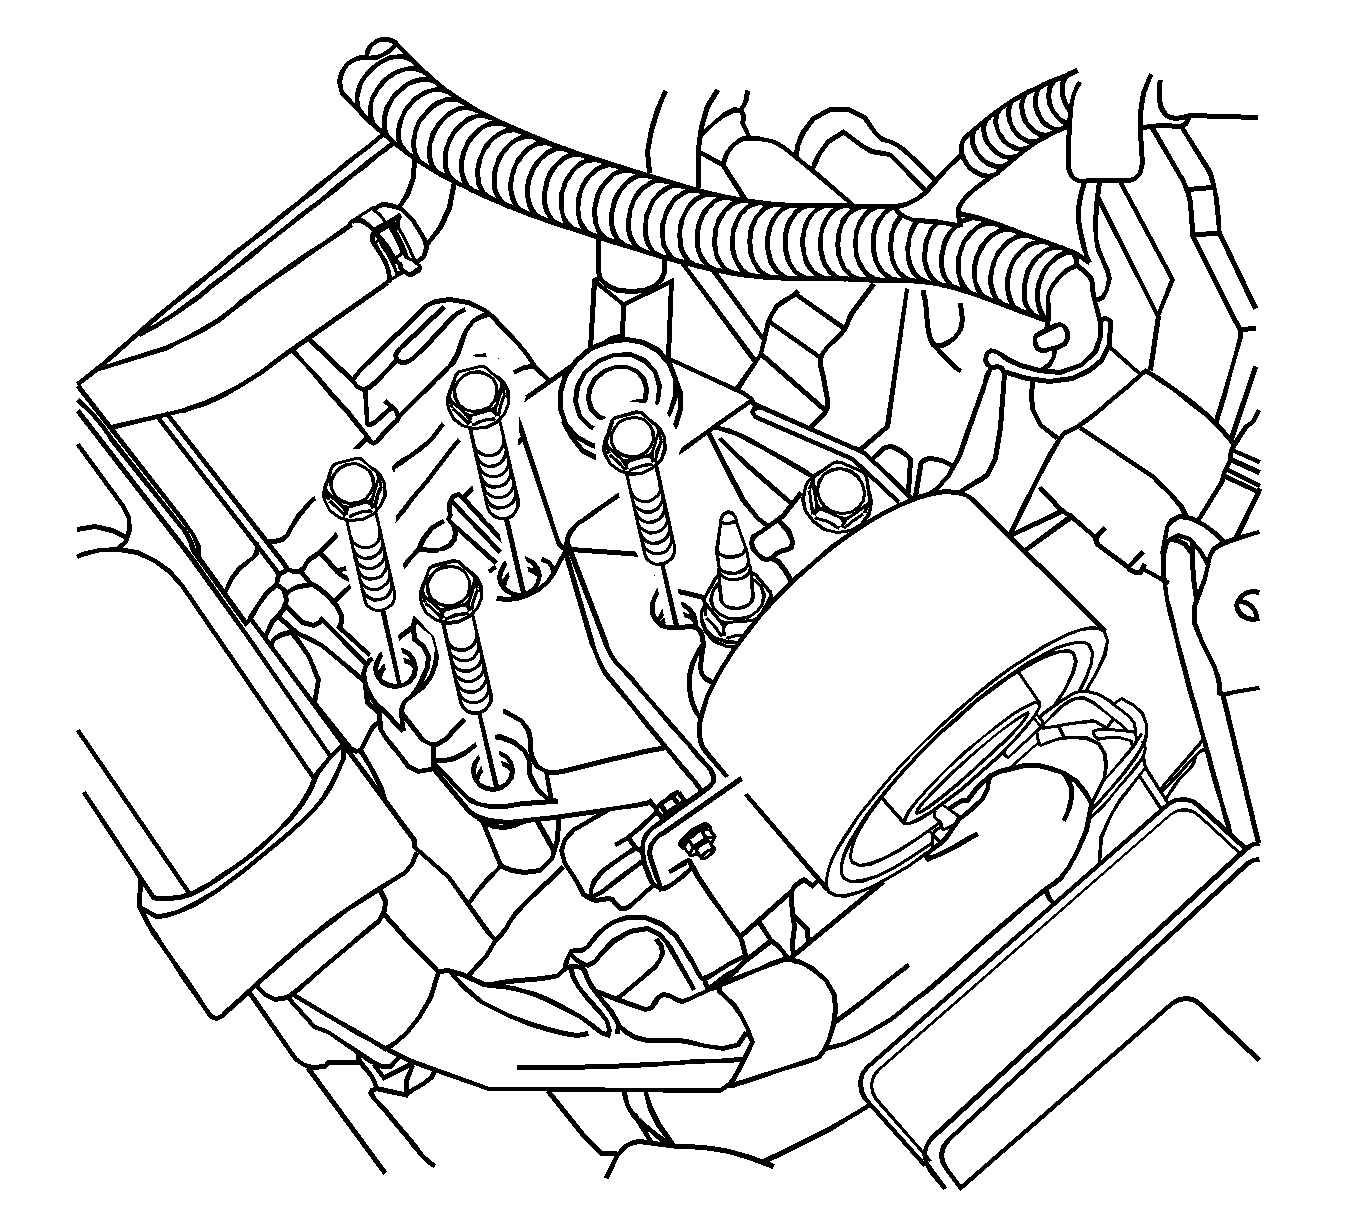
- Remove the oil pan flange-to-transaxle bolts (a).
- Remove the left lower engine-to-transaxle bolts (b) near the rear transaxle mounting bracket side.
- Remove the right lower engine-to-transaxle bolt (c) near the front damper bush.
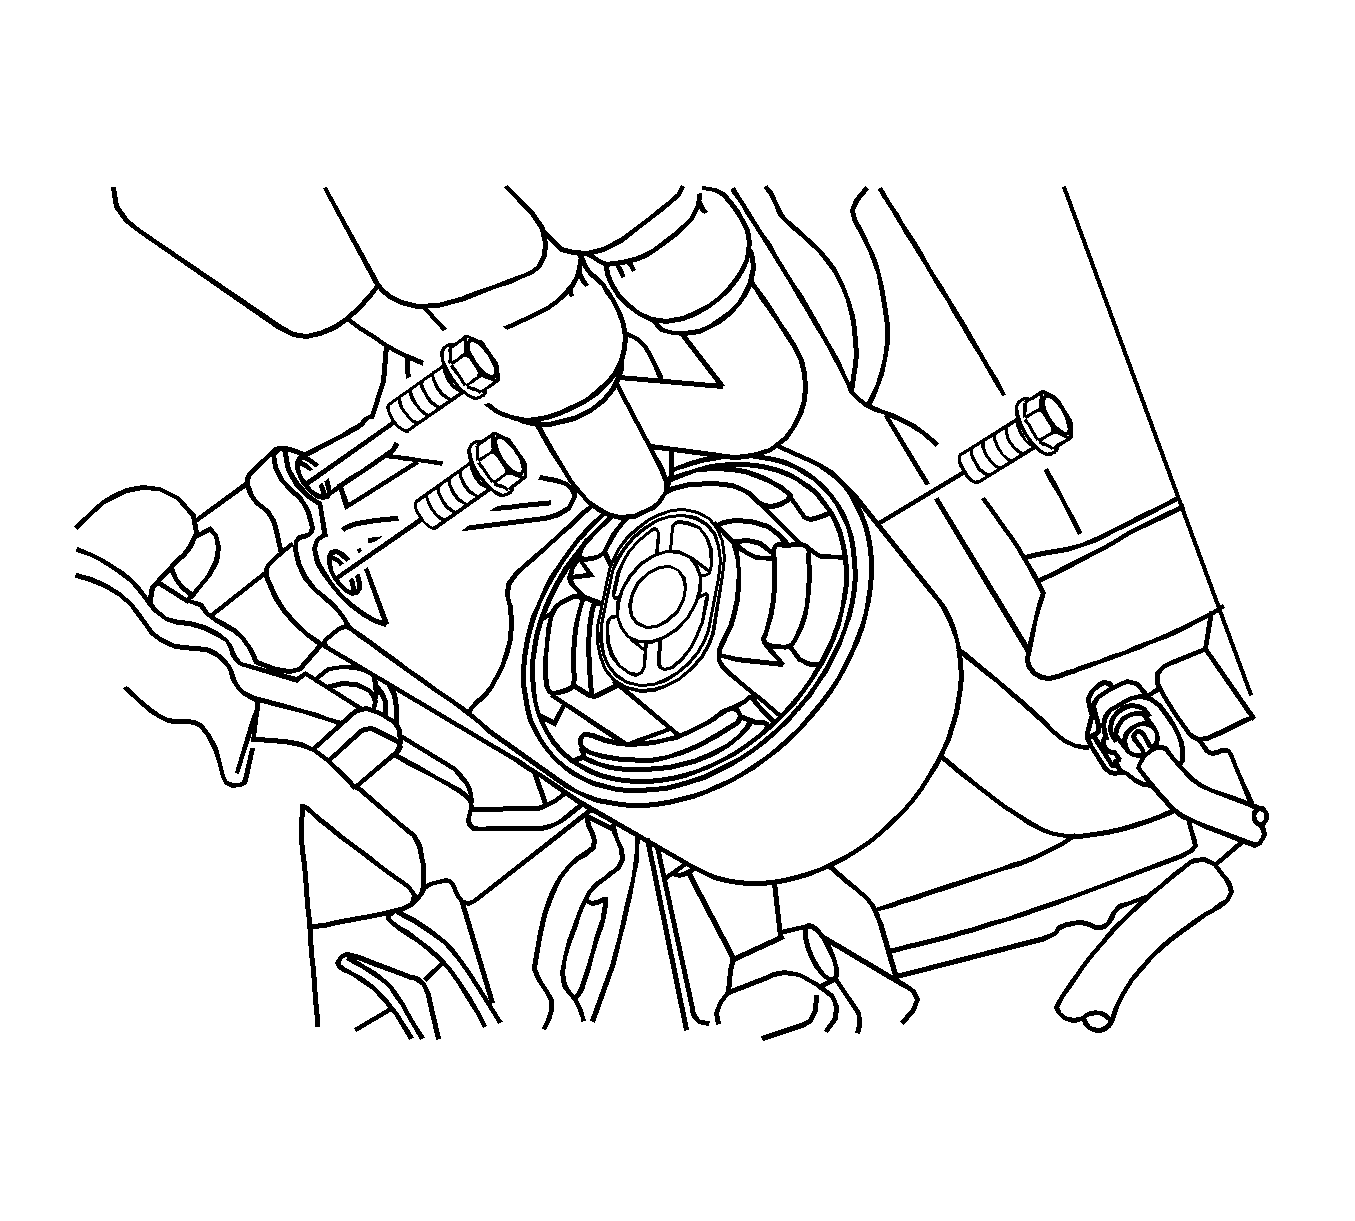
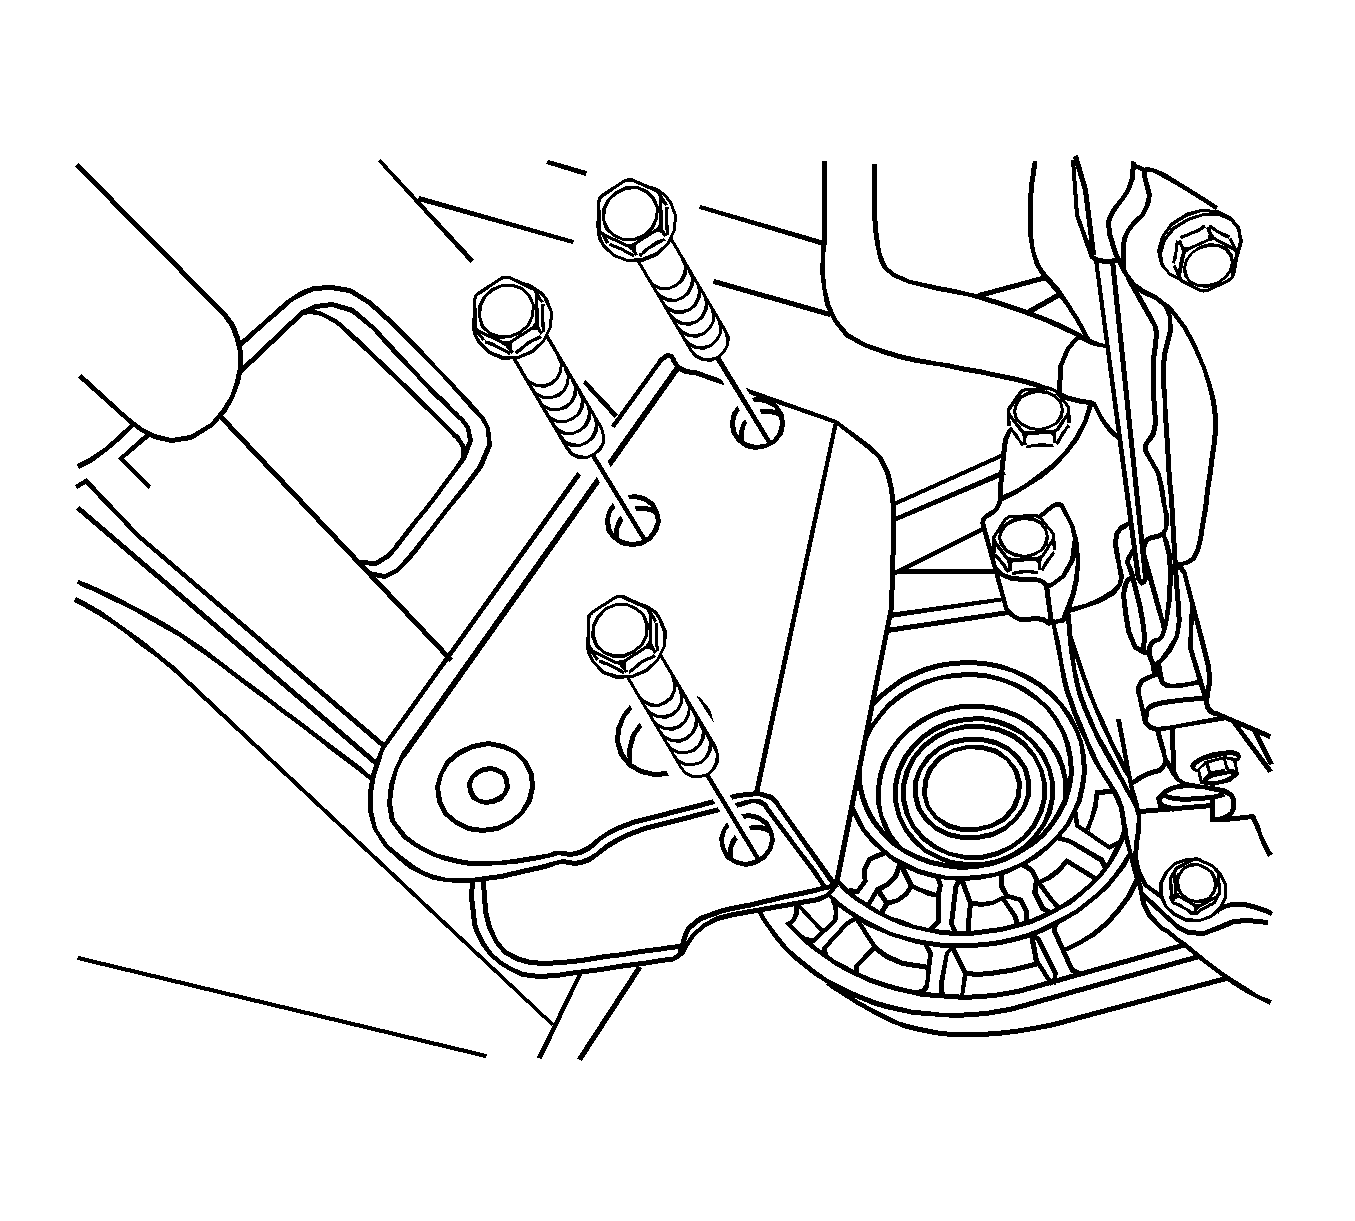
- Remove the upper transaxle mounting bracket bolts.
- Carefully remove the transaxle assembly from the vehicle.


Installation Procedure
- Install the transaxle into the vehicle and support the transaxle assembly using the supporting jack.
- Install the upper transaxle mounting bracket bolts.
- Install the right lower engine-to-transaxle bolt (c) near the front damper bush bracket.
- Install the left lower engine-to-transaxle bolts (b) near the rear transaxle mounting bracket side.
- Install the oil pan flange-to-transaxle bolts (a).
- Remove the transaxle support jack.
- Install the rear transaxle mounting bracket and the rear transaxle mounting bracket bolts.
- Install the starter. Refer to Starter Motor Replacement .
- Install the transaxle ground wiring harness and the transaxle ground bolt.
- Install the front damper bush and the front damper bush mounting bolts.
- Install the drive axle shafts. Refer to Wheel Drive Shaft Replacement .
- Install the impact bar. Refer to I-Beam Suspension Replacement .
- Install the centermember. Refer to Front Suspension Support Brace Replacement .
- Install the front exhaust pipe. Refer to Front Pipe Replacement .
- Install the engine under covers.
- Lower the vehicle.
- Remove the DW-110-060 from the engine.
- Install the upper transaxle-to-engine bolts.
- Connect the backup lamp switch electrical wiring connector.
- Connect the speedometer driven gear electrical wiring connector.
- Connect the clutch actuator cylinder pipe to the concentric slave cylinder pipe and install the clip.
- Execute the air bleeding.
- Install the cables (2) to the shift control cable bracket.
- Install the shift control cables (1) to the transaxle.
- Adjust the shift control cable.
- Install the battery and the battery tray.
- Install the engine cover and the air filter housing.
- Check the fluid level.
Notice: Refer to Fastener Notice in the Preface section.
Tighten
Tighten the upper transaxle mounting bracket bolts to 40 N·m (30 lb ft).
Tighten
Tighten the right lower engine-to-transaxle bolt to 75 N·m (55 lb ft).
Tighten
Tighten the left lower engine-to-transaxle bolts to 75 N·m (55 lb ft).
Tighten
Tighten the oil pan flange-to-transaxle bolts to 50 N·m (37 lb ft).
Tighten
Tighten the rear transaxle mounting bracket bolts to 90 N·m (66 lb ft).
Tighten
Tighten the front damper bush mounting bolts to 65 N·m (48 lb ft).
Tighten
Tighten the upper transaxle-to-engine bolts to 75 N·m (55 lb ft).
