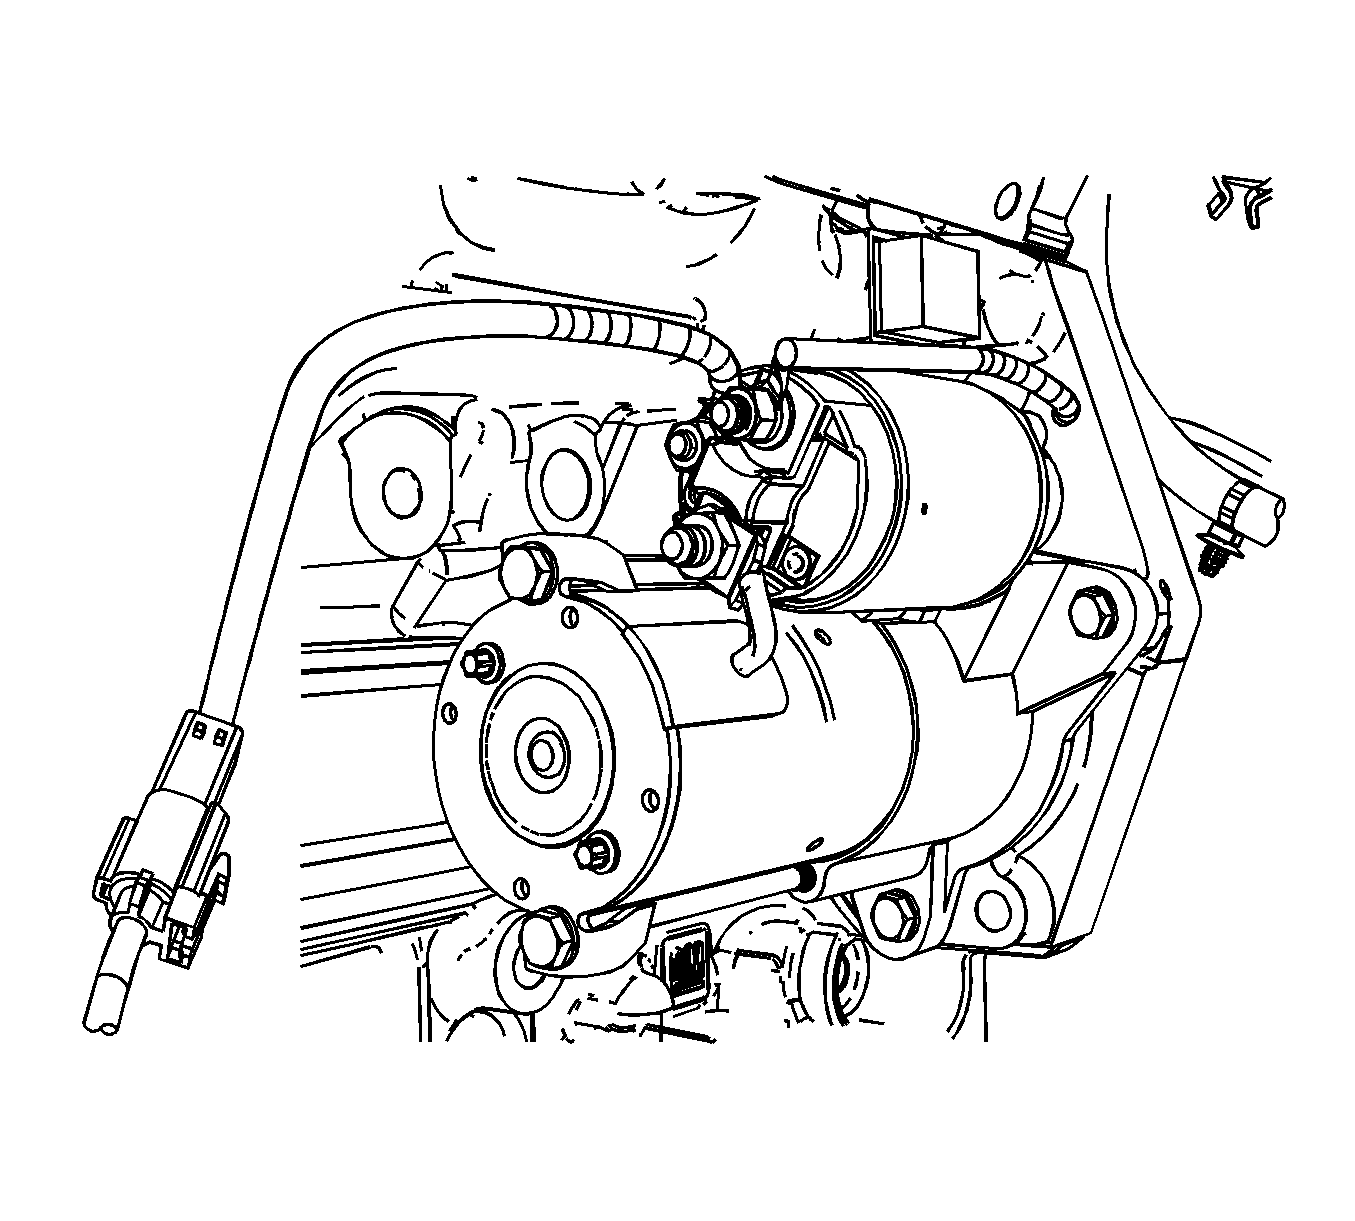
Starter Replacement 2.4L
Removal Procedure
- Disconnect the negative battery cable.
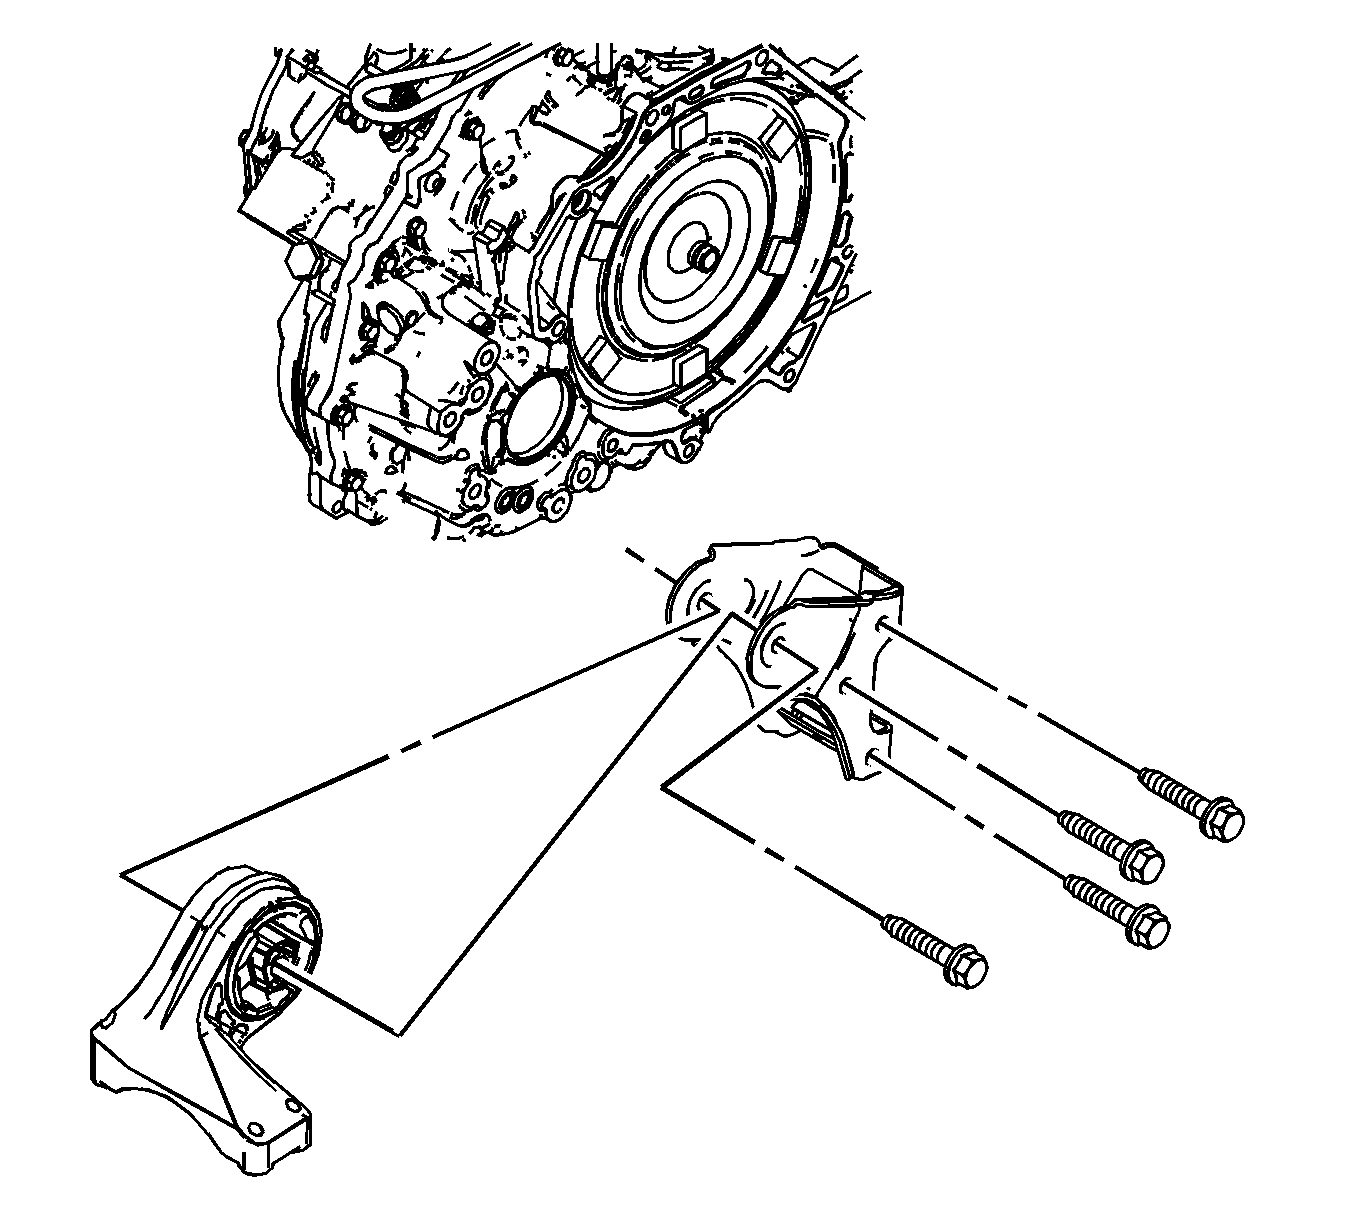
- Remove the transaxle rear mount bracket. Refer to Engine Rear Mount Replacement .
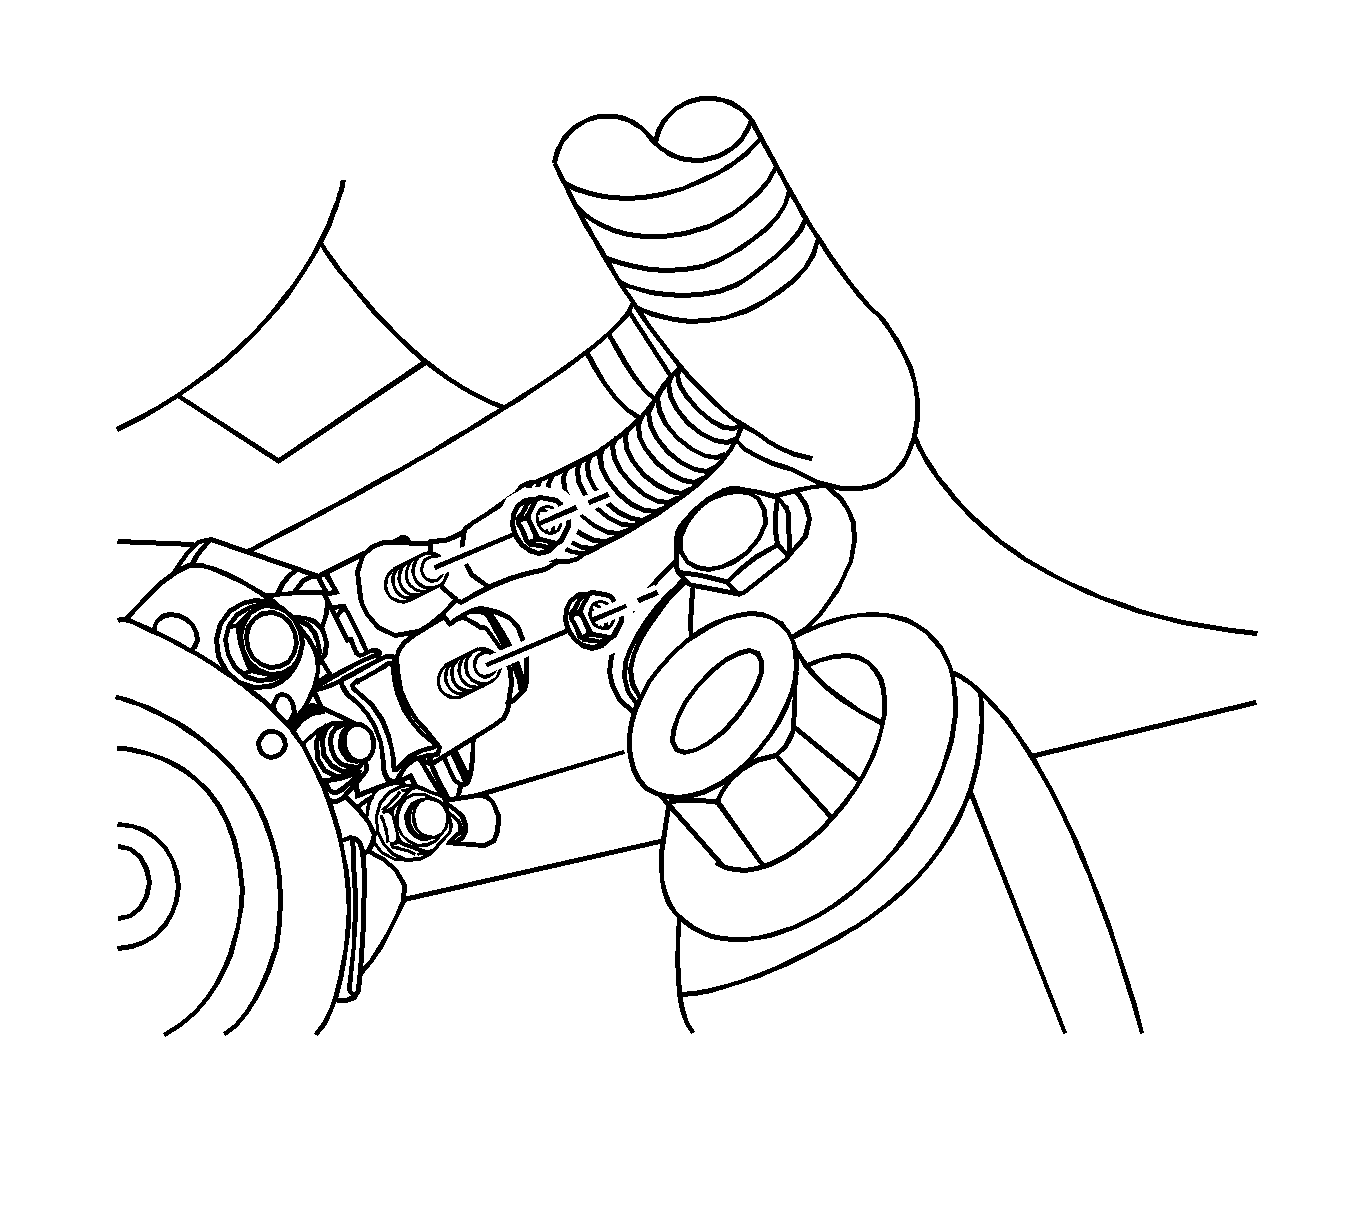
- Remove the nuts which secure the battery lead wire and the generator lead wire from the starter solenoid terminals.
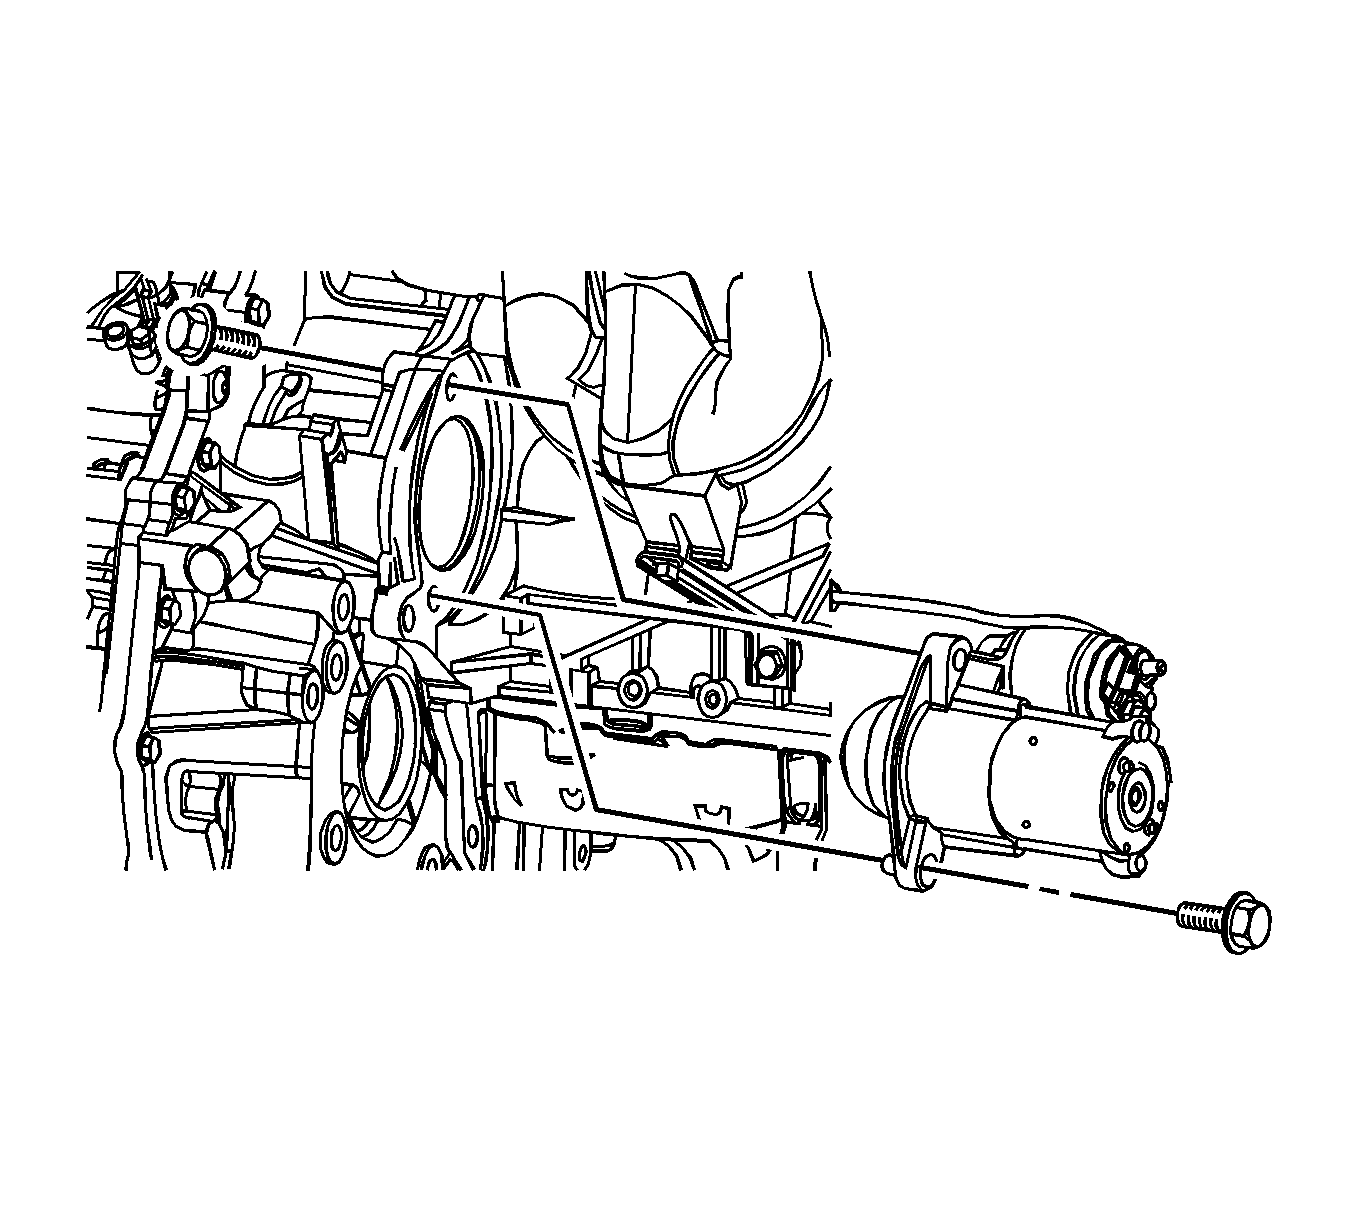
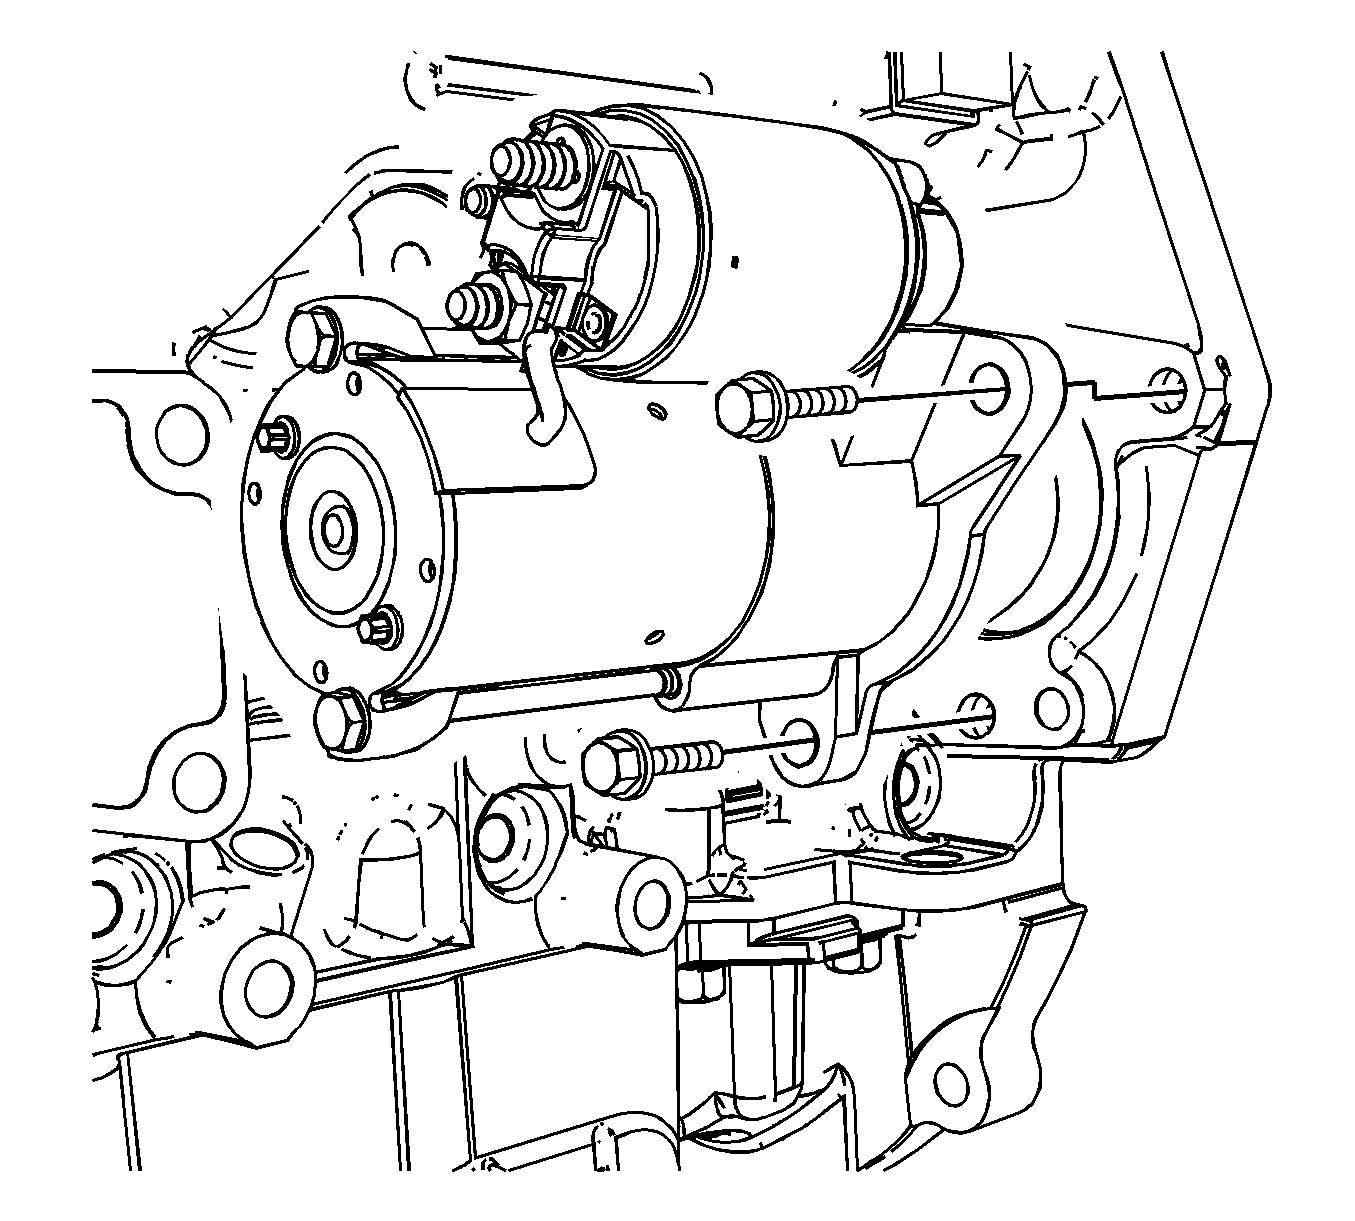
- Remove the starter-to-engine block mounting bolt and the starter-to-transmission mounting bolt.
- Remove the starter assembly.
Caution: Refer to Battery Disconnect Caution in the Preface section.
Installation Procedure
- Install the starter mounting bolts.
- Install the ignition solenoid nut and the generator lead wire nut to the starter solenoid terminals.
- Install the transaxle rear mount bracket. Refer to Engine Rear Mount Replacement .
Notice: Refer to Fastener Notice in the Preface section.
Tighten
| • | Tighten the starter-to-engine block mounting bolt to 75 N·m (55 lb ft). |
| • | Tighten the transmission-to-starter mounting bolt to 75 N·m (55 lb ft). |
Tighten
| • | Tighten the starter solenoid terminal-to-battery lead wire nut to 15 N·m (11 lb ft). |
| • | Tighten the starter solenoid terminal-to-generator lead wire nut to 15 N·m (11 lb ft). |
Tighten
| • | Tighten the transaxle rear mount bracket retaining bolts to 90 N·m (66 lb ft). |
| • | Tighten the transaxle rear mount-to-bracket through bolt and nut to 90 N·m (66 lb ft). |
Starter Replacement 2.0L Diesel
Removal Procedure
- Disconnect the battery negative cable.
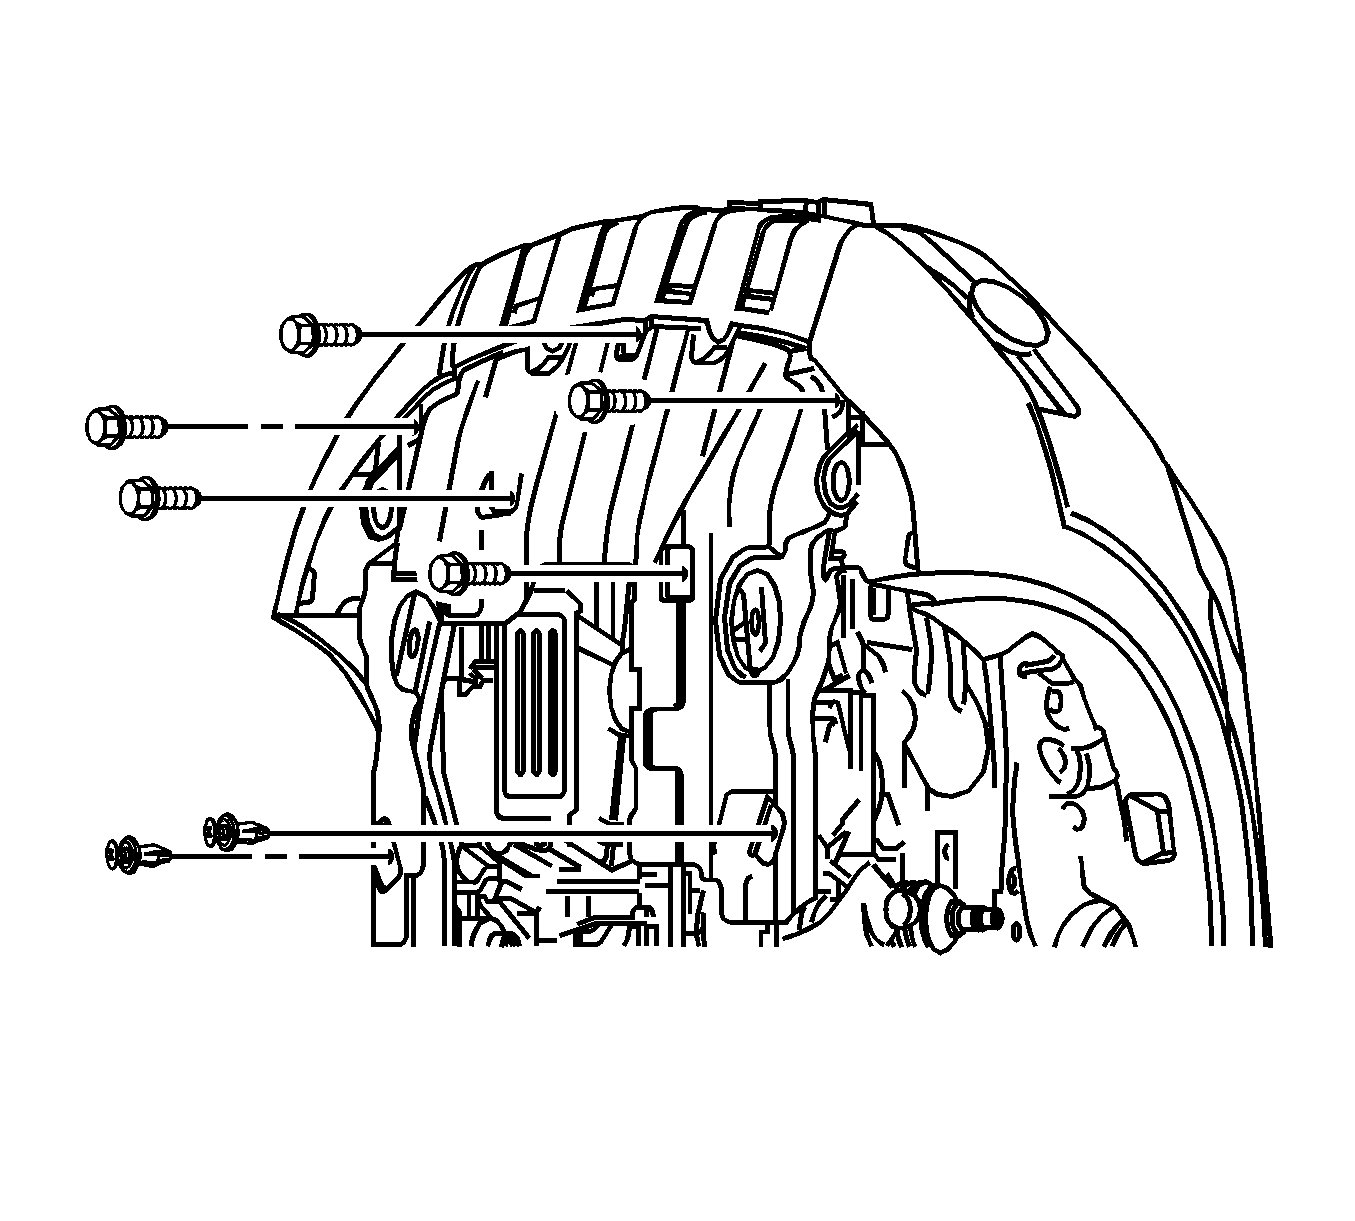
- Remove the engine undercover. Refer to Engine Shield Replacement .
- Remove the nuts which secure the battery lead wire and the generator lead wire from the starter solenoid terminals.
- Remove the starter-to-engine block mounting bolts.
- Remove the starter assembly.
Caution: Refer to Battery Disconnect Caution in the Preface section.
Installation Procedure
- Install the starter mounting bolts.
- Install the starter solenoid nut.
- Install the engine undercover. Refer to Engine Shield Replacement .
- Connect the negative battery cable.
Notice: Refer to Fastener Notice in the Preface section.
Tighten
Tighten the starter-to-engine block mounting bolt to 45 N·m (33.2 lb ft).
Tighten
Tighten the starter solenoid terminal-to-battery lead wire nut to 15 N·m (11 lb ft).
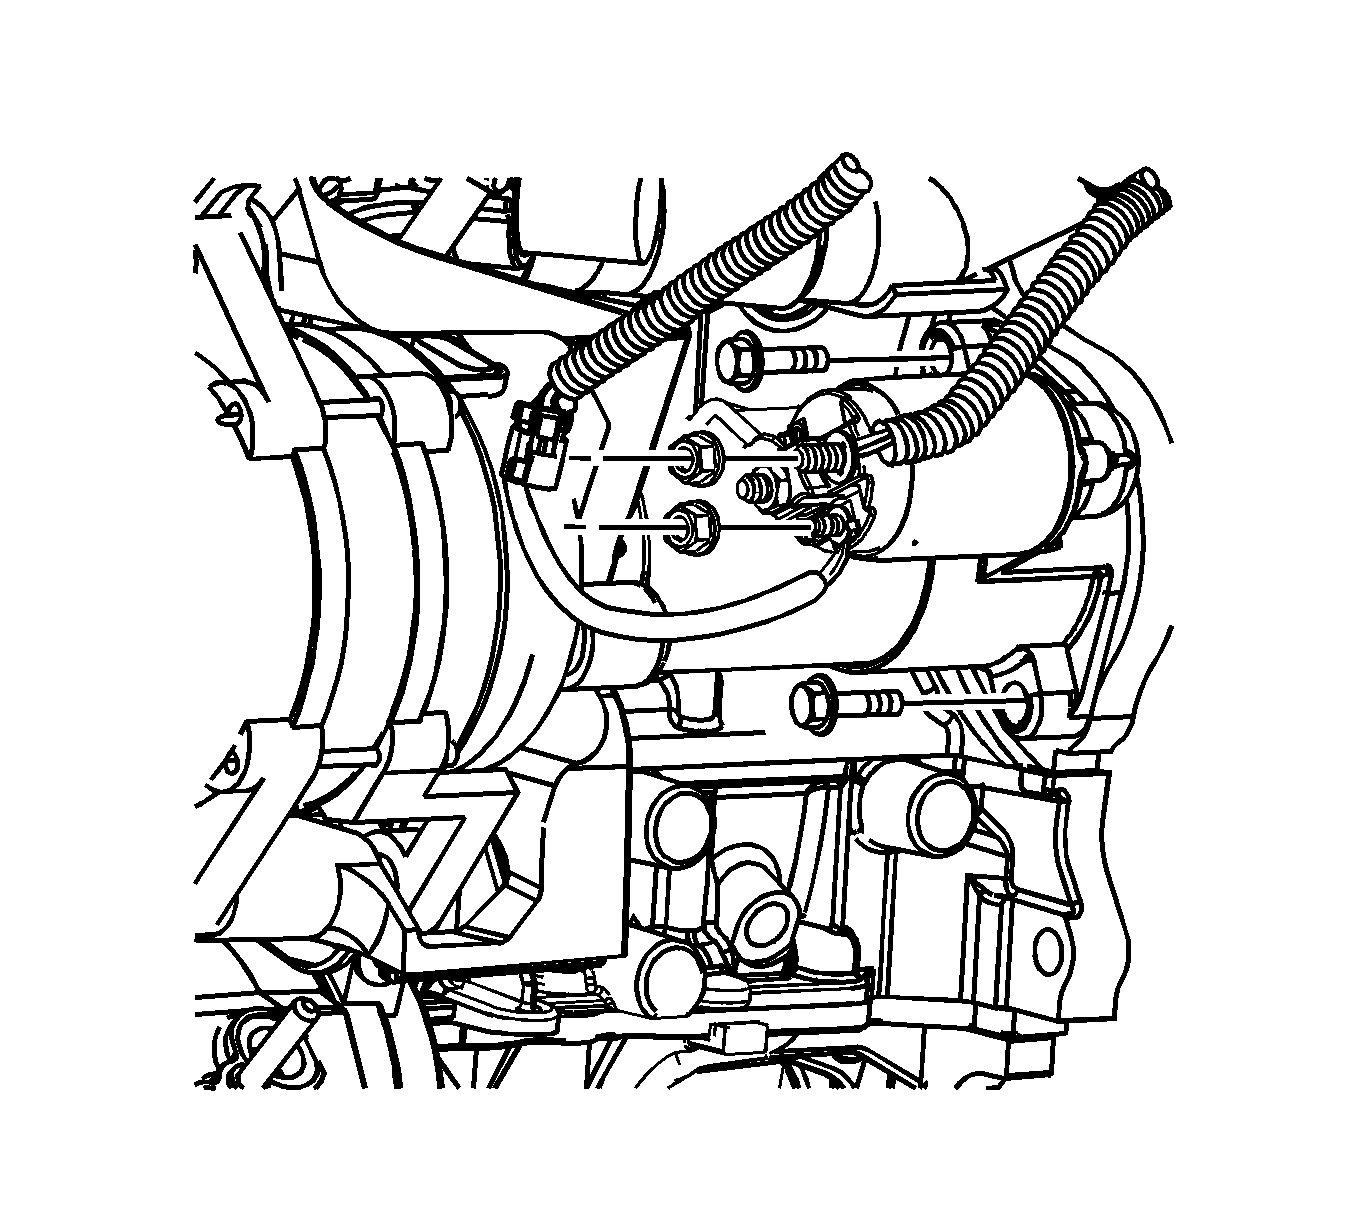
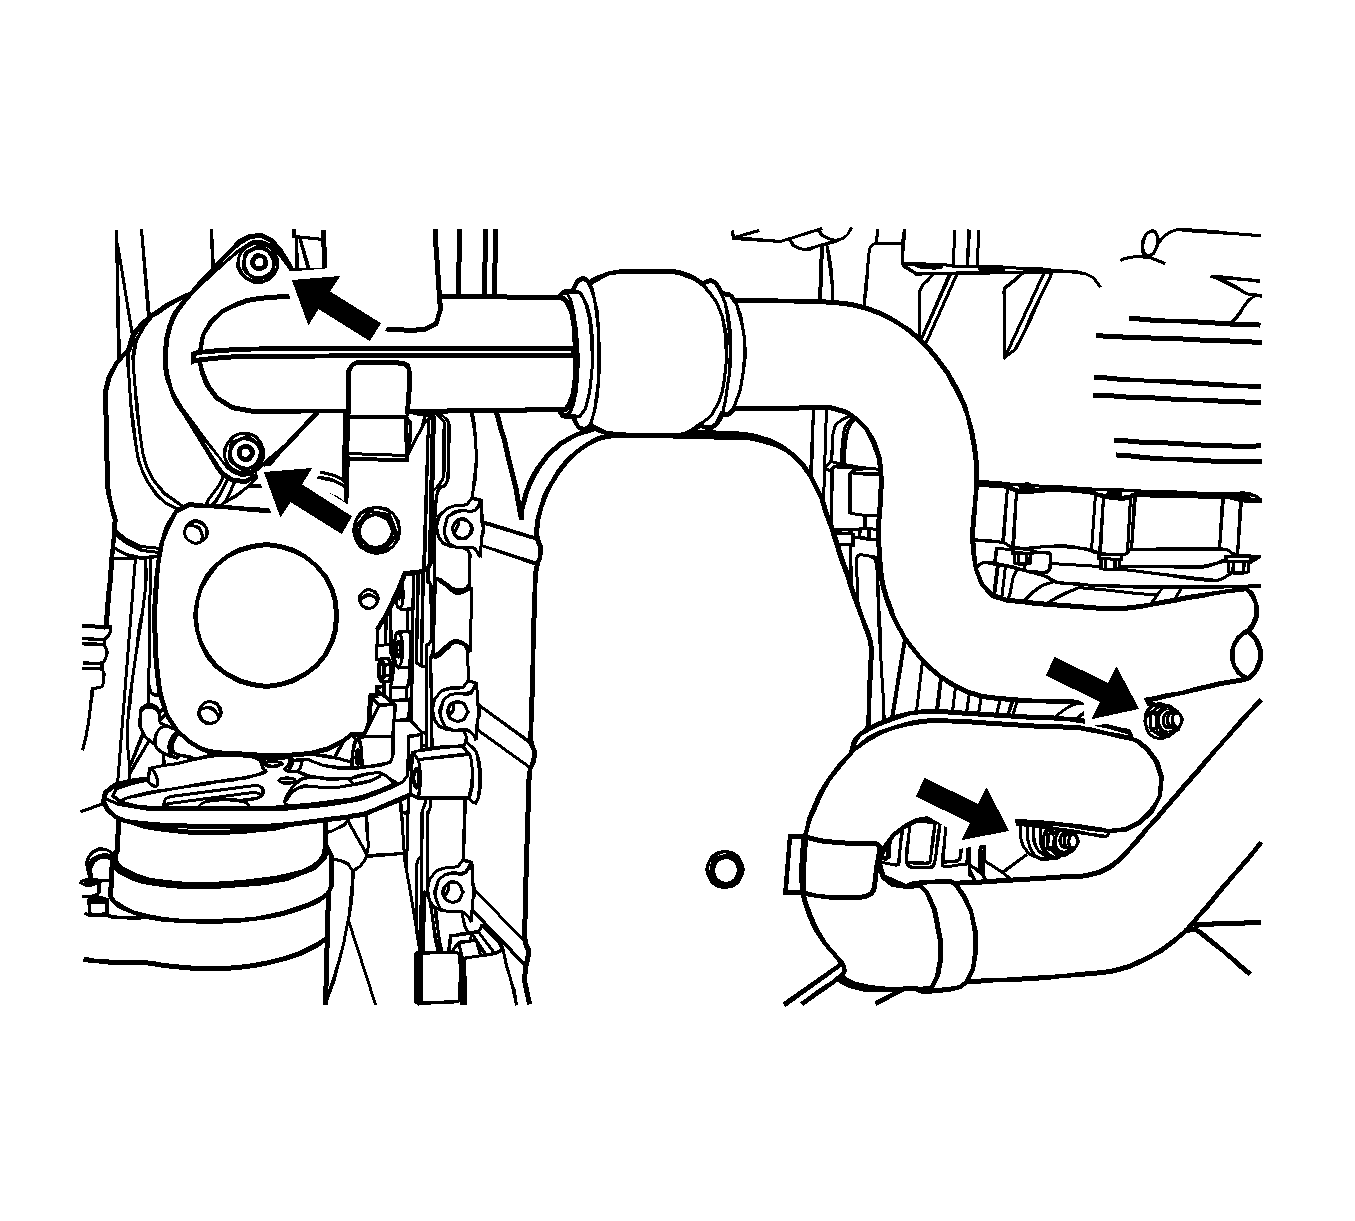
Starter Replacement 3.2L
Removal procedure
- Disconnect the negative battery cable.
- Remove the exhaust front pipe. Refer to Front Pipe Replacement.
- Remove the bank 2 pup converter. Refer to Auxiliary Catalytic Converter Replacement.
- Remove the nut which secures the battery lead wire from the starter solenoid.
- Disconnect the starter-to-engine main harness lead wire connector.
- Remove the starter mounting bolts.
- Remove the starter assembly.
- Remove the starter solenoid-to-engine main harness lead wire retaining nut, if necessary.
Caution: Refer to Battery Disconnect Caution in the Preface section.
Installation procedure
- Install the starter solenoid-to-engine main harness lead wire retaining nut, if necessary.
- Install the starter assembly.
- Install the starter solenoid-to-battery lead wire retaining nut to the solenoid.
- Connect the engine main harness lead wire connector.
- Install the bank 2 pup converter and the exhaust front pipe. Refer to Auxiliary Catalytic Converter Replacement.
- Install the front exhaust pipe. Refer to Front Pipe Replacement.
- Connect the negative battery cable.
Notice: Refer to Fastener Notice in the Preface section.
Tighten
Tighten the starter solenoid-to-engine main harness lead wire retaining nut to 10 N·m (89 lb in).
Tighten
Tighten the stater assembly mounting bolts to 45 N·m (33 lb in).
Tighten
Tighten the starter solenoid-to-battery lead wire retaining nut to 15 N·m (11 lb in).
