For 1990-2009 cars only
- Remove the booster reserve by applying the brakes several times with the engine OFF until all the reserve is depleted.
- Fill the master cylinder reservoir with brake fluid. Keep the master cylinder at least 1/2 full of fluid during the bleeding operation.
- Disconnect the front brake lines at the master cylinder.
- Allow the brake fluid to fill the master cylinder until it begins to flow from the front pipe connector port.
- Connect the front brake lines to the master cylinder.
- Slowly push and hold the brake pedal one time.
- Loosen the front brake line at the master cylinder to purge all air from the cylinder.
- Tighten the brake line as in step 5, and then release the brake pedal slowly. Wait 15 seconds before proceeding to the next step.
- Repeat the sequence, including the 15 second wait, until all the air is removed from the master cylinder bore.
- After all the air has been removed at the forward connections, bleed the master cylinder at the rear air inlet connections in the same manner as with the front connections.
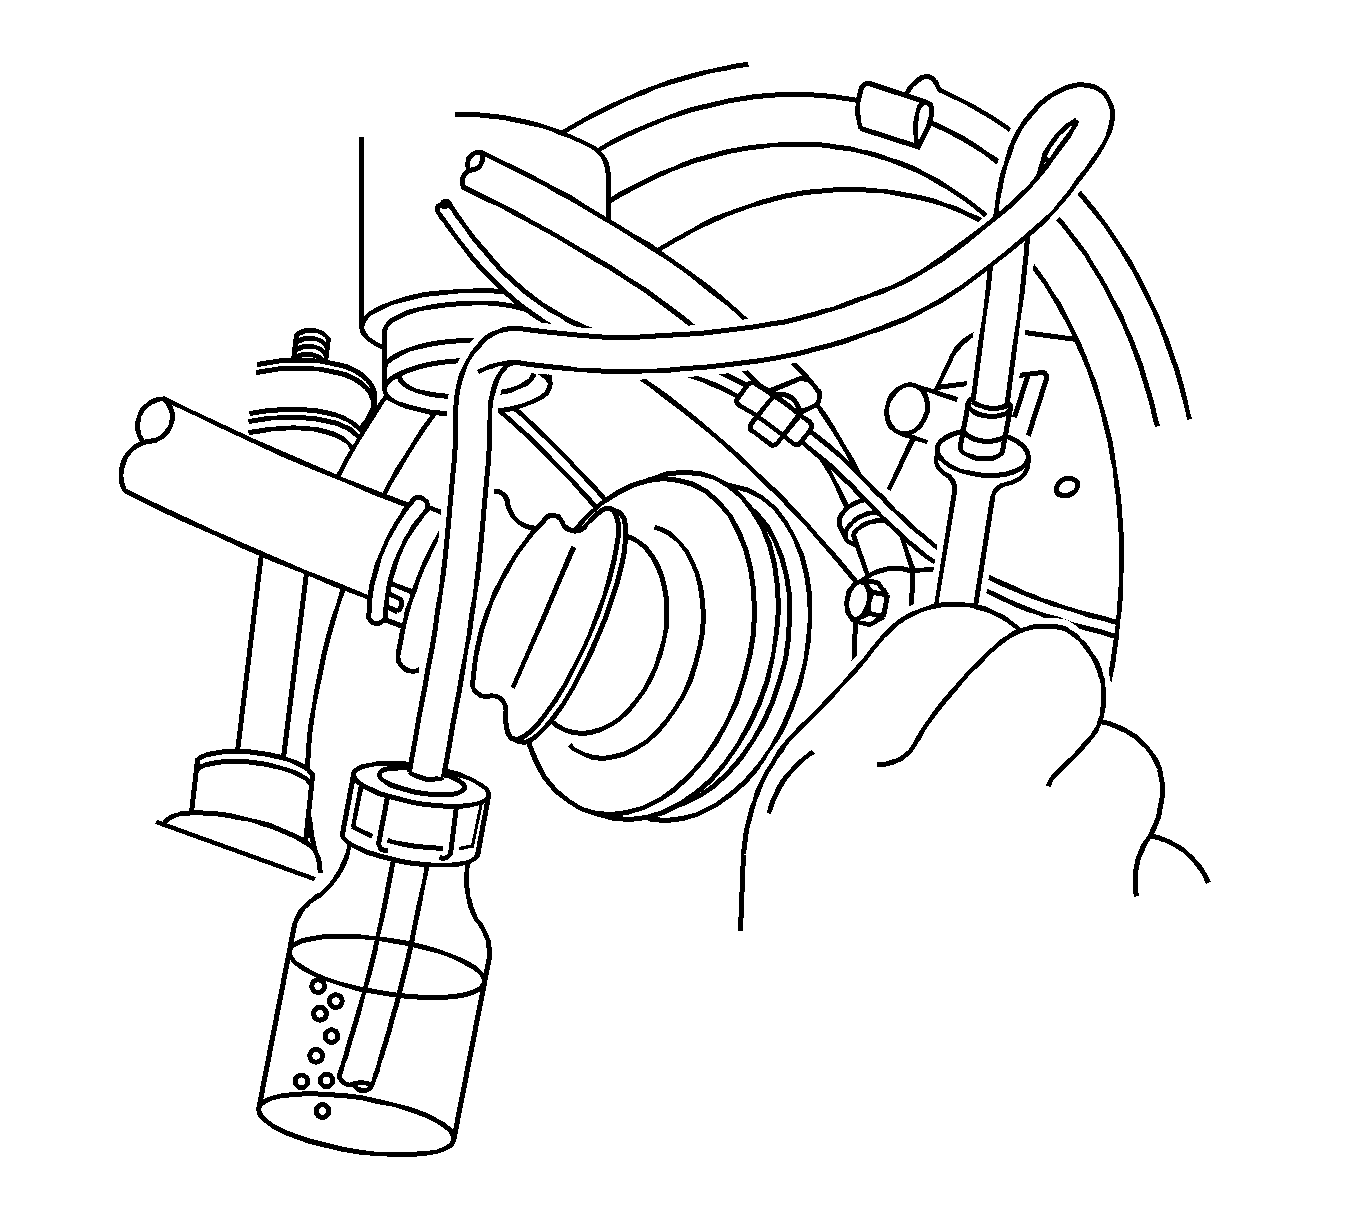
- Attach a transparent tube over the valve. Allow the tube to hang submerged in brake fluid in a transparent container.
- Slowly push and hold the brake pedal one time.
- Remove the bleeder cap and loosen the bleeder screw to purge the air from the cylinder.
- Tighten the bleeder screw.
- Slowly release the brake pedal. Wait 15 seconds before proceeding with the next step.
- Repeat the sequence, including the 15 second wait, until all the air is removed. It may be necessary to repeat the sequence 10 or more times to remove all the air.
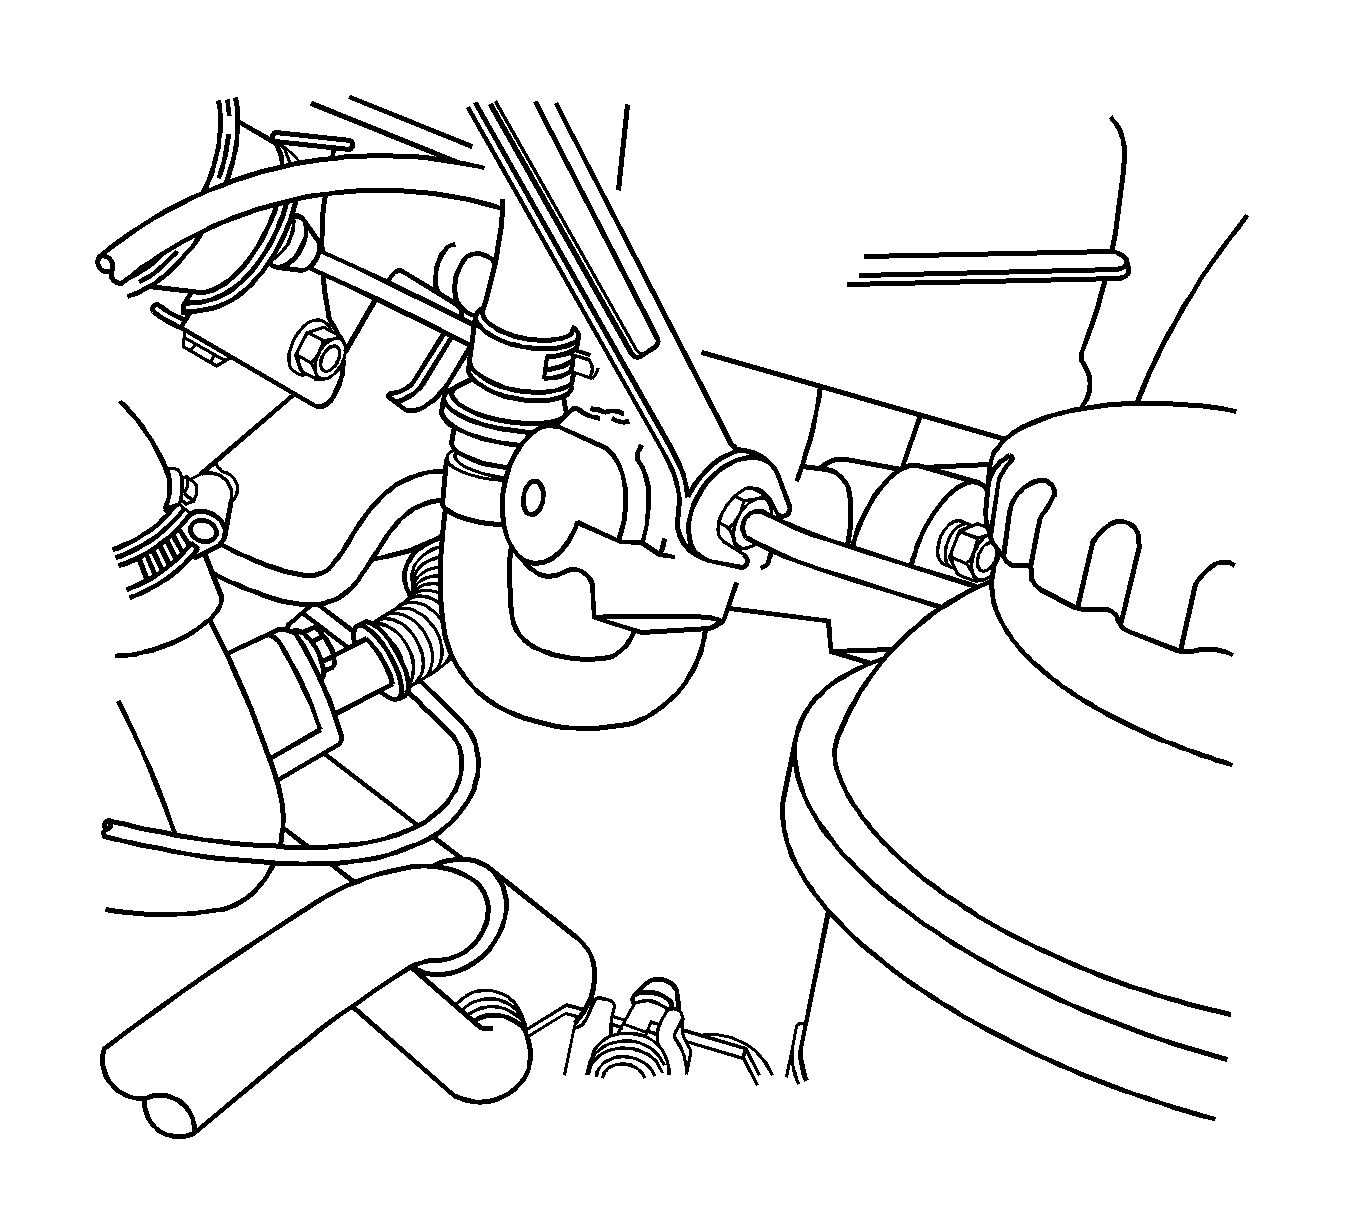
- Locate the front bleeder caps.
- Proceed to bleed the front brakes following the appropriate sequence, beginning with step 12.
- Check the brake pedal for sponginess. Repeat the entire bleeding procedure to correct this condition.


Note: If the master cylinder is known or suspected to have air in the bore, then it must be bled before any wheel cylinder or caliper is bled.
Caution: Refer to Fastener Caution in the Preface section.
Tighten
Tighten the brake lines to 16 N·m (12 lb ft).
Caution: Refer to Brake Fluid Effects on Paint and Electrical Components Caution in the Preface section.
Note: The bleeding sequence is as follows: right rear, left front, left rear, and right front.

Tighten
Tighten the bleeder screw to 9 N·m (80 lb in).
Note: Rapid pumping of the brake pedal pushes the master cylinder secondary piston down the bore in a manner that makes it difficult to bleed the system.