Battery Positive Cable Replacement L26
Removal Procedure
Important: When replacing battery cables be sure to use replacement cables that are the same type, gage and length.
- Disconnect the negative battery cable. Refer to Battery Negative Cable Disconnection and Connection .
- Loosen the positive battery terminal nut.
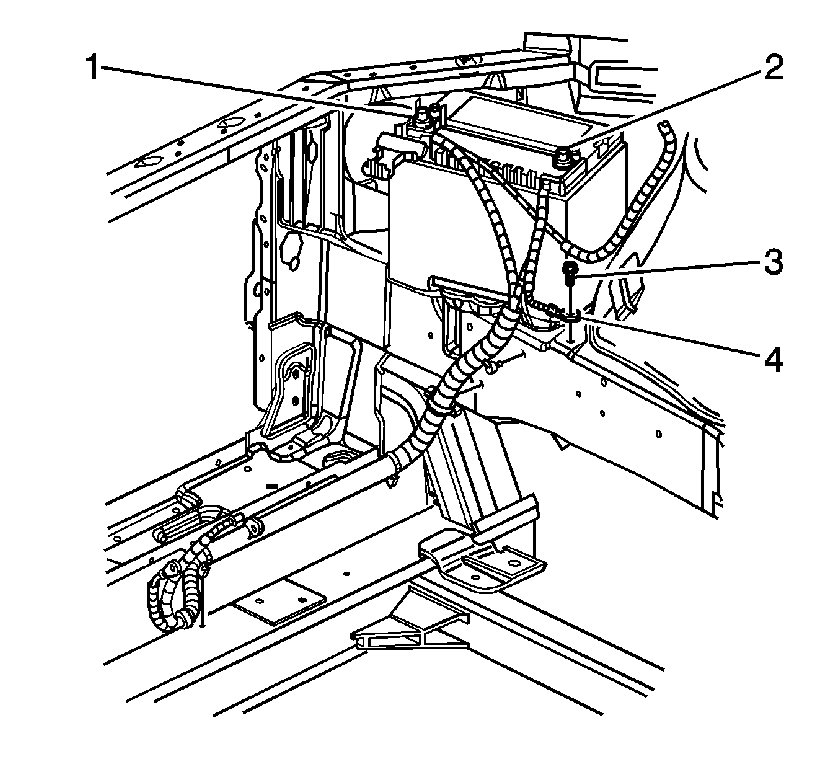
- Remove the positive battery terminal (1) from the battery.
- Remove the ground wire bolt (3) and the wire (4) from the frame.
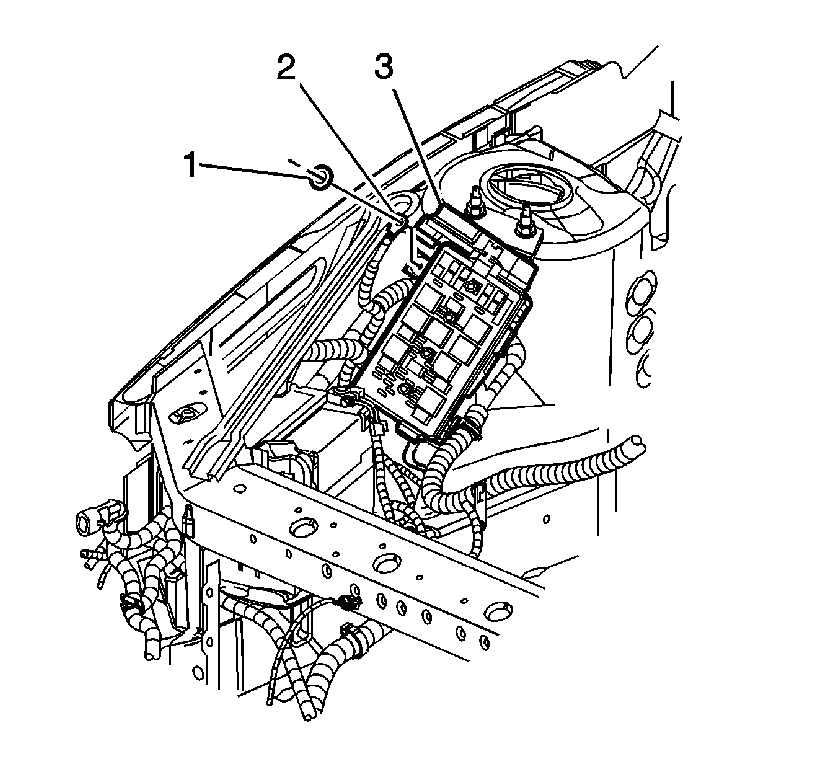
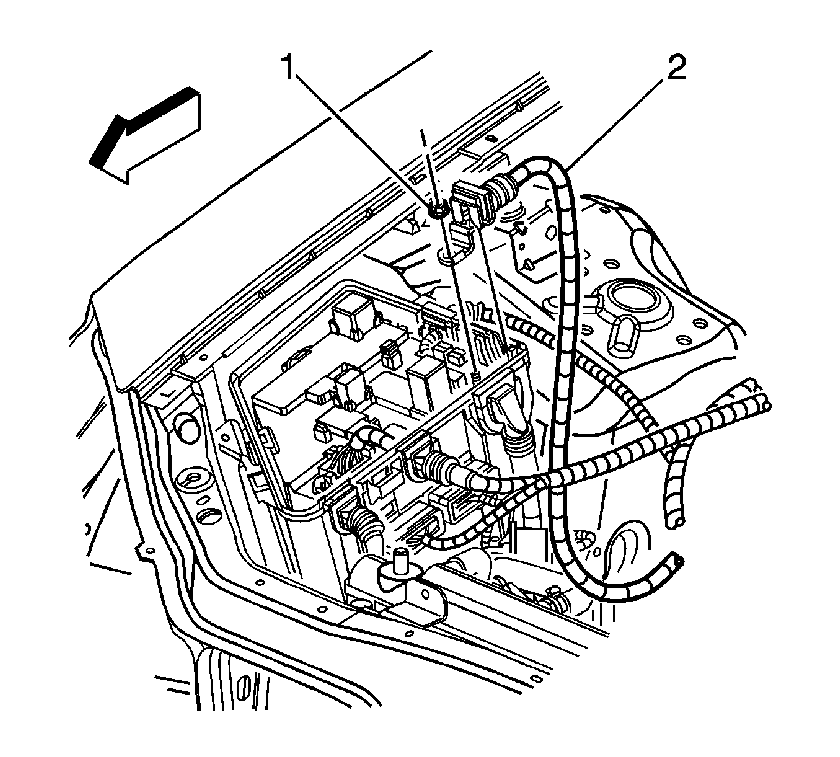
- Remove the positive battery cable junction block lead nut (1).
- Remove the positive battery cable (2) from the bussed electrical center (BEC).
- Remove the BEC (3) from the strut tower.
- Unclip and remove the positive battery cable harness from the BEC.
- Raise and support the vehicle. Refer to Lifting and Jacking the Vehicle .
- Remove the front lower air deflector. Refer to Radiator Air Lower Baffle and Deflector Replacement .
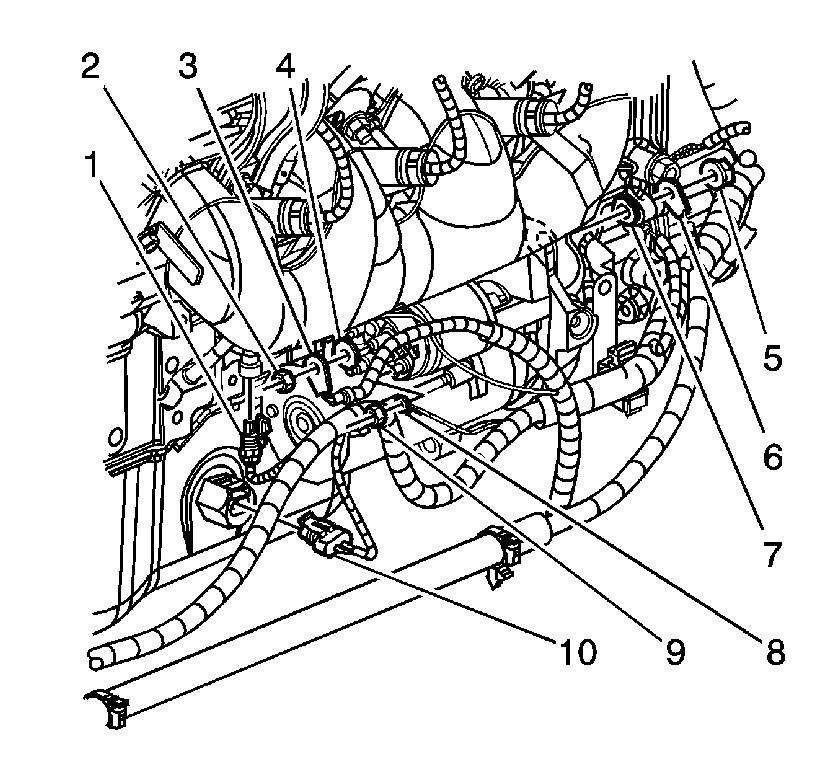
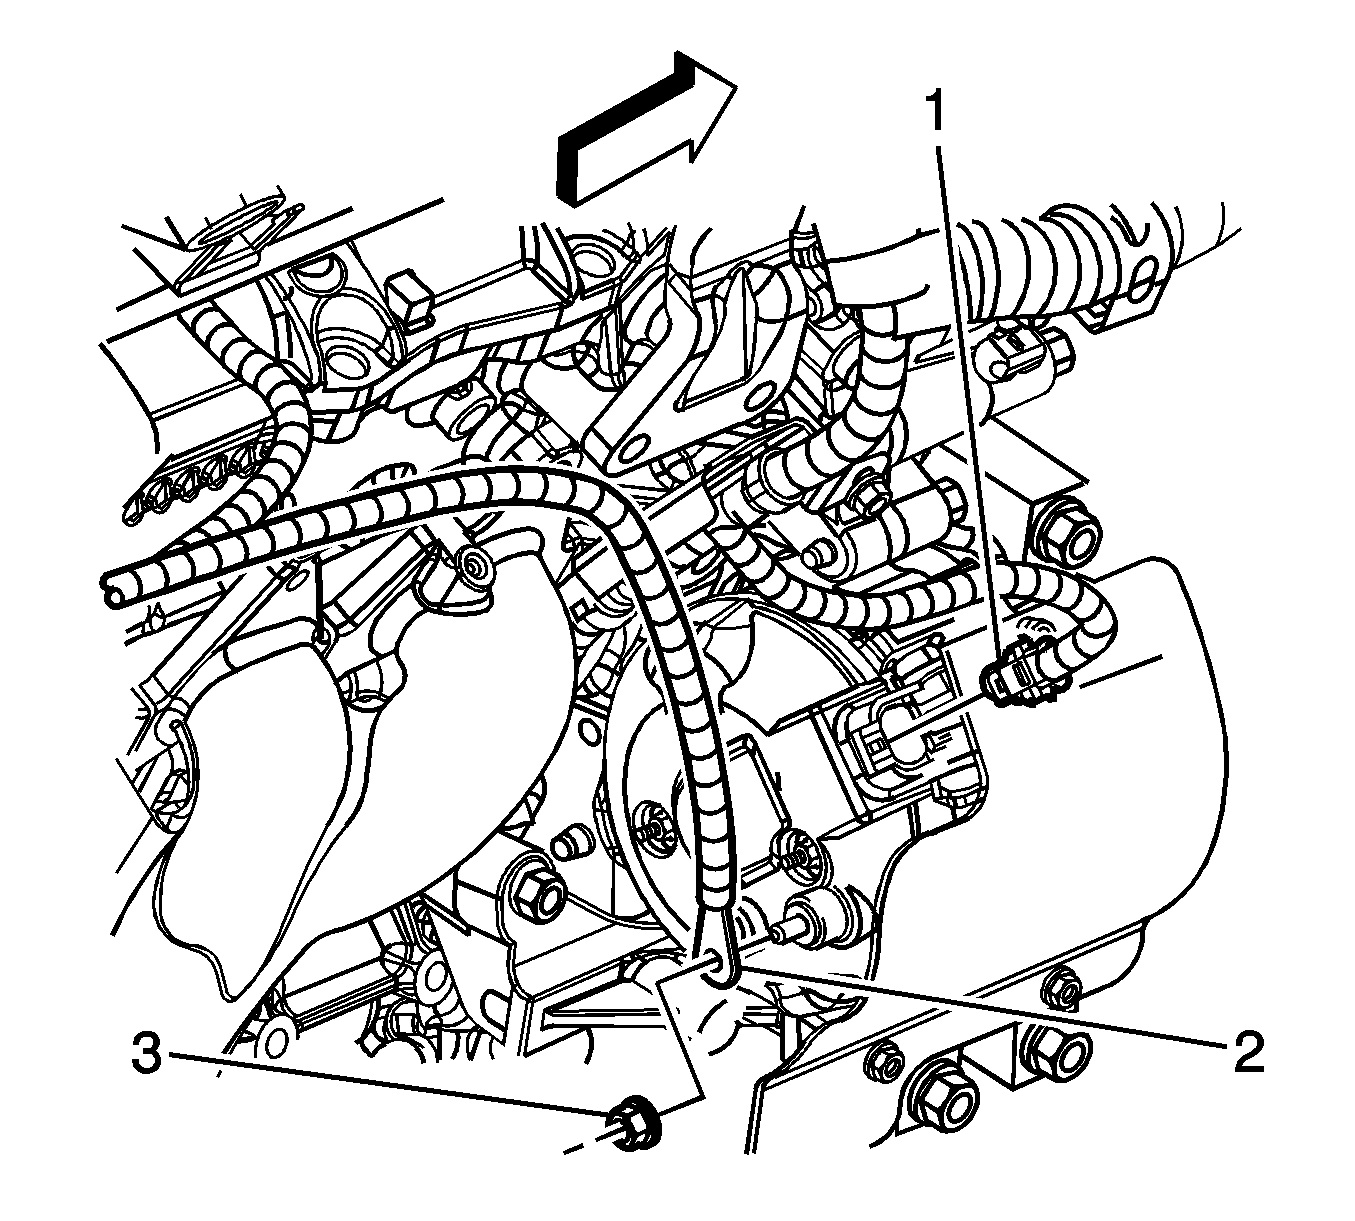
- Remove the positive battery cable nut (2) from the starter.
- Remove the positive battery cable (3) from the starter motor BAT terminal.
- Remove the transaxle stud nut (5).
- Remove the engine ground cable (6) from the transaxle stud.
- Unclip and remove the battery cable harness from the retainers.
- Remove the battery cable harness from the vehicle.
- Remove the positive battery cable from the wiring harness conduit.
Installation Procedure
- Install the positive battery cable into the wiring harness conduit.
- Install the battery cable harness to the vehicle.
- Install the battery cable harness to the retainers.
- Install the engine ground cable (6) to the transaxle stud.
- Install the transaxle stud nut (5).
- Install the positive battery cable to the starter motor BAT terminal.
- Install the starter solenoid BAT terminal nut.
- Install the front lower air deflector. Refer to Radiator Air Lower Baffle and Deflector Replacement .
- Lower the vehicle.
- Install the positive battery cable harness to the BEC.
- Install the BEC to the strut tower.
- Install the positive battery cable (2) to the BEC (3).
- Install the positive battery cable junction block lead nut (1).
- Install the ground wire (4) and the bolt (3) to the frame.
- Install the positive battery terminal (1) to the battery.
- Connect the negative battery cable. Refer to Battery Negative Cable Disconnection and Connection .
Notice: Refer to Fastener Notice in the Preface section.
Tighten
Tighten the nut to 30 N·m (22 lb ft).
Tighten
Tighten the nut to 10 N·m (89 lb in).
Tighten
Tighten the nut to 10 N·m (89 lb in).
Tighten
Tighten the bolt to 10 N·m (89 lb in).
Tighten
Tighten the nut to 15 N·m (11 lb ft).
Battery Positive Cable Replacement LY7
Removal Procedure
Important:
• Always use replacement cables that are of the same type, diameter and length of the cables that you are replacing. • Always route the replacement cable the same as the original cable.
- Disconnect the battery negative cable. Refer to Battery Negative Cable Disconnection and Connection .
- Disconnect the battery positive cable (1) from the battery.
- Depress the tabs in order to remove the cover from the electrical center.
- Remove the nut (1) securing the battery positive cable (2) to the electrical center.
- Reposition the protective boot from the generator output BAT terminal for access.
- Remove the generator output BAT terminal nut (3) and disconnect the battery positive lead (2) from the generator.
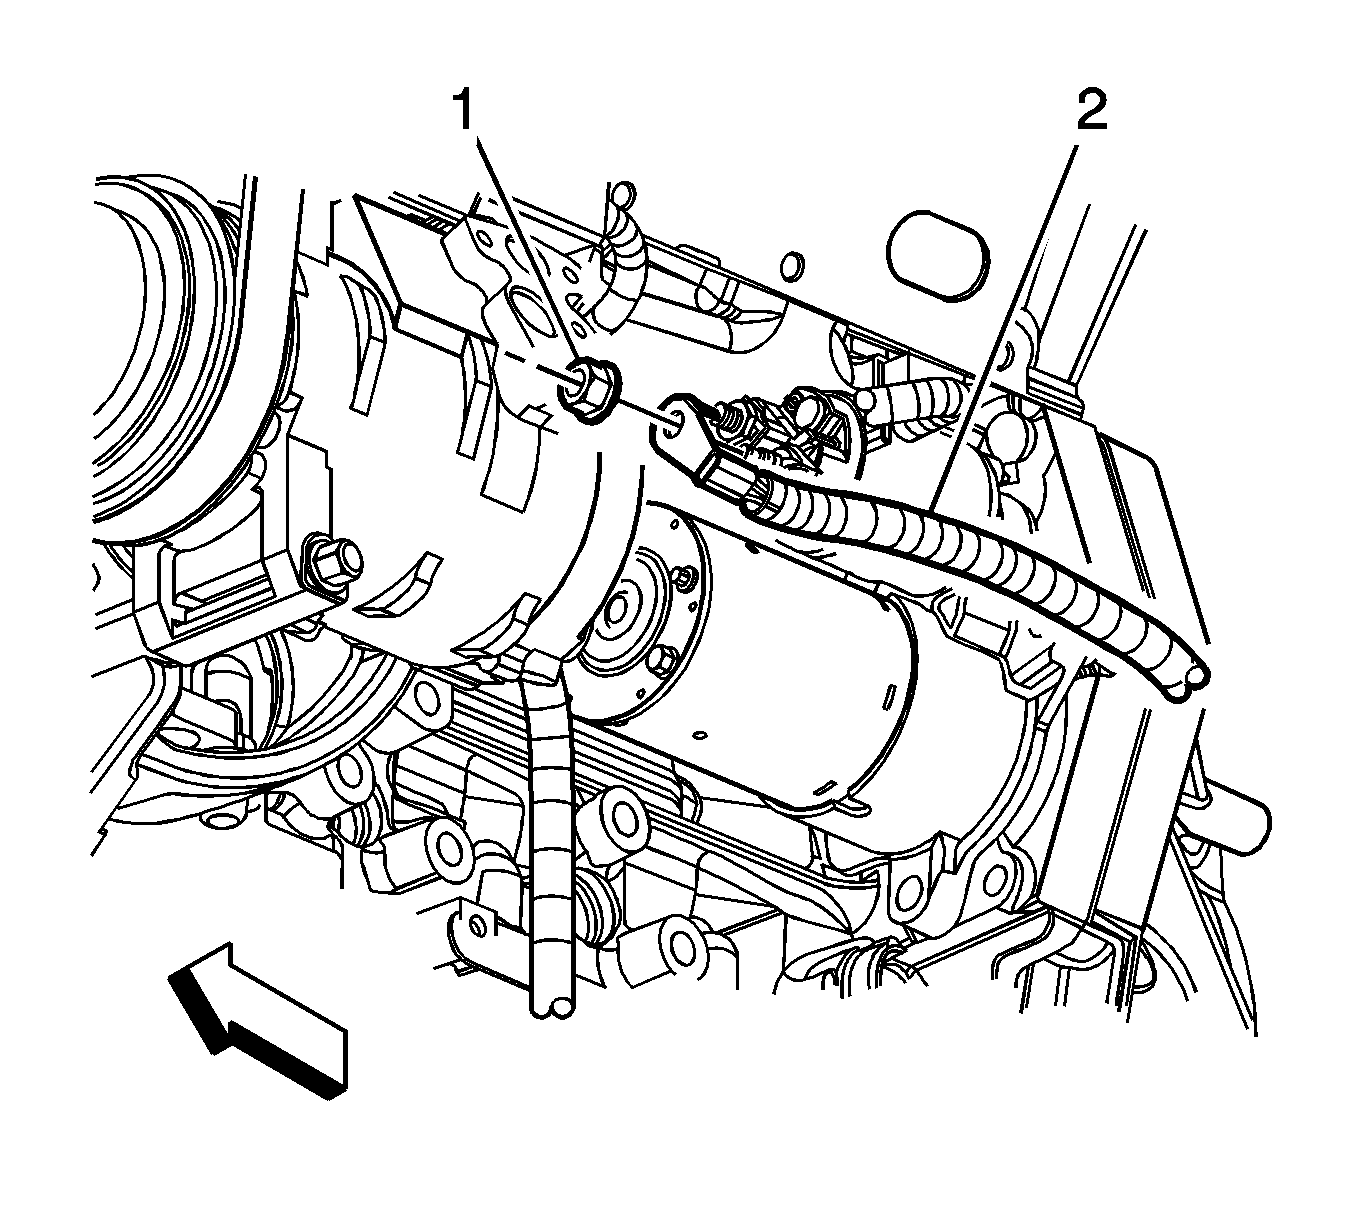
- Remove the starter terminal nut (1) and disconnect the battery positive cable (2) from the starter.
- Lower the vehicle.
- Remove the battery positive cable from the engine.
Installation Procedure
- Position the battery positive cable to the engine.
- Raise and support the vehicle. Refer to Lifting and Jacking the Vehicle .
- Connect the battery positive cable (2) to the starter and install the starter terminal nut (1).
- Connect the battery positive lead (2) to the generator and install the generator BAT terminal nut (3).
- Install the protective boot to the generator output BAT terminal.
- Lower the vehicle.
- Install the nut (1) securing the battery positive cable (2) to the electrical center.
- Install the electrical center cover.
- Connect the battery positive cable (1) to the battery.
- Connect the battery negative cable. Refer to Battery Negative Cable Disconnection and Connection .
Notice: Refer to Fastener Notice in the Preface section.
Tighten
Tighten the battery positive cable nut to 13 N·m (115 lb in).
Tighten
Tighten the generator BAT terminal nut to 13 N·m (115 lb in).
Tighten
Tighten the battery positive cable to electrical center nut to 15 N·m (11 lb ft).
Tighten
Tighten the battery cable to 15 N·m (11 lb ft).
