Removal Procedure
- Raise and support the vehicle. Refer to
Lifting and Jacking the Vehicle
.
- Before removing the air tubes, perform the following steps:
| • | Turn the ignition On, with the engine OFF. |
| • | With the scan tool, exhaust the air from the system for at least 60 seconds. |

Important: Clean the components and the surrounding area to prevent dirt from entering the air system before disconnecting the air hose from the air compressor.
Important: There will be a minimal amount still in the air tubes.
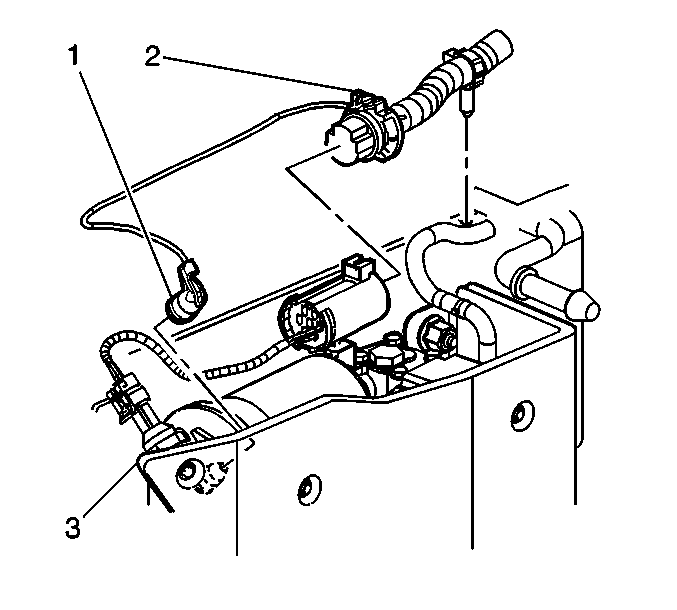
- Disconnect the air tube (1) from the air dryer.
- Disconnect the electrical connection (2).

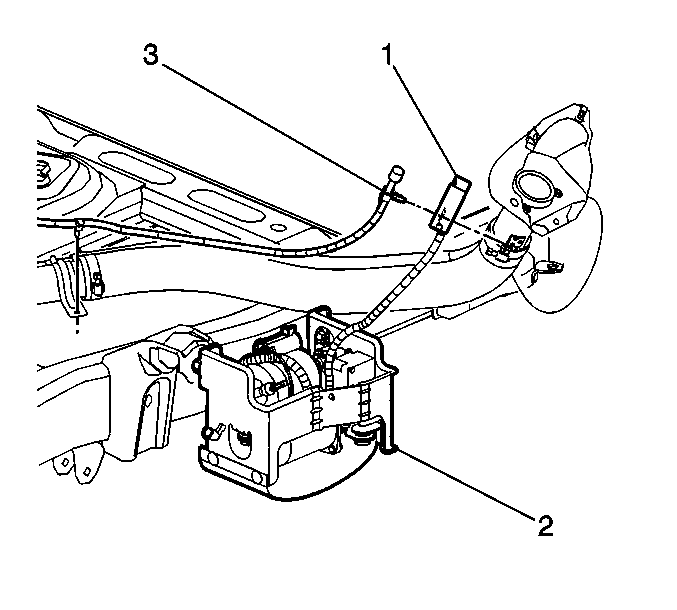
- Remove the air inlet and hose (1) from the fuel filler neck bracket.
- Loosen the mounting nuts.
- Slide the air compressor (2) rearward to clear the frame slots.
- Remove the air compressor from the vehicle.
Installation Procedure

- Install the air compressor (2) to the vehicle.
Notice: Use the correct fastener in the correct location. Replacement fasteners
must be the correct part number for that application. Fasteners requiring
replacement or fasteners requiring the use of thread locking compound or sealant
are identified in the service procedure. Do not use paints, lubricants, or
corrosion inhibitors on fasteners or fastener joint surfaces unless specified.
These coatings affect fastener torque and joint clamping force and may damage
the fastener. Use the correct tightening sequence and specifications when
installing fasteners in order to avoid damage to parts and systems.
- Slide the air compressor forward to secure the fasteners into the frame slots and tighten the mounting nuts.
Tighten
Tighten the nuts to 15 N·m (11 lb ft).
- Install the air inlet hose (1) to the fuel filler neck bracket.

- Connect the air tube (1) to the air dryer.
- Connect the electrical connection (2).
- Lower the vehicle.
- perform the following procedure after the air compressor has been replaced.
| • | Turn the ignition ON, with the engine OFF. |
| • | With the scan tool, operate the air compressor for 30 seconds or until the rear of the vehicle begins to rise. |
| • | Cycle the ignition OFF, then back ON, with the engine ON to allow the air suspension system to regain the desired rear suspension position. |


