For 1990-2009 cars only
Removal Procedure
- Remove the IP top trim panel. Refer to Instrument Panel Upper Trim Panel Replacement in Instrument Panel, Gages, and Console.
- Remove the drivers side accessory housing (1) from the IP.
- Remove the transfer case control module, if equipped. Refer to Transfer Case Shift Control Module Replacement in Transfer Case.
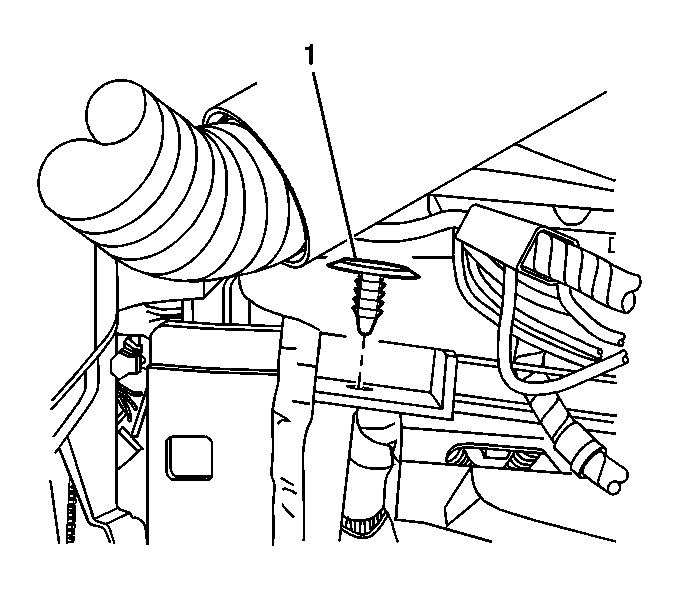
- Release the pressure on the headliner wire harness by removing the wire harness retainer (1) from the IP support beam.
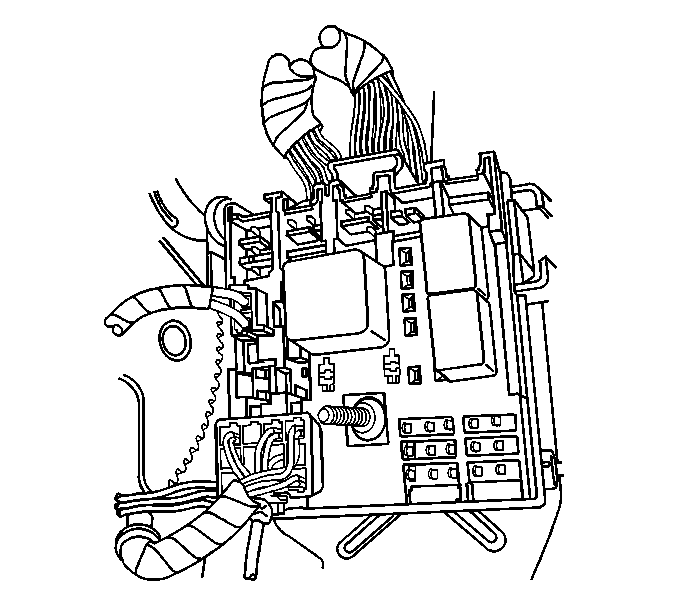
- Disconnect the headliner wire connectors from the junction block located next to the brake pedal.
- Remove the wire harness retainers along the windshield pillar.
- Follow the routing of the wire harness through the IP and release any wire harness retainers.
- Carefully pull out the wire harness from the windshield pillar ensuring that the wire harness does not get caught on any part.
- Remove the center trim pillar moldings. Refer to Center Pillar Garnish Molding Replacement .
- Remove the third pillar trim pillar moldings. Refer to Third Pillar Trim Replacement .
- Remove the rear corner trim pillar moldings. Refer to Body Rear Corner Garnish Molding Replacement .
- Disconnect the electrical connector to the rear view mirror.
- Remove the upper console. Refer to Roof Console Replacement .
- Remove the front sunshades. Refer to Sunshade Replacement .
- Remove the sunshade holders.
- Remove the rear coat hook, if equipped. Refer to Coat Hook Replacement .
- Remove the assist handles. Refer to Roof Rail Rear Assist Handle Replacement .
- Remove auxiliary climate control console assembly. Refer to Auxiliary Heater and Air Conditioning Control Replacement - Front in Heating, Ventilation and Air Conditioning.
- Remove the roof mounted air outlet louver by turning counter clockwise in order to remove the retainer.
- Remove the retainer.
- Remove the sunroof finishing lace, if equipped. Refer to Sunroof Opening Trim Finish Lace Replacement .
- Remove the rear headliner retainers, if needed.
- Carefully separate the air duct at the right C-pillar from the headliner.
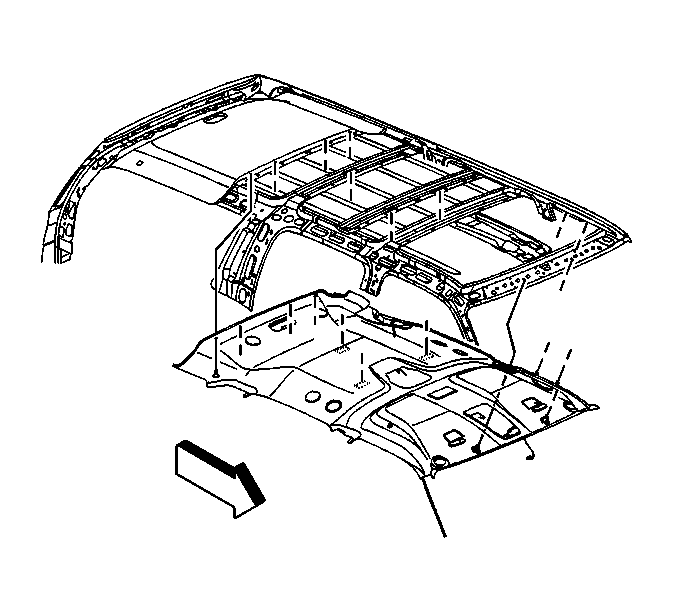
- Carefully separate the headliner from the roof Velcro® retainers.
- With the aid of an assistant carefully slide the headliner out through the rear of the vehicle.
- Remove the interior dome lamp assembly in order to transfer to the new headliner. Refer to Dome Lamp Replacement in Lighting Systems.


Installation Procedure
- Install the interior dome lamp assembly to the new headliner.
- With the aid of an assistant carefully slide the headliner in through the rear of the vehicle.
- Secure the headliner to the roof Velcro® retainers while aligning the air duct at the right of the third pillar.
- Install the retainer through the air outlet louver
- Install the air outlet louver by turning clockwise till it is seated in place.
- Install the auxiliary climate control assembly. Refer to Auxiliary Heater and Air Conditioning Control Replacement - Front in Heating, Ventilation and Air Conditioning.
- Install the assist handles. Refer to Roof Rail Rear Assist Handle Replacement .
- Install the interior dome lamp. Refer to Dome Lamp Replacement in Lighting Systems.
- Install the rear coat hook, if equipped. Refer to Coat Hook Replacement .
- Install the sunshade holders to the headliner.
- Install the front sunshades. Refer to Sunshade Replacement .
- Connect the electrical connector to the rear view mirror, if needed.
- Install the upper console. Refer to Roof Console Replacement .
- Install the rear corner trim pillar moldings. Refer to Body Rear Corner Garnish Molding Replacement .
- Install the third pillar trim moldings. Refer to Third Pillar Trim Replacement .
- Install the center trim pillar moldings. Refer to Center Pillar Garnish Molding Replacement .
- Carefully route the wire harness through the IP in order to connect the wire to the junction block located next the brake pedal.
- Install the transfer case control module, if equipped. Refer to Transfer Case Shift Control Module Replacement in Transfer Case.
- Press in the wire harness retainer (1) in order to secure the harness.
- Connect the headliner electrical connectors to the junction block located next to the brake pedal.
- Install the drivers side accessory housing (1) to the IP.
- Install the sunroof finishing lace, if equipped. Refer to Sunroof Opening Trim Finish Lace Replacement .
- Install the IP top trim panel. Refer to Instrument Panel Upper Trim Panel Replacement in Instrument Panel, Gages, and Console.


Important: Please ensure that all of the wire harness retainers in the IP and the windshield pillar are all pressed into place in order to prevent rattling during driving.


