For 1990-2009 cars only
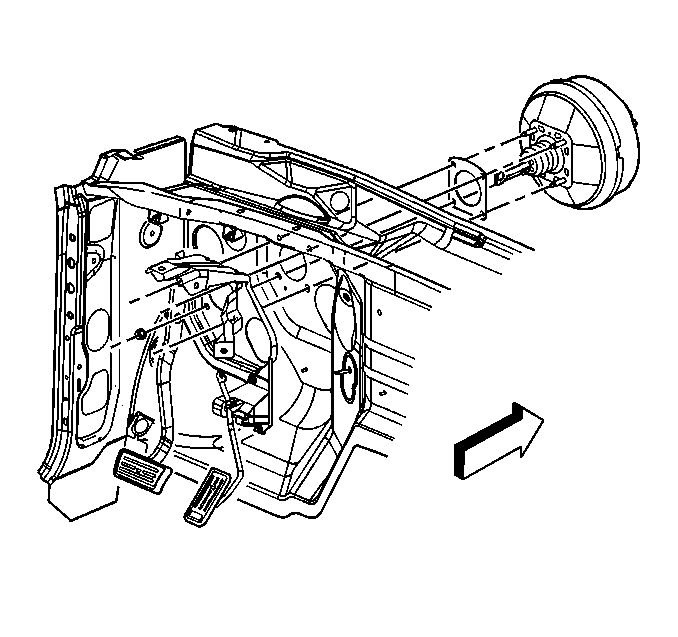
Removal Procedure
Caution: Refer to Brake Fluid Irritant Caution in the Preface section.
Notice: Refer to Brake Fluid Effects on Paint and Electrical Components Notice in the Preface section.
- Apply the park brake.
- Deplete the vacuum reserve in the vacuum booster by applying the brake pedal 3 times or until the pedal becomes firm.
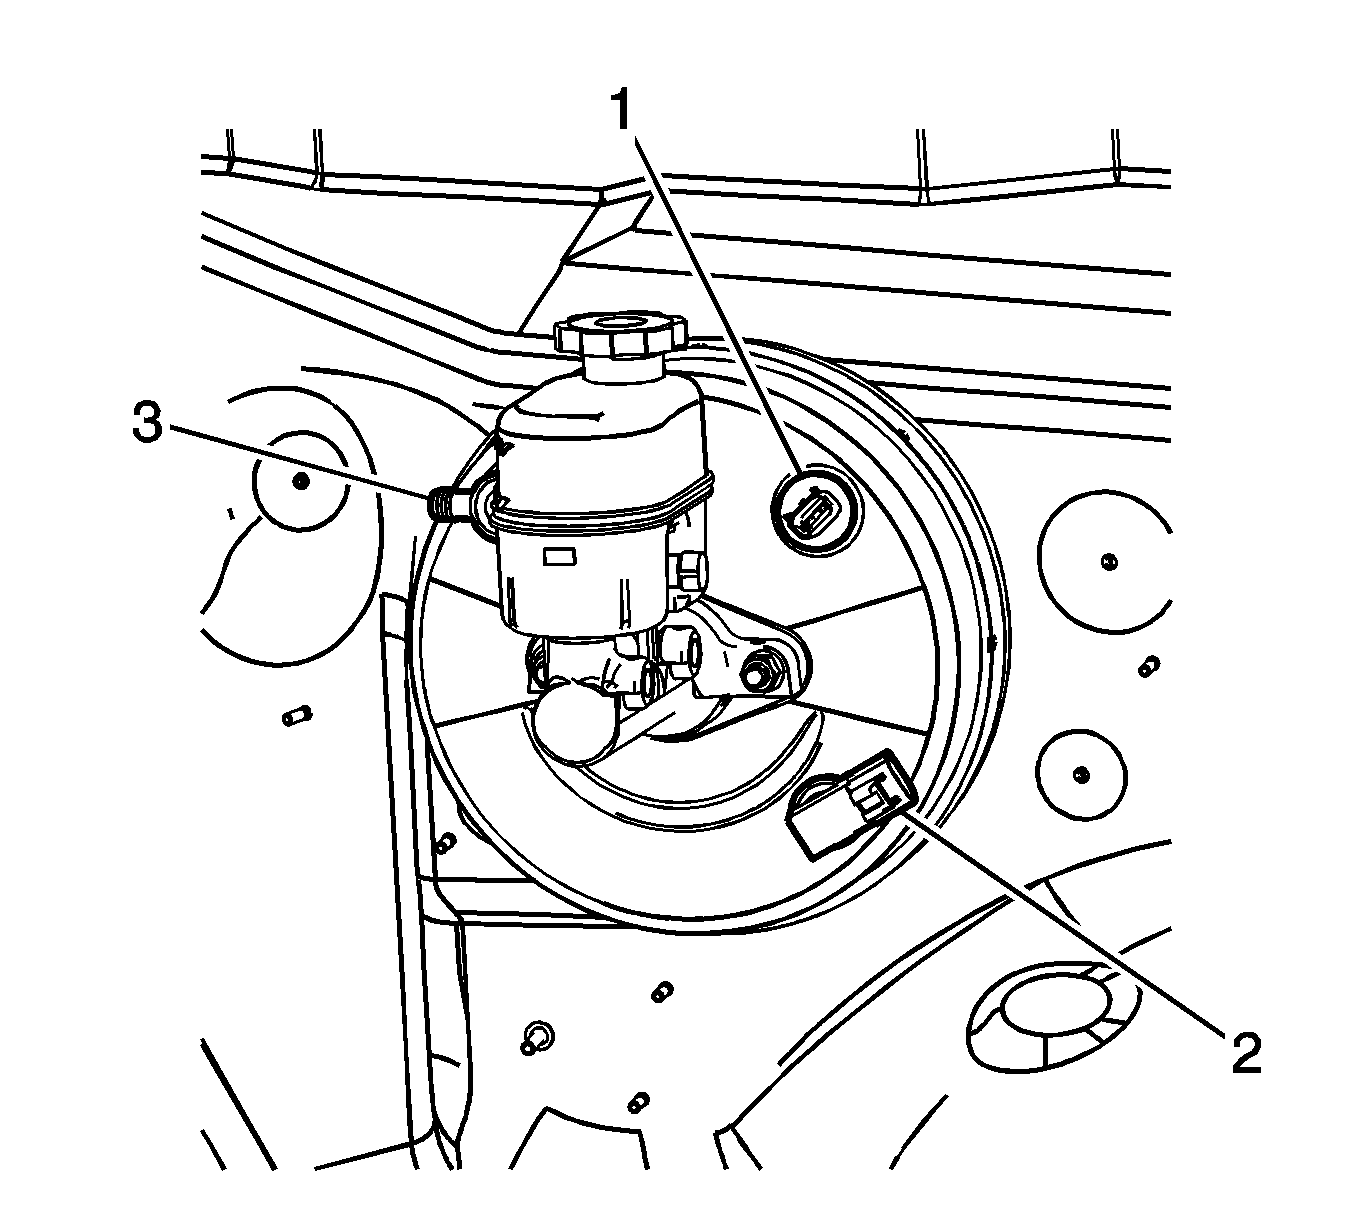
- Remove the electrical connectors for the DOD sensor (1) and the active booster connector (2).
- Remove the vacuum hose from the check valve (3).
- Remove the 2 master cylinder nuts.
- Position the master cylinder aside and secure with heavy mechanics wire or equivalent.
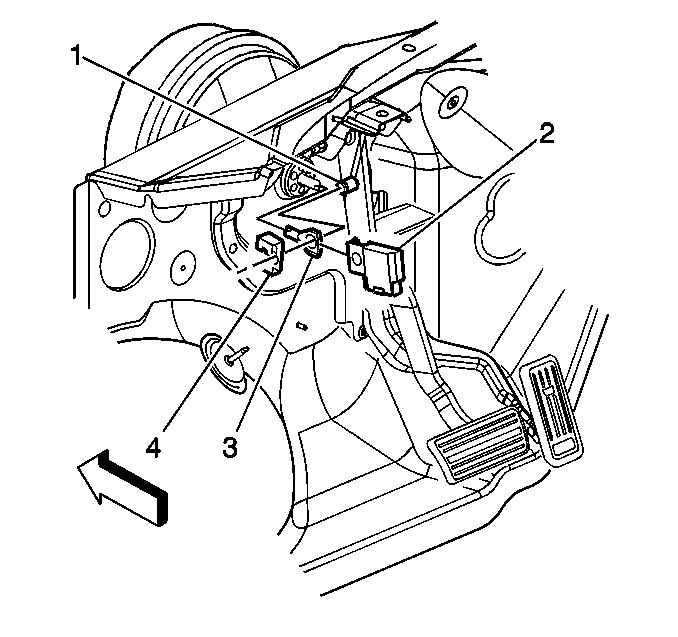
- Remove the retaining clip (4) for the pushrod (1).
- Remove the stop lamp switch (2) and the pushrod (3) from the brake pedal (1).
- Remove the brake booster mounting nuts.
- Remove the brake booster.
- Remove and discard the brake booster gasket.
Important:
• It is not necessary to disconnect the brake pipes from the master cylinder. • Ensure the O-ring vacuum seal is on the master cylinder after removal.
Installation Procedure
- Install the NEW brake booster gasket.
- Install the brake booster to the vehicle.
- Install the brake booster nuts.
- Install the pushrod (3) and stop lamp switch (2) to the brake pedal (1).
- Install the pushrod retaining clip (4) to the brake pedal (1).
- Install the vacuum hose to the check valve (3).
- Install the electrical connectors to the DOD sensor (1) and the active booster connector (2).
- Install the master cylinder.
- Install the 2 master cylinder nuts.
Important: An assistant may be necessary to hold the brake booster in place while installing the nuts.
Notice: Refer to Fastener Notice in the Preface section.
Important: Tighten the upper right brake booster nut first.
Tighten
Tighten the nuts to 33 N·m (24 lb ft).
Tighten
Tighten the nuts to 33 N·m (24 lb ft).
