High Intensity Discharge Headlamp Ballast Replacement Early Design
Removal Procedure
Caution: The high intensity discharge system produces high voltage and current.
To reduce the risk of severe shocks and burns:
• Never open the high intensity discharge system ballast or the
arc tube assembly starter. • Never probe between the high intensity discharge system ballast
output connector and the arc tube assembly.
Caution: The high intensity discharge system produces high voltage and current. In order to reduce the risk of severe shocks and burns, the battery negative cable must be disconnected any time service work is being performed on or around the high intensity discharge system.
- Disconnect the battery negative cable. Refer to Battery Negative Cable Disconnection and Connectionin Engine Electrical.
- Remove the headlamp. Refer to Headlamp Assembly or Headlamp Bulb Replacement.
- Remove all rubber covers from the headlamp housing.
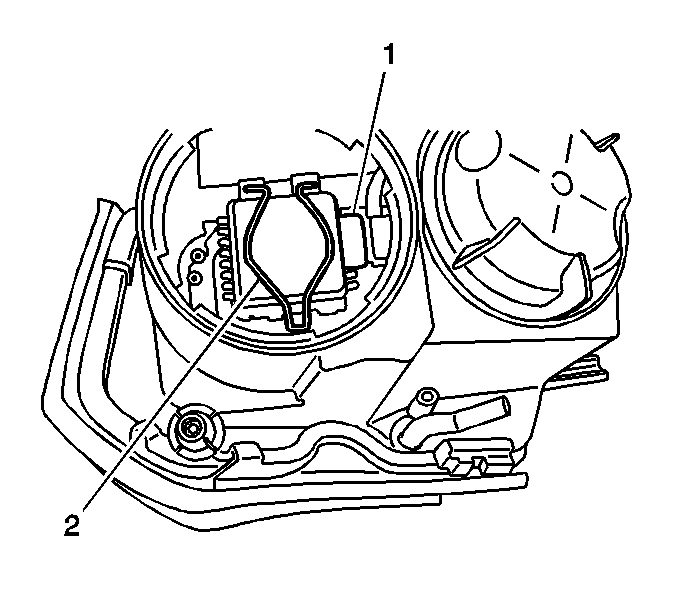
- Press the retaining clip (2) downward to release the clip and disconnect the electrical connector (1) from the bulb.
- Remove all bulbs to prevent damage and to allow easy removal of ballast harness.
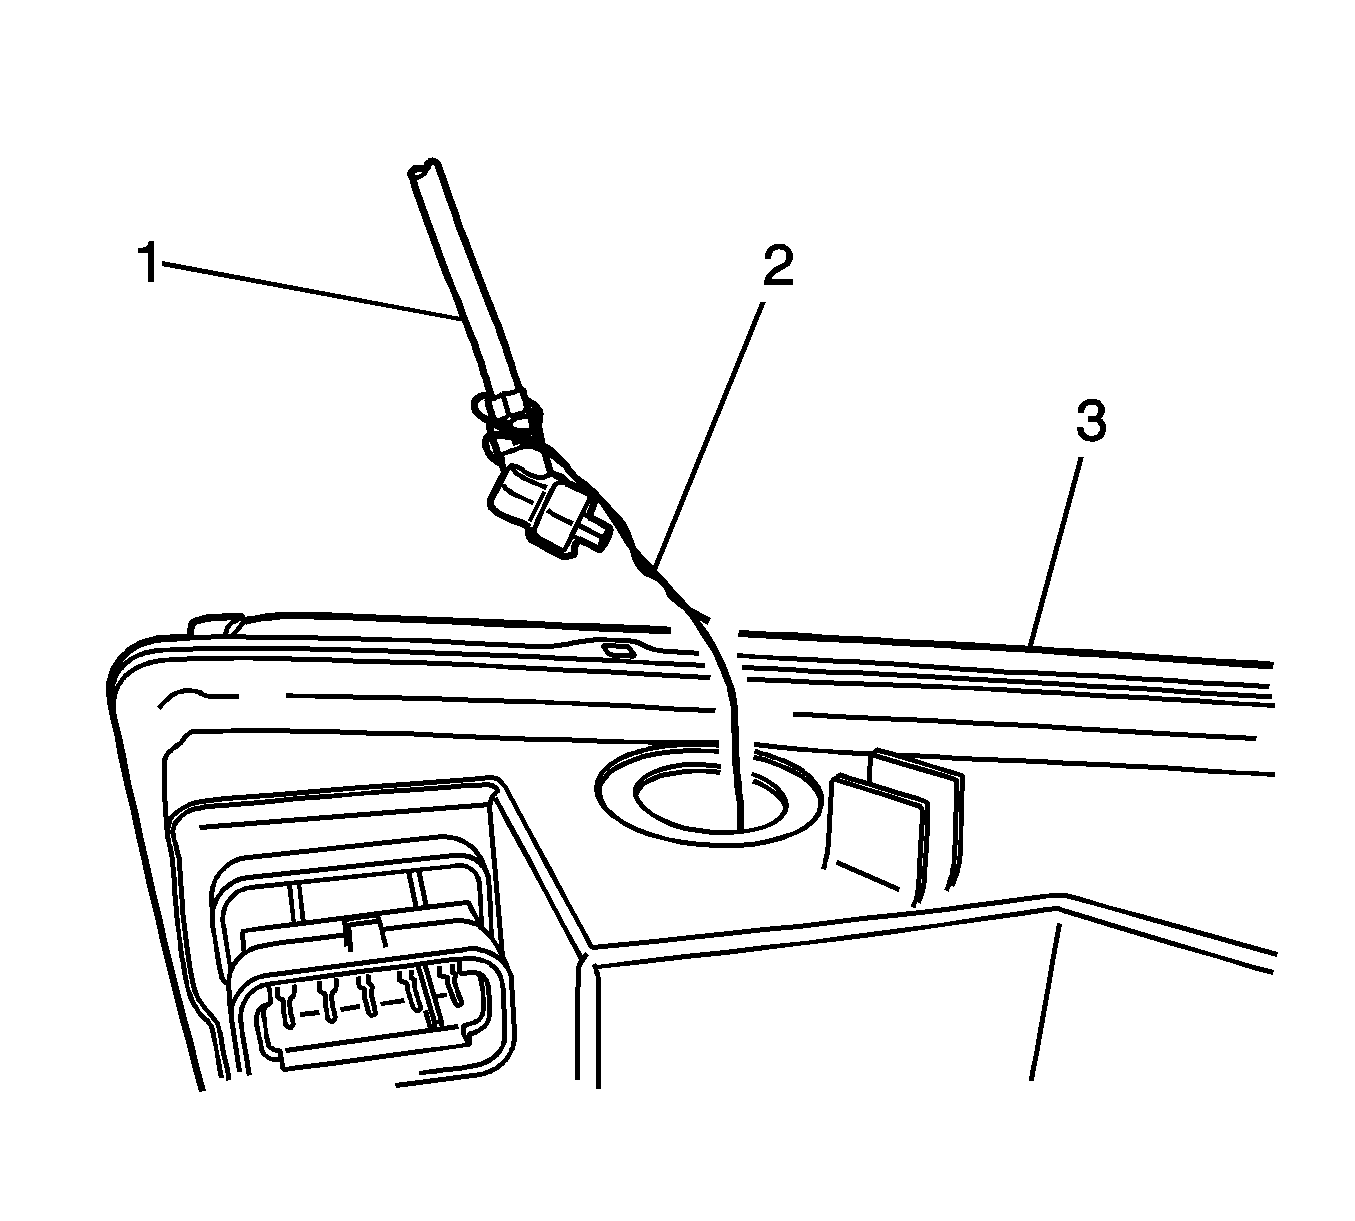
- Attach a suitable length of wire to the ballast harness electrical connector (1).
- If necessary, turn the headlamp adjuster counterclockwise to allow ample space to release the electrical connector.
- Pull the ballast harness (1) from the opposite end to allow the wire (2) to flow through the inside of the headlamp (3).
- Disconnect the wire (2) from the ballast harness (1).


Installation Procedure
- Attach the wire (2) to the ballast harness electrical connector (1).
- Pull the wire from the opposite end to allow ballast harness to flow through the headlamp.
- Connect the ballast harness electrical connector to the bulb and install the bulb to the headlamp.
- Press down on the retaining clip (2) to lock the bulb in place.
- Install the remaining bulbs onto the headlamp.
- Install all rubber covers to the headlamp housing.
- Install the headlamp to the vehicle. Refer to Headlamp Assembly or Headlamp Bulb Replacement.
- Connect the battery negative cable. Refer to Battery Negative Cable Disconnection and Connectionin Engine Electrical.


High Intensity Discharge Headlamp Ballast Replacement Late Design
Removal Procedure
Caution: The high intensity discharge system produces high voltage and current.
To reduce the risk of severe shocks and burns:
• Never open the high intensity discharge system ballast or the
arc tube assembly starter. • Never probe between the high intensity discharge system ballast
output connector and the arc tube assembly.
Caution: The high intensity discharge system produces high voltage and current. In order to reduce the risk of severe shocks and burns, the battery negative cable must be disconnected any time service work is being performed on or around the high intensity discharge system.
- Disconnect the battery negative cable. Refer to Battery Negative Cable Disconnection and Connection in Engine Electrical.
- Remove the headlamp. Refer to Headlamp Assembly or Headlamp Bulb Replacement .
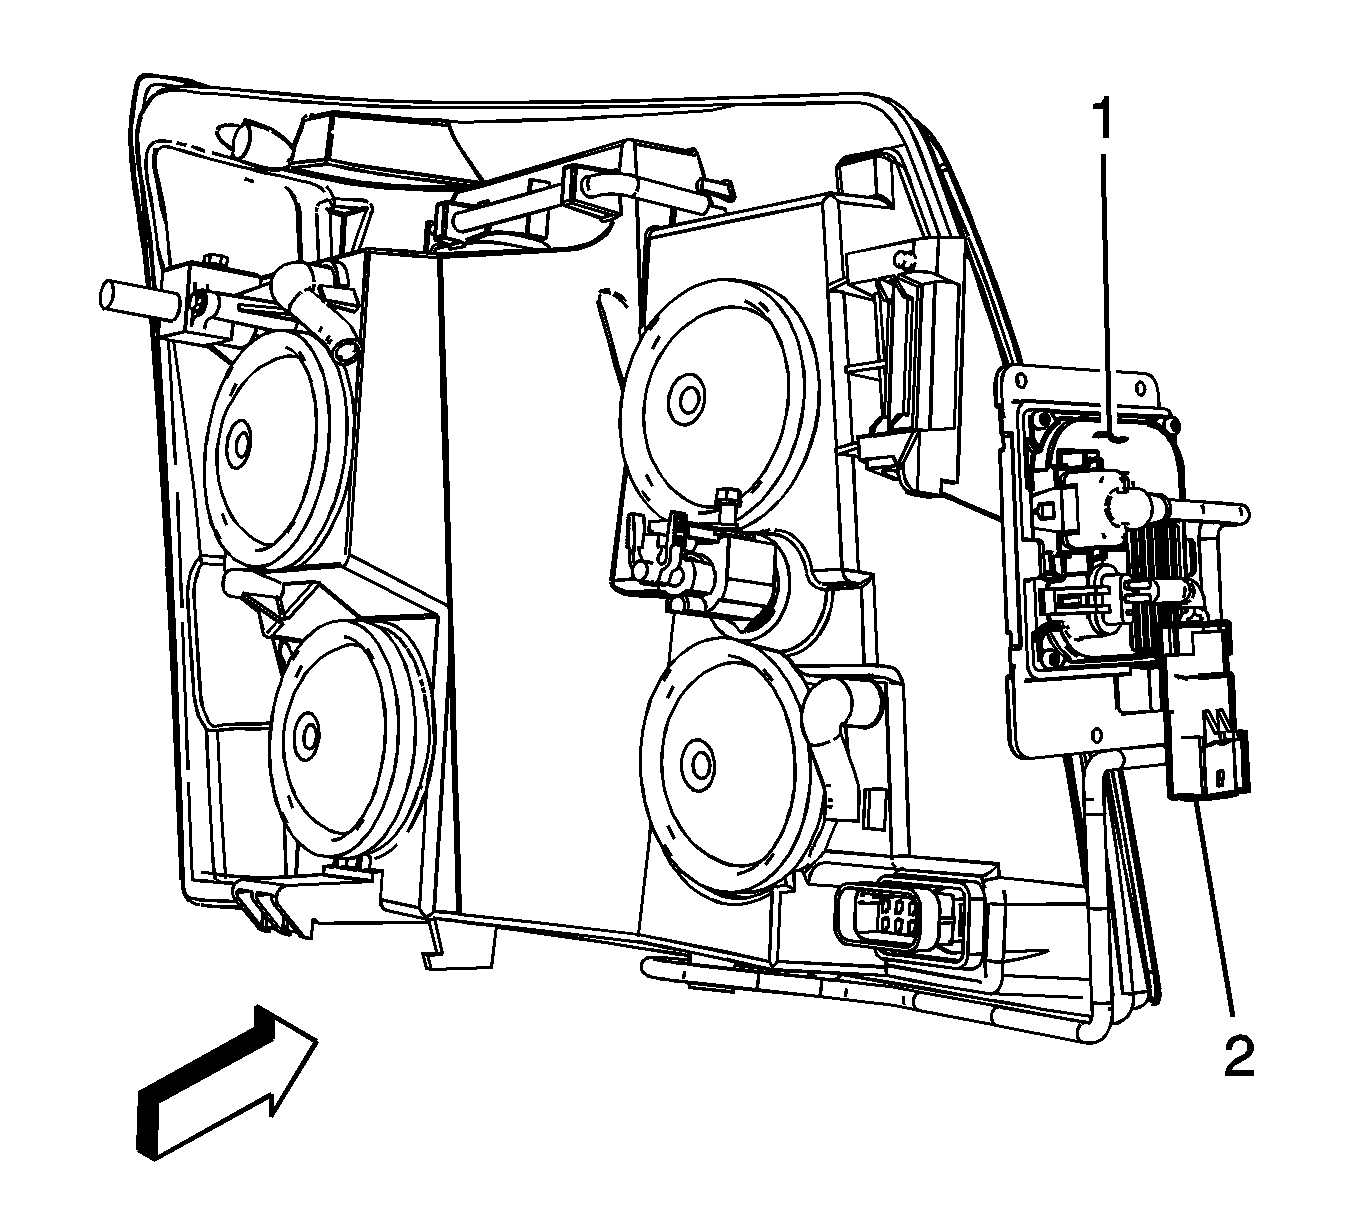
- Disconnect the main electrical connector (2) from the ballast (1).
- Remove the screws securing the ballast to the headlamp.
- Remove the ballast from the headlamp assembly.

Installation Procedure
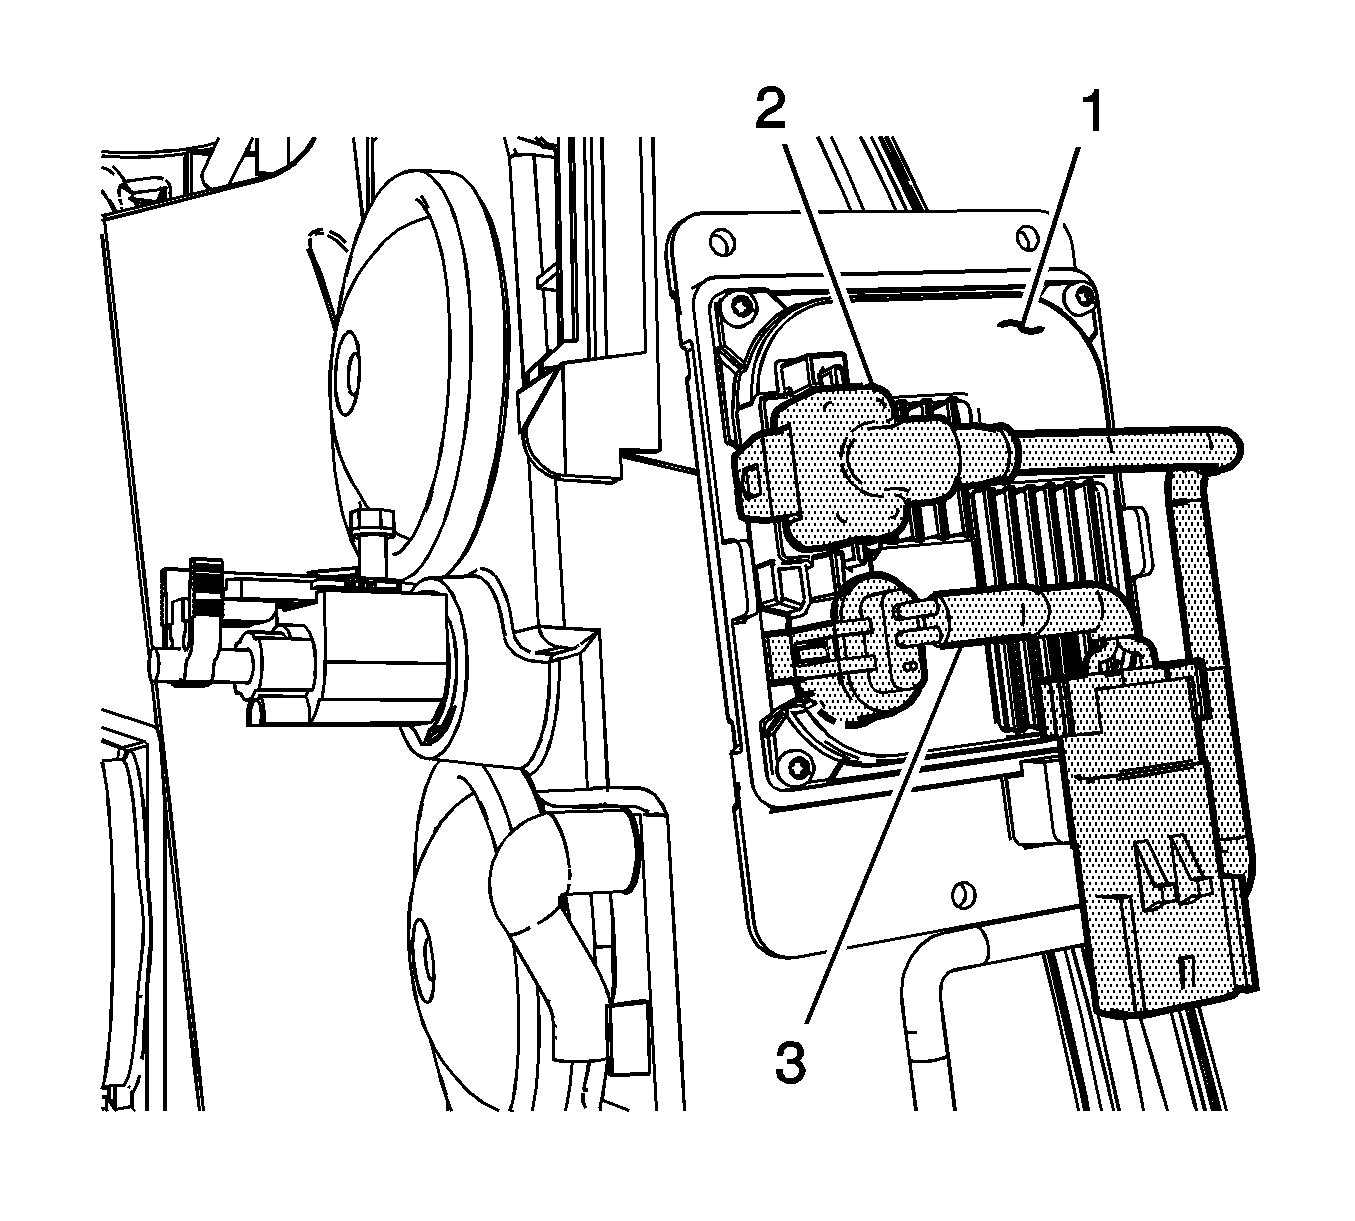
- Position the ballast (1) to the headlamp assembly.
- Install the screws.
- Connect the main harness connector (3).
- Connect the headlamp ballast connector (2) to the ballast.
- Install the headlamp to the vehicle. Refer to Headlamp Assembly or Headlamp Bulb Replacement .
- Connect the battery negative cable. Refer to Battery Negative Cable Disconnection and Connection in Engine Electrical.

