Tools Required
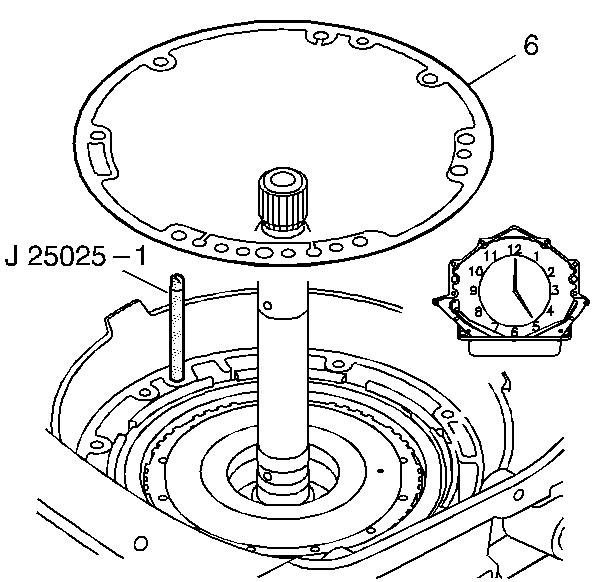
J 25025-1 Guide Pins
- Install the J 25025-1 at the 12 o'clock and the 5 o'clock positions.
- Install the transmission oil pump gasket (6).
- Install the oil pump assembly (4) into the transmission case assembly.
- Remove J 25025-1 .
- Install the 7 transmission oil pump bolt and seal assemblies (3).
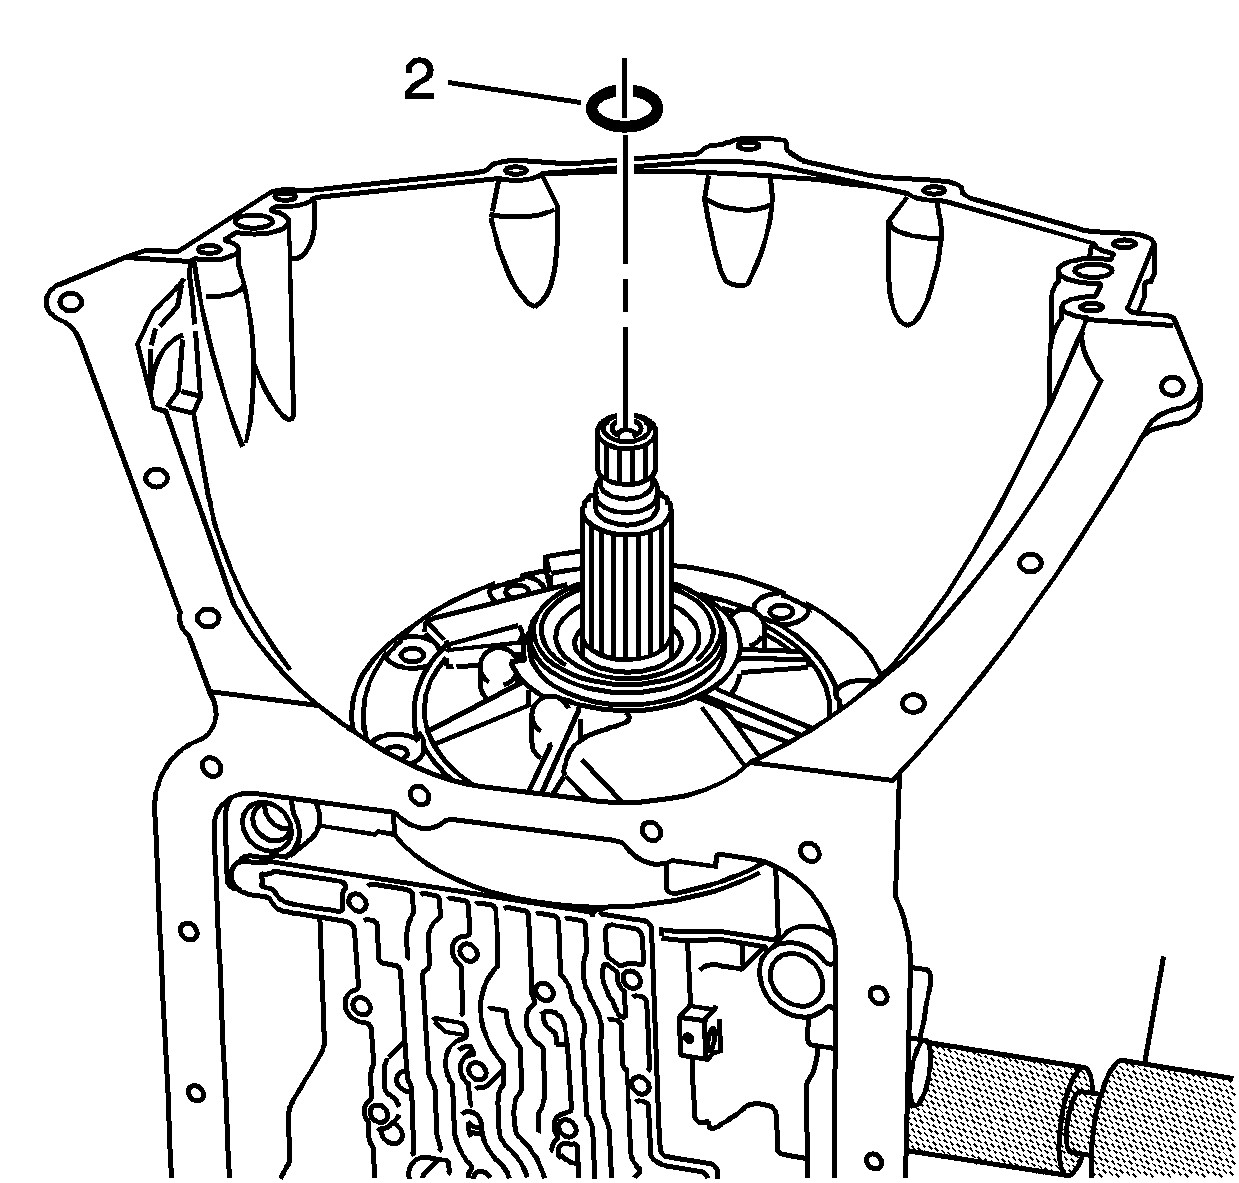
- Install the turbine shaft front oil seal ring (2).
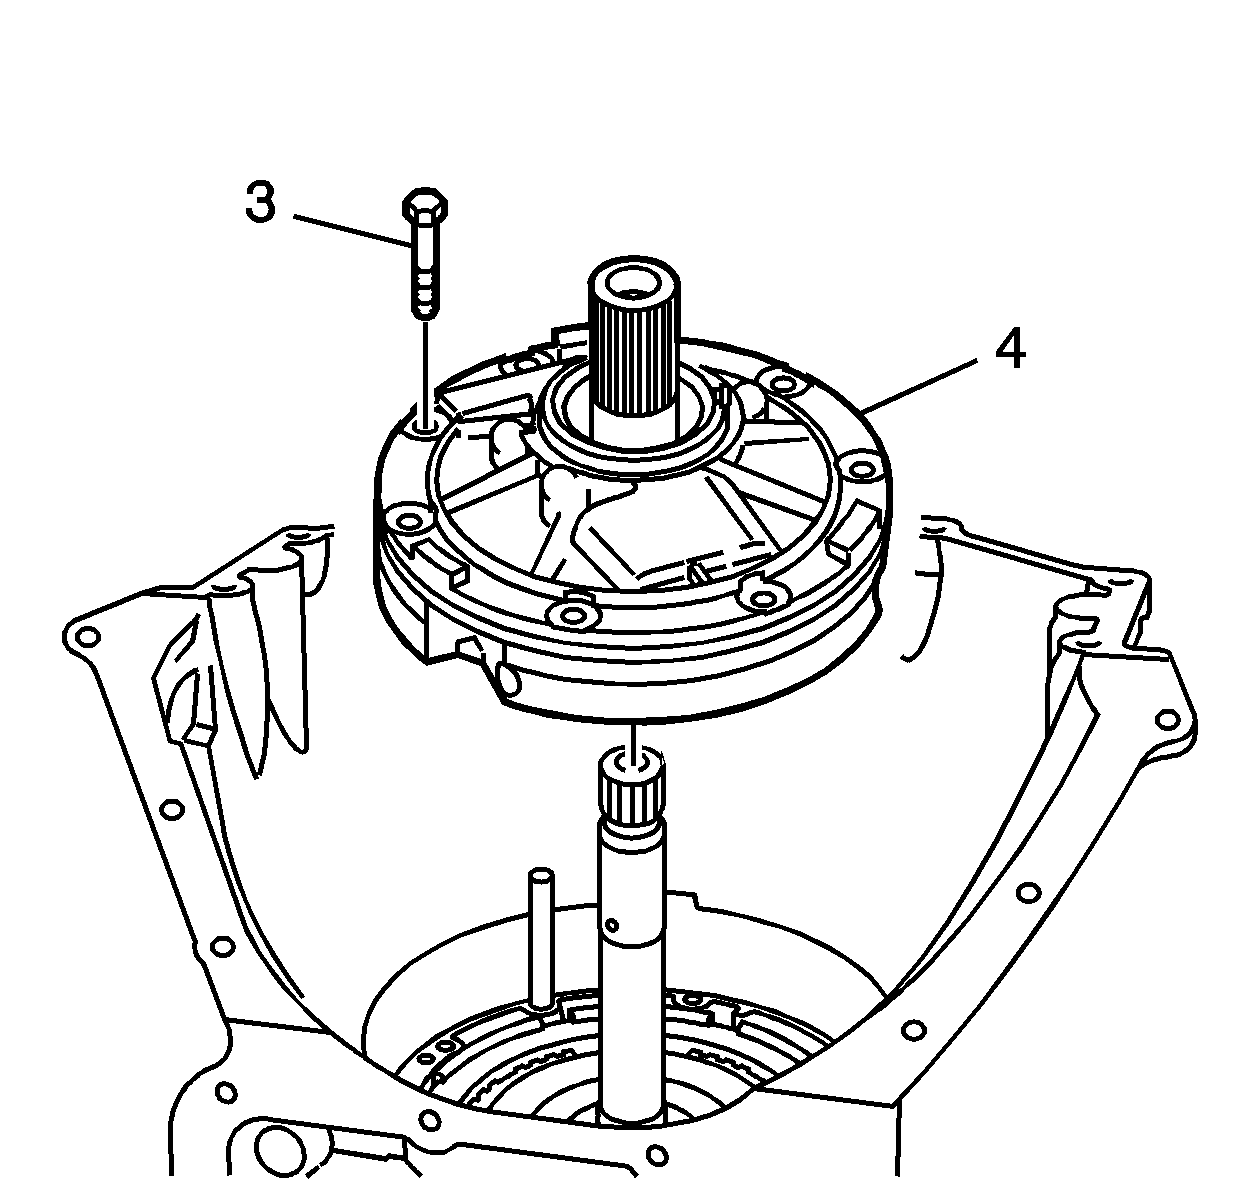
Important: When installing the oil pump assembly (4), position the bolt holes closest together toward the bottom of valve body side of the transmission case assembly.
Important: If you cannot rotate the turbine shaft while lowering the oil pump assembly into place, then you have improperly installed the overrun clutch assembly, the fourth clutch assembly, the forward clutch assembly and/or the direct clutch assembly. These components have not indexed with all of the clutch plates. Correct the condition before installing the oil pump assembly.
Notice: Use the correct fastener in the correct location. Replacement fasteners must be the correct part number for that application. Fasteners requiring replacement or fasteners requiring the use of thread locking compound or sealant are identified in the service procedure. Do not use paints, lubricants, or corrosion inhibitors on fasteners or fastener joint surfaces unless specified. These coatings affect fastener torque and joint clamping force and may damage the fastener. Use the correct tightening sequence and specifications when installing fasteners in order to avoid damage to parts and systems.
Tighten
Tighten the bolts to 24 N·m (18 lb ft).