For 1990-2009 cars only
Removal Procedure
- Disconnect the negative battery cable, as necessary on vehicles with power components. Refer to Battery Negative Cable Disconnection and Connection in Engine Electrical.
- Apply cloth-backed tape to the door and to the body pillar.
- Remove the taillamp(s). Refer to Tail/Turn Signal Lamp Replacement in Lighting Systems.
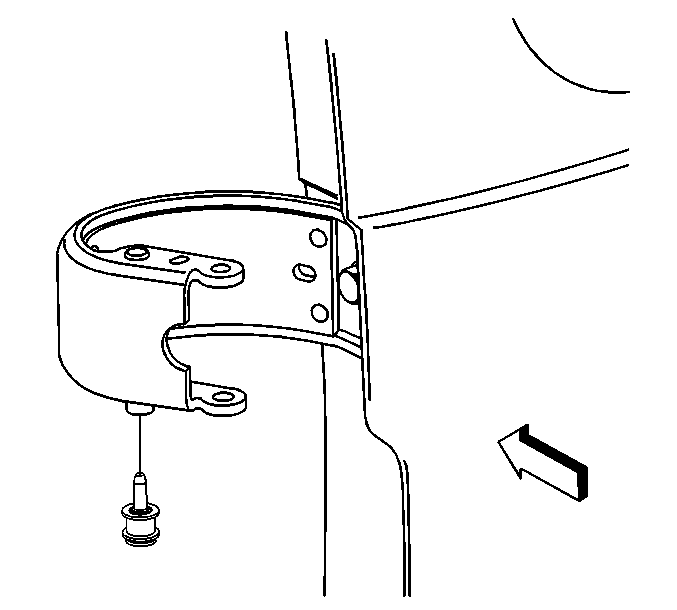
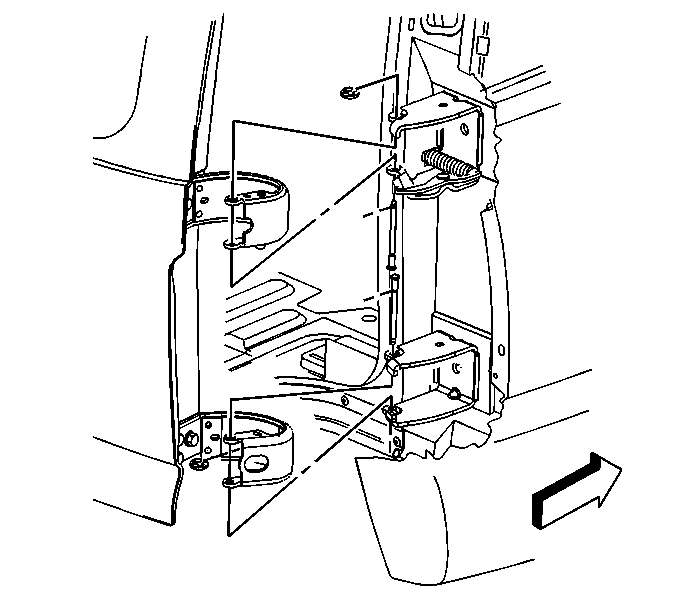
- Remove the bolts in roller assembly from upper door side hinge.
- Remove the upper and lower hinge pin retainer clips.
- Using a soft-faced hammer and locking pliers, remove the lower hinge pin.
- Install a temporary bolt through the lower hinges in order to hold the door in place during the removal of the upper hinge pin.
- Remove the upper hinge pin.
- Remove the bolt from the lower hinge pin hole.
- With an assistant, remove the door from the vehicle.
Installation Procedure
- Install the upper and lower hinge pin retainer clips to the hinge.
- Install the bolts on the roller assembly to the upper door side hinge.
- With an assistant, position the door to the vehicle.
- Install a bolt through the lower hinge pin holes.
- Using a soft-faced hammer and a pair of locking pliers, install the upper hinge pin with the pointed end of the pin pointing upward.
- Remove the temporary bolt from the lower hinge.
- Install the lower hinge pin with the pointed end of the pin pointing downward.
- Remove the cloth-backed tape from the door and the body pillar.
- Install the taillamps. Refer to Tail/Turn Signal Lamp Replacement in Lighting Systems.
- Install the check assembly hinge pin with the pointed end of the pin pointing downward.
- Connect the negative battery cable, as necessary on vehicles with power components. Refer to Battery Negative Cable Disconnection and Connection in Engine Electrical.
