Tools Required
| • | J 25025 Guide Pins |
| • | J 36850 Transjel® |
Removal Procedure
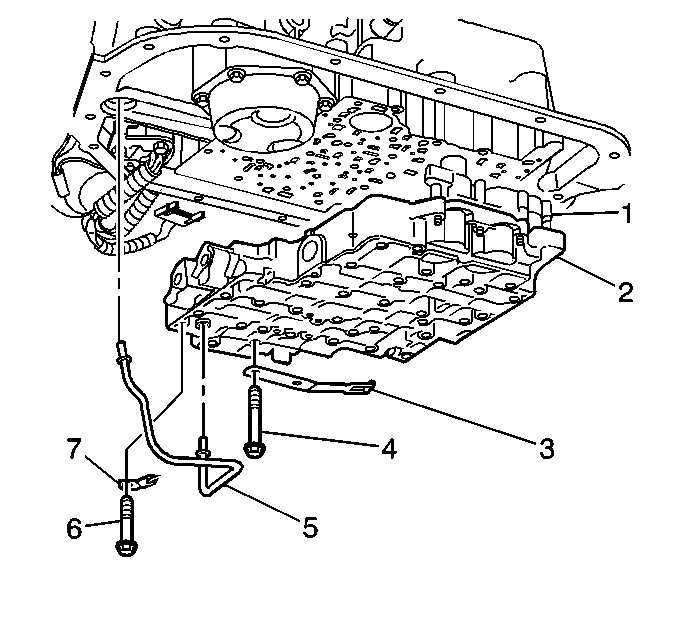
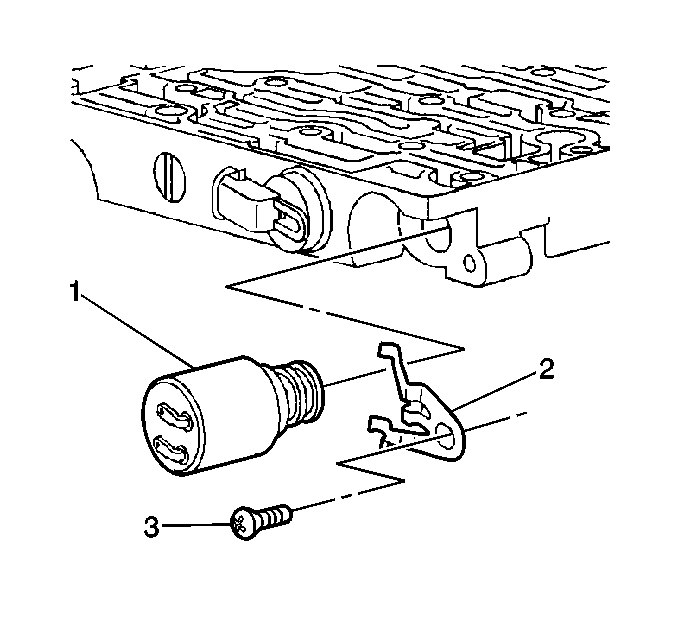
- Remove the transmission fluid pressure (TFP) manual valve position switch bolts (1) and the TFP valve position switch (2).
- Remove the control valve assembly bolts (4).
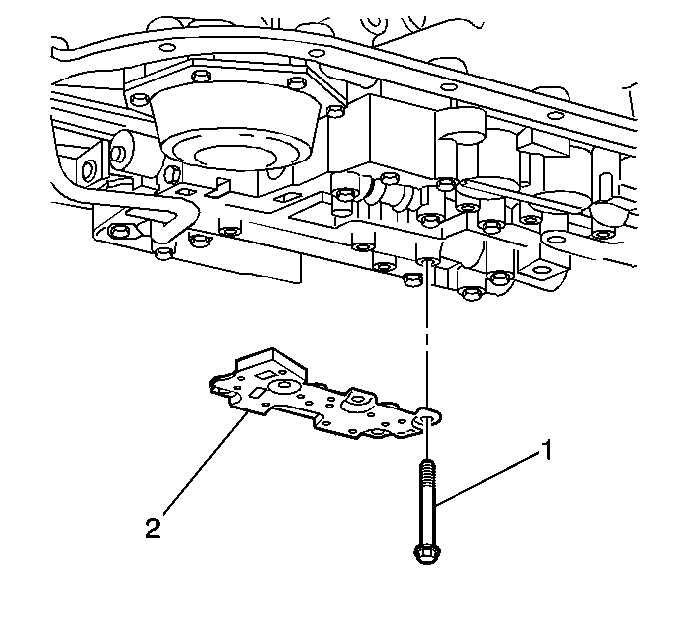
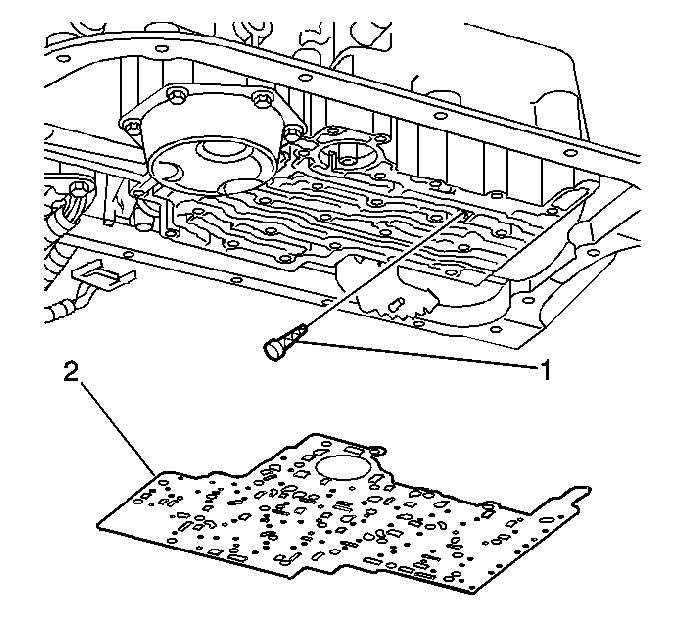
- Remove the fluid level indicator stop bracket.
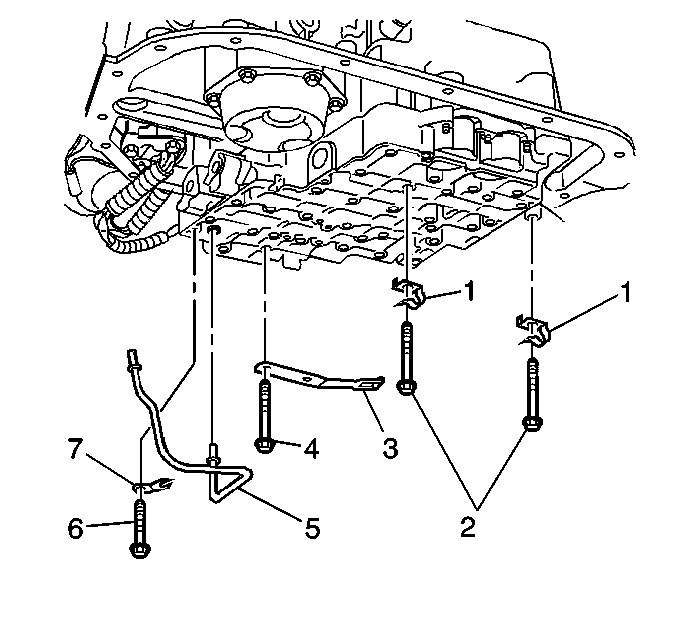
- Remove the lube oil pipe retainer (7) and the clamp.
- Remove the lube oil pipe (5).
- Remove the manual shaft detent spring assembly (3).
- Remove the control valve assembly (2) which includes the following:
- Remove the manual valve (1) from the control valve body to prevent any damage.
- Inspect the manual valve for nicks and burrs.
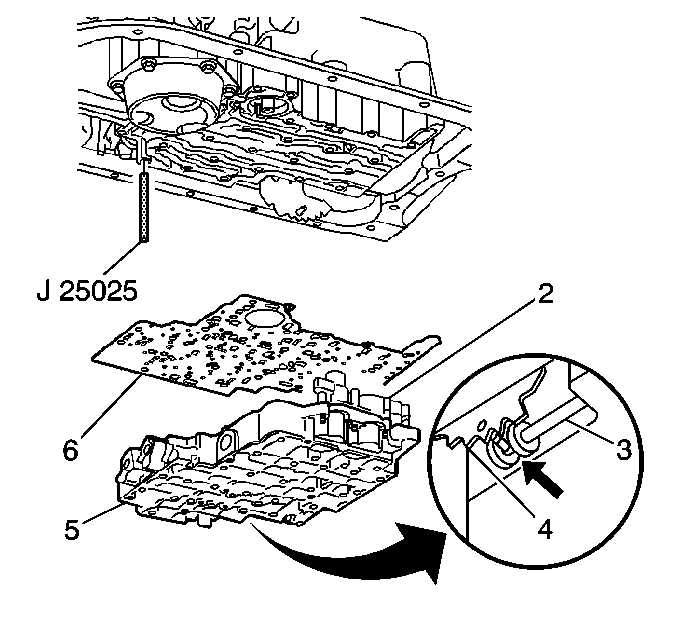
- Remove the spacer plate to case gasket (2) from the case. The gasket may stick to the spacer plate.
- Remove the PWM screen (1) from the case passages.
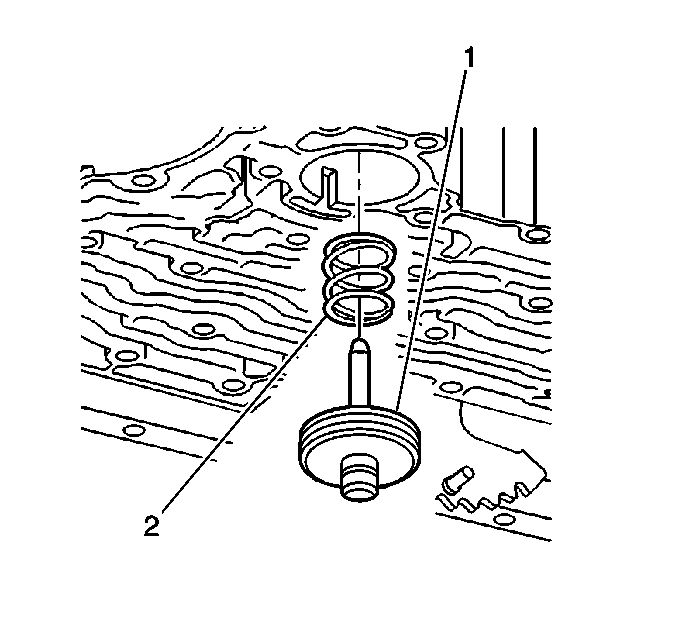
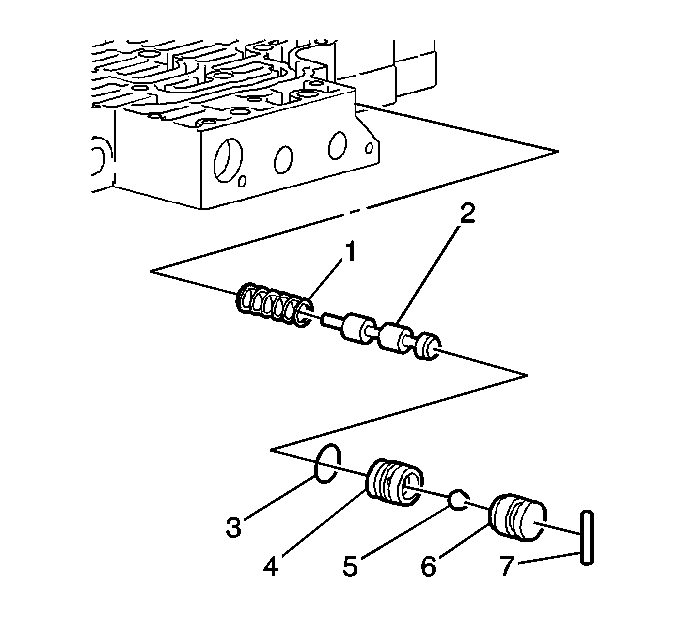
- Remove the manual 2-1 band servo assembly (1).
- Remove the servo piston cushion spring (2).
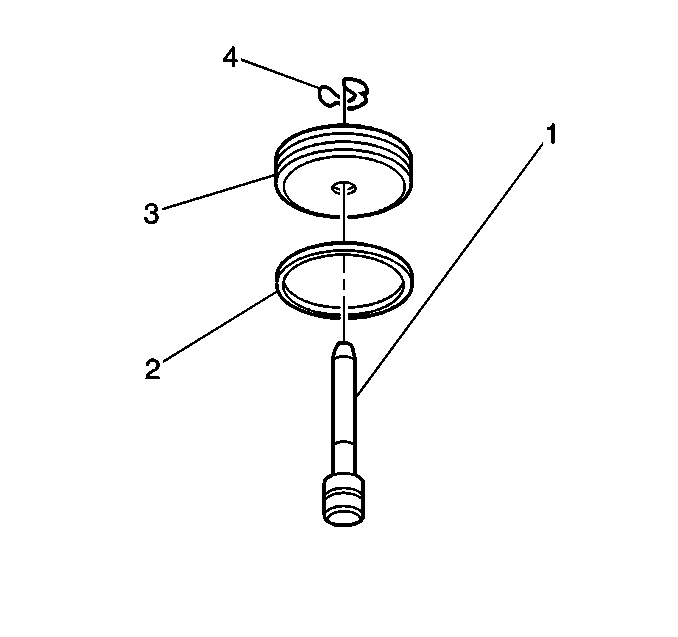
- Remove the manual 2-1 band servo piston pin retainer ring (4).
- Remove the manual 2-1 band servo piston pin (1).
- Remove the manual 2-1 band servo piston seal (2).
- Remove the eight checkballs (nine checkballs for some models).
Important: The five O-rings should remain attached to the TFP valve position switch.
| • | The accumulator housing assembly (1) |
| • | The control valve assembly to the spacer plate gasket |
| • | The spacer plate |
| • | The accumulator gasket |
Important: Do not use a magnet in order to remove the checkballs. Using a magnet to remove the checkballs may magnetize the checkballs, causing metal particles to stick.
Control Valve Body Disassemble
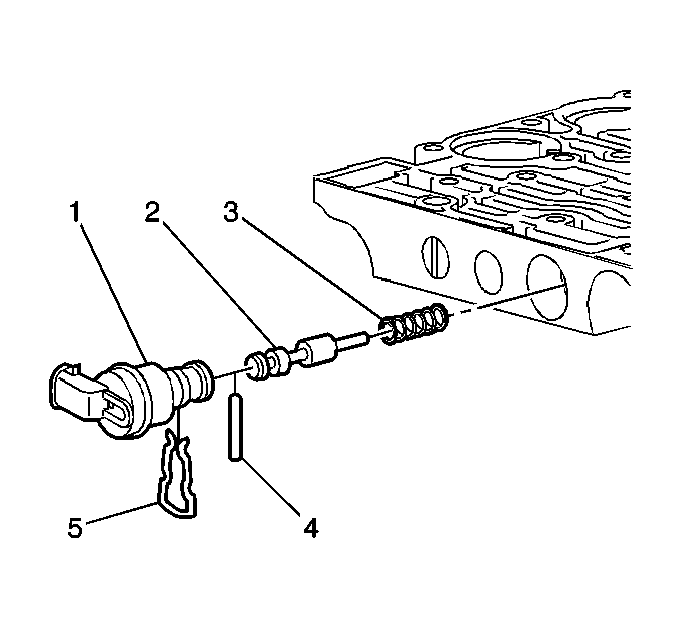
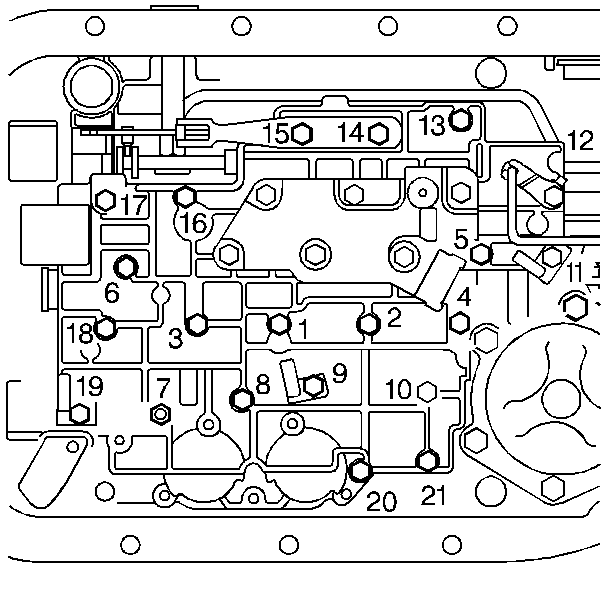
- Remove the pressure control solenoid clamp bolt (3) and clamp (2).
- Remove the pressure control solenoid (1).
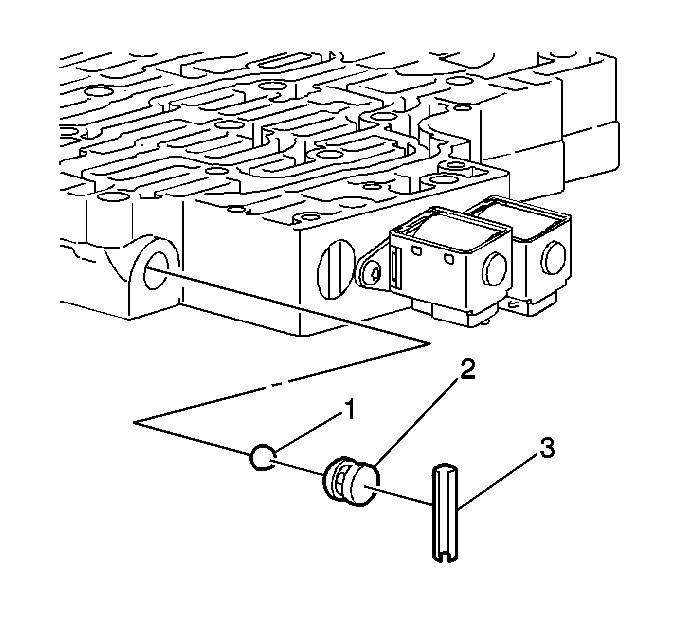
- Remove the TCC PWM solenoid retainer (5).
- Remove the TCC PWM solenoid (1).
- Remove the TCC regulator apply valve pin (4). Use a drill bit to remove the spring pin.
- Remove the TCC regulator apply valve (2).
- Remove the TCC regulator apply valve spring (3).
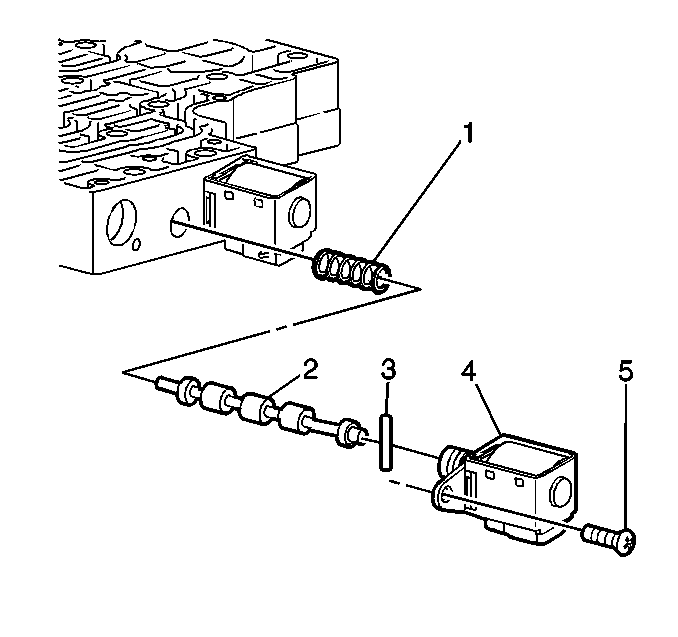
- Remove the actuator feed limit valve spring retainer (1).
- Remove the actuator feed limit valve spring (2).
- Remove the actuator feed limit valve (3).
- Remove the accumulator valve bore plug retainer pin (1).
- Remove the accumulator valve bore plug (2).
- Remove the accumulator valve spring (3).
- Remove the accumulator valve (4).
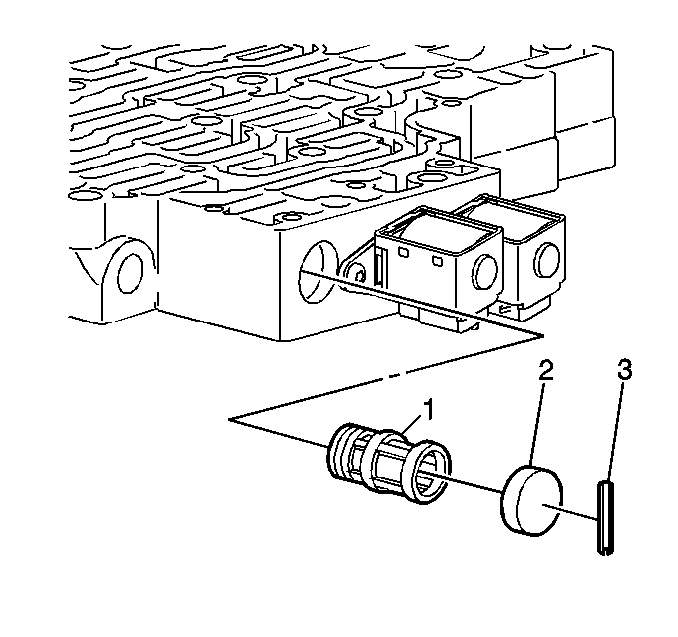
- Remove the pressure control solenoid valve fluid filter (1).
- Remove the low-reverse ball valve seat pin (3).
- Remove the low-reverse ball valve seat (2).
- Remove the low-reverse ball valve (1).
- Remove the shift valve fluid filter bore plug pin (3).
- Remove the shift valve fluid filter bore plug (2).
- Remove the shift solenoid valve fluid filter (1).
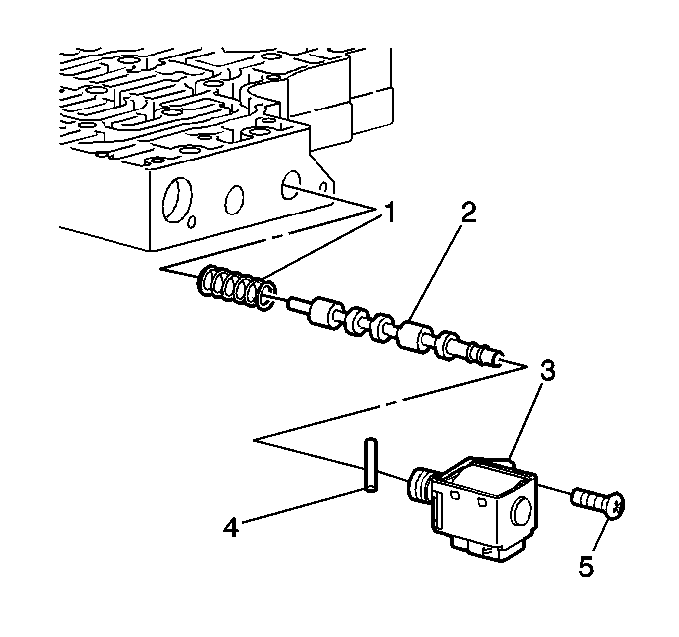
- Remove the 1-2 shift solenoid valve bolt (5).
- Remove the 1-2 shift solenoid valve (4).
- Remove the 1-2 shift valve pin (3).
- Remove the 1-2 shift valve (2).
- Remove the 1-2 shift valve spring (1).
- Remove the 2-3 shift solenoid valve bolt (5).
- Remove the 2-3 shift solenoid valve (3).
- Remove the 2-3 shift valve pin (4).
- Remove the 2-3 shift valve (2).
- Remove the 2-3 shift valve spring (1).
- Remove the 3rd-reverse ball valve seat pin (7).
- Remove the reverse ball valve bushing (6).
- Remove the 3rd-reverse ball valve (5).
- Remove the 3rd ball valve bushing (4) and 3rd ball valve bushing seal (3).
- Remove the 3-4 shift valve (2).
- Remove the 3-4 shift valve spring (1).

Control Valve Body Assemble
- Install the 3-4 shift valve spring (1).
- Install the 3-4 shift valve (2).
- Install the 3rd ball valve bushing (4) and 3rd ball valve bushing seal (3).
- Install the 3rd-reverse ball valve (5).
- Install the reverse ball valve bushing (6).
- Install the 3rd-reverse ball valve seat pin (7).
- Install the 2-3 shift valve spring (1).
- Install the 2-3 shift valve (2).
- Install the 2-3 shift valve pin (4).
- Install the 2-3 shift solenoid valve (3).
- Install the 2-3 shift solenoid valve bolt (5).
- Install the 1-2 shift valve spring (1).
- Install the 1-2 shift valve (2).
- Install the 1-2 shift valve pin (3).
- Install the 1-2 shift solenoid valve (4).
- Install the 1-2 shift solenoid valve bolt (5).
- Install the shift solenoid valve fluid filter (1).
- Install the shift valve fluid filter bore plug (2).
- Install the shift valve fluid filter bore plug pin (3).
- Install the low-reverse ball valve (1).
- Install the low-reverse ball valve seat (2).
- Install the low-reverse ball valve seat pin (3).
- Install the pressure control solenoid valve fluid filter (1).
- Install the accumulator valve (4).
- Install the accumulator valve spring (3).
- Install the accumulator valve bore plug (2).
- Install the accumulator valve bore plug retainer pin (1).
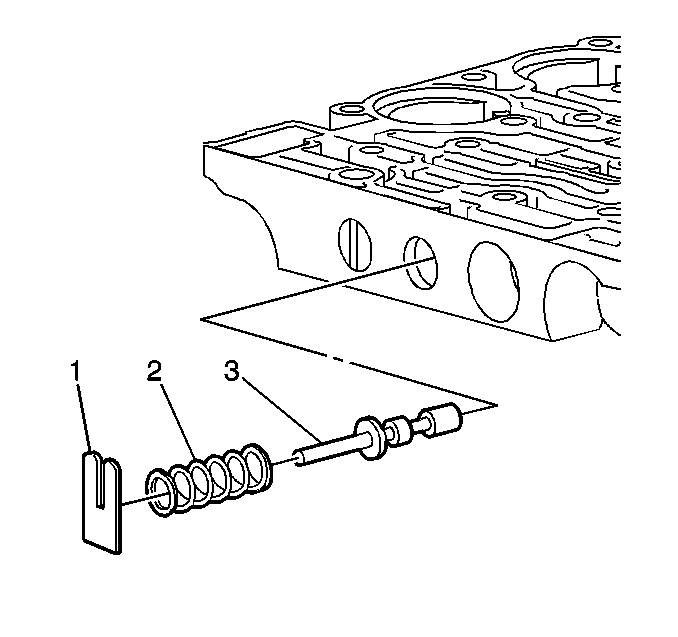
- Install the actuator feed limit valve (3).
- Install the actuator feed limit valve spring (2).
- Install the actuator feed limit valve spring retainer (1).
- Install the TCC regulator apply valve spring (3).
- Install the TCC regulator apply valve (2).
- Install the TCC regulator apply valve pin (4).
- Install the TCC PWM solenoid valve (1).
- Install the TCC PWM solenoid valve retainer (5).
- Install the pressure control solenoid valve (1) with the electrical connector facing away from the control valve body.
- Install the pressure control solenoid clamp (2).
- Install the pressure control solenoid clamp bolt (3).
Notice: Refer to Fastener Notice in the Preface section.
Tighten
Tighten the bolt to 8 N·m (71 lb in).
Tighten
Tighten the bolt to 8 N·m (71 lb ft).
Tighten
Tighten the bolt to 8 N·m (71 lb in).
Installation Procedure
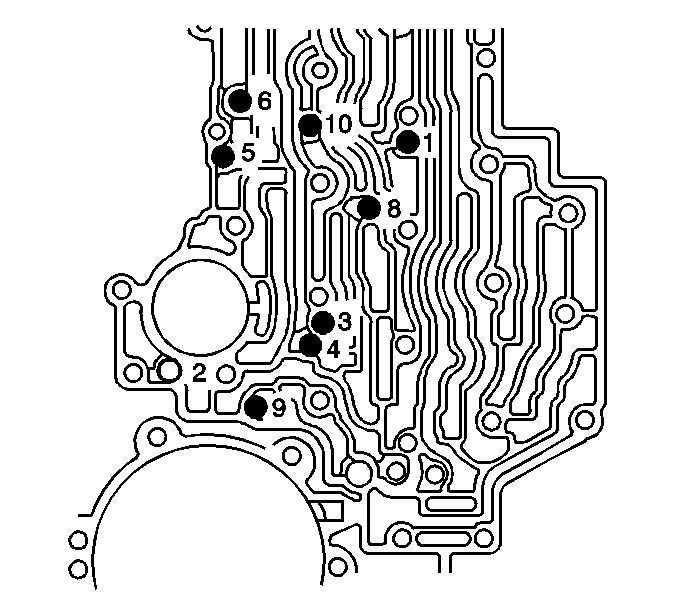
- Install the 8 checkballs (9 checkballs for some models) into the control valve body.
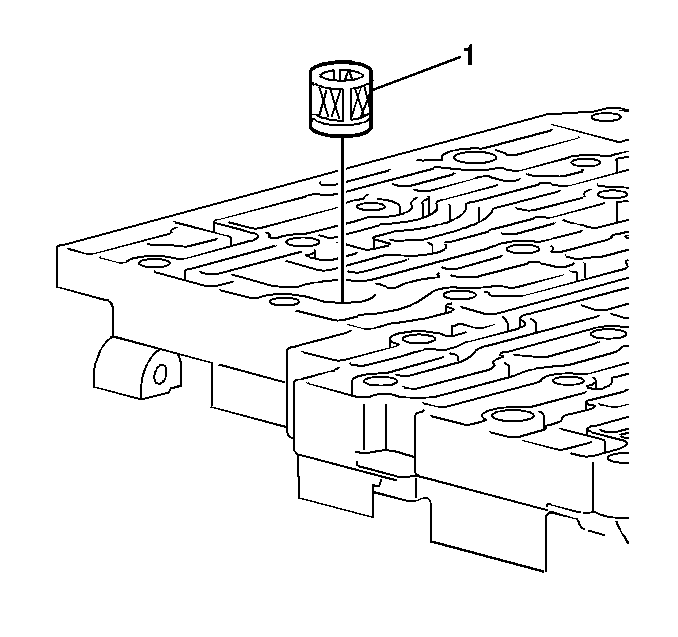
- Install the PWM screen into the control valve body.
- Install a new manual 2-1 band servo piston seal (2) onto the manual 2-1 band servo piston (3).
- Install the manual 2-1 band servo piston pin (1) into the manual 2-1 band servo piston (3).
- Install the manual 2-1 band servo piston pin retainer ring (4).
- Install the manual 2-1 band servo piston cushion spring (2).
- Install the manual 2-1 band servo piston assembly (1).
- Install the manual valve (1) into the control valve body.
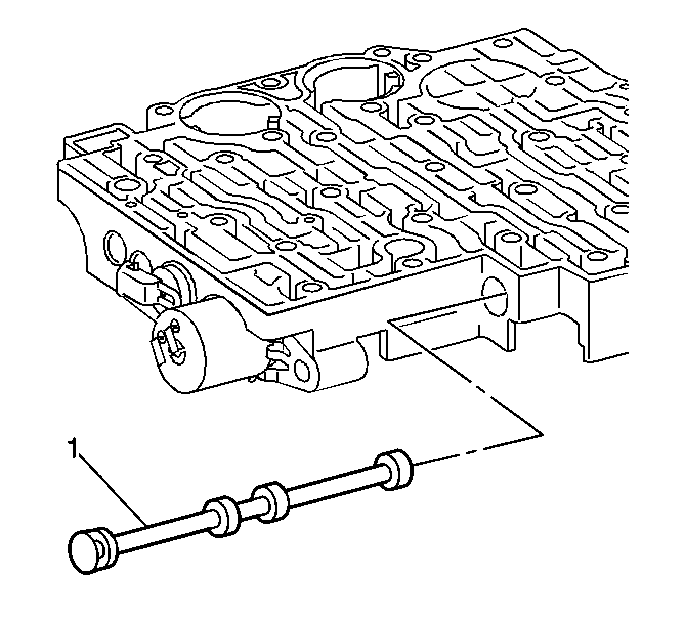
- In order to aid in alignment and assembly, install J 25025 .
- Install the control valve body gasket (6).
- Install the control valve body assembly (5). Attach the manual valve to the detent lever while installing the control valve body assembly.
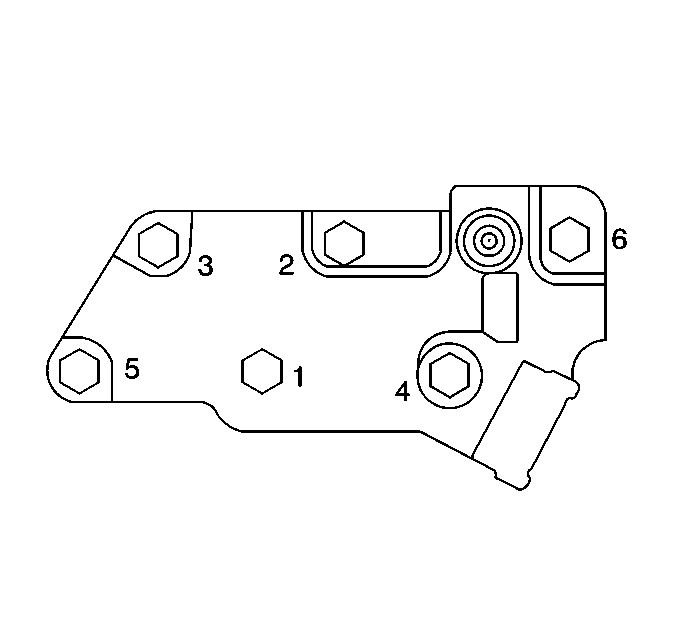
- Install the transmission fluid pressure manual valve position switch (2).
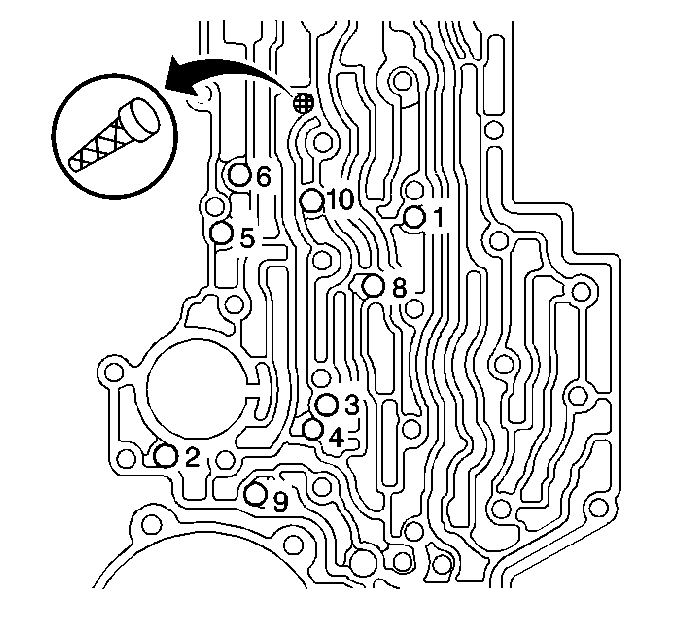
- Install the transmission fluid pressure manual valve position switch bolts (1) finger tight.
- Tighten the bolts in the order shown.
- Remove the J 25025 .
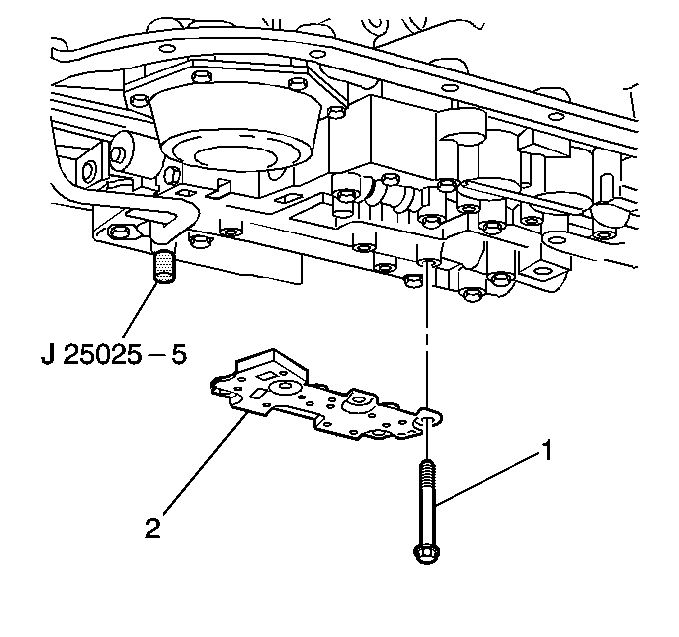
- Install the manual shaft detent roller and spring assembly (3) and bolts (2 and 4).
- Install the two wiring harness clips (1) and bolts (2).
- Install the wiring harness clip (1) and bolts (2).
- Install the lube oil pipe (5) with the short end into the control valve body.
- Install the lube oil pipe retainer (7) and the bolt (6).
- Install the control valve body bolts.
- Install the remaining control valve body bolts.
- Reset the TAP values. Refer to Adapt Function.
| • | The checkball marked as number 2, is used on RCP, RDP, ZJP and ZLP models only |
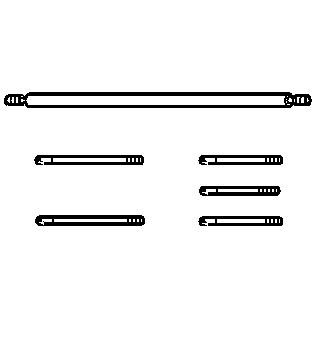
| • | To hold the checkballs in place, use the J 36850 |
Important: Ensure that the tapered end of the manual 2-1 band servo piston pin contacts the manual 2-1 band.
Tighten
Tighten the bolts to 11 N·m (97 lb in).
Tighten
Tighten the bolts in the order shown to 11 N·m (97 lb in).
Tighten
Tighten the remaining bolts to 11 N·m (97 lb in).
Important: It is recommended that transmission adaptive pressure (TAP) information be reset.
Resetting the TAP values using a scan tool will erase all learned values in all cells. As a result, The ECM, PCM or TCM will need to relearn TAP values. Transmission performance may be affected as new TAP values are learned.