Tools Required
| • | J 8062 Valve Spring Compressor |
| • | J 43105 Valve Stem Seal Installer |
Checking Valve Spring Installed Height
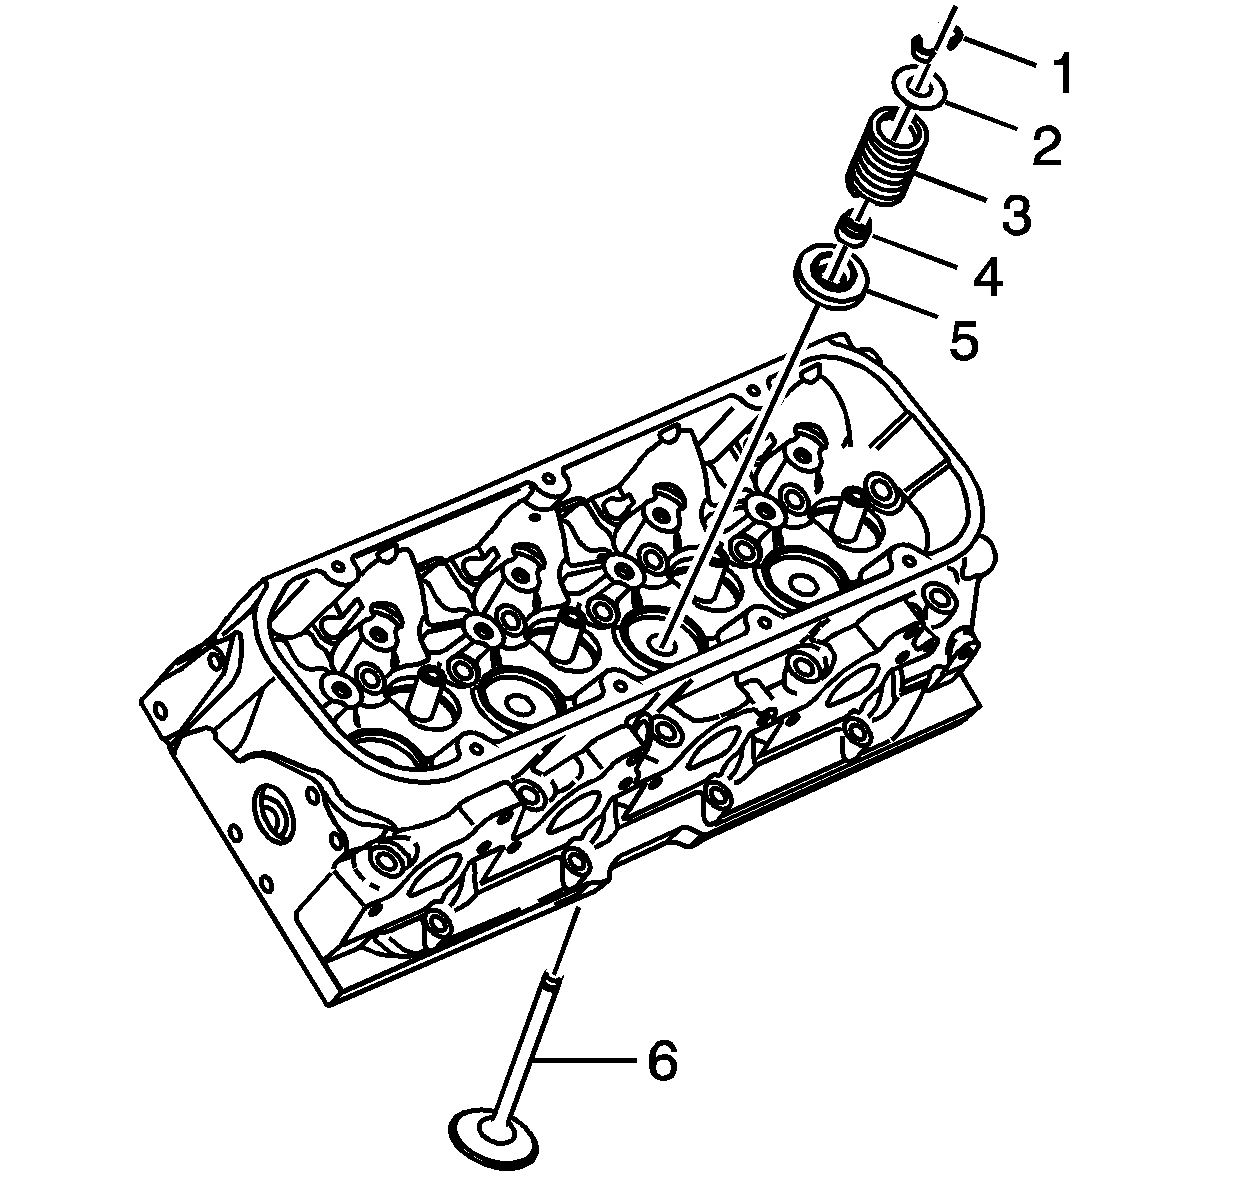
- Install the valve rotator (3), the valve (4), the valve spring cap (1) and the valve stem keys (5) into the cylinder head.
- Using a snap gage or inside micrometer, measure the distance from the top of the valve rotator to the bottom of the valve spring cap. Refer to Engine Mechanical Specifications for proper valve spring installed height specifications.
- Install a valve spring seat shim if the valve spring installed height measurement is above the specification.
- Recheck the valve spring installed height, replace the cylinder head if the valve spring installed height cannot be obtained.
Important:
• Never shim the spring to obtain an installed height under the specified
amount. • Install the valve spring seat shims under the rotator, between the rotator
and the cylinder head spring seat. • Add a maximum of one valve spring seat shim, up to 0.726 mm (0.030 in)
thick to achieve the valve spring installed height specification. • The combination of valve spring seat shims to correct valve spring installed
height and valve spring tension should not exceed 1.524 mm (0.060 in)
thick.
Valve Installation
- Lubricate the valve stems (6) with clean engine oil.
- Insert the valves into their proper locations.
- Install the necessary valve spring shims onto the cylinder head, if applicable.
- Lubricate the rotators (5) with clean engine oil.
- Install the rotators over the guide and on top of the cylinder head or valve spring shims, if applicable.
- Lubricate the valve stem seal and the outside diameter of the valve guide with clean engine oil.
- Install the valve stem oil seals (2) over the valve tip and onto the valve guides using J 43105 . Tap the valve stem seal onto the valve guide until the J 43105 fully seats the seal.
- Install the valve springs (3).
- Install the valve spring caps (2).
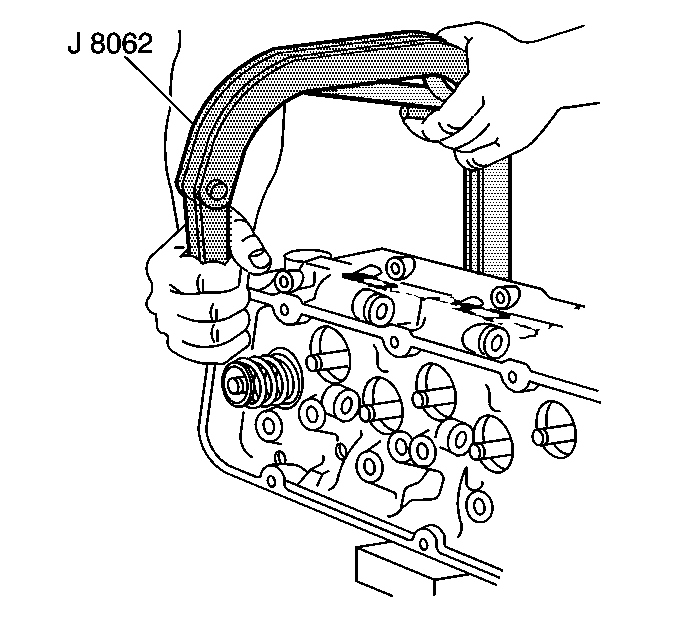
- Use the J 8062 in order to compress the valve spring. Compress the spring enough to clearly see the valve stem key grooves of the valve.
- Install the valve stem keys.
- Release and remove the J 8062 .
- Lightly tap the end of the valve stem with a plastic-faced hammer to seat the keys.
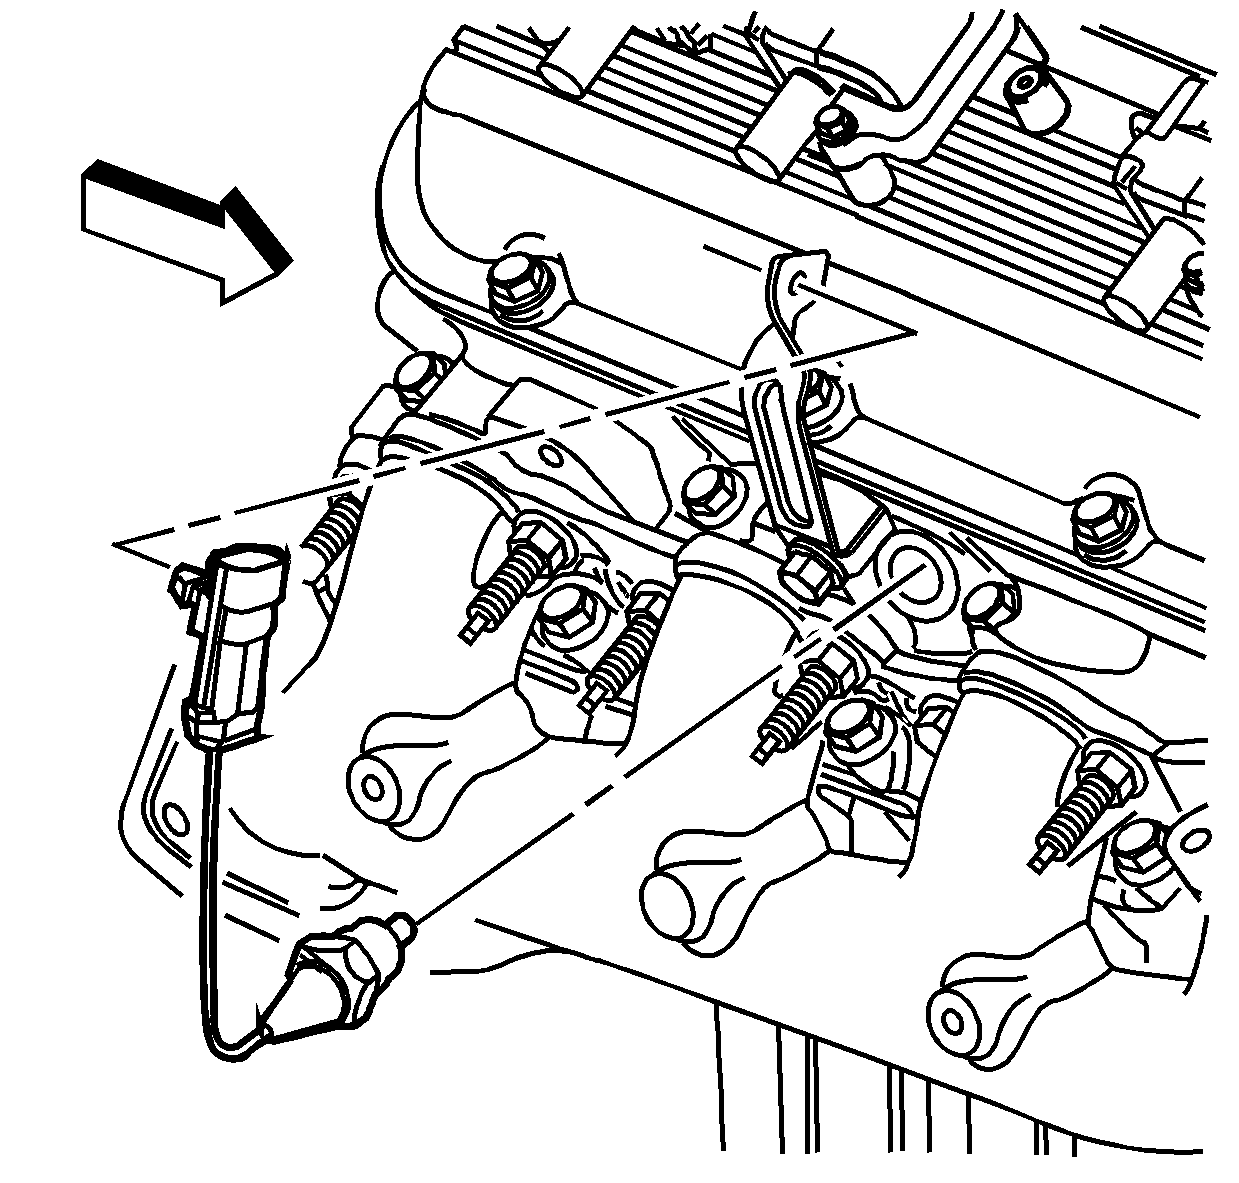
- Apply sealant GM P/N 12346004, (Canadian P/N 10953480), or equivalent to the threads of the engine coolant temperature (ECT) sensor.
- Install the ECT sensor into the right cylinder head.
- Install the ECT sensor bracket and bolt.
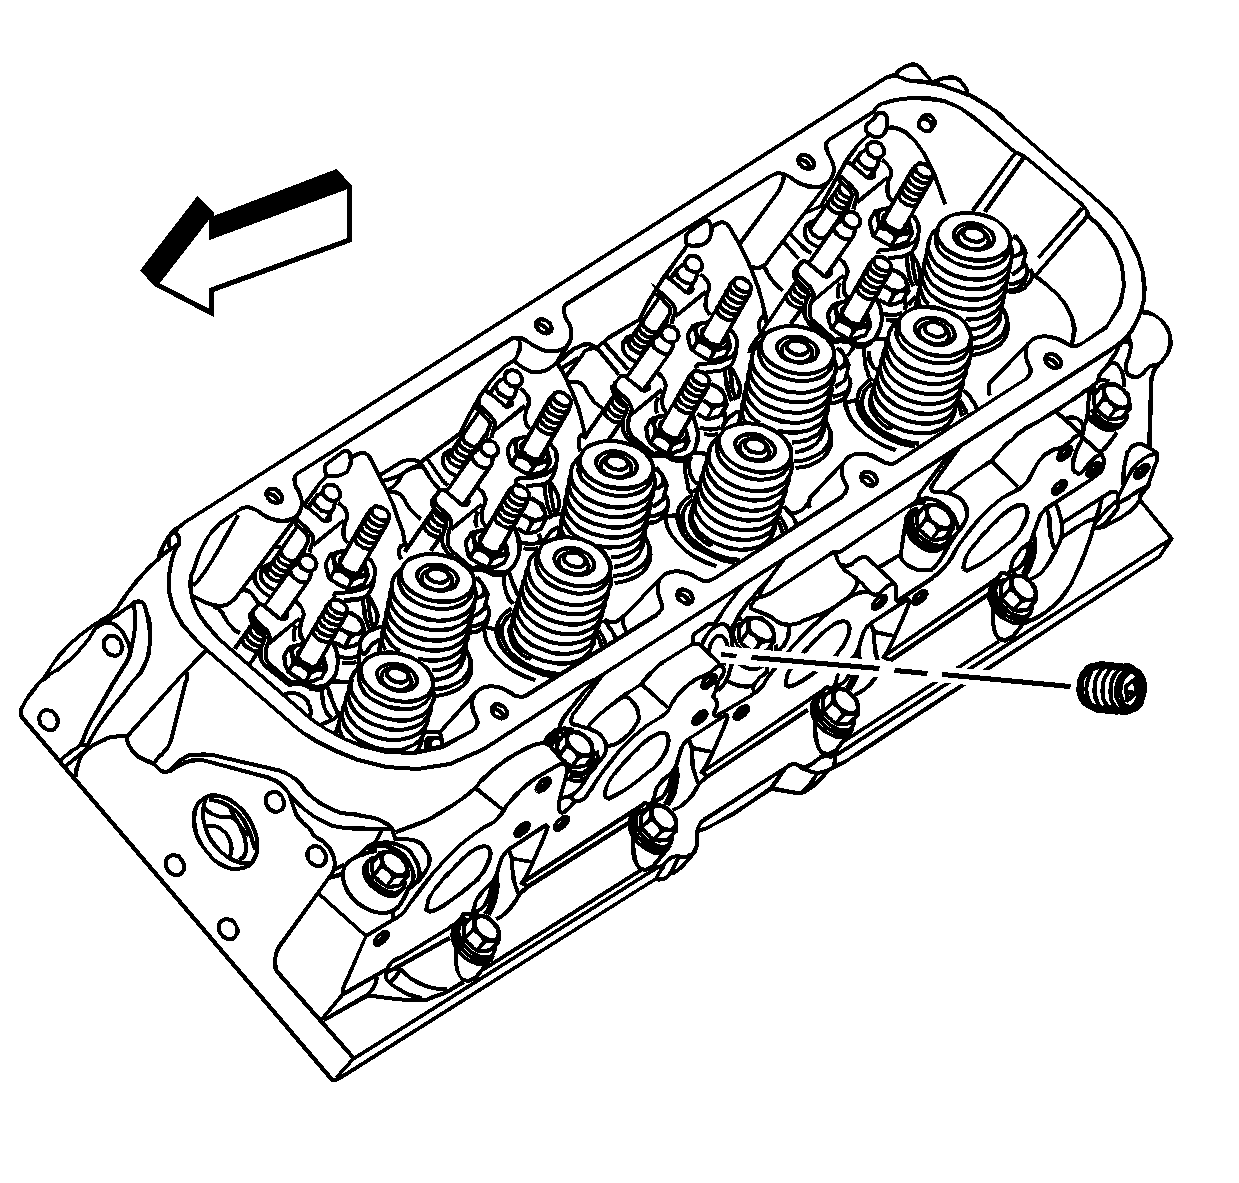
- Install the cylinder head coolant hole plug into the left cylinder head.
Caution: Wear safety glasses in order to avoid eye damage.
Caution: Compressed valve springs have high tension against the valve spring compressor. Valve springs that are not properly compressed by or released from the valve spring compressor can be ejected from the valve spring compressor with intense force. Use care when compressing or releasing the valve spring with the valve spring compressor and when removing or installing the valve stem keys. Failing to use care may cause personal injury.
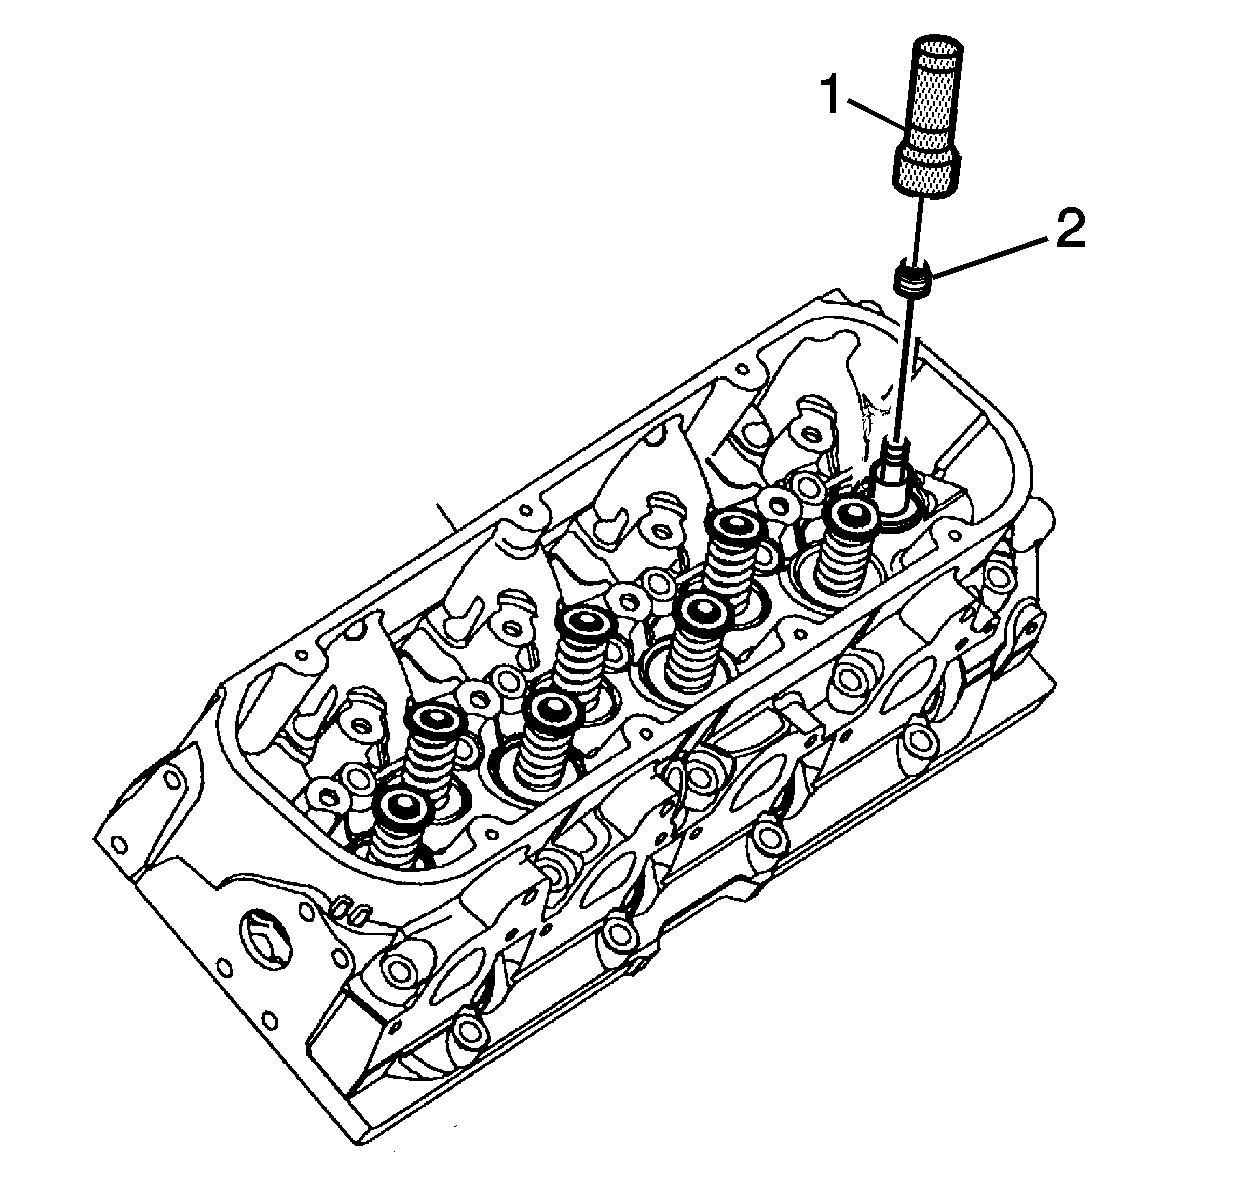
Important: When installing valve stem oil seals onto the valve guides, be careful not to tear the seal lip.
Important: When installing valve seals, J 43105 must be used to achieve correct installation. Failure to use J 43105 may cause excessive oil consumption.
Important: When installing valve springs, the small end of the valve spring must be installed up.
| • | Use grease to hold the keys in place. |
| • | Ensure that the keys seat properly in the upper groove of the valve stem. |
Notice: Use the correct fastener in the correct location. Replacement fasteners must be the correct part number for that application. Fasteners requiring replacement or fasteners requiring the use of thread locking compound or sealant are identified in the service procedure. Do not use paints, lubricants, or corrosion inhibitors on fasteners or fastener joint surfaces unless specified. These coatings affect fastener torque and joint clamping force and may damage the fastener. Use the correct tightening sequence and specifications when installing fasteners in order to avoid damage to parts and systems.
Tighten
Tighten the ECT sensor to 35 N·m (26 lb ft).
Tighten
Tighten the ECT sensor bracket bolt to 50 N·m (37 lb ft).
Tighten
Tighten the cylinder head coolant hole plug to 35 N·m (26 lb ft).
