For 1990-2009 cars only
Fuel Hose/Pipes Replacement - Chassis Front Tank
Removal Procedure
- Relieve the fuel system pressure. Refer to the Fuel Pressure Relief .
- Clean all the fuel pipe connections and the surrounding areas before disconnecting the pipes in order to avoid possible contamination of the fuel system.
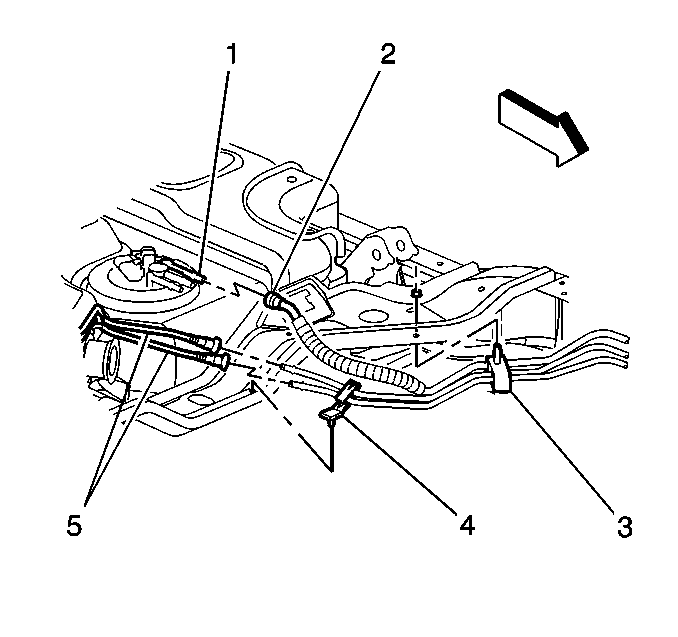
- Disconnect the fuel feed and return pipes (1,2) from the fuel rail. Refer to Metal Collar Quick Connect Fitting Service .
- Cap the fuel rail pipes.
- Raise the vehicle. Refer to Lifting and Jacking the Vehicle in General Information.
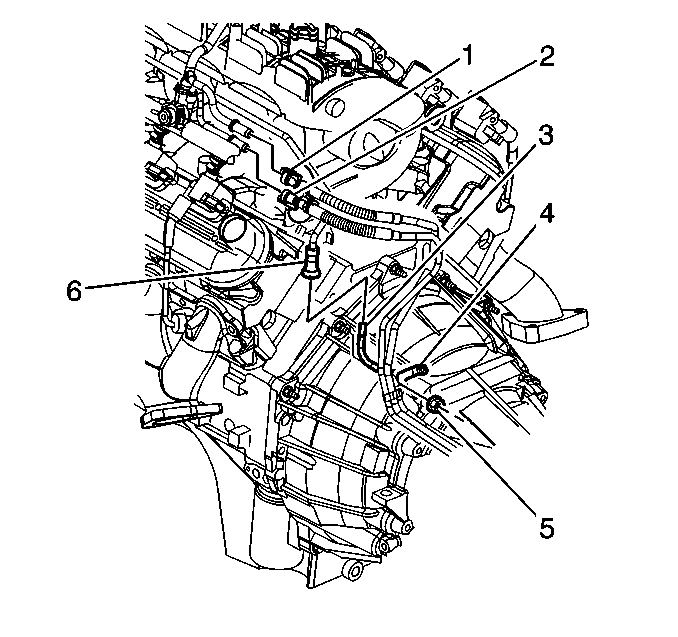
- Remove the fuel pipes from the bellhousing stud clip (4).
- Remove the fuel pipes from the transmission bracket clip.
- Remove the fuel pipes from the transfer case bracket clip for the 4-wheel drive only.
- Remove the fuel tank. Refer to Fuel Tank Replacement .
- Note the position of the fuel pipes for aid in installation.
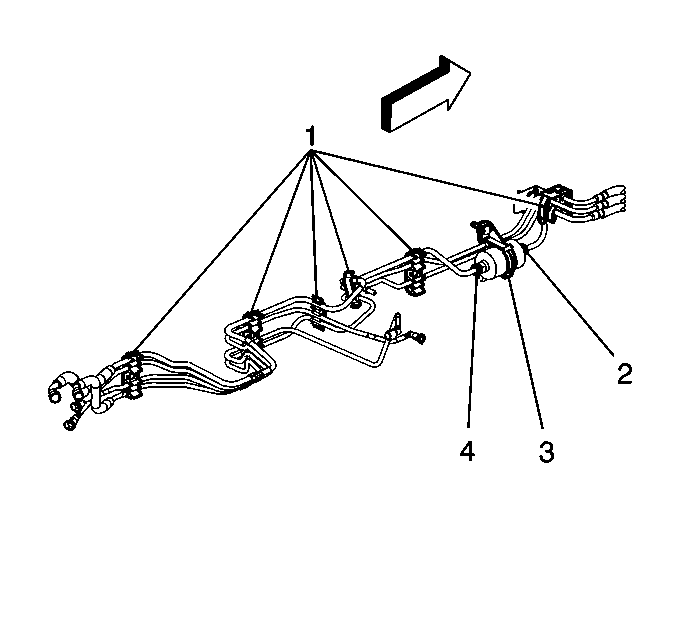
- Disconnect the fuel feed pipe from the fuel filter inlet (4) and outlet (2).
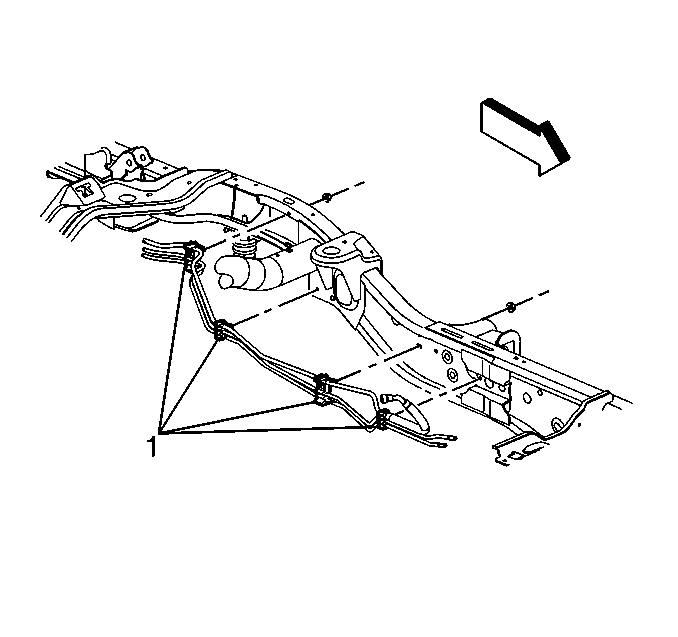
- Remove the fuel pipes from the retaining clips (1).
- Remove the fuel pipes.
Installation Procedure
- Install the fuel pipes into the retaining clips (1).
- Connect the fuel feed pipes to the fuel filter. Refer to Fuel Filter Replacement .
- Install the fuel tank. Refer to Fuel Tank Replacement .
- Install the fuel pipes into the transfer case bracket clip, for the 4-wheel drive only.
- Install the fuel pipes into the transmission bracket clip.
- Install the fuel pipes into the bellhousing stud clip (4).
- Lower the vehicle.
- Remove the caps from the fuel rail pipes.
- Connect the fuel feed and return pipes (1, 2) to the fuel rail.
- Tighten the fuel filler cap.
- Connect the negative battery cable. Refer to Battery Negative Cable Disconnection and Connection in Engine Electrical.
- Inspect for leaks using the following procedure:
- Install the engine sight shield.
Important:
• When replacing the fuel pipes, always replace them with original
equipment or parts that meet the GM specifications for those parts.
The replacement pipes must have the same type of fittings as the original
pipes in order to ensure the integrity of the connection. • DO NOT use copper or aluminum tubing to replace steel tubing.
Only tubing meeting the 124-M specification or its equivalent is capable
of meeting all pressure, corrosion and vibration characteristics
necessary to ensure the durability standard required.
| 12.1. | Turn ON the ignition, with the engine OFF, for 2 seconds. |
| 12.2. | Turn OFF the ignition for 10 seconds. |
| 12.3. | Turn ON the ignition, with the engine OFF. |
| 12.4. | Inspect for fuel leaks. |
Fuel Hose/Pipes Replacement - Chassis Rear Tank
Removal Procedure
- Remove the front fuel tank. Refer to Fuel Tank Replacement .
- Disconnect the fuel pipe (2) from the rear fuel tank.
- Note the position of the fuel pipe for aid in installation.
- Remove the fuel pipe from the retaining clip (3).
- Remove the fuel pipe from the retaining clips (1).
- Cap the fuel pipes in order to prevent possible fuel system contamination.
Installation Procedure
- Remove the caps from the fuel pipes.
- Install the fuel pipe into the retaining clips (1).
- Connect the fuel pipe (2) at the rear fuel tank.
- Install the fuel pipe into the retaining clip (3).
- Install the fuel tank. Refer to Fuel Tank Replacement .
