Removal Procedure
- Raise and support the vehicle. Refer to
Lifting and Jacking the Vehicle.
- Before removing the air tubes, perform the following steps:
| • | Turn the ignition On, with the engine OFF. |
| • | With the scan tool, exhaust the air from the system for at least 60 seconds. |
Note: Clean the components and the surrounding area to prevent dirt from entering the air system before disconnecting the air hose from the air compressor.
Note: There will be a minimal amount still in the air tubes.
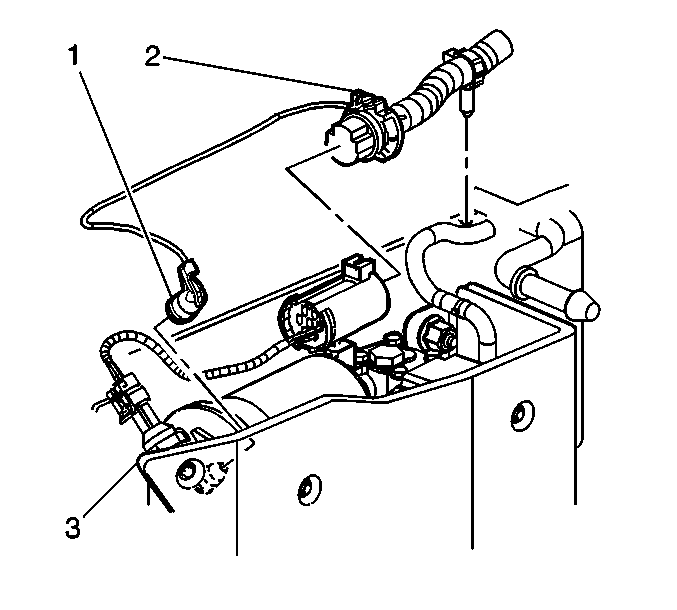
- Disconnect the air tube (1) from the air dryer.
- Disconnect the electrical connection (2).
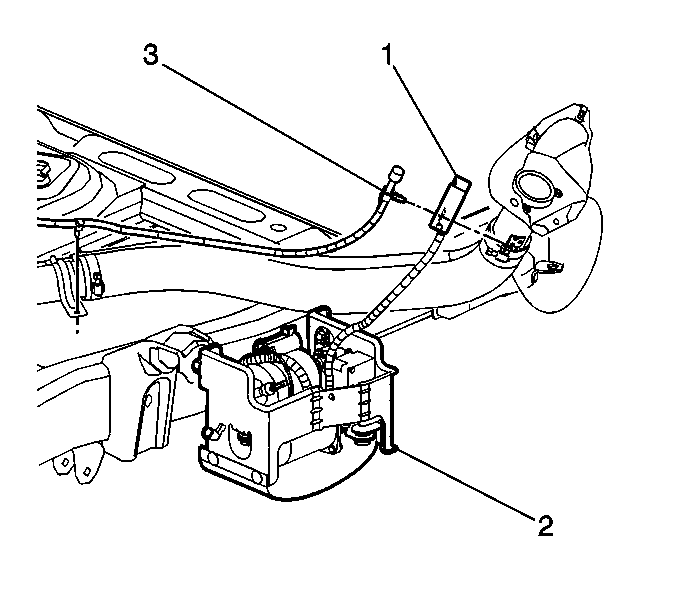
- Remove the air inlet and hose (1) from the fuel filler neck bracket.
- Loosen the mounting nuts.
- Slide the air compressor (2) rearward to clear the frame slots.
- Remove the air compressor from the vehicle.
Installation Procedure
- Install the air compressor (2) to the vehicle.
Caution: Refer to Fastener Caution in the Preface section.
- Slide the air compressor forward to secure the fasteners into the frame slots and install the mounting nuts. Tighten the bolts to
15 N·m (11 lb ft)
- Install the air inlet hose (1) to the fuel filler neck bracket.
- Connect the air tube (1) to the air dryer.
- Connect the electrical connection (2).
- Lower the vehicle.
- perform the following procedure after the air compressor has been replaced.
| • | Turn the ignition ON, with the engine OFF. |
| • | With the scan tool, operate the air compressor for 30 seconds or until the rear of the vehicle begins to rise. |
| • | Cycle the ignition OFF, then back ON, with the engine ON to allow the air suspension system to regain the desired rear suspension position. |
