For 1990-2009 cars only
Cooling Fan and Shroud Replacement HP2
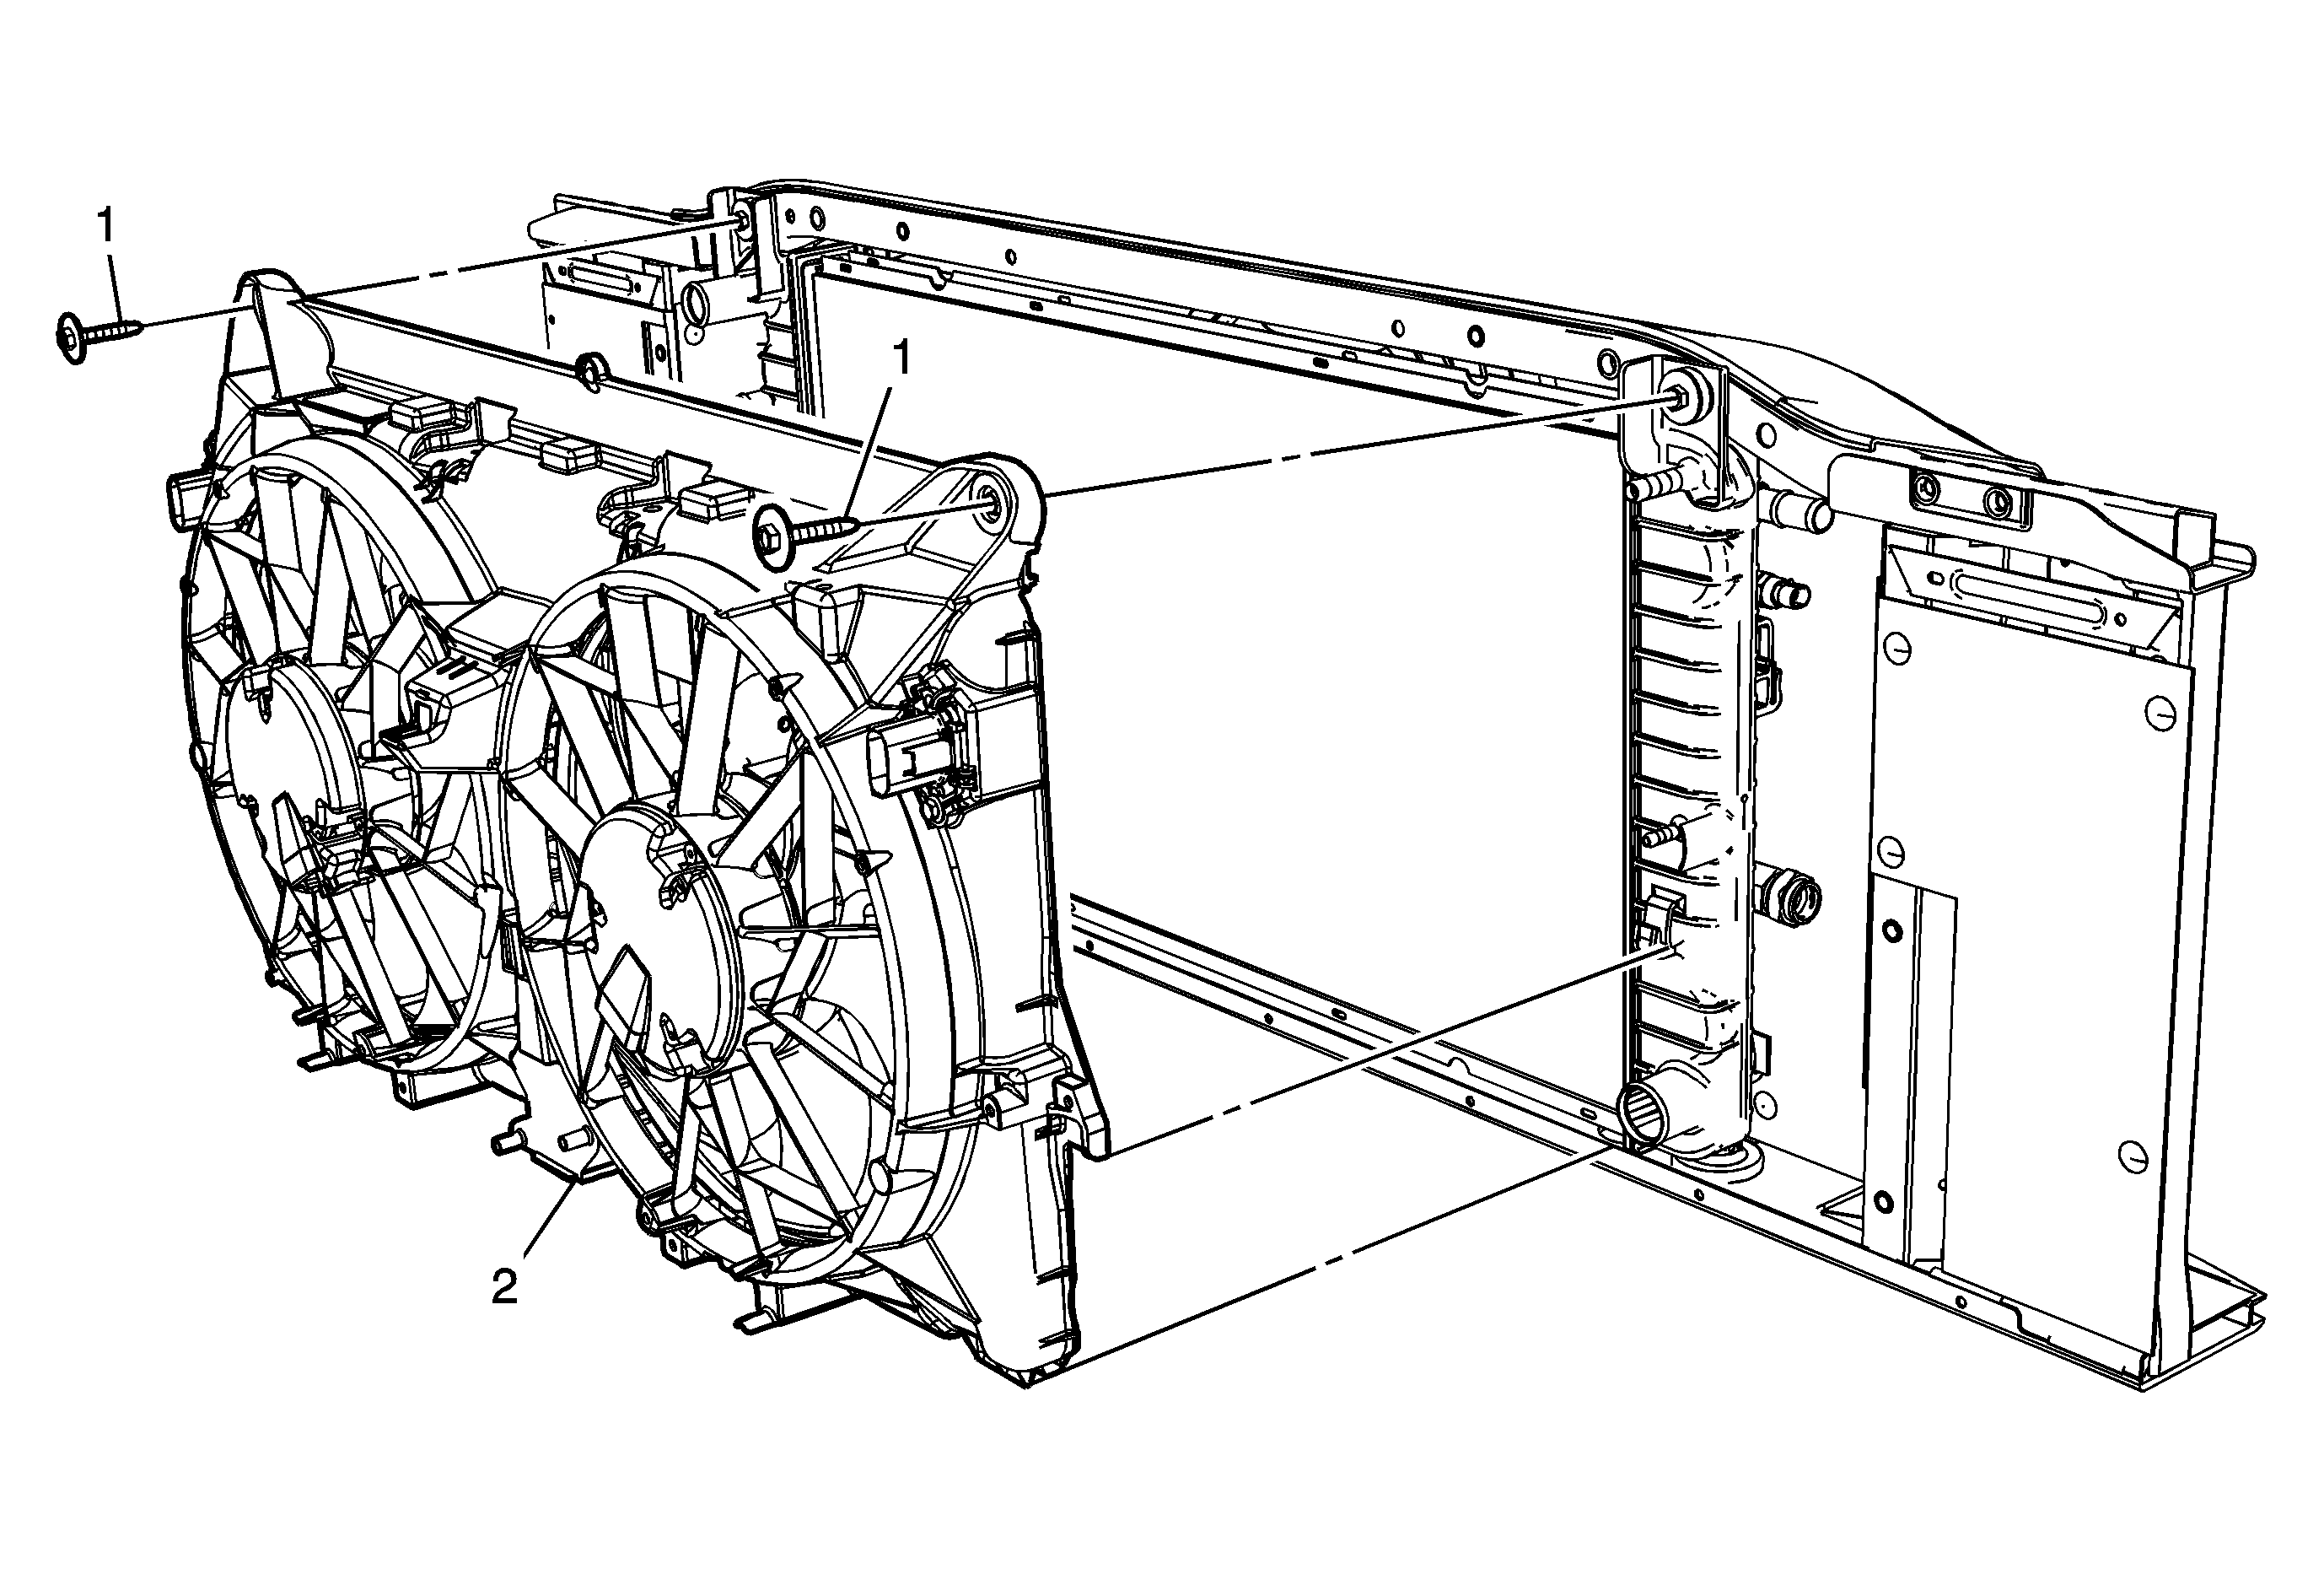
Callout | Component Name | ||||
|---|---|---|---|---|---|
Preliminary Procedures
| |||||
1 | Cooling Fan Shroud Bolt (Qty: 2) | ||||
2 | Cooling Fan Shroud Tip
| ||||
Cooling Fan and Shroud Replacement Non-HP2
Removal Procedure
- Drain the cooling system. Refer to Cooling System Draining and Filling
- Remove air inlet duct.
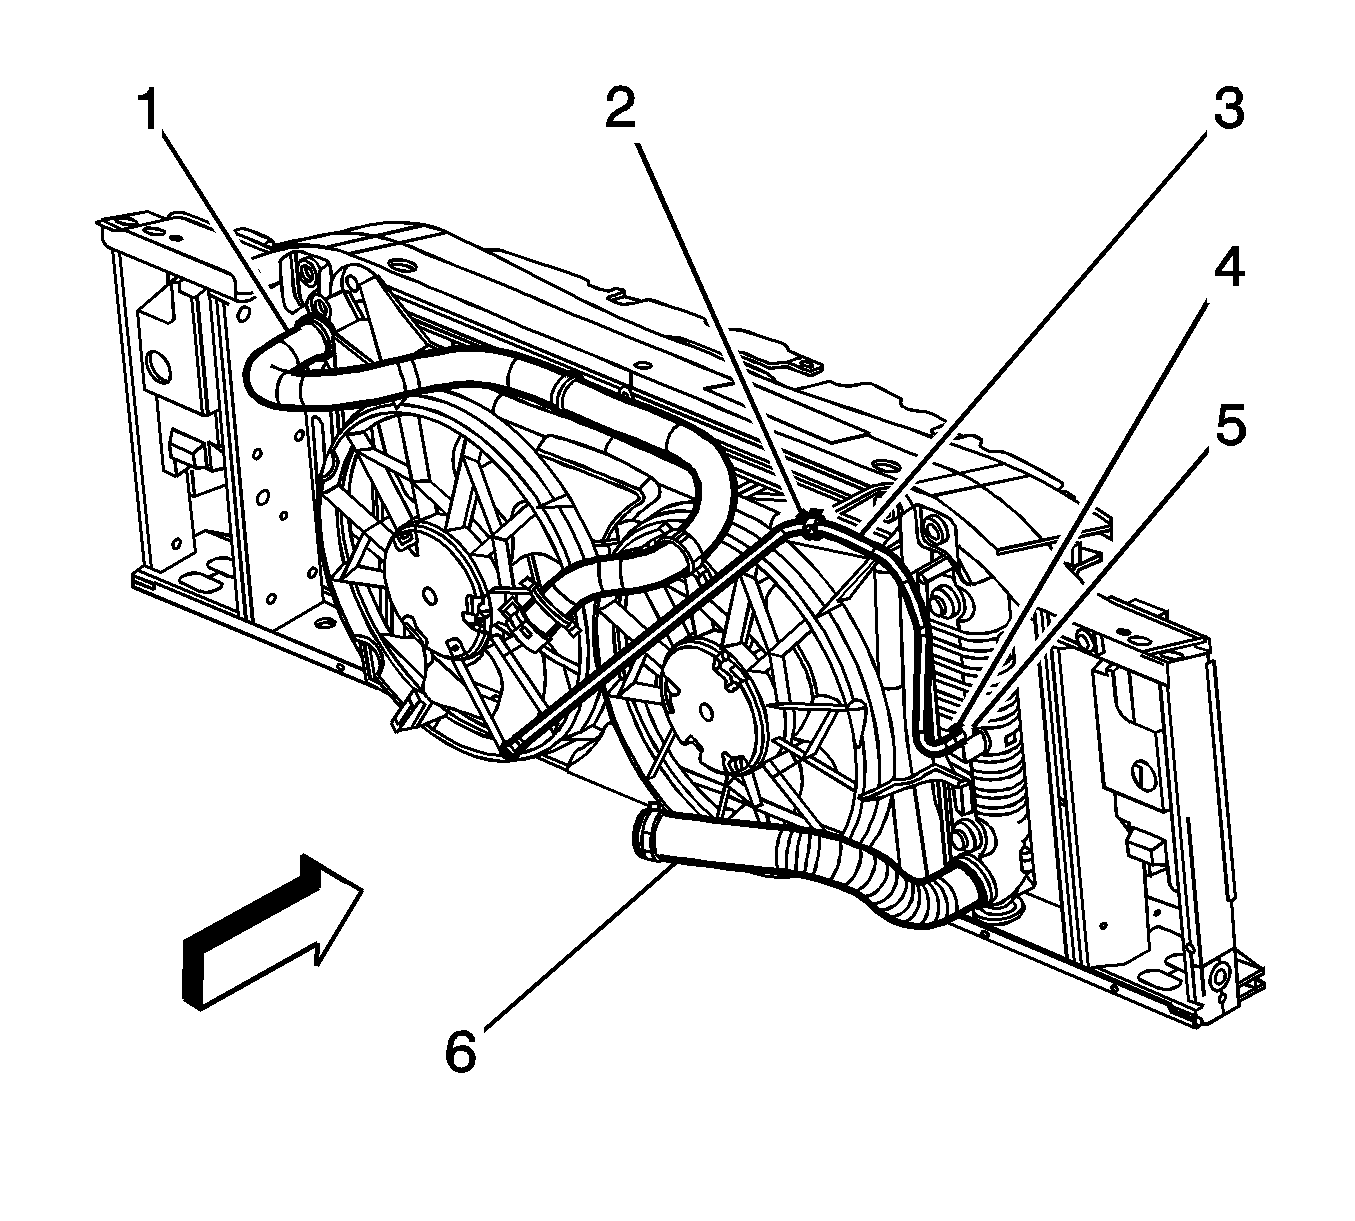
- Disconnect upper radiator hose from radiator.
- Disengage the radiator inlet hose clip (2) at the fan shroud.
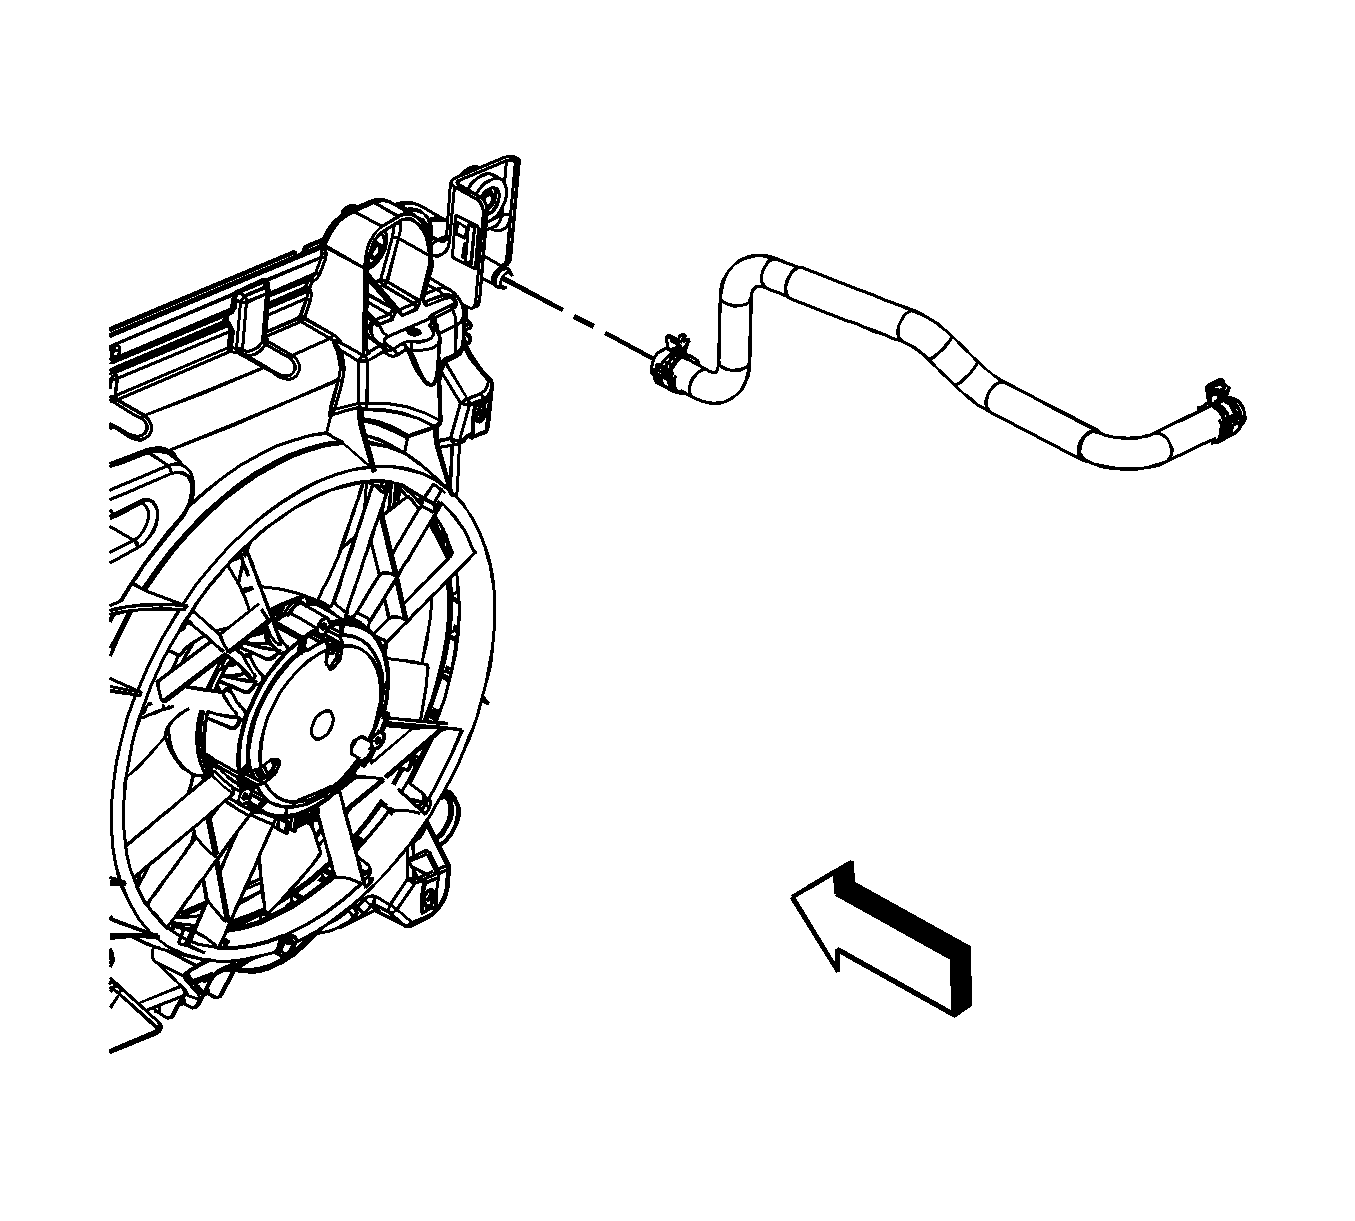
- If necessary, reposition the surge tank inlet hose clamp at the radiator.
- If necessary, remove the surge tank inlet hose from the radiator.
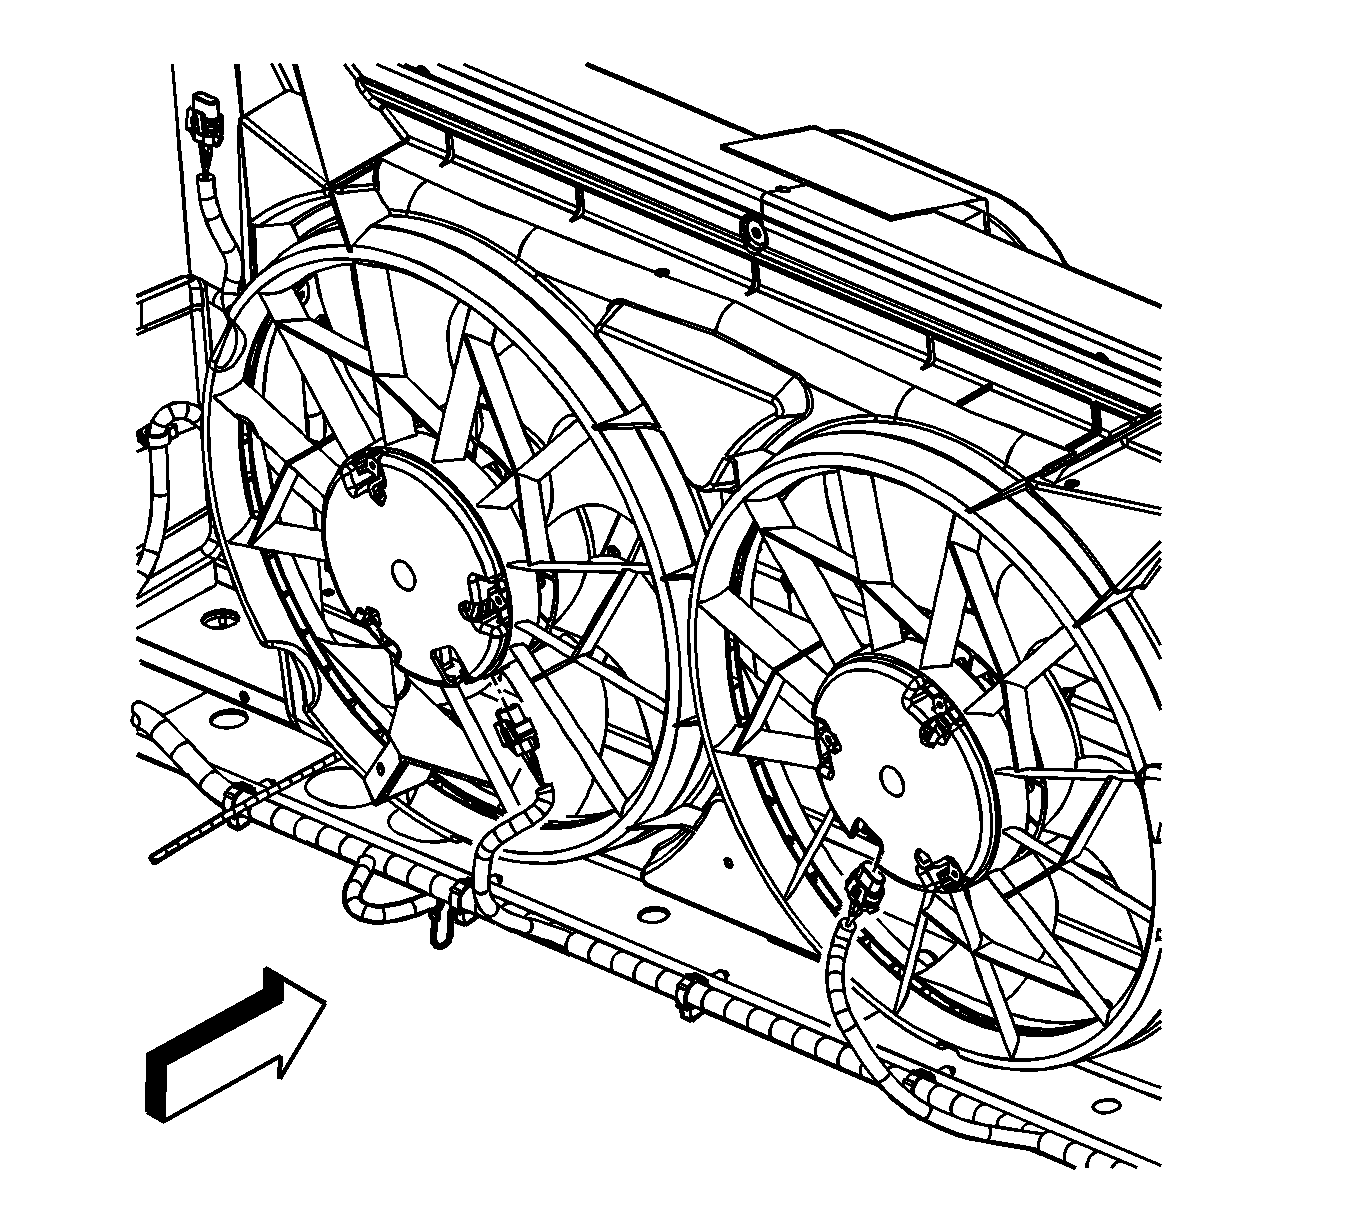
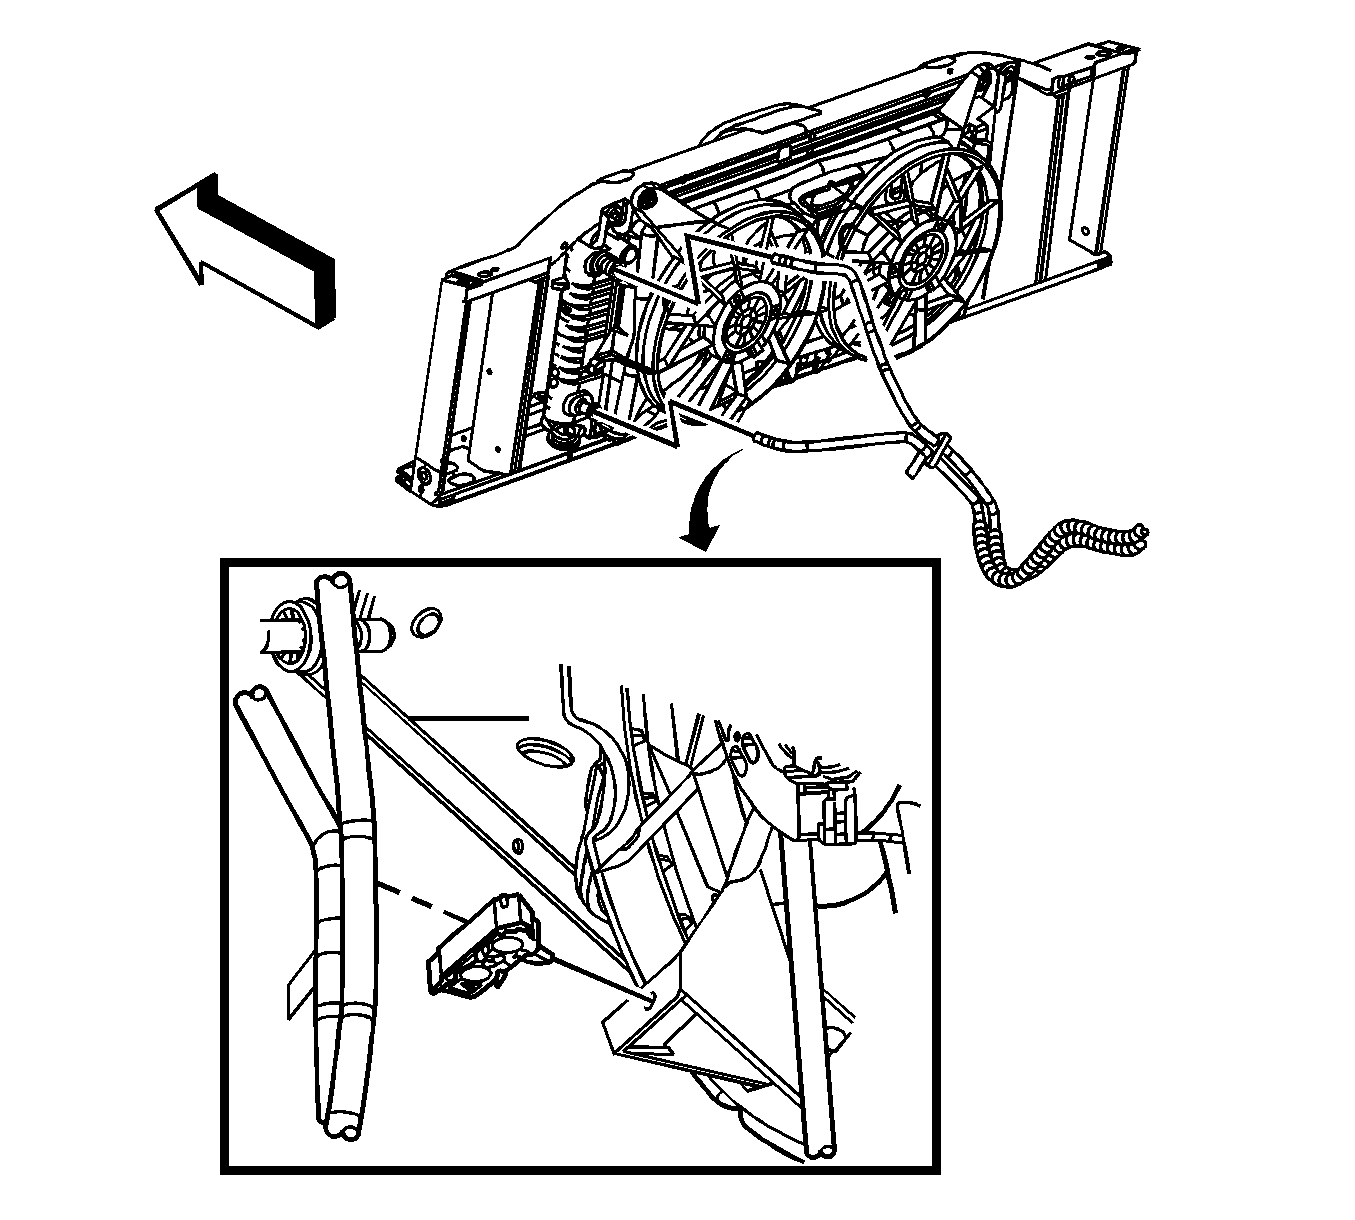
- Disconnect the electrical connectors from the cooling fans.
- Remove the clip attaching the wiring harness to the shroud.
- Remove transmission cooler lines bolts from fan shroud.
- If necessary, open the engine oil cooler line clip and remove the cooler lines from the clip.
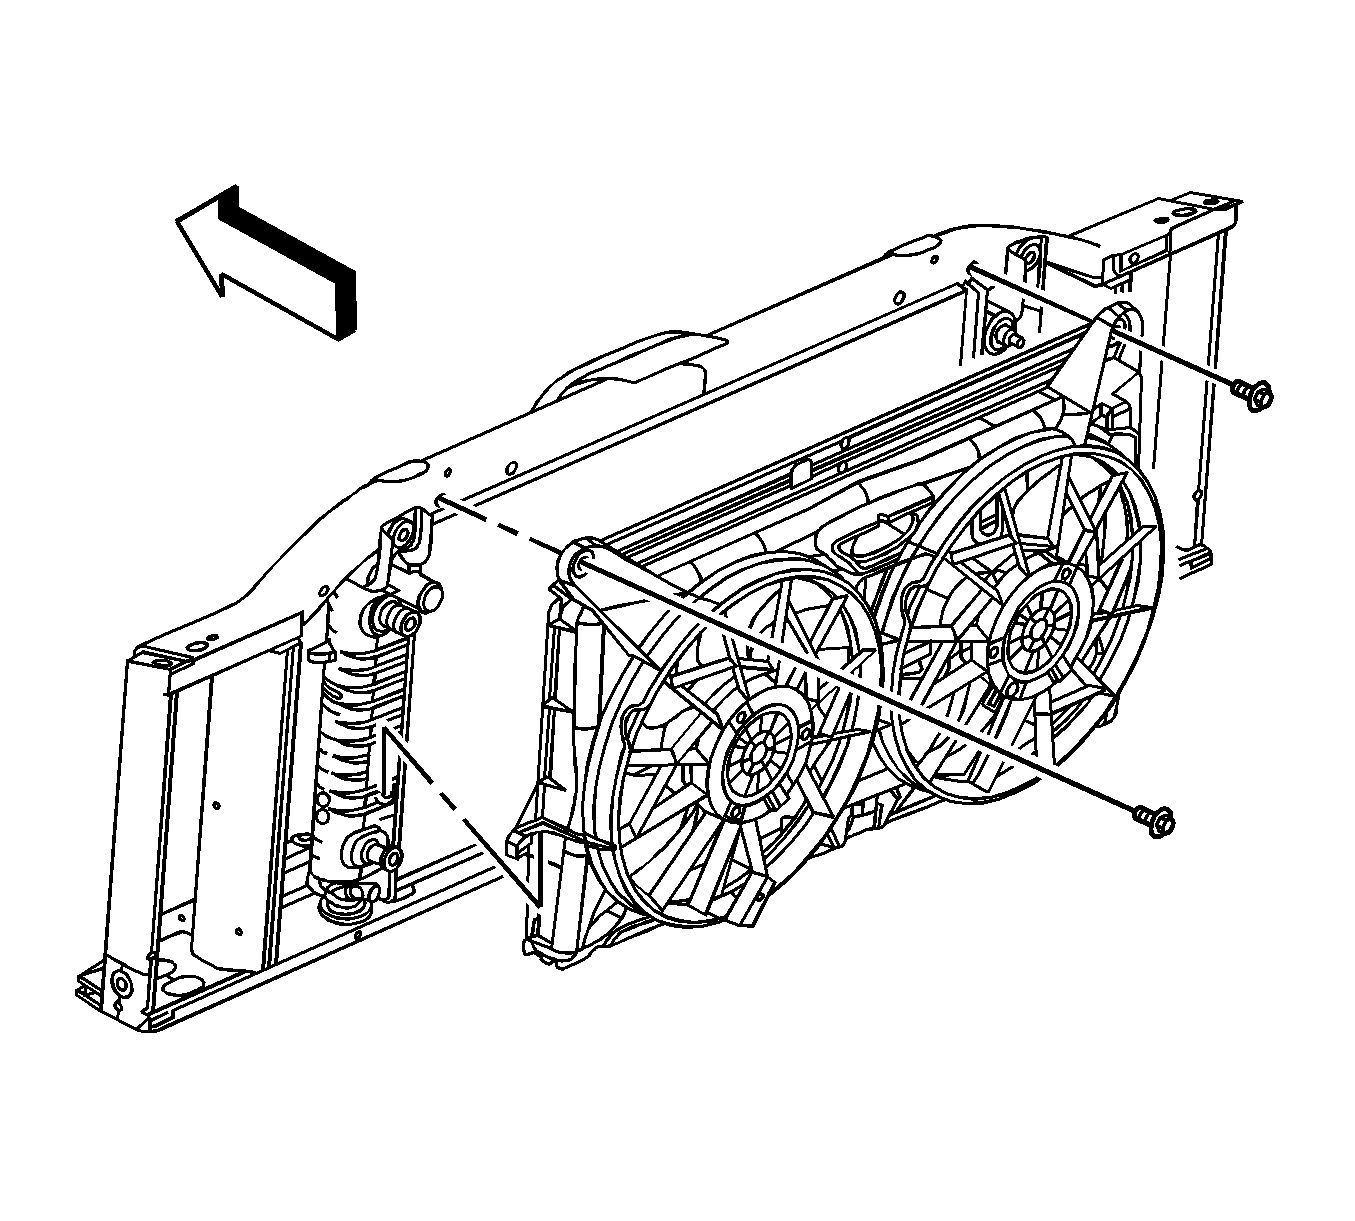
- Remove the cooling fan shroud bolts.
- Remove the cooling fan and shroud.
Installation Procedure
- Install the cooling fan and shroud.
- Install the cooling fan shroud bolts.
- If equipped, install the cooler lines to the clip and close the clip.
- Connect the electrical connectors to the cooling fans.
- Install the clip attaching the wiring harness to the shroud.
- Install the transmission cooling line bolts to fan shroud.
- If necessary, install the surge tank inlet hose to the radiator.
- If necessary, reposition the surge tank inlet hose clamp at the radiator.
- Engage the radiator inlet hose clip (2) at the fan shroud.
- Connect upper radiator hose from radiator.
- Install air inlet duct.
- Fill the cooling system. Refer to Cooling System Draining and Filling

Note: Insert the 3 lower tabs into the radiator support flange. Keeping the shroud parallel to the radiator will ensure the correct installation of the lower tabs.
Caution: Refer to Fastener Caution in the Preface section.
Tighten
Tighten the bolts to 9 N·m (80 lb in).


Tighten
Tighten the bolts to 4 N·m (35 lb in).


