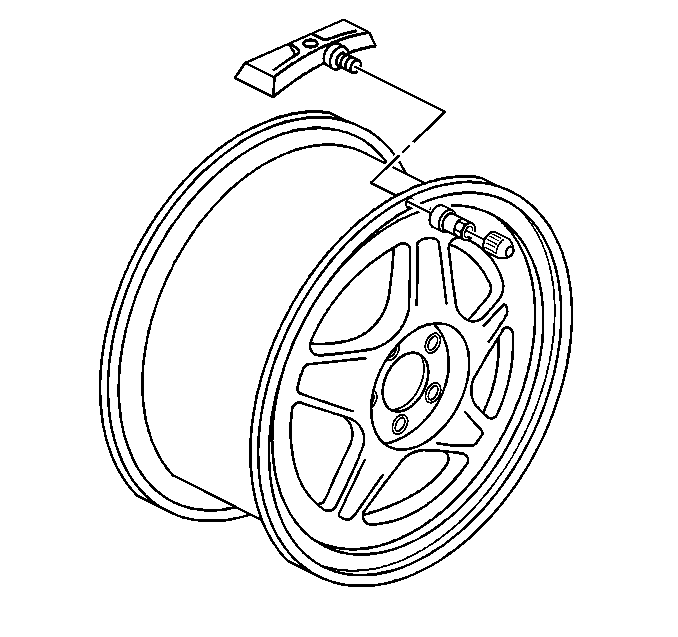
Tire Pressure Indicator Sensor Replacement Clamp In Style
Removal Procedure
- Raise the vehicle on a suitable support. Refer to Lifting and Jacking the Vehicle.
- Remove the tire/wheel assembly from the vehicle. Refer to Tire and Wheel Removal and Installation.
- Remove the tire from the wheel. Refer to Tire Dismounting and Mounting.
- Remove the tire pressure sensor nut.
- Remove the tire pressure sensor.
Important: Before the tire is removed from the wheel, note the following items to avoid tire pressure sensor damage upon tire dismounting:
• Place the sensors cap and valve on a dry clean surface after removal. The cap is aluminum and the valve is nickel plated to prevent corrosion and are not to be substituted with a cap or valve made of any other material. • When separating the tire bead from the wheel, position the bead breaking fixture 90 degrees from the valve stem. • Position the mounting/dismounting head so the tire iron, or pry bar can be inserted slightly clockwise of the sensor body when prying the tire bead up and over the mounting/dismounting head. • Using the tire machine, rotate the tire/wheel assembly clockwise when transferring the tire bead to the out side of the wheel rim. • Repeat items for inner bead.
Important: If any tire sealant is noted upon tire dismounting, remove all residual liquid sealant from the inside of the tire and wheel surfaces.
Installation Procedure
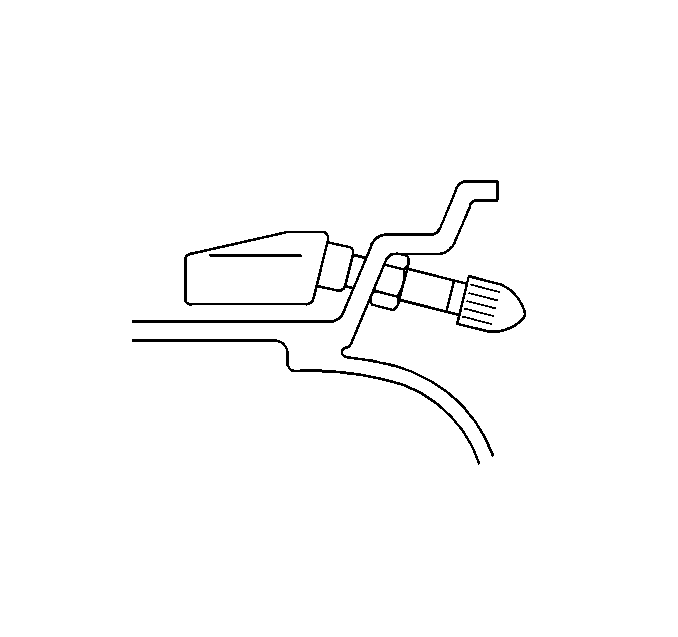
- Clean any dirt or debris from the grommet sealing area.
- Insert the sensor in the wheel hole with the air passage facing away from the wheel.
- Install the sensor nut and position the sensor body parallel to the inside wheel surface while torquing.
- Install the tire on the wheel. Refer to Tire Dismounting and Mounting.
- Install the tire/wheel assembly on the vehicle. Refer to Tire and Wheel Removal and Installation.
- Lower the vehicle.
- Learn the tire pressure sensors. Refer to Tire Pressure Sensor Learn.
Notice: Refer to Fastener Notice in the Preface section.
Tighten
Tighten the sensor nut to 7 N·m (62 lb in).
Important: Before reinstalling the tire on the wheel, note the following items to avoid tire pressure sensor damage upon tire mounting:
• Position the mounting/dismounting head 180 degrees from the valve stem. • Position the bead transition area 45 degrees counterclockwise of the valve stem. • Using the tire machine, rotate the tire/wheel assembly clockwise when transferring the tire bead to the inside of the wheel rim. • Repeat items for outer bead.
Important: A service replacement tire pressure sensor is shipped in OFF mode. In this mode the sensor unique identification code cannot be learned into the remote control door lock receiver (RCDLR) memory. The sensor must be taken out of OFF mode by spinning the tire/wheel assembly above 32 km/h (20 mph) in order to close the sensors internal roll switch for at least 10 seconds.
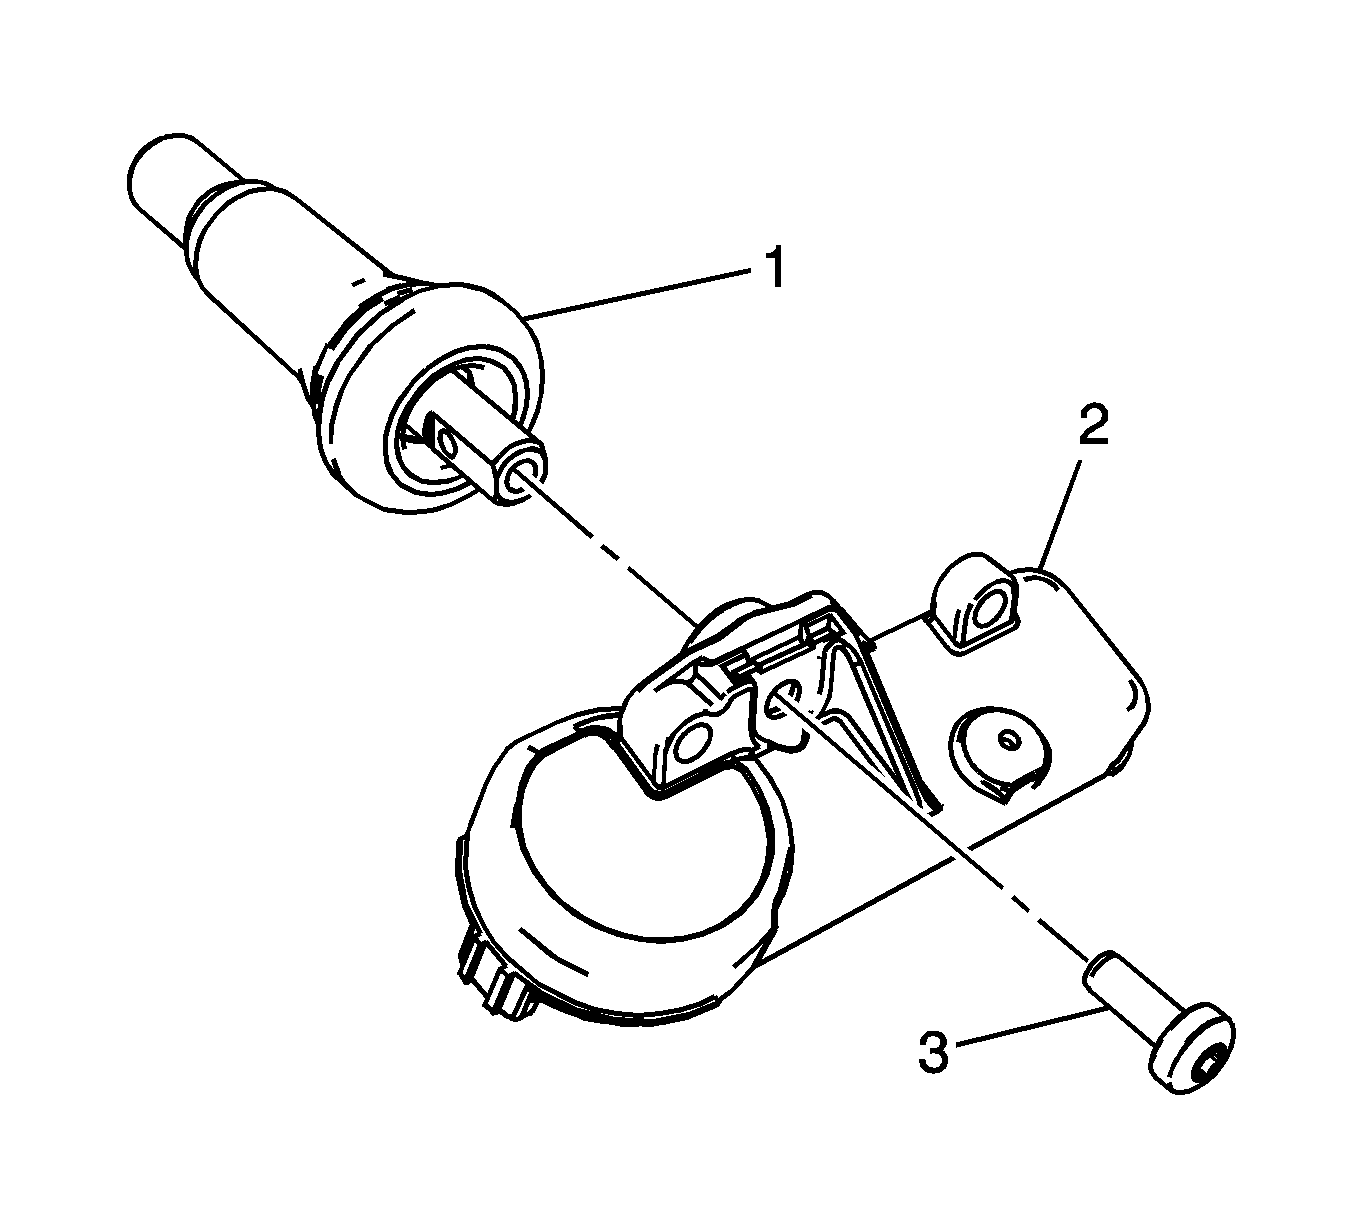
Tire Pressure Indicator Sensor Replacement Snap In Style
Removal Procedure
- Raise the vehicle on a suitable support. Refer to Lifting and Jacking the Vehicle .
- Remove the tire/wheel assembly from the vehicle. Refer to Tire and Wheel Removal and Installation .
- Dismount the tire from the rim. Refer to Tire Dismounting and Mounting .
- Remove the TORX screw (1) from the tire pressure sensor (2) and pull it straight off the tire pressure valve stem (3).
- Remove the tire pressure valve stem by pulling it through the rim.
Important: When servicing the tire pressure sensor always use a new Schrader® tire pressure monitor (TPM) and a new TORX screw during installation.

Notice: Do not scratch or damage the clear coating on aluminum wheels with the tire changing equipment. Scratching the clear coating could cause the aluminum wheel to corrode and the clear coating to peel from the wheel.
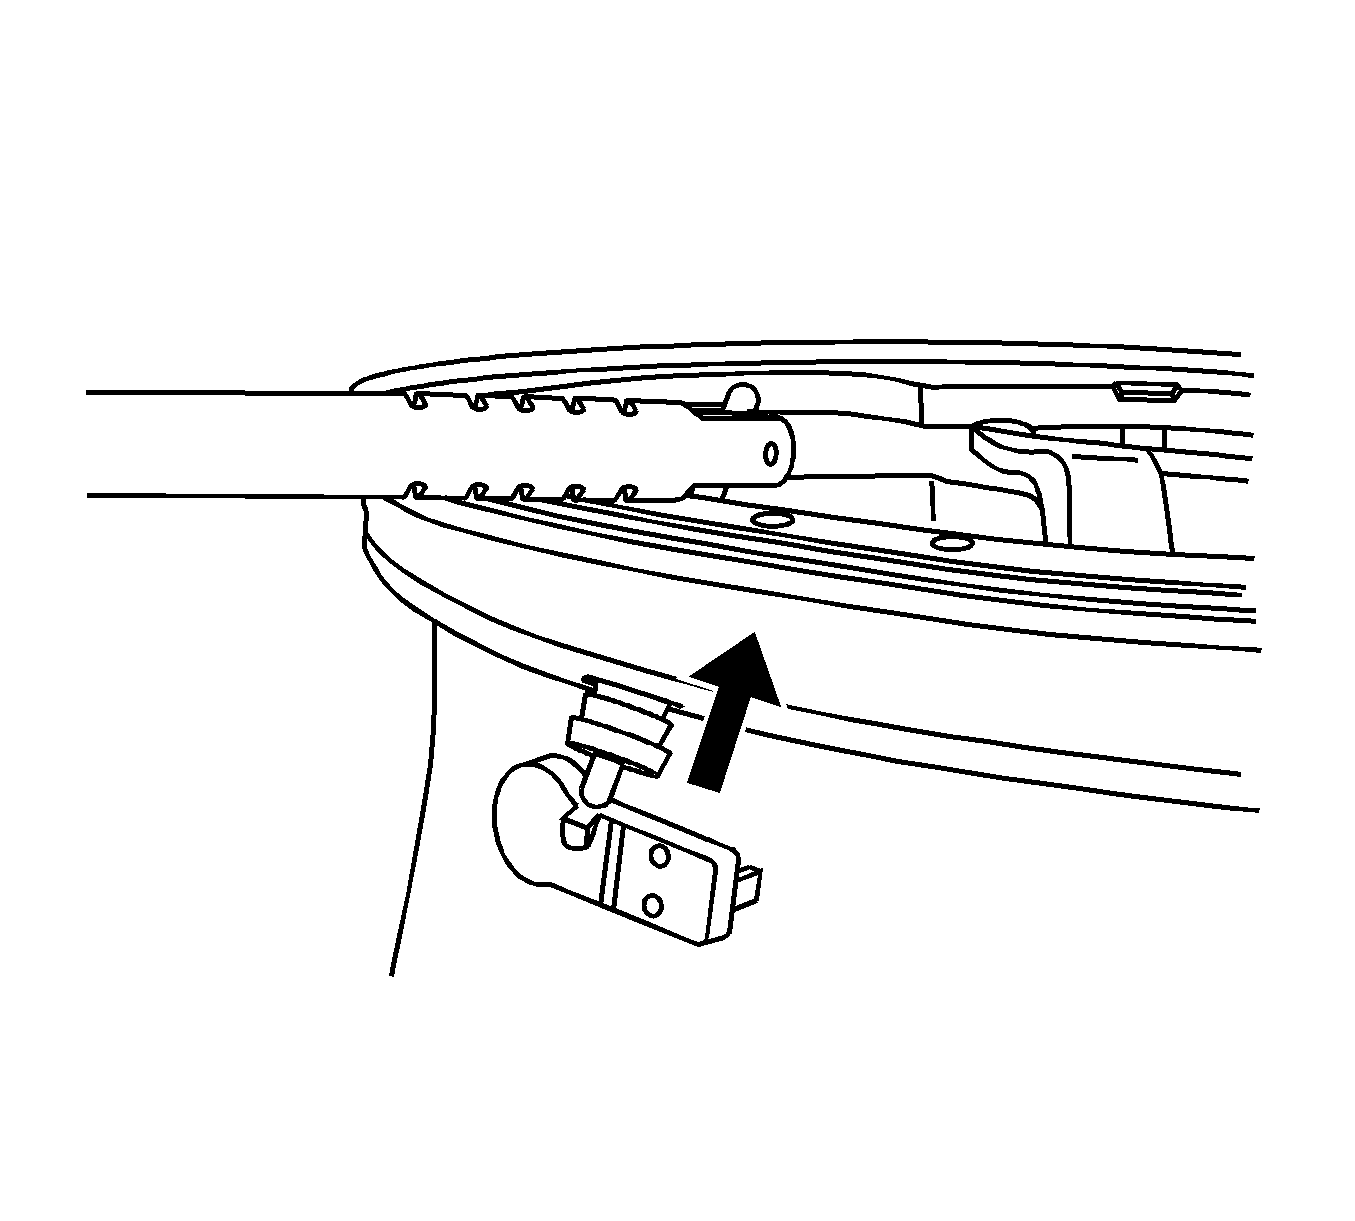
Installation Procedure
- Assemble the tire pressure sensor (2) to the valve stem and install the new TORX screw (3).
- Apply tire soap to the rubber portion of the valve stem (1).
- Using a tire valve stem mounting tool, pull the valve stem through in a direction parallel to the valve hole on the rim.
- Mount the tire to the rim. Refer to Tire Dismounting and Mounting .
- Install the tire/wheel assembly on the vehicle. Refer to Tire and Wheel Removal and Installation .
- Lower the vehicle.
- Learn the tire pressure sensors. Refer to Tire Pressure Sensor Learn .
Notice: Refer to Fastener Notice in the Preface section.
Important:
• Ensure the flat of the valve, lines up with the flats of the snap in the enclosure. • TPM valves and TORX screws are one-time use only.
Tighten
Tighten the TORX screw to 1.3 N·m (11.5 lb in).
Important: Use and approved tire mounting lubricant. DO NOT use silicon or corrosive base compounds to lubricate the tire bead and the wheel rim. A corrosive type compound can cause tire or rim deterioration.
Important: Snap Fit TPM sensors are still shipped in the OFF mode. However, the TPM no longer needs to be spun to remove it from the OFF mode. The sensor will exit its OFF state when the tire is inflated. The technician can then program the vehicle as normal.
