For 1990-2009 cars only
Digital Radio Antenna Cable Replacement Primary
Removal Procedure
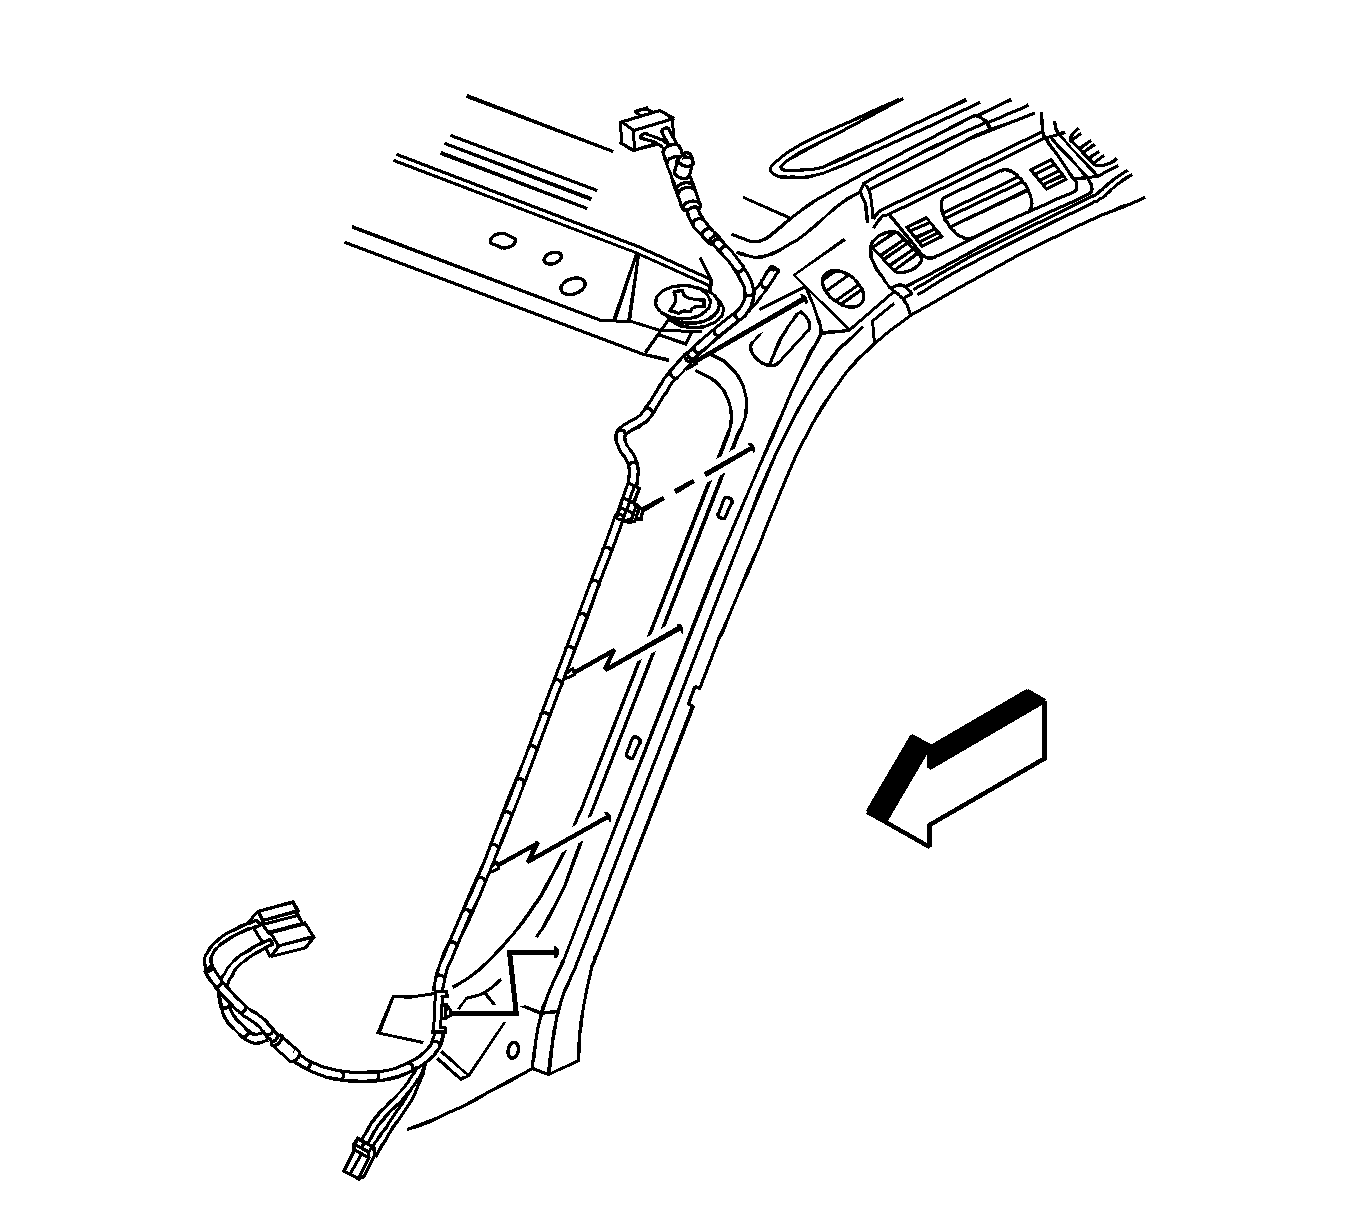
- Remove the left windshield pillar garnish molding. Refer to Windshield Pillar Garnish Molding Replacement in Interior Trim.
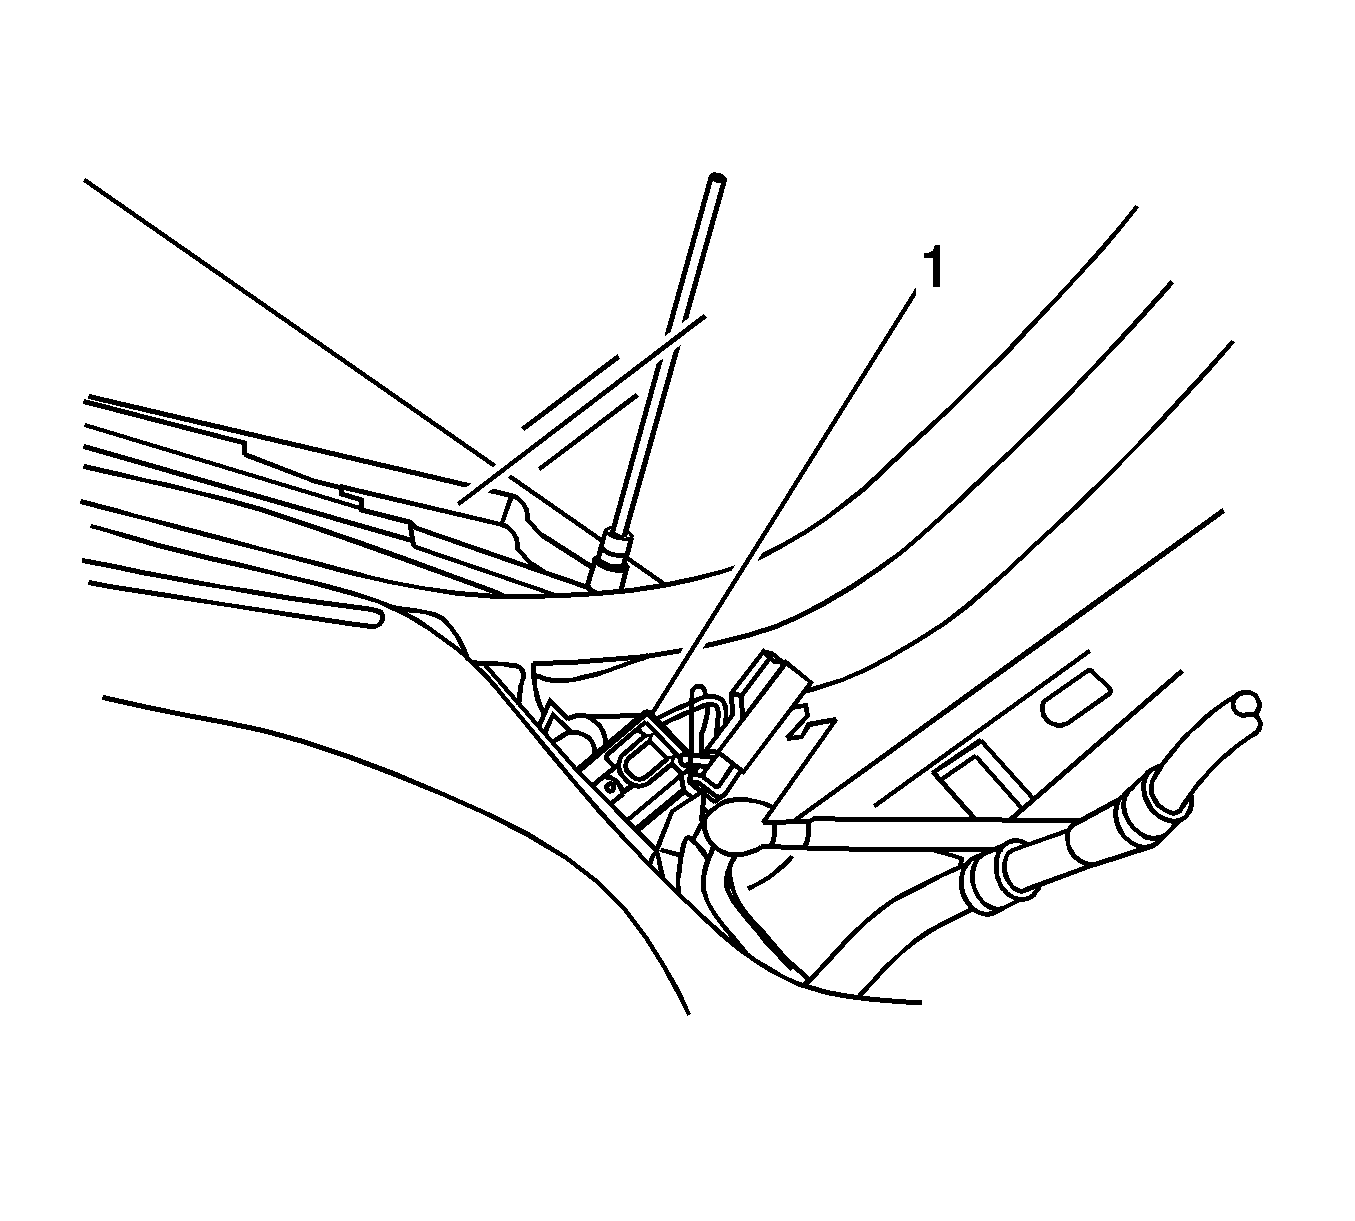
- Disconnect the XM radio antenna cable (1).
- Lower the front of the headliner. Refer to Headlining Trim Panel Replacement in Interior Trim.
- Disconnect the XM antenna cable from the antenna connection above the headliner.
- Remove the upper I/P trim panel. Refer to Instrument Panel Upper Trim Panel Replacement in Instrument Panel, Gages and Console.
- Remove the cable clips from the windshield pillar and remove the antenna cable from the vehicle.
Notice: Use care when removing and installing the headliner. If reusing the headliner lay the headliner down flat on a clean surface. Excessive bending will damage the headliner.
Installation Procedure
- Install the XM antenna cable and clips to the windshield pillar.
- Connect the cable to the antenna connection above the headliner.
- Install the headliner. Refer to Headlining Trim Panel Replacement in Interior Trim.
- Connect the XM radio antenna cable (1) at the IP.
- Install the upper I/P trim panel. Refer to Instrument Panel Upper Trim Panel Replacement in Instrument Panel, Gages and Console.
- Install the windshield pillar garnish molding. Refer to Windshield Pillar Garnish Molding Replacement in Interior Trim.
Digital Radio Antenna Cable Replacement Extension
Removal Procedure
- Remove the upper trim panel from the instrument panel (I/P). Refer to Instrument Panel Upper Trim Panel Replacement in Instrument Panel, Gages and Console.
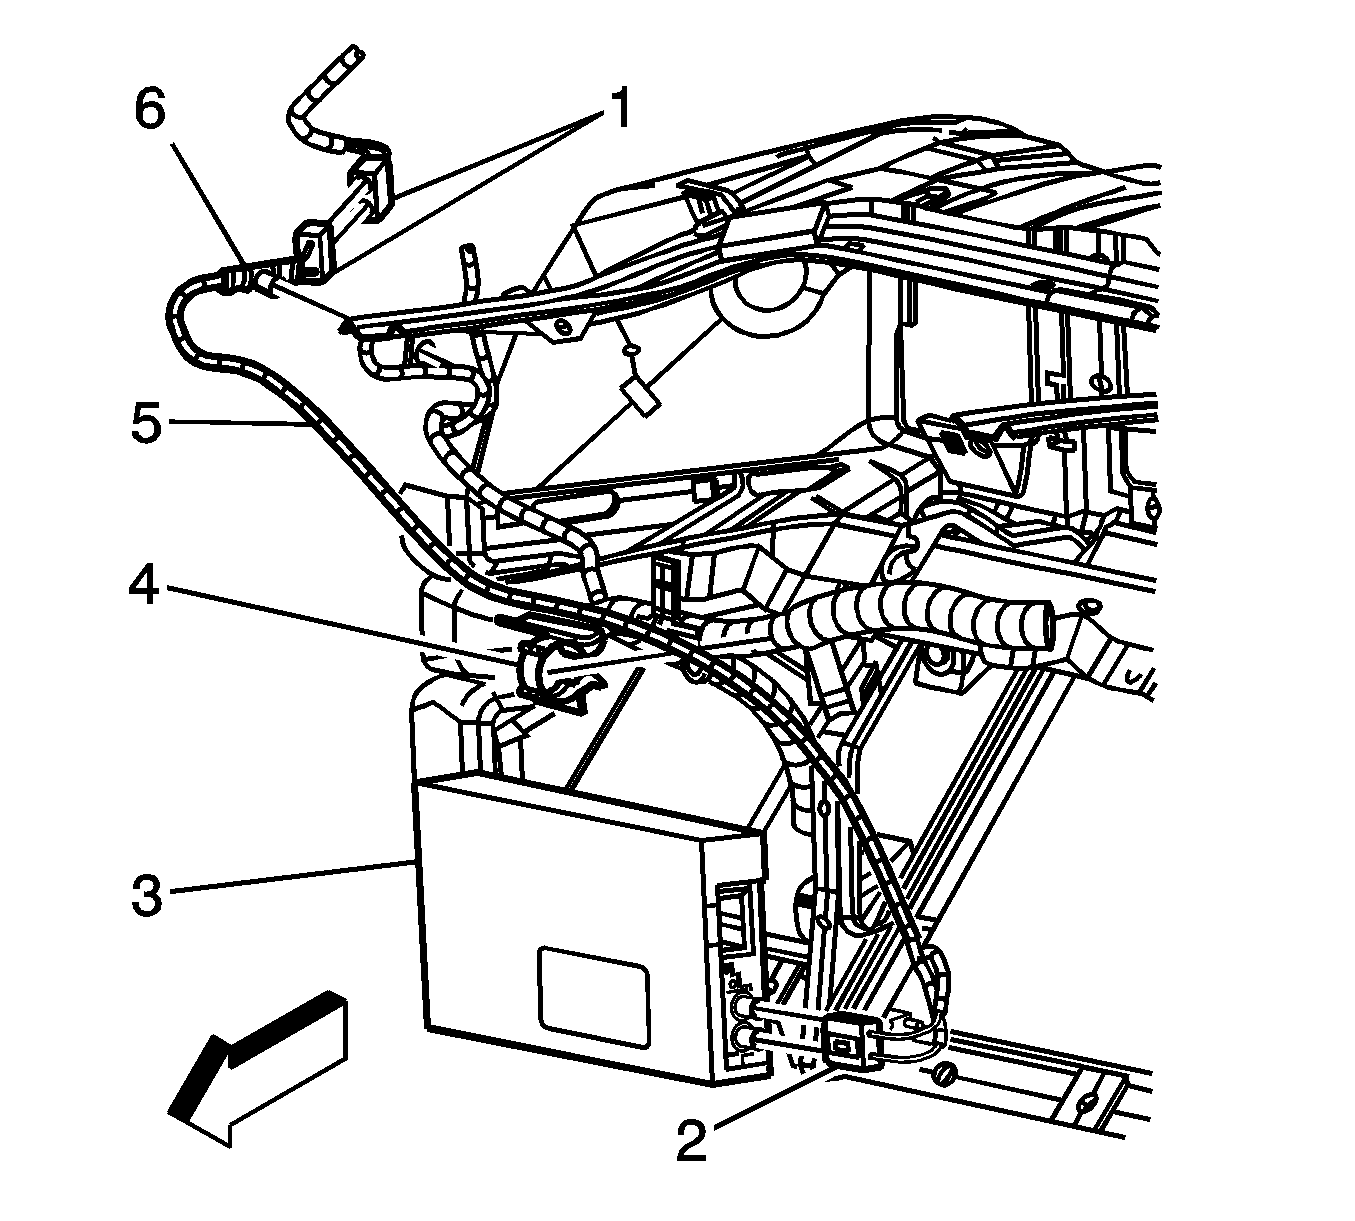
- Disconnect the digital radio antenna cable (1).
- Fully open the I/P storage compartment in order to access the digital receiver (3).
- Disconnect the antenna cable (2) from the digital receiver (3).
- Cut the ends off the original cable and leave the remainder of cable in the wiring harness assembly.

Installation Procedure
- Install, route and retain the new cable (5) to the I/P.
- Engage the antenna cable clips (4, 6) to the I/P.
- Connect the antenna cable (2) to the digital receiver (3).
- Connect the digital radio antenna extension cable to the digital radio antenna cable (1).
- Install the I/P upper trim panel. Refer to Instrument Panel Upper Trim Panel Replacement in Instrument Panel, Gages and Console.
- Close the I/P storage compartment.
