For 1990-2009 cars only
Removal Procedure
- Remove the air cleaner layer. Refer to Air Cleaner Replacement .
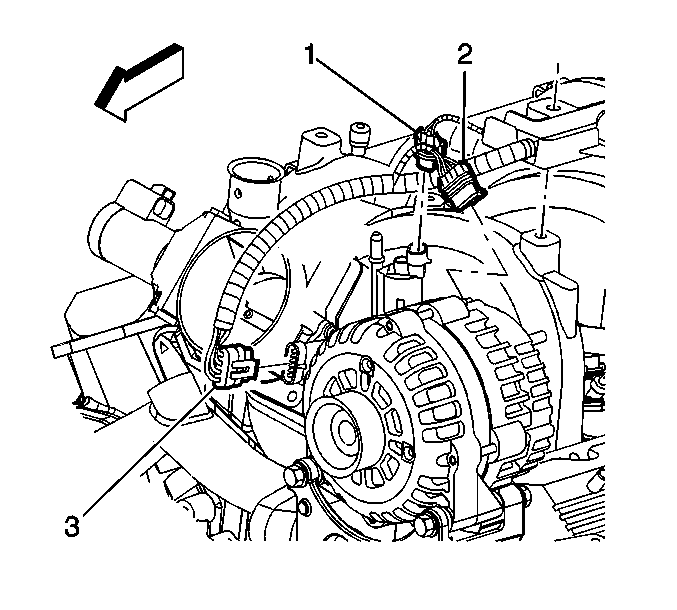
- Disconnect the evaporative emission (EVAP) canister purge valve harness connector (1).
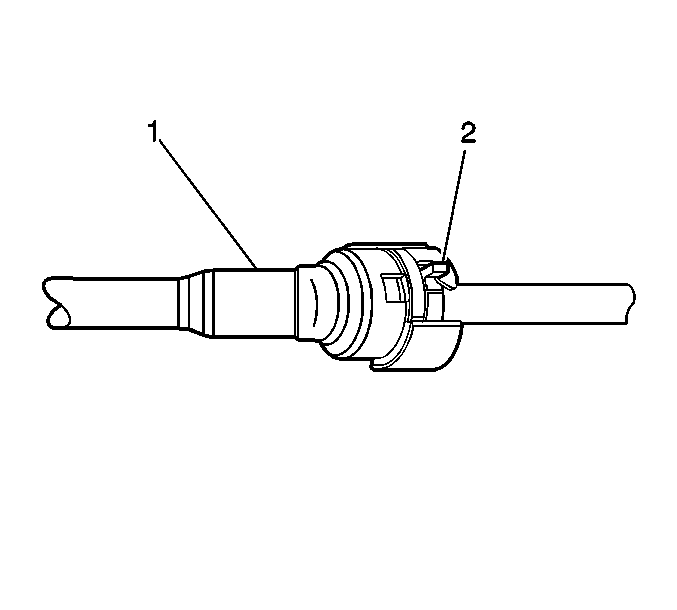
- To disconnect the EVAP purge pipe connector (1), slide the retaining tab (2) to the release position and separate the connection.
- Disconnect the EVAP purge pipe connector from the EVAP canister purge valve.
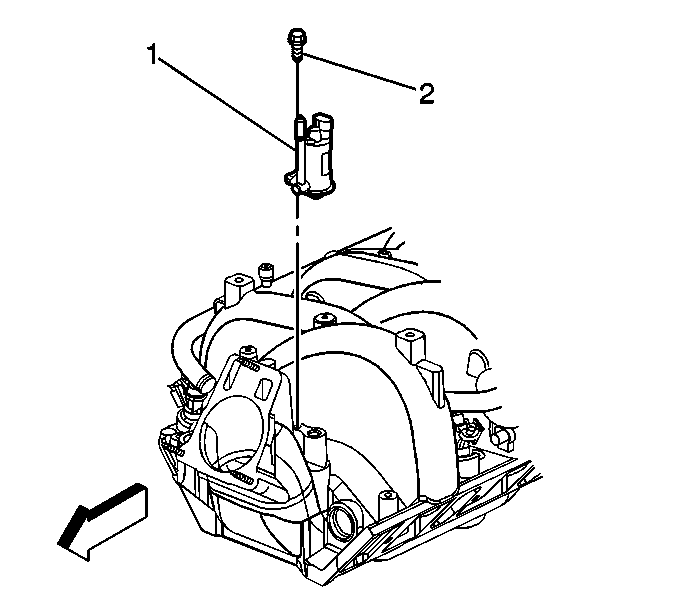
- Remove the EVAP canister purge valve retaining bolt (2).
- Remove the EVAP canister purge valve (1).
Installation Procedure
- Position the EVAP canister purge valve (1) on the intake manifold.
- Install the EVAP canister purge valve retaining bolt (2).
- To connect the purge pipe connector (1), press the components together in order to snap the tab (2) in place.
- Connect the purge pipe to the EVAP canister purge valve.
- Connect the EVAP canister purge valve harness connector (1).
- Install the air cleaner layer. Refer to Air Cleaner Replacement .
Notice: Refer to Fastener Notice in the Preface section.
Tighten
Tighten the EVAP purge valve retaining bolt to 10 N·m (89 lb in).
