For 1990-2009 cars only
Air Conditioning (A/C) Compressor and Power Steering Pump Bracket Replacement LBZ, LLY
Removal Procedure
- Disconnect the battery negative cable. Refer to Battery Negative Cable Disconnection and Connection .
- Remove the drive belt. Refer to Drive Belt Replacement .
- If equipped, remove the auxiliary generator. Refer to Auxiliary Generator Replacement .
- Remove the upper fan shroud. Refer to Fan Shroud Replacement .
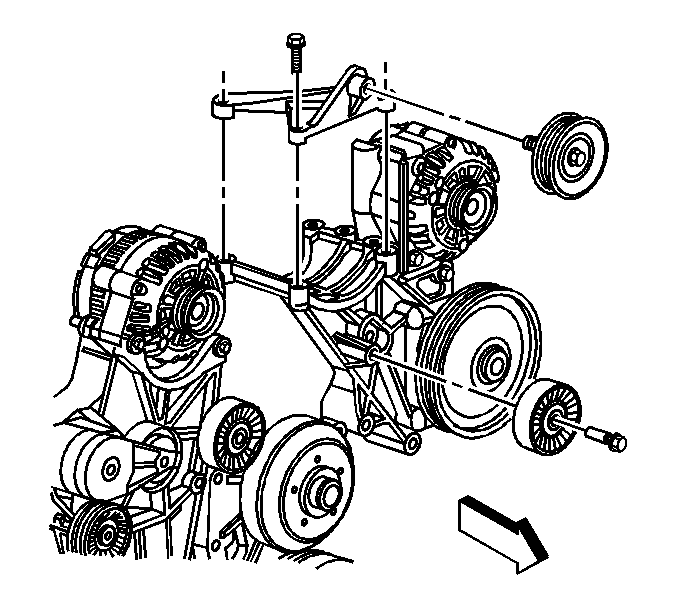
- If equipped with dual generators, remove the bolt from the left side idler pulley (smooth pulley).
- Remove the idler pulley assembly.
- Disconnect the air conditioning (A/C) compressor clutch electrical connector.
- Disconnect the A/C cut out switch electrical connector.
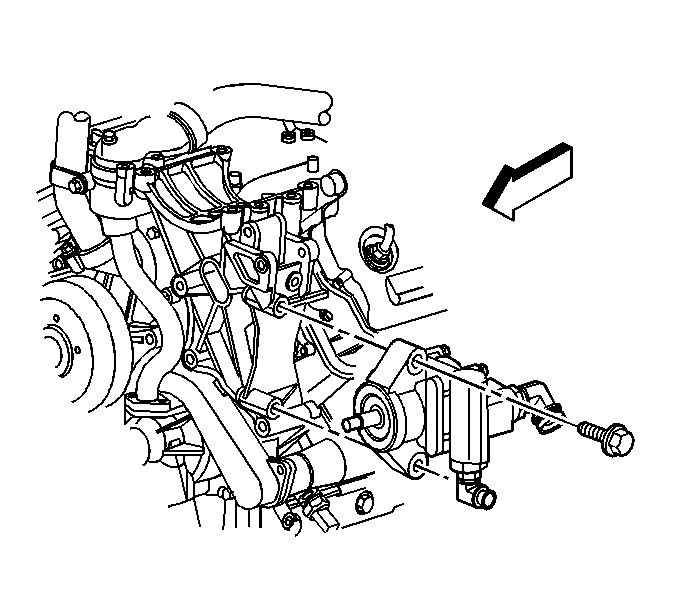
- Remove the A/C compressor mounting bolts.
- Move the A/C compressor with the hoses attached to the right side of the engine compartments.
- Remove the bolts retaining the rear power steering (PS) pump bracket to the A/C compressor and PS pump mounting bracket.
- Remove the bolts retaining the PS pump front bracket to the PS pump and A/C compressor mounting bracket.
- Move and secure the PS pump out of the way. The hoses and battery cables can remain attach to PS pump.
- Remove the A/C compressor and PS pump mounting bracket 4 bolts.
- Remove the A/C compressor and PS pump mounting bracket.

Installation Procedure
- Install the A/C compressor and PS pump mounting bracket.
- Install the A/C compressor and PS pump mounting bracket 4 bolts.
- Install the PS pump with the front bracket.
- Loosely install the bolts.
- Install the bolts to the rear PS pump bracket.
- Tighten the rear bracket bolts to 50 N·m (37 lb ft).
- Tighten the PS pump front bracket bolts to 50 N·m (37 lb ft).
- If equipped with dual generators, install the left side idler pulley assembly with the bolt.
- Install the auxiliary generator. Refer to Auxiliary Generator Replacement .
- Position the A/C compressor.
- Install the A/C compressor mounting bolts.
- Connect the A/C cut out switch electrical connector.
- Connect the A/C clutch electrical connector.
- Install the drive belt. Refer to Drive Belt Replacement .
- Install the upper fan shroud. Refer to Fan Shroud Replacement .
- Connect the battery negative cable. Refer to Battery Negative Cable Disconnection and Connection .
Notice: Refer to Fastener Notice in the Preface section.
Tighten
Tighten the mounting bracket bolts to 46 N·m (34 lb ft).
Tighten
Tighten
Tighten the idler pulley bolt to 43 N·m (32 lb ft).
Tighten
Tighten the A/C compressor mounting bolts to 50 N·m (37 lb ft).
